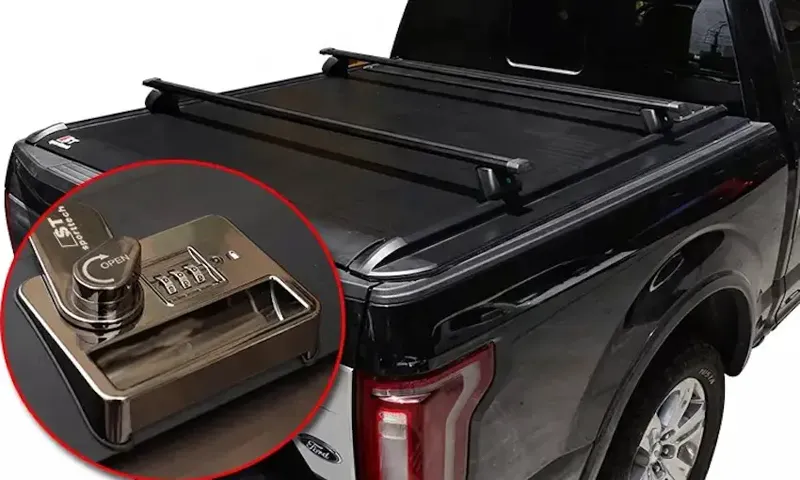
Are you struggling with a tonneau cover that just won’t stay closed? Maybe you’ve noticed that the Velcro strips are no longer sticking properly, leaving your truck bed exposed to the elements. Don’t worry, you’re not alone! Many truck owners face this same frustrating issue. But fear not, because in this blog post, we’re going to show you how to fix your tonneau cover Velcro in a few simple steps.
Think of it as giving your truck’s bed a brand new suit that fits it perfectly! So, grab your tools and let’s get started on restoring functionality and protection to your tonneau cover.
Table of Contents
Overview
Are you struggling with a tonneau cover that won’t stay closed because the Velcro is not working properly? Don’t worry, you’re not alone. Velcro can wear out over time and lose its adhesive strength, causing it to not stick as well as it should. The good news is that there are a few simple steps you can take to fix the Velcro on your tonneau cover and get it working like new again.
First, inspect the Velcro to see if there are any visible signs of damage or wear. If so, it may be time to replace the Velcro altogether. You can find replacement Velcro at most hardware or automotive stores.
If the Velcro is still in good condition, try cleaning it with a mild detergent and warm water to remove any dirt or debris that may be inhibiting its stickiness. Allow it to air dry completely before reattaching it to your tonneau cover. If these steps don’t solve the problem, you can also try using a Velcro adhesive spray to enhance the stickiness of the Velcro.
Simply spray a small amount onto the Velcro and press it firmly against the surface to create a strong bond. With these simple steps, you can easily fix the Velcro on your tonneau cover and ensure that it stays securely closed.
Explanation of tonneau cover velcro
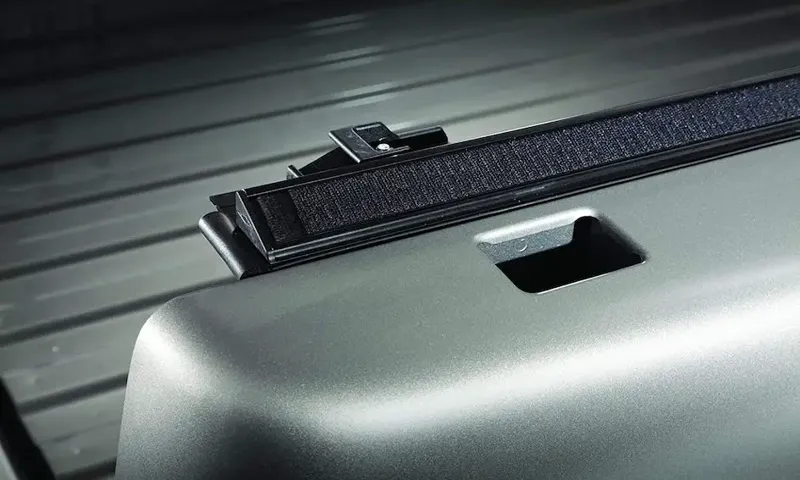
tonneau cover velcro Overview: Tonneau covers have become a popular accessory for truck owners, offering a secure and stylish way to protect their cargo. One essential component of a tonneau cover is the velcro fastener. Velcro is a hook-and-loop fastening system that consists of two components: the hook side and the loop side.
The hook side features tiny hooks that latch onto the loops on the loop side, creating a strong bond that keeps the tonneau cover in place. This simple yet effective fastening system allows for easy opening and closing of the cover, providing convenient access to the truck bed while ensuring that the cargo remains secure. The velcro used in tonneau covers is typically made of high-quality materials that are resistant to wear and tear, ensuring its durability even in harsh weather conditions.

Common problems with tonneau cover velcro
tonneau cover velcro, common problems with tonneau cover velcro Overview: Tonneau covers are a popular accessory for truck owners, providing protection and security for their cargo. These covers often feature velcro closures, which allow for easy access to the truck bed while keeping it securely closed when not in use. However, there are some common problems that can arise with tonneau cover velcro, and it’s important to be aware of these issues so they can be addressed and resolved.
In this article, we will discuss some of the common problems with tonneau cover velcro and provide tips on how to prevent and fix them. Whether you’re a truck owner considering a tonneau cover or already have one installed, this information will be valuable to ensure the velcro closure stays functional and secure.
Tools and Materials Needed
If you’re experiencing issues with the velcro on your tonneau cover, don’t panic! Fixing it is actually quite easy. To do so, you’ll need a few tools and materials. First and foremost, you’ll need a clean cloth to wipe down the velcro and remove any dirt or debris that may be causing it to lose stickiness.
Additionally, you’ll need a pair of scissors to trim any loose threads or frayed edges on the velcro. If the velcro is severely damaged or worn out, you may need to replace it altogether. In this case, you’ll need to purchase a roll of adhesive-backed velcro from your local hardware or automotive store.
With these tools and materials in hand, you’ll be able to fix your tonneau cover velcro in no time and ensure that it securely fastens to keep your cargo protected.
List of tools needed
List of tools needed for a project or task is an essential aspect to consider before starting anything. Having the right tools not only makes the task easier but also ensures efficiency and accuracy. Whether you are a professional or a DIY enthusiast, having a well-stocked toolbox is a must.
Some common tools that you should have in your toolbox include a hammer, screwdriver set, pliers, adjustable wrench, tape measure, level, utility knife, and a power drill. These tools will come in handy for various tasks like hanging picture frames, assembling furniture, fixing loose screws, or even doing basic repairs around the house. Additionally, it is important to remember that quality matters when it comes to tools.
Investing in good quality tools will ensure durability and longevity, making them a worthwhile investment in the long run. So, before you start your next project, make sure you have the right tools on hand to tackle any task that comes your way.
List of materials needed
The Tools and Materials Needed for a Project When starting a new project, whether it’s a DIY home improvement task or a creative crafting endeavor, having the right tools and materials is essential. The list of necessary items will depend on the specific project, but there are some common tools and materials that are often needed across different types of projects. For tools, it’s always handy to have a good set of basic hand tools such as a hammer, screwdrivers in different sizes, pliers, a utility knife, and a measuring tape.
These tools can help you tackle a wide range of tasks and are a great starting point for any project. Additionally, power tools like a drill, a saw, and a sander can make the job easier and faster, but they may not be necessary for every project. In terms of materials, it’s important to consider what you’ll need to complete the project.
This could include things like paint and brushes for a painting project, nails and screws for a woodworking project, or fabric and thread for a sewing project. It’s also important to have the right safety equipment, such as goggles or gloves, depending on the nature of the project. Making a list of tools and materials before you start your project can help ensure that you have everything you need and can avoid any unnecessary trips to the store.
It’s always better to be prepared and have everything on hand, so you can focus on the task at hand and enjoy the satisfaction of completing your project. So, gather your tools and materials, and get ready to bring your project to life!
Step-by-Step Instructions
If your tonneau cover’s velcro is not holding up as well as it used to, don’t worry, because fixing it is actually quite simple. All you need is a bit of patience and a few basic tools. First, start by thoroughly cleaning the velcro strips on both the cover and the truck bed.
Use a mild soap and water solution, and gently scrub the velcro to remove any dirt or debris. Once the velcro is clean, allow it to air dry completely. Next, take a closer look at the velcro hooks and loops.
Over time, they can become worn or flattened, which reduces their effectiveness. If this is the case, you may need to replace the velcro entirely. Measure the dimensions of the existing velcro and purchase a new roll with the same size.
Cut the new velcro to the desired length and attach it to both the cover and the truck bed using adhesive. Press firmly to ensure a secure bond. Finally, test the velcro by closing the tonneau cover and checking for any gaps or loose areas.
Adjust as necessary. With these easy steps, your tonneau cover’s velcro should be good as new in no time.
Step 1: Assess the damage
“assess the damage, step-by-step instructions” When disaster strikes, the first thing you need to do is assess the damage. This step is crucial in determining the extent of the problem and what steps you need to take to fix it. Whether it’s a flood, a fire, or a severe storm, assessing the damage will give you a clear picture of what needs to be done.
Start by taking a walk around your property and taking note of any visible damage. Look for things like broken windows, leaks, or structural damage. It’s also important to check your roof for any signs of damage, such as missing shingles or leaks.
Don’t forget to document everything by taking photographs or videos. This documentation will be helpful when dealing with your insurance company or contractors. Remember, assessing the damage is the first step towards getting your life back to normal after a disaster.
Step 2: Clean the velcro
clean the velcro One important step in properly maintaining your velcro is to clean it regularly. Over time, dirt, lint, and other debris can get lodged in the hooks and loops of the velcro, causing it to lose its grip and effectiveness. Cleaning the velcro is a simple process that can be done with just a few household items.
First, you’ll need a soft-bristled brush, such as a toothbrush, to gently scrub away any dirt or debris from the velcro. Be sure to brush in all directions to ensure you reach all parts of the hook and loop. Next, you can use a damp cloth or sponge to wipe away any remaining dirt or residue.
If the velcro is particularly dirty or sticky, you can mix a mild detergent with water and use a small amount of the mixture to clean the velcro. Once you’ve finished cleaning, allow the velcro to air-dry completely before using it again. Regularly cleaning your velcro will help it maintain its grip and extend its lifespan, ensuring that it continues to securely fasten items together.
Step 3: Repair the velcro
velcro repair If you’re tired of your velcro straps losing their grip and not sticking together properly, don’t worry, there’s an easy fix! Repairing velcro can save you money and extend the life of your gear. The first step is to clean the velcro. Over time, dirt and debris can accumulate in the hooks and loops, preventing them from latching securely.
Use a toothbrush or a soft brush to gently scrub the velcro surfaces and remove any dirt. Next, inspect the velcro for any damage. If there are loose threads or fraying edges, trim them down with sharp scissors.
Now it’s time to rejuvenate the velcro. For this, you will need a hook and loop fastener cleaning solution. Apply a small amount of the solution to the velcro and rub it in using a cloth or your fingers.
This will help remove any residues and restore the velcro’s stickiness. Once you’ve cleaned and rejuvenated the velcro, it’s time to re-position it. If the velcro is coming off an item, carefully peel it away and remove any adhesive residue.
Then, apply a strong adhesive to the back of the velcro and firmly press it onto the item. Finally, wait at least 24 hours for the adhesive to dry and set properly. And voila! Your velcro is as good as new and ready to provide a secure and reliable fastening once again!
Step 4: Reinforce the velcro
“Step 4: Reinforce the velcro” Now that you’ve attached the velcro to your desired surface and let it set for a few minutes, it’s time to reinforce it. This step is crucial to ensure that the velcro stays firmly in place and can withstand the force of pulling and tugging. To reinforce the velcro, you can use an adhesive or a sewing machine, depending on your preference and the material you’re working with.
If you choose to use an adhesive, apply a thin layer on top of the velcro and press it firmly against the surface. Make sure to let it dry completely before testing its strength. If you prefer to sew it, use a sturdy thread and a sewing machine with a heavy-duty needle.
Sew a few stitches across the velcro, going back and forth to create a strong bond. Whichever method you choose, reinforcing the velcro will provide an extra layer of security and ensure that it stays in place for a long time.
Tips and Precautions
Are you having trouble with the velcro on your tonneau cover? Don’t worry, you’re not alone. Velcro can sometimes lose its stickiness over time, making it difficult to secure your cover properly. But fear not, because there are some simple steps you can take to fix this issue.
First, make sure to clean the area where the velcro is attached. Use a mild soap and water solution to remove any dirt or debris that may be stuck to it. Next, try using a Velcro brush or a toothbrush to gently scrub the velcro.
This will help restore its grip by removing any lint or fuzz that may have accumulated on the hooks. If the velcro is still not sticking, you can try applying a small amount of adhesive or glue to the hooks. Just make sure to use a glue that is safe for fabric and will not damage the tonneau cover.
Finally, give the adhesive ample time to dry before attempting to use the velcro again. By following these simple tips and precautions, you can easily fix the velcro on your tonneau cover and ensure that it stays in place securely.
Tips for preventing future damage to tonneau cover velcro
One of the most common issues with tonneau covers is the wear and tear that can occur on the Velcro strips used to secure them. Over time, the Velcro can become damaged or lose its effectiveness, making it difficult to keep your tonneau cover securely in place. Luckily, there are some tips and precautions you can take to prevent future damage to the Velcro and ensure that your tonneau cover stays in top condition.
First and foremost, it’s important to be mindful of how you handle and store your tonneau cover. Avoid dragging it on the ground or rough surfaces, as this can cause the Velcro to fray or become damaged. Instead, try to lift and carry the cover when moving it around.
Additionally, it’s a good idea to regularly inspect the Velcro strips for any signs of damage or wear. If you notice any fraying or loose threads, it’s best to address it immediately to prevent further damage. You may be able to repair the Velcro yourself by sewing or gluing any loose threads back into place.
Another helpful tip is to clean the Velcro regularly to remove any dirt or debris that may be causing it to lose its grip. Use a soft brush or cloth to gently scrub the Velcro, being careful not to apply too much force that could further damage it. Additionally, avoid using any harsh chemicals or cleaning agents that could cause the Velcro to deteriorate.
Lastly, consider using a tonneau cover cleaner or protectant specifically designed for use on Velcro. These products can help to prevent damage and extend the lifespan of the Velcro strips. Just be sure to follow the manufacturer’s instructions when using these products to ensure they are applied correctly.
By following these tips and precautions, you can prolong the life of your tonneau cover’s Velcro strips and keep them in optimal condition. This will not only save you money in the long run but also ensure that your tonneau cover continues to provide the protection and functionality you need for years to come.
Precautions to take during the repair process
“precautions to take during the repair process” When it comes to repairing something, whether it’s a broken appliance or a leaky pipe, it’s important to take certain precautions to ensure your safety and the success of the repair. Here are some tips and precautions to keep in mind: Turn off the power: Before working on any electrical appliance or circuit, always make sure to turn off the power.
This will help prevent any electrical shocks or accidents. It’s also a good idea to use a voltage tester to double-check that the power is indeed off.
Wear protective gear: Depending on the type of repair you’re doing, you may need to wear protective gear such as gloves, goggles, or a helmet. For example, when working with chemicals or in a construction site, it’s essential to protect yourself from potential hazards.
Use the right tools: Using the correct tools for the repair is crucial. Not only will using the right tools make the job easier, but it will also help ensure that the repair is done correctly. Using improper tools can lead to accidents or further damage to the item you’re fixing.
Follow instructions carefully: Whether you’re following a repair manual or watching a tutorial online, it’s important to carefully follow the instructions. Skipping steps or not understanding the process can result in a failed repair or even cause more damage.
Take your time: Rushing through a repair can lead to mistakes or accidents. Take your time to assess the situation, plan your steps, and execute the repair carefully.
Conclusion
In conclusion, fixing a tonneau cover velcro is as easy as 1-2-velcro! With just a few simple steps and a touch of patience, you can restore your cover to its former glory. Remember, like a skilled tailor, precision and attention to detail are key in this endeavor. So grab your velcro and unleash your inner MacGyver, because you now have all the knowledge to conquer this sticky situation.
Happy velcro-fixing, my clever comrades!”
Summary of the steps in fixing tonneau cover velcro
tonneau cover velcro, fixing steps, tips, precautions, bursting. Summary of the steps in fixing tonneau cover velcro: If you’re experiencing issues with the velcro on your tonneau cover, don’t worry – it’s a common problem that can be easily fixed. The first step is to identify the specific areas where the velcro is not sticking properly.
Once you’ve done that, clean those areas with a mild detergent and warm water to remove any dirt or debris that may be causing the issue. Next, make sure that the velcro is properly aligned and straightened out. If it’s not, adjust it accordingly to ensure a secure connection.
For added support, consider using adhesive tape or hook-and-loop fasteners in addition to the velcro. Finally, test the velcro by opening and closing the tonneau cover to ensure that it sticks properly. If the issue persists, you may need to replace the velcro entirely.
Tips and Precautions: – When cleaning the velcro, make sure to use a soft brush or cloth to avoid damaging the fabric or the velcro itself. – Avoid using harsh chemicals or abrasive cleaners, as they can weaken the velcro and cause it to lose its stickiness. – Take your time when adjusting the velcro to ensure that it is properly aligned.
Rushing can lead to a misaligned or uneven connection. – Consider applying a small amount of silicone or adhesive to the velcro to enhance its sticking power. However, be careful not to apply too much, as it can make the velcro difficult to open and close.
– If you decide to replace the velcro, look for high-quality, automotive-grade velcro that is designed to withstand the elements and provide a strong bond. – Regularly inspect and clean the velcro to prevent debris buildup and maintain optimal stickiness. – If you’re unsure about the process or encounter any difficulties, consult your tonneau cover’s manufacturer or a professional for assistance.
FAQs
How do I fix the velcro on my tonneau cover?
To fix the velcro on your tonneau cover, start by cleaning the velcro strips with a mild soap and water solution. After they have dried, you can try using a lint roller to remove any debris or loose fibers from the velcro. If the velcro is still not sticking properly, you may need to replace it with new velcro strips specifically designed for tonneau covers.
Why is the velcro on my tonneau cover not sticking?
There are several reasons why the velcro on your tonneau cover may not be sticking. It could be due to dirt, debris, or fibers getting caught in the velcro, which prevents it from properly adhering. Another reason could be that the velcro has lost its adhesive properties over time and needs to be replaced. Additionally, extreme temperatures or exposure to sunlight can also weaken the velcro’s stickiness.
Can I repair the velcro on my tonneau cover myself?
Yes, you can try repairing the velcro on your tonneau cover yourself. Start by cleaning the velcro strips thoroughly. If that doesn’t solve the issue, you can purchase adhesive-backed velcro strips from a hardware or automotive store and replace the old ones. Make sure to follow the instructions provided with the new velcro strips for best results.
Are there any alternatives to velcro for securing a tonneau cover?
Yes, there are alternatives to using velcro for securing a tonneau cover. Some tonneau covers come with snap or latch systems that allow you to secure the cover in place without relying on velcro. If your tonneau cover does not have these options, you may also consider using bungee cords or cargo nets to keep it securely fastened.
How often should I replace the velcro on my tonneau cover?
The frequency of velcro replacement on a tonneau cover can vary depending on factors such as usage, exposure to the elements, and the quality of the velcro itself. However, as a general guideline, it is recommended to inspect the velcro regularly and replace it if it shows signs of wear, loss of stickiness, or damage.
Where can I buy replacement velcro strips for my tonneau cover?
You can purchase replacement velcro strips for your tonneau cover from various sources. Check with the manufacturer of your tonneau cover to see if they offer replacement parts. Additionally, you can also find velcro strips specifically designed for tonneau covers at automotive supply stores, online retailers, or specialty shops that sell truck accessories.
Can I use regular velcro strips for my tonneau cover?
While regular velcro strips may work temporarily, it is recommended to use velcro strips specifically designed for tonneau covers. These strips are usually made with stronger adhesive properties and are better suited for the demands of securing a tonneau cover. Using regular velcro strips may result in ineffective or unreliable attachment of the cover.


