
Are you tired of struggling to figure out how to fold up your hitch carrier? Don’t worry, you’re not alone. Folding up a hitch carrier can be a daunting task, especially if you’ve never done it before. But fear not, because in this blog post, I’m going to show you exactly how to do it.
Think of it as a step-by-step guide that will make the process much simpler and less frustrating. So grab your hitch carrier, and let’s get started!
Table of Contents
Introduction
Are you wondering how to fold up your hitch carrier? Well, look no further! Folding up a hitch carrier is not as complicated as it may seem. In fact, it can be done with just a few simple steps. First, make sure that the carrier is empty and any items or cargo have been removed.
Next, locate the latches or release buttons on the carrier. These are usually located near the hinges or corners of the carrier. Once you have found the latches, simply press or pull them to release the carrier.
Depending on the design of your carrier, it may fold up horizontally or vertically. Follow the natural movement of the carrier and fold it in the prescribed direction. It may take a little bit of strength to fold up the carrier, so don’t be afraid to use some elbow grease.
Once the carrier is folded up, you can secure it in place using any provided straps or locks. And voila! Your hitch carrier is now folded up and ready for storage. So, the next time you need to transport items, you’ll know exactly how to fold up your trusty hitch carrier.
Happy travels!
Explanation of a Hitch Carrier
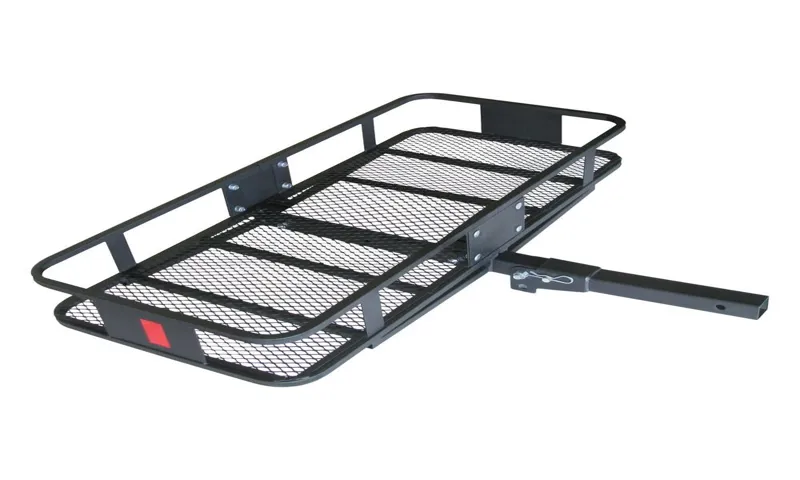
hitch carrier Introduction: A hitch carrier, also known as a hitch cargo carrier, is a handy device that allows you to transport large, bulky items on the back of your vehicle. It is essentially a platform that attaches to the rear hitch of your car, SUV, or truck, providing extra storage space for items that may not fit inside the vehicle itself. Whether you’re going on a road trip and need extra luggage space, or simply need to transport large equipment or gear, a hitch carrier can be a game-changer.
It eliminates the need for a roof rack or a trailer and offers a convenient and secure way to transport your belongings. But how exactly does a hitch carrier work and what are the benefits of using one? Let’s dive in and find out.

Benefits of a Hitch Carrier
hitch carrier, benefits
Step-by-Step Guide on Folding Up a Hitch Carrier
If you’re looking for a convenient way to transport your belongings on the back of your car, a hitch carrier is a great option. These carriers are designed to fit onto the hitch of your vehicle, allowing you to easily load and secure items such as luggage, camping gear, or even bikes. One of the great advantages of a hitch carrier is that it can be folded up when not in use, making it easier to store and saving you valuable space.
So, how do you fold up a hitch carrier? Here’s a step-by-step guide to help you out. First, make sure the carrier is empty and any cargo is removed. Next, locate the release mechanism or latch on the carrier.
This can usually be found on the hinge or the sides of the carrier. Once you’ve located the release mechanism, simply press or pull on it to unlock the carrier. As you do this, you’ll notice that the carrier begins to fold upwards.
Continue to press or pull on the release mechanism until the carrier is folded all the way up. Some carriers may have additional locking mechanisms to secure the carrier in the folded position. If this is the case, make sure to engage these locks to keep the carrier securely folded.
Finally, double-check that the carrier is completely folded and locked before storing it away. And there you have it – a simple step-by-step guide on how to fold up a hitch carrier. Now you can easily transport your belongings and enjoy the convenience of a hitch carrier, knowing that you can fold it up and store it away when not in use.
Step 1: Remove any items from the carrier
In the first step of folding up a hitch carrier, it is important to remove any items that may still be on the carrier. This includes anything that is strapped or attached to the carrier itself, as well as any loose items that may have been placed on top. By clearing off the carrier, you not only make the folding process easier, but you also ensure that nothing gets damaged or lost in the process.
It’s like clearing off a table before you fold it up – you want to make sure there’s nothing in the way that could interfere with the folding mechanism or get in the way when you’re trying to store it. So take a few moments to remove all items from the carrier before moving on to the next step.
Step 2: Loosen the straps or clips securing the carrier
Folding up a hitch carrier may seem like a complicated task, but it’s actually quite simple if you follow a step-by-step process. The second step in this process is to loosen the straps or clips that secure the carrier. These straps are typically used to hold the carrier in place when it is attached to the hitch.
By loosening them, you will be able to fold up the carrier more easily. It’s important to take your time and ensure that all of the straps are properly loosened before attempting to fold up the carrier. Once the straps have been loosened, you can move on to the next step in the process.
Step 3: Fold down the sides of the carrier
When it comes to folding up a hitch carrier, one important step is to fold down the sides of the carrier. This is a crucial part of the process as it helps to secure the items you are transporting and prevent them from falling off during transit. To fold down the sides, start by removing any items that may be on the carrier.
Then, locate the release latches on either side of the carrier. These latches are typically found near the rear of the carrier and are used to unlock and fold down the sides. Once you have located the latches, press them down or pull them towards you to release the sides.
As you do this, you will notice that the sides of the carrier begin to fold down towards the ground. Keep pressing or pulling on the latches until the sides are fully folded down. It is important to note that different hitch carriers may have slightly different mechanisms for folding down the sides, so it is always a good idea to consult the manufacturer’s instructions for specific information on your particular carrier.
By following these steps, you will be well on your way to folding up your hitch carrier and getting ready for your next adventure.
Step 4: Collapse the carrier into a compact size
folding up a hitch carrier So, you’ve successfully unloaded all your cargo from your hitch carrier and you’re ready to head back home. Now comes the tricky part – folding up the carrier into a compact size for storage. Don’t worry, though, because I’m here to guide you through it step by step.
First, make sure the carrier is empty and free of any objects or debris. This will make the folding process much easier and prevent any damage to your carrier. Next, locate the hinges or locking mechanisms on the carrier.
These are usually located on the sides of the carrier and are used to secure it in its expanded position. Now, start by collapsing the sides of the carrier inwards towards the center. This can usually be done by releasing the locking mechanism and gently pushing the sides inwards.
As you do this, you’ll notice the carrier start to fold up into a more compact shape. Once the sides are collapsed, you’ll want to fold the carrier in half. This can be done by grabbing the front of the carrier and folding it towards the back.
Make sure the sides are securely in place before folding the carrier to avoid any accidents or damage. Once the carrier is folded in half, you may need to secure it with straps or bungee cords to keep it from unfolding. This will prevent the carrier from taking up too much space during storage and ensure that it stays in its compact shape.
Finally, you can store the folded carrier in your garage or any other suitable storage space. It’s a good idea to clean the carrier before storing it to remove any dirt or debris that may have accumulated during use. And there you have it – a step-by-step guide on folding up a hitch carrier.
Tips and Precautions
Folding up a hitch carrier may seem like a daunting task, but with a few simple tips and precautions, you can easily tackle it. First and foremost, always make sure to read the manufacturer’s instructions before attempting to fold up your hitch carrier. This will give you a step-by-step guide on how to properly disassemble and fold the carrier.
Additionally, it’s important to take your time and be patient during the process. Rushing or forcing the carrier to fold can result in damage or injury. One helpful tip is to enlist the help of a friend or family member to assist you in folding up the carrier.
Having an extra set of hands can make the process much smoother and safer. Another precaution to keep in mind is to wear appropriate safety gear, such as gloves, to protect your hands from any sharp edges or pinch points. Finally, always double-check that the carrier is securely folded and latched before transporting it.
Taking the time to properly fold up your hitch carrier will ensure its longevity and your safety on the road.
Check the weight capacity of your hitch carrier
hitch carrier, weight capacity Blog Section h3: Check the weight capacity of your hitch carrier Main Sub_heading: Tips and Precautions When it comes to using a hitch carrier, it’s important to check the weight capacity before loading it up with all your gear. The weight capacity refers to the maximum weight that the carrier can safely handle without causing any damage. Ignoring this crucial detail can lead to significant problems, such as the carrier breaking or the hitch becoming overloaded.
Imagine heading out on a long road trip, only to have your hitch carrier fail halfway through the journey – it would be a disaster! So, before hitting the road, take a few moments to check the weight capacity of your hitch carrier. This information is typically found in the owner’s manual or on a label attached to the carrier itself. It’s worth noting that the weight capacity includes not only the weight of the items you’re transporting but also the carrier’s own weight.
It’s always better to err on the side of caution and choose a carrier with a higher weight capacity than the total weight of your load. This way, you can ensure the safety of both your belongings and those sharing the road with you. So, be sure to double-check the weight capacity of your hitch carrier before embarking on your next adventure.
Make sure the carrier is securely attached to the hitch
When it comes to transporting your belongings or recreational equipment, using a hitch-mounted carrier can be a convenient option. However, it’s important to make sure that the carrier is securely attached to the hitch before hitting the road. This will not only ensure the safety of your cargo but also prevent any damage to your vehicle or other drivers on the road.
To ensure a proper attachment, start by checking that the hitch and carrier are compatible and that the weight capacity of the carrier is suitable for your needs. Once you have confirmed this, make sure to follow the manufacturer’s instructions for attaching the carrier to the hitch. This may involve using bolts, screws, or a locking mechanism.
It’s also a good idea to periodically check the carrier during your journey to make sure it hasn’t become loose. By taking these simple precautions, you can enjoy peace of mind knowing that your cargo is safely secured during your travels.
Use caution and ask for assistance if needed
When it comes to undertaking tasks or projects that are challenging or unfamiliar, it’s important to use caution and ask for assistance if needed. This is especially true when it comes to tasks that have potential risks or complexities. By taking the time to research and understand what you’re getting into, you can ensure that you’re equipped with the necessary knowledge and tools to handle the task at hand.
However, even with careful preparation, sometimes there are unexpected obstacles or difficulties that arise. In these cases, it’s important not to be afraid to reach out for help. Whether it’s asking a more experienced colleague for advice or seeking guidance from a professional, seeking assistance can help you navigate through challenges and ultimately achieve success.
Remember, it’s better to ask for help and ensure a job well done than to struggle alone and potentially make costly mistakes. So, don’t hesitate to use caution and reach out for assistance when needed.
Conclusion
So there you have it, my friends. Now you know how to fold up a hitch carrier like a pro. It’s all about mastering the art of folding, like a ninja folding a shuriken.
But instead of throwing deadly weapons, you’ll be hurling your cargo safely and stylishly onto the back of your vehicle. Remember, practice makes perfect. Don’t be discouraged if your first attempt ends up looking more like a twisted pretzel than a neatly folded carrier.
Just keep at it, and soon you’ll be folding with the grace of a swan and the precision of a surgeon. Folding up a hitch carrier might not be the most glamorous skill in the world, but hey, it’s a handy one to have. And who knows, maybe one day it’ll even come in handy in a post-apocalyptic world where survival depends on your ability to efficiently pack and transport supplies.
But until then, let’s just enjoy the satisfaction of successfully folding up our hitch carriers, knowing that we are now a part of a secret society of folding aficionados. So go forth, my fellow fold-masters, and may your hitch carriers always be perfectly compact and your adventures be epic. Happy folding!”
FAQs
How to fold up a hitch carrier for storage?
To fold up a hitch carrier for storage, first, remove any items or equipment from the carrier. Then, locate the folding mechanism, which is usually located near the hitch attachment point. Follow the manufacturer’s instructions on how to fold up the carrier, as the process may vary depending on the specific model. Generally, you will need to release the locking pins or levers, collapse the carrier, and secure it in the folded position using the provided mechanisms or straps. Ensure that the carrier is securely folded and locked in place before storing it.
Is it necessary to fold up a hitch carrier when not in use?
Folding up a hitch carrier when not in use is not always necessary, but it is highly recommended. Folding up the carrier reduces its footprint, making it easier to store and maneuver in tight spaces. Additionally, it helps protect the carrier from environmental elements and potential damage, ensuring its longevity. If you have limited storage space or plan to store the carrier for an extended period, folding it up is a convenient and practical option.
Can I fold up a hitch carrier with items still on it?
It is not recommended to fold up a hitch carrier with items still on it. Folding up the carrier with items can lead to imbalance, damage, or even injury. Before folding up the carrier, remove all items and equipment securely stored on it. Ensure that the carrier is empty and in a stable position before attempting to fold it. Follow the manufacturer’s instructions to ensure proper folding and to avoid any potential risks.
How do I unfold a folded hitch carrier for use?
Unfolding a folded hitch carrier for use is a simple process. First, locate the locking mechanisms or straps that secure the carrier in the folded position. Release or undo these mechanisms, allowing the carrier to unfold. Ensure that the carrier unfolds smoothly and locks into place in the open position. Double-check that all locking pins or levers are securely engaged before loading items onto the carrier. Follow the manufacturer’s instructions for specific unfolding procedures, as they may vary depending on the model.
What are the benefits of folding up a hitch carrier?
Folding up a hitch carrier provides several benefits. Firstly, it allows for easier storage, particularly in compact spaces or garages. Folded carriers take up less space, making them more convenient for those with limited storage capacity. Secondly, folding up the carrier protects it from potential damage caused by exposure to the elements or accidental contact. Lastly, folding up the hitch carrier enhances safety by reducing the risk of tripping or bumping into the carrier when it is not in use.
Can I fold up a hitch carrier without tools?
Yes, it is possible to fold up a hitch carrier without tools. Most hitch carriers come with mechanisms or levers that allow for tool-free folding. These mechanisms are designed to be user-friendly and only require manual manipulation to fold or unfold the carrier. However, it is essential to follow the manufacturer’s instructions and recommendations for the specific model of hitch carrier being used. Some carriers may have additional locking pins or mechanisms that require tools for folding and unfolding.
Are there any weight limitations when folding up a hitch carrier?
While weight limitations for folding up a hitch carrier may vary between models, it is generally advisable to remove any heavy items from the carrier before folding it up. The folding mechanisms and locking mechanisms of hitch carriers are designed to support the weight of the carrier itself, but additional weight can strain or damage these components. To ensure the longevity and safe usage of the hitch carrier, always refer to the manufacturer’s guidelines on weight limitations and follow the recommended procedures for folding and unfolding.