
So, you’ve got yourself a shiny new 2016 Toyota Tacoma and you’re ready to enhance its functionality and style with some running boards. Installing running board brackets may seem like a daunting task, but fear not! In this blog post, we’ll walk you through the process step by step, so you can have those running boards securely attached in no time. Running boards not only provide a convenient step up into your truck, but they also add a touch of ruggedness and flair to its appearance.
Whether you’re a weekend warrior, an off-road enthusiast, or simply want that extra convenience, running boards are a must-have accessory for your Tacoma. Now, before we dive into the installation process, it’s important to note that running board brackets are specifically designed to fit your 2016 Toyota Tacoma. This ensures a perfect fit and a secure attachment.
So, be sure to get the right brackets for your specific truck model. Alright, let’s get started! The first step is to gather all the necessary tools and equipment. You’ll need a socket wrench, a torque wrench, a set of sockets, a Phillips screwdriver, and of course, the running board brackets themselves.
Next, locate the mounting points on your Tacoma’s frame. These are the areas where the brackets will be attached. It’s important to align the brackets properly to ensure a secure fit and prevent any potential damage to your truck.
Once you’ve located the mounting points, use the socket wrench to remove any existing bolts or screws. This will clear the way for the installation of the running board brackets. Take note of the thread sizes and lengths of the bolts you remove, as you’ll need to use these same specifications for the installation.
Now it’s time to attach the running board brackets. Line them up with the mounting points and begin securing them using the bolts you removed earlier. Be sure to tighten the bolts securely, but be careful not to overtighten and damage the brackets or the truck’s frame.
Table of Contents
Introduction
So you’ve got yourself a 2016 Toyota Tacoma and you’re looking to install some running board brackets. Well, you’ve come to the right place! Installing running board brackets on your Tacoma can be a fairly simple task that can greatly enhance the functionality and appeal of your vehicle. First thing’s first, gather all the necessary tools: a socket wrench, a socket set, and a torque wrench.
Next, locate the mounting points on your truck. These are usually located underneath the vehicle, along the frame rail. Once you’ve found them, use your socket wrench to loosen the bolts that are already in place.
Then, slide the running board bracket over the mounting points and line up the holes. Finally, tighten the bolts back into place using a torque wrench to ensure a secure fit. And just like that, you’ve successfully installed running board brackets on your 2016 Toyota Tacoma! Enjoy the added convenience and style they bring to your vehicle.
Overview of Running Board Brackets
running board brackets, vehicle accessories, installation process.
Why Install Running Board Brackets?
running board brackets
Tools and Materials Needed
So you’ve got yourself a shiny new 2016 Toyota Tacoma and you’re ready to add some running boards to give it that extra bit of style and functionality. Installing running board brackets on your Tacoma is a fairly straightforward process that you can do yourself with just a few tools and materials. Here’s what you’ll need:
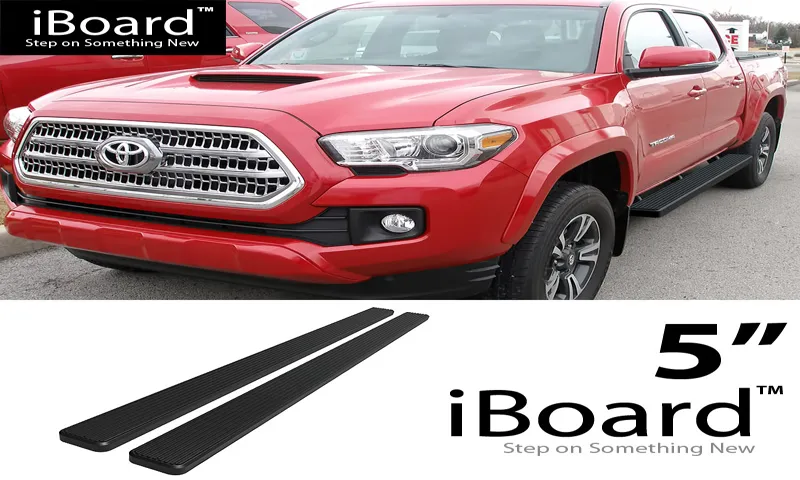
Running board brackets: Make sure you have the proper brackets that are designed specifically for your 2016 Toyota Tacoma. Running boards: Choose the style and material of running boards that you prefer.
There are options such as aluminum, stainless steel, or plastic. Socket set: You’ll need a socket set with different sizes to remove and install bolts.
Wrenches: Depending on the type of bolts used, you may also need a set of wrenches to help with the installation.
Torque wrench: This tool is essential for tightening the bolts to the proper torque specification. Drill: If your running board brackets require drilling into the frame of your Tacoma, you’ll need a drill and appropriate drill bits.
Protective gear: Safety first! Don’t forget to wear protective gloves and safety glasses while working. Now that you have all the necessary tools and materials, you’re ready to start installing the running board brackets on your 2016 Toyota Tacoma.
List of Required Tools
“List of Required Tools” When it comes to tackling any DIY project, having the right tools is crucial. Whether you’re a seasoned pro or a beginner, having the right tools and materials can make all the difference in the success of your project. So, what tools do you need? Well, it depends on the specific project you’re working on, but there are a few basics that every DIYer should have in their toolbox.
First and foremost, a good set of screwdrivers is a must-have. You’ll need both Phillips and flathead screwdrivers in various sizes to handle different types of screws. A reliable hammer is also a necessity.
Whether you’re hanging pictures or building a bookshelf, a good hammer can make the job much easier. For cutting and measuring, you’ll need a few tools. A tape measure is essential for ensuring accurate measurements, while a utility knife comes in handy for cutting materials like cardboard or drywall.
A good pair of pliers is another tool that should be in every toolbox. You’ll find yourself using them for a variety of tasks, from tightening a loose bolt to bending wires. Other tools that are worth having include a level, a stud finder, and a set of wrenches.
These tools can help ensure that your project is sturdy and well-built. It’s also important to have the right safety equipment when working on DIY projects. Safety goggles, gloves, and a dust mask are all essential for protecting yourself from potential hazards.
Remember, the specific tools you’ll need will vary depending on the project at hand. Before starting any DIY project, it’s a good idea to make a list of the tools and materials you’ll need to ensure you have everything on hand. By having the right tools, you’ll be well-prepared to tackle any project that comes your way.
List of Needed Materials
For any DIY project, it’s important to have the right tools and materials on hand to get the job done. When it comes to tackling home improvement or craft projects, having the necessary tools and materials can make all the difference. Some essential tools to have in your toolbox include a hammer, screwdriver set, tape measure, level, and a utility knife.
These tools will come in handy for a wide range of projects. In addition to tools, it’s also important to have the right materials for the job. This can include things like nails, screws, sandpaper, paint, brushes, and glue.
Having a variety of materials on hand will ensure that you are prepared for any project that comes your way. So, before you tackle your next DIY project, take the time to gather the necessary tools and materials to ensure success.
Preparing Your Toyota Tacoma
If you’re looking to add some extra style and functionality to your 2016 Toyota Tacoma, installing running board brackets is a great option. Running boards not only give your truck a more rugged and polished look, but they also provide a convenient stepping surface for you and your passengers. To install running board brackets on your Tacoma, you’ll first need to gather the necessary tools and materials, including the running board brackets themselves, a drill, a socket set, and a torque wrench.
Once you have everything you need, you can begin the installation process. Start by removing any existing brackets or hardware from your truck’s frame, then carefully align the new running board brackets with the pre-drilled holes on your Tacoma’s frame. Use the drill to secure the brackets in place with bolts, making sure they are tight and secure.
Finally, double-check your work to ensure that the running board brackets are properly aligned and securely fastened. With just a few simple steps, you can transform your 2016 Toyota Tacoma into a more stylish and practical vehicle.
Park the Vehicle on a Level Surface
Toyota Tacoma, level surface, preparing the vehicle, parking the car, safety precautions, parking brake, transmission, park position, wheels, turning the engine off, flat ground, stability, even surface, potential accidents, parking on a slope. When preparing your Toyota Tacoma for parking, it’s essential to find a level surface to ensure the safety and stability of your vehicle. Parking on a level surface helps prevent accidents and makes it easier to keep your car secure.
Before you park, make sure to engage the parking brake and shift the transmission into the park position. Once you’ve found a level spot, carefully maneuver the car until the wheels are aligned with the flat ground. Finally, turn the engine off to complete the parking process.
By following these simple steps and parking on a level surface, you can ensure the safety of your Toyota Tacoma and avoid any potential accidents.
Remove the Factory Side Steps (if applicable)
Toyota Tacoma, side steps. If your Toyota Tacoma has factory-installed side steps, you may want to remove them before you start any off-road modifications or upgrades. While side steps can be convenient for getting in and out of the truck, they can also limit ground clearance and potentially get damaged during off-roading adventures.
Removing the side steps will give your Tacoma a more streamlined look and allow for greater clearance when navigating uneven terrain. To remove the factory side steps, you’ll typically need a socket wrench, a few different socket sizes, and a bit of elbow grease. Start by locating the bolts securing the side steps to the frame of the truck.
Use your socket wrench to remove these bolts, being careful not to strip them. Once the bolts are removed, the side steps should slide off easily. Be sure to keep the bolts and any accompanying hardware in a safe place for reinstallation later if desired.
With the side steps successfully removed, your Toyota Tacoma is now ready for the next step in your off-road adventures.
Clean the Exterior of the Vehicle
Toyota Tacoma, cleaning the exterior
Installing Running Board Brackets
So you’ve got yourself a shiny new 2016 Toyota Tacoma and you want to give it a little extra flair by adding some running boards. Well, you’ve come to the right place because I’m going to walk you through how to install running board brackets on your Tacoma. First things first, you’ll need to gather your materials.
You’ll need a set of running board brackets specifically designed for your Tacoma model year, a socket wrench set, and a helper to assist you with the installation. Once you have all your materials ready, it’s time to get started. Start by locating the pre-existing mounting holes on the underside of your Tacoma.
These holes are usually found along the rocker panel area, towards the front and rear of the truck. Next, position the running board brackets over the pre-existing holes, lining up the holes in the brackets with the holes in the truck. Once lined up, insert the mounting bolts through the brackets and into the pre-existing holes.
Now, grab your socket wrench and tighten the mounting bolts securely. It’s important to make sure that the brackets are tightly secured to the truck to ensure a sturdy and safe installation. Repeat this process for each bracket, making sure to evenly distribute them along the length of the running boards.
This will help distribute the weight evenly and prevent any sagging or instability. Once all the brackets are securely in place, it’s time to attach the running boards. Simply slide the running boards onto the brackets, making sure they are centered and level.
Some running boards may require additional hardware or brackets for attachment, so be sure to consult the manufacturer’s instructions for your specific running board model. And there you have it! With just a few simple steps, you’ve successfully installed running board brackets on your 2016 Toyota Tacoma. Now you can step up into your truck with style and ease.
Locate the Mounting Holes on Your Vehicle
running board brackets, mounting holes, install
Attach the Brackets to the Vehicle
running board brackets, vehicle, attach, installation, instructions Installing running board brackets is an essential step in adding running boards to your vehicle. These brackets serve as the foundation for the running boards and provide the necessary support. While the exact process may vary depending on the make and model of your vehicle, the installation instructions generally remain the same.
To begin, you will need to gather all the necessary tools, including a wrench and socket set. It is important to ensure that you have the correct size brackets for your vehicle. Once you have everything ready, you can proceed with the installation.
First, locate the mounting points on your vehicle where the brackets will be attached. These mounting points are usually pre-drilled holes or existing bolt locations. It is important to align the brackets properly with these mounting points to ensure a secure fit.
Next, place the brackets onto the mounting points and loosely attach them using the provided bolts. It is important not to tighten the bolts at this stage, as it may make it difficult to adjust the position of the brackets if needed. After the brackets are in place, check for any potential clearance issues.
Make sure that the brackets do not interfere with any existing components or moving parts of the vehicle. Adjust the position of the brackets if necessary. Once you are satisfied with the placement of the brackets, go ahead and tighten the bolts securely.
It is crucial to ensure that the brackets are firmly attached to the vehicle to prevent any wobbling or instability. Lastly, repeat the same process for the remaining brackets, ensuring that they are evenly spaced on both sides of the vehicle. Once all the brackets are securely attached, you are ready to proceed with the installation of the running boards.
Secure the Brackets with Bolts and Nuts
running board brackets, secure, bolts and nuts. Installing running board brackets is a crucial step in ensuring the stability and safety of your vehicle’s running boards. Once you have measured and marked the correct positioning for the brackets, it’s time to secure them in place.
This is done by using bolts and nuts. First, place the bracket on the designated area and align it with the pre-drilled holes on the underside of the vehicle. Once you have done this, insert the bolts through the holes, making sure they pass through both the bracket and the corresponding holes on the vehicle.
Next, tighten the nuts onto the bolts using a wrench or socket set. Make sure to tighten them securely, ensuring that the bracket is firmly attached. This is important because the running boards will bear weight and need to be stable while in use.
It’s always a good idea to check the tightness of the brackets and bolts periodically, as they may loosen over time due to vibrations and use. This will help maintain the integrity and stability of your running boards, ensuring they stay securely in place. By following these steps and securely fastening the brackets with bolts and nuts, you can have peace of mind knowing that your running boards will provide you with a safe and sturdy platform to step onto when entering or exiting your vehicle.
Attaching Running Boards to Brackets
If you’re looking to upgrade your 2016 Toyota Tacoma with some running boards, you’ll need to know how to install the brackets that attach them to the vehicle. Installing running board brackets is a relatively straightforward process, but it does require some time and patience. Start by locating the mounting holes on the underside of your Tacoma.
These holes should be pre-existing and specifically designed for attaching running board brackets. Once you’ve found the holes, insert the bolts provided with your running board kit into the brackets, making sure they align with the holes on your truck. Tighten the bolts securely, but be careful not to overtighten and damage the threads or brackets.
Repeat this process for each bracket, ensuring that they are evenly spaced along the length of the running board. Once all the brackets are securely attached, you can then proceed to mount the running boards onto the brackets. Line up the holes on the running board with the bolts on the brackets and slide them into place.
Use the included nuts to secure the running boards to the brackets, again being careful not to overtighten. Finally, check that everything is secure and tightly fastened before taking your newly installed running boards for a test drive.
Line Up the Running Boards with the Brackets
The next step in attaching running boards to brackets is to line them up correctly. This may seem like a simple task, but it is important to get it right in order to ensure a secure fit. Start by placing the running board on top of the brackets, making sure that they are aligned properly.
You may need to adjust the position slightly to ensure that they line up perfectly. Once you are satisfied with the placement, use a wrench or a screwdriver to tighten the bolts or screws that hold the brackets in place. It is crucial to make sure that these are tightened securely to prevent the running boards from shifting or coming loose while in use.
Taking the extra time to line up the running boards with the brackets will ensure a professional-looking installation and a solid foundation for your vehicle.
Secure the Running Boards to the Brackets
When it comes to adding running boards to your vehicle, securely attaching them to the brackets is crucial. This step ensures that the running boards stay in place and provide the necessary support for entering and exiting your vehicle. To secure the running boards to the brackets, start by positioning the running board onto the brackets.
Make sure the holes in the running board align with the holes in the brackets. You may need to adjust the positioning to get a perfect fit. Once the running board is in the correct position, use the provided screws and washers to secure it to the brackets.
Be sure to tighten the screws securely, but be careful not to overtighten and strip the threads. Once all the screws are tightened, give the running boards a gentle tug to make sure they are secure. If they feel loose, go back and tighten the screws a bit more.
By taking the time to properly attach the running boards to the brackets, you can ensure that they will stay in place and provide the added convenience and style you desire for your vehicle.
Final Steps
So, you finally bought a set of running boards for your 2016 Toyota Tacoma, and now it’s time to install them. One important step in this process is attaching the running board brackets to your truck. These brackets serve as the connection point between the running boards and the frame of your vehicle, providing stability and support.
To install the running board brackets on your Tacoma, start by locating the mounting points on the underside of your truck. These mounting points are typically located along the sides of the frame. Once you’ve found them, align the brackets with the mounting points and secure them in place using the provided hardware.
Make sure to tighten the bolts or screws firmly, but not too tight, as this may cause damage to your vehicle’s frame. Repeat this process for each bracket until they are all securely installed. Once the brackets are in place, you can then proceed to attach the running boards using the specified instructions provided by the manufacturer.
And voila! With the running board brackets successfully installed, you can now enjoy the added convenience and style that running boards bring to your 2016 Toyota Tacoma.
Check the Alignment and Tightness of the Brackets and Running Boards
running board brackets, installation, alignment, tightness, final steps, tips, steps, secure, safety, level, secure, visually inspect, ensure, correctly installed, wobbling, movement, snug, brackets, checking, bolts, running board, adjustment, lock washers, tighten, final check In the final steps of installing your running boards, it’s important to check the alignment and tightness of the brackets. This is crucial for both the safety and aesthetic appeal of your running boards. After securely fastening the brackets to the vehicle, take a moment to visually inspect them and ensure they are correctly installed.
Look for any signs of wobbling or movement, as this could indicate that the brackets are not tight enough. To address this, you can snug up the brackets by checking the bolts and making any necessary adjustments. It’s a good idea to use lock washers to provide an added level of security.
Once you’ve made any necessary adjustments, do a final check to make sure everything is secure and tight. This will ensure that your running boards stay in place and provide the necessary support and convenience as you enter and exit your vehicle.
Test the Stability of the Running Boards
test stability, running boards
Conclusion
So there you have it, my friends. Installing running board brackets on your 2016 Toyota Tacoma is a piece of cake. With the right tools, a little bit of patience, and this handy guide, you’ll be stepping up onto those running boards in no time.
But remember, it’s not just about function – it’s about style too. And luckily, these running board brackets are not only practical but also sleek and stylish. They’ll give your Tacoma that extra oomph that will make heads turn as you cruise down the street.
So go ahead, take the plunge and install those running board brackets. It may seem like a small upgrade, but trust me, it will make a big difference. And who knows, maybe one day you’ll be teaching your friends how to install running board brackets on their own vehicles.
But until then, enjoy the convenience, the style, and the satisfaction of a job well done. Happy installing, my friends!”
Final Thoughts
“Final Steps: Wrapping Up Your Project” Congratulations! You’re almost at the finish line of your project. As you approach the end, it’s important to tie up any loose ends and ensure that everything is in order. Here are a few final steps to consider before calling it a day.
First and foremost, take a step back and evaluate your project as a whole. Did you achieve your goals? Did you encounter any unexpected obstacles along the way? Reflecting on your journey can provide valuable insights and help you learn from both your successes and your challenges. Next, it’s time to complete any remaining tasks.
Are there any outstanding action items that still need to be addressed? Make a list and prioritize what needs to be done. This might include finalizing documentation, conducting final tests or reviews, or ensuring that all stakeholders are satisfied with the end result. Once you’ve completed your tasks, it’s time to celebrate! Acknowledge and appreciate your hard work and the accomplishments you’ve achieved.
Share your success with your team, celebrate together, and bask in the satisfaction of a job well done. Finally, don’t forget to take a moment to reflect on the lessons learned from this project. What worked well? What could have been done better? Use these insights to improve your future projects and to continue growing both personally and professionally.
As you wrap up your project, remember that endings are also opportunities for new beginnings. Take some time to rest, rejuvenate, and recharge before moving on to your next endeavor. And always remember that every project, no matter how big or small, is a valuable learning experience that brings you one step closer to reaching your goals.
So embrace the final steps with enthusiasm and with the knowledge that you’ve given your best.
Enjoy Your Newly Installed Running Boards
running boards, newly installed, enjoy Congratulations on your newly installed running boards! Your vehicle now has that extra touch of style and functionality. But before you hit the road and show off your upgraded ride, there are a few final steps you should take to ensure that your running boards are properly installed and ready for use. First, give them a thorough inspection to make sure they are securely attached and not wobbly.
If you notice any issues, such as loose bolts or brackets, tighten them up or contact your installer for assistance. Once you’re satisfied with the stability of your running boards, it’s time to give them a good cleaning. Over time, dust, dirt, and road grime can accumulate on the surface, dulling their appearance and potentially causing damage.
Using a mild soap and water solution, scrub the running boards gently with a sponge or soft cloth, paying close attention to any hard-to-reach areas. Rinse them off with clean water and dry thoroughly with a towel. This will not only make them look shiny and new but also help to prolong their lifespan.
Finally, take a moment to admire your newly installed running boards. Not only do they provide an extra step up into your vehicle, but they also add a sleek and stylish element to its overall appearance. So go ahead, step back and enjoy the sight of your improved ride.
Whether you’re out on the town or simply running errands, your new running boards will serve you well.
FAQs
What are running board brackets?
Running board brackets are metal brackets that are used to securely attach running boards or side steps to a vehicle, like a 2016 Toyota Tacoma. They provide support and stability for the running boards, allowing for easy access to the vehicle.
Why do I need running board brackets on my 2016 Toyota Tacoma?
Running board brackets are essential if you want to install running boards or side steps on your 2016 Toyota Tacoma. They ensure a proper and secure installation, improving safety and convenience when entering or exiting the vehicle.
Can I install running boards without using brackets on my 2016 Toyota Tacoma?
It is not recommended to install running boards without using brackets on your 2016 Toyota Tacoma. Brackets provide stability and support for the running boards, preventing them from sagging or detaching from the vehicle. Without brackets, the running boards may not be securely attached and could pose a safety hazard.
How do I choose the right running board brackets for my 2016 Toyota Tacoma?
When choosing running board brackets for your 2016 Toyota Tacoma, it is important to consider factors such as the specific model of your vehicle, the type and size of the running boards, and the weight capacity of the brackets. It is best to consult the manufacturer’s recommendations or seek professional advice to ensure compatibility and proper fitment.
Are running board brackets universal for all vehicles?
No, running board brackets are not universal for all vehicles. They are designed to fit specific makes and models, including the 2016 Toyota Tacoma. It is crucial to choose brackets that are specifically designed for your vehicle to ensure proper installation and compatibility.
Can I install running board brackets on my 2016 Toyota Tacoma by myself?
Yes, it is possible to install running board brackets on your 2016 Toyota Tacoma by yourself if you have the necessary tools and mechanical skills. However, it is recommended to follow the manufacturer’s installation instructions and seek professional assistance if needed to ensure a secure and proper installation.
Are running board brackets included when purchasing running boards for my 2016 Toyota Tacoma?
It depends on the manufacturer and the specific product. Some running boards may come with brackets included, while others may require you to purchase them separately. It is important to check the product description or consult with the seller to determine if brackets are included or not.