
Are you looking to add some style and functionality to your Toyota vehicle? Installing a running board might be just what you need! Running boards not only enhance the appearance of your Toyota, but they also provide a convenient step for getting in and out of your vehicle. Whether you have a large SUV or a compact sedan, installing running boards is a relatively simple process that you can do yourself. In this blog post, we will guide you through the steps to install running boards on your Toyota, so you can enjoy all the benefits they offer.
Get ready to take your Toyota to the next level and make a stylish statement with running boards!
Table of Contents
Introduction
Looking to install running boards on your Toyota vehicle? Well, you’ve come to the right place! Installing running boards can not only enhance the aesthetic appeal of your Toyota but also provide practical benefits such as easier access to the vehicle and added protection. So, how do you go about installing Toyota running boards? First, gather all the necessary tools and parts for the installation. Depending on the type of running boards you choose, you may need brackets, bolts, and other hardware.
Next, locate the mounting points on the side of your Toyota where the running boards will be installed. These points are typically marked on the underside of the vehicle. Once you’ve found them, use a wrench or socket wrench to remove any bolts or screws in these areas.
This will allow you to attach the running board brackets securely. After the brackets are in place, you can now install the running boards themselves. Line them up with the brackets and use the provided hardware to attach them securely.
Make sure to tighten the bolts or screws properly to ensure a snug fit. And just like that, you have successfully installed running boards on your Toyota! Enjoy the added functionality and style that they bring to your vehicle.
Overview of the installation process
The installation process of any system or software can sometimes seem like a daunting task, but with a little guidance and understanding, it can become much simpler. In this blog post, we will provide you with an overview of the installation process, making it easier for you to navigate through it. So, let’s dive right in and learn more about the ins and outs of installing a system or software.
To understand the installation process, it is important to have a clear understanding of the components involved. When you install a system or software, you typically have a setup file or an installer package. This file contains all the necessary files and instructions that are needed to properly install the system or software on your device.
The installation process generally starts with running the setup file or installer package. This can be achieved by double-clicking on the file, which will launch the installation wizard. The installation wizard is a step-by-step guide that will assist you in the installation process.
During the installation process, you will be prompted to choose the installation location. This is the directory or folder where the system or software will be installed on your device. You can choose to install it in the default location or select a different location according to your preference.
Next, you will be prompted to accept the terms and conditions of the software or system. It is important to carefully read and understand these terms before proceeding with the installation. Once you have accepted the terms, the installation wizard will begin copying the necessary files to your device.
This process may take a few minutes, depending on the size of the software or system. After the files have been copied, the installation wizard might prompt you to configure certain settings. This could include setting up preferences, creating user accounts, or selecting additional features to install.
Benefits of installing a running board
running board, vehicle accessory, benefits, installation Running boards are a popular vehicle accessory that offers a range of benefits. These wide, flat steps are installed on the sides of trucks, SUVs, and other larger vehicles to make entering and exiting the vehicle easier and more convenient. But the benefits of installing running boards go beyond just providing a step up.
They also offer protection to the vehicle’s lower body by acting as a buffer against debris, mud, and road grime that can cause damage and corrosion. Additionally, running boards can enhance the overall appearance of your vehicle, giving it a more rugged and stylish look. So, whether you’re looking for easier access to your vehicle, protection against damage, or a way to enhance its aesthetics, installing running boards is a smart choice.
Tools and Materials Needed
Installing running boards on your Toyota can provide added convenience and functionality to your vehicle. To get started, you’ll need a few basic tools and materials. First, make sure you have a set of running boards specifically designed for your Toyota model.
You’ll also need a socket wrench and various sized sockets, as well as a torque wrench to properly tighten the running board brackets. Additionally, you’ll need a set of mounting brackets and any necessary hardware that comes with the running board kit. A jack and jack stands are also recommended for safely raising and securing the vehicle.
Before beginning the installation process, make sure to thoroughly read and follow the instructions provided by the running board manufacturer.
List of tools required
In order to successfully complete a DIY project, it’s important to have the right tools and materials on hand. Whether you’re fixing a leaky faucet or building a piece of furniture, having the necessary tools can make the job much easier and more efficient. Some common tools that are often needed for DIY projects include a hammer, screwdrivers (both flathead and Phillips), pliers, a tape measure, and a level.
These basic tools can be used for a wide range of tasks and are essential for any DIY enthusiast. Additionally, it’s important to have the proper materials for the project at hand. This can include things like nails, screws, sandpaper, paint, and wood or metal materials, depending on the specific project.
By having the right tools and materials on hand, you can ensure that your DIY project goes smoothly and that you’re able to achieve the results you desire.
List of materials needed
In order to complete a DIY project successfully, it’s essential to have the right tools and materials on hand. Here is a list of some commonly used items that you may need for your next project. Firstly, having a basic set of hand tools is essential.
This can include items such as a hammer, screwdrivers (both flathead and Phillips), pliers, and a tape measure. Additionally, you may need power tools such as a drill, circular saw, or jigsaw, depending on the project. Other materials you may need include various types of screws, nails, or bolts, depending on what you are building.
Don’t forget to stock up on sandpaper and paint brushes if you plan on painting or refinishing any surfaces. Safety equipment is also crucial, so be sure to have goggles, gloves, and a dust mask on hand. Finally, make sure to have the appropriate materials for the project, such as wood, piping, or electrical wiring, depending on what you are working on.
By having these tools and materials ready to go, you’ll be well-prepared to tackle your next DIY project with confidence.
Preparing for Installation
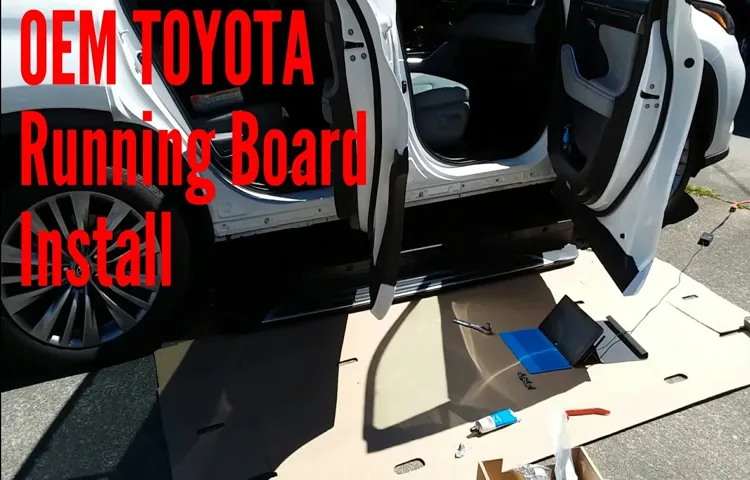
So you’ve decided to give your Toyota a stylish upgrade with running boards. Congratulations! Installing running boards not only enhances the look of your vehicle but also provides practical benefits like easier access and added protection. But where do you start? Don’t worry, we’ve got you covered.
In this blog section, we’ll guide you on how to install Toyota running boards like a pro. First things first, gather all the necessary tools and materials. You’ll need a socket set, a wrench, a drill, a measuring tape, a marker, and of course, the running boards themselves.
Make sure you have the correct running boards that are compatible with your specific Toyota model. Next, carefully read the installation instructions provided by the manufacturer. These instructions will give you a detailed step-by-step guide on how to properly install the running boards.
It’s crucial to follow the instructions closely to ensure a safe and secure installation. Before you begin, prepare your vehicle by cleaning the area where the running boards will be installed. This step will help the adhesive or mounting brackets adhere properly to the surface.
Now it’s time to start the installation process. Begin by positioning the running boards against the side of your Toyota to determine the correct placement. Use the measuring tape and marker to mark the locations where the brackets or adhesive will be installed.
If your running boards require brackets, attach them to the marked locations using the provided hardware. Make sure the brackets are securely fastened and aligned properly. For adhesive-based running boards, apply the adhesive strips or pads to the marked locations on your Toyota.
Clearing workspace and ensuring safety
Clearing workspace and ensuring safety is an essential step before starting any installation project. Preparing for installation involves decluttering the area and removing any unnecessary items that could potentially interfere with the process. This includes clearing the floor of any obstacles, moving furniture, and taking down any wall decorations or artwork.
By creating an open and spacious environment, you can ensure that there is enough room for the installation team to work efficiently and safely. It is also important to consider safety measures such as turning off the power to the area where the installation will take place, disconnecting any electrical devices, and securing any loose wires or cables. By taking these precautions, you can minimize the risk of accidents and ensure the safety of both the installation team and yourself.
So, before embarking on any installation project, make sure to clear your workspace and prioritize safety.
Reading the installation instructions
“Reading the installation instructions” Before you dive into installing that new piece of software or gadget, it’s always a good idea to take a few moments to read through the installation instructions. I know, I know, reading instructions might not be your idea of a good time, but trust me, it can save you a lot of headaches down the line. Installation instructions are like a roadmap that guides you through the process step by step, ensuring that you don’t miss any important details or skip any necessary steps.
Think of it like following a recipe when you’re cooking a new dish – you want to make sure you have all the ingredients and know the correct order and measurements to use. So, before you start fumbling around with the installation process, grab a cup of coffee, sit down, and give those instructions a read. It may seem like a small step, but it can make a big difference in the success of your installation.
Step-by-Step Installation Guide
So, you’ve decided to add some running boards to your Toyota. Good choice! Installing running boards can add style and functionality to your vehicle. Plus, they make it easier to get in and out of your Toyota, especially if it’s lifted or has a higher ground clearance.
But how do you install them? Don’t worry, it’s actually a pretty simple process. First, gather all the tools you’ll need for the installation. This typically includes a socket set, a screwdriver, and a torque wrench.
You may also need a drill and drill bits if your running boards require additional holes. Next, locate the mounting points on your Toyota where the running boards will be attached. These mounting points are usually located along the rocker panels, underneath the doors.
Once you’ve found the mounting points, you’ll need to remove any existing hardware or trim that may be in the way. This could include things like mud flaps or plastic body cladding. With the area prepared, it’s time to place the running boards onto the mounting points.
Make sure they’re lined up correctly and then attach them using the provided bolts and washers. Once all of the bolts are in place, use a torque wrench to tighten them down to the recommended specifications. This ensures that the running boards are securely attached and won’t come loose while you’re driving.
Finally, step back and admire your handiwork! You’ve successfully installed running boards on your Toyota. Now you can enjoy the added style and convenience that they provide. Remember, this is just a general guide and installation steps may vary depending on the specific brand and model of running boards you choose.
Step 1: Preparing the running board
The first step in installing running boards on your vehicle is to prepare the running board itself. To do this, you will need to gather all the necessary tools and materials, including the running board kit, a tape measure, a marker or pencil, a drill, and screws. Once you have everything ready, it’s time to position the running board on your vehicle.
Start by measuring the distance from the ground to the bottom of your vehicle’s door. This will help you determine the height at which the running board should be installed. After you have determined the height, use the marker or pencil to mark the placement of the running board on the underside of your vehicle.
Make sure to position it evenly and symmetrically on both sides. Once you have marked the placement, use the drill to create pilot holes for the screws. This step will make it easier to attach the running board securely.
Finally, attach the running board to your vehicle using the screws provided in the kit. Make sure to tighten the screws securely, but be careful not to overtighten and damage the running board or your vehicle’s body. And with that, you have successfully prepared the running board for installation!
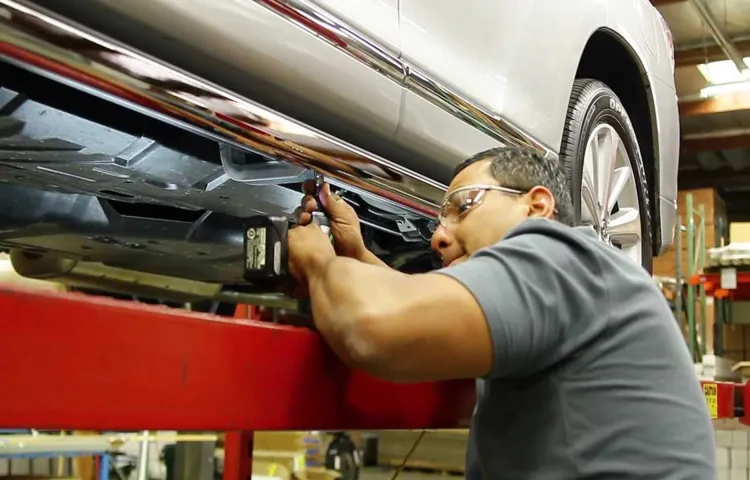
Step 2: Attaching the brackets to the vehicle’s frame
If you’re looking to attach brackets to your vehicle’s frame, you may be wondering where to start. Luckily, we’ve got you covered with this step-by-step installation guide. The first step is to gather all of the necessary tools and materials, such as the brackets, bolts, and a wrench.
Once you have everything you need, it’s time to locate the frame rails on your vehicle. These are the long, horizontal bars that run underneath the vehicle from front to back. Once you’ve located the frame rails, you’ll need to clean the areas where the brackets will be attached.
This will help ensure a secure and long-lasting attachment. After cleaning the frame rails, it’s time to position the brackets. Carefully align the brackets with the designated mounting holes on the frame rails, making sure they are level and symmetrical.
Once you have the brackets in the correct position, use the bolts provided to attach them to the frame rails. Tighten the bolts securely using a wrench, making sure the brackets are firmly attached. Congratulations! You have successfully attached the brackets to your vehicle’s frame.
Now you’re ready to move on to the next step in the installation process.
Step 3: Placing the running board on the brackets
When it comes to installing a running board on your vehicle, placing it on the brackets is a crucial step. Once you have properly secured the brackets onto the vehicle, it’s time to carefully position the running board on top. Make sure to align the holes in the running board with the holes in the brackets.
This will ensure a proper fit and prevent any movement or instability. Gently lower the running board onto the brackets, making sure it sits securely. You may need a helping hand to hold the running board in place while you secure it.
Use the provided bolts and washers to firmly attach the running board to the brackets. It’s important to follow the manufacturer’s instructions and specifications for tightening the bolts. Be sure not to overtighten or strip the screws.
Once everything is securely in place, give the running board a firm shake to ensure it is stable. If it wiggles or feels loose, double-check the installation and make any necessary adjustments. With the running board properly installed, you can now enjoy the added convenience and style it brings to your vehicle.
Step 4: Tightening the bolts and securing the running board
When it comes to installing running boards on your vehicle, tightening the bolts and securing the running board is a crucial step. After all, you want to ensure that the running board is securely attached and won’t become loose over time. To begin, locate the bolt holes on the underside of the running board and align them with the holes on the vehicle’s frame.
Insert the bolts through the holes and hand-tighten them. Once all the bolts are in place, use a wrench or socket set to tighten them further. Be careful not to overtighten, as this could cause damage to the running board or the vehicle’s frame.
Once all the bolts are securely tightened, give the running board a gentle tug to ensure it is stable. If it moves or feels loose, tighten the bolts further until it is properly secured. With the running board securely in place, you can now enjoy the added convenience and style it brings to your vehicle.
Tips and Precautions
If you’re looking to add some functionality and style to your Toyota vehicle, installing running boards is a great option. Running boards provide a convenient step for easier access to your vehicle, as well as added protection from rocks, debris, and other road hazards. To install Toyota running boards, there are a few tips and precautions to keep in mind.
First, make sure to carefully read and follow the instructions provided by the manufacturer. Each running board kit may have specific installation steps that need to be followed. It’s also important to gather all the necessary tools and equipment before getting started.
This will ensure a smooth and efficient installation process. Additionally, it’s a good idea to clean and prep the area where the running boards will be installed. This will help ensure a secure and long-lasting attachment.
Lastly, take your time during the installation process and double-check that all the bolts and screws are tightened properly. This will ensure that the running boards are securely attached to your vehicle. By following these tips and taking the necessary precautions, you’ll be able to successfully install Toyota running boards and enjoy the added functionality and style they provide.
Tips for a successful installation
In order to ensure a successful installation, there are a few tips and precautions that you should keep in mind. Firstly, it’s important to carefully read and follow the installation instructions provided by the manufacturer. These instructions are there for a reason and can help you avoid any potential issues or mistakes.
Secondly, make sure to measure and prepare the installation area properly. This means ensuring that you have enough space, as well as ensuring that the area is clean and free from any debris or obstructions. Additionally, it’s important to use the right tools and materials for the job.
Using the wrong tools or materials can not only make the installation more difficult, but it can also potentially damage the product. Lastly, take your time and be patient during the installation process. Rushing can lead to mistakes, so it’s important to take your time and do it right.
By following these tips and taking the necessary precautions, you can ensure a successful installation and enjoy the benefits of your new product.
Precautions to take during the installation process
During the installation process of any product or equipment, it is important to take certain precautions to ensure safety and proper functioning. One tip is to carefully read and follow the manufacturer’s instructions. These instructions provide important information on how to correctly assemble and install the product.
It is also important to make sure that all the necessary tools and equipment are available before starting the installation. This will help prevent delays and ensure that the installation process goes smoothly. Another precaution to take is to wear appropriate safety gear, such as gloves and goggles, to protect yourself from any potential hazards.
Additionally, it is important to double-check all connections and fittings to ensure that they are secure and properly installed. This will help prevent any leaks or malfunctions in the future. Lastly, it is always a good idea to have a professional or an experienced person supervise the installation process, especially if you are unsure about certain steps or procedures.
This will help ensure that everything is done correctly and safely. By following these tips and taking these precautions, you can have a successful and hassle-free installation process.
Conclusion
And there you have it! A step-by-step guide on how to install running boards on your Toyota. But let’s be honest, installing running boards isn’t just about adding a touch of style and functionality to your ride – it’s about making a statement. With these sleek and sturdy additions, your Toyota will exude confidence and a certain je ne sais quoi.
Picture yourself gracefully stepping in and out of your vehicle, like a celebrity on the red carpet. The running boards aren’t just an accessory; they’re a reflection of your personality and impeccable taste. So, don’t just hop into your car like any ordinary person.
Leave a lasting impression with your perfectly installed running boards. Because why settle for average when you can make a grand entrance every time you open that door? So, follow these instructions, take your time, and enjoy the satisfaction of a job well done. And remember, every time you see those running boards, you can pat yourself on the back for being a true automotive aficionado.
Now go forth, my adventurous Toyota owner, and conquer the streets in style. Happy installing!”
Summary of the installation process
Tips and Precautions for Installing a New Appliance When it comes to installing a new appliance, there are a few important tips and precautions to keep in mind. Firstly, it’s crucial to carefully read and follow the manufacturer’s instructions. Each appliance has its own specific installation requirements, and failing to follow them could result in damage to the appliance or even pose a safety risk.
Secondly, make sure to turn off the power supply to the area where the appliance will be installed. This is especially important when dealing with electrical appliances, as working with live wires can be extremely dangerous. It’s also a good idea to wear protective gear, such as gloves and safety goggles, to prevent any accidents or injuries.
If you’re unsure about any aspect of the installation process, it’s always best to consult a professional. They will have the knowledge and experience to ensure that the appliance is properly installed and functioning correctly. So, whether you’re installing a new dishwasher, refrigerator, or washing machine, be sure to follow these tips and precautions to ensure a smooth and safe installation.
Final thoughts on the benefits of installing a running board
One of the final tips and precautions to consider when installing a running board is to make sure it is properly aligned and securely attached to your vehicle. This will help ensure that it stays in place and provides the desired support and convenience. It is also important to regularly check the running board for any signs of damage, such as cracks or loose screws, and repair or replace them as needed.
Another tip is to take into account the weight limit of the running board and avoid exceeding it to prevent any potential accidents or damage to your vehicle. Additionally, it is important to be cautious when using the running board, especially when getting in and out of the vehicle, to avoid any slips or falls. By following these tips and taking precautions, you can enjoy the benefits of having a running board without any unnecessary risks or issues.
FAQs
What is the purpose of installing a running board on a Toyota vehicle?
The purpose of installing a running board on a Toyota vehicle is to provide a convenient step for easier access to the vehicle, especially for passengers with limited mobility or shorter stature.
How do I choose the right running board for my Toyota vehicle?
When choosing a running board for your Toyota vehicle, consider factors such as material (e.g., aluminum, stainless steel), style (e.g., sleek, rugged), and compatibility with your specific Toyota model. It is also important to ensure that the running board can support the weight capacity you require.
Can I install a running board on my Toyota vehicle myself?
Yes, many running boards come with installation instructions and can be installed as a do-it-yourself project. However, it is recommended to have some basic mechanical knowledge and tools to ensure proper installation. If you are not confident in your abilities, it is advisable to seek professional installation.
Are running boards compatible with all Toyota vehicle models?
Running boards are typically designed to be compatible with specific Toyota vehicle models. It is important to check the compatibility of the running board with your specific Toyota model before making a purchase.
Can I paint or customize my Toyota running board?
Yes, many running boards can be painted or customized to match the color or style preferences of your Toyota vehicle. However, it is important to follow the manufacturer’s instructions for proper painting and customization techniques to ensure durability and longevity.
How do I clean and maintain my Toyota running board?
Cleaning and maintenance of your Toyota running board can vary depending on the material. It is generally recommended to use a mild, non-abrasive cleaner and a soft cloth or brush to remove dirt and debris. Regular inspections for any damages or loose fittings are also important to ensure the running board remains secure and functional.
Can a Toyota running board be installed on both sides of the vehicle?
Yes, most running boards are designed to be installed on both the driver and passenger sides of the vehicle. This provides balanced accessibility and convenience for all occupants.