
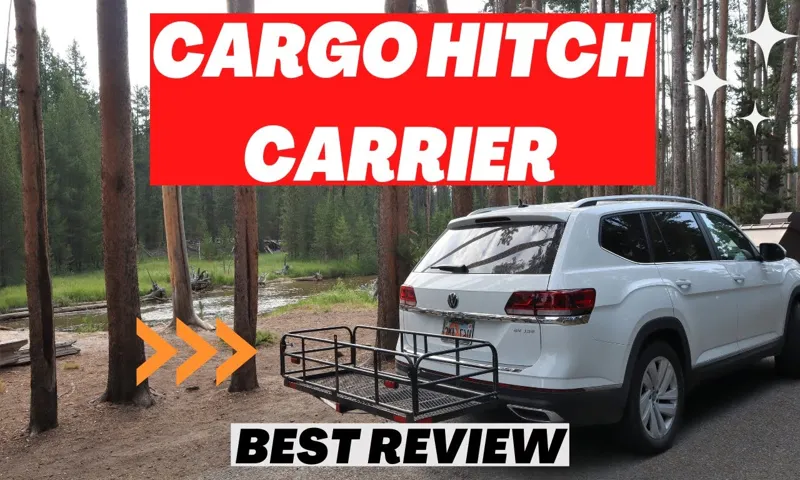
So you’re considering investing in a hitch mount cargo carrier, but what exactly is it? Well, imagine a road trip without the hassle of cramming everything into a limited trunk space. A hitch mount cargo carrier is a convenient and versatile storage solution for any vehicle with a hitch receiver. Whether you’re planning a weekend getaway or moving across the country, this accessory can make your life so much easier.
Think of it as a portable trunk that attaches to the back of your vehicle. It’s like having an extra storage compartment without sacrificing passenger comfort. With a hitch mount cargo carrier, you can securely transport bulky items such as luggage, camping gear, or even bicycles.
It’s a game-changer when it comes to maximizing your vehicle’s storage capacity. One of the biggest advantages of a hitch mount cargo carrier is its ease of use. Simply attach it to your vehicle’s hitch receiver, secure it with a pin or lock, and you’re ready to hit the road.
There’s no need for complicated installation or special tools. Plus, most hitch mount cargo carriers have a foldable design, making them easy to store when not in use. Not only do these carriers provide additional storage space, but they also offer convenience and peace of mind.
No more worrying about whether everything will fit in your vehicle or having to leave important items behind. With a hitch mount cargo carrier, you can pack everything you need and travel with confidence. In conclusion, a hitch mount cargo carrier is a game-changing accessory for any vehicle owner.
It offers convenience, extra storage space, and peace of mind when it comes to transporting bulky items. So why not invest in one and make your next road trip or adventure a stress-free experience?
Table of Contents
Benefits of a Hitch Mount Cargo Carrier
Are you looking for a convenient and efficient way to transport your extra luggage or equipment on your next road trip? Look no further than a hitch mount cargo carrier. These carriers attach easily to the hitch receiver on the back of your vehicle, providing a secure and stable way to transport your belongings. One of the main benefits of a hitch mount cargo carrier is the extra storage space it provides.
Whether you need to transport camping gear, sports equipment, or even a cooler full of food and drinks, a hitch mount cargo carrier can accommodate all of your needs. Another advantage is that it frees up valuable space inside your vehicle, allowing for more comfort and legroom for passengers. Plus, it eliminates the need for a roof rack, which can be difficult to access and can create wind resistance and noise.
Installing a hitch mount cargo carrier is also very straightforward. With just a few simple steps, you can have it attached and ready to go in no time. So, if you’re planning a road trip and need some extra storage space, consider investing in a hitch mount cargo carrier.
It’s a practical and efficient solution that will make your journey much more enjoyable.
Increased Storage Space
hitch mount cargo carrier A hitch mount cargo carrier offers the benefit of increased storage space for your vehicle when traveling. Whether you’re going on a road trip, camping adventure, or simply need extra room for hauling everyday items, a hitch mount cargo carrier can provide the necessary solution. With its sturdy construction and secure attachment to the back of your vehicle, you can easily transport bulky items such as luggage, camping gear, sports equipment, and more.
The extra storage space frees up room inside your vehicle, allowing for a more comfortable and clutter-free ride. No longer will you have to worry about cramming everything into the trunk or backseat, causing discomfort for passengers or blocking your rearview mirror. With a hitch mount cargo carrier, you can conveniently access your belongings without the hassle of unpacking and repacking every time you need something.
It’s like having a portable storage unit that goes wherever you go. So why limit yourself to the confines of your vehicle when you can enjoy the benefits of increased storage space with a hitch mount cargo carrier?
Convenience and Versatility
hitch mount cargo carrier
Easy Installation and Removal
hitch mount cargo carrier Have you ever struggled with fitting all your belongings into your vehicle for a road trip or camping adventure? If so, a hitch mount cargo carrier could be your solution. With its easy installation and removal, this type of carrier offers a convenient way to transport extra luggage, coolers, camping gear, and more. Unlike rooftop cargo boxes that require lifting heavy loads overhead, a hitch mount carrier attaches to the back of your vehicle, eliminating the need for any heavy lifting.
Simply slide it into your vehicle’s hitch receiver, secure it in place, and you’re ready to go. When you arrive at your destination, removing the carrier is just as effortless. Plus, with its compact design, it takes up less space when not in use, making it a practical choice for any vehicle.
So why struggle with cramming everything into your car? Invest in a hitch mount cargo carrier and enjoy the ease and convenience it provides.
Materials Needed
If you’re looking to make your own hitch mount cargo carrier, there are a few materials you’ll need to gather. First and foremost, you’ll need a sturdy metal frame or platform that can withstand the weight of your cargo. This can be made out of metal tubing or even plywood.
Additionally, you’ll need to purchase or create a hitch receiver that can attach to your vehicle’s hitch. This will allow you to securely mount your cargo carrier to your car or truck. You’ll also need bolts, nuts, and washers to fasten everything together, as well as any necessary tools such as a wrench or socket set.
Lastly, depending on the design of your cargo carrier, you may also need materials such as mesh or straps to secure your cargo in place. With these materials in hand, you’ll be well on your way to creating your own hitch mount cargo carrier.
Hitch Mount
In order to properly attach a hitch mount to your vehicle, there are a few materials that you will need. First and foremost, you will need the actual hitch mount itself. This is the piece that attaches to the back of your vehicle and provides a secure connection point for towing or carrying items.
Hitch mounts come in various sizes and weight capacities, so it’s important to choose one that is compatible with your specific vehicle and towing needs. In addition to the hitch mount, you will also need a hitch receiver. This is the part that is installed on your vehicle and acts as the receiver for the hitch mount.
Hitch receivers come in different sizes, so it’s important to choose one that is compatible with the hitch mount you have selected. To attach the hitch mount to your vehicle, you will also need some mounting hardware. This typically includes bolts, nuts, and washers that will securely attach the hitch mount to the hitch receiver.
It’s important to make sure that you have the correct size and strength of hardware to ensure a safe and secure connection. Lastly, you will need some basic tools, including a wrench and socket set, to properly install the hitch mount and hitch receiver. These tools will allow you to tighten the mounting hardware and ensure a secure fit.
By having all of these materials on hand, you will be well-equipped to attach a hitch mount to your vehicle and enjoy the benefits of towing or carrying items with ease and security.
Cargo Carrier
In order to transport goods efficiently and securely, a cargo carrier is an essential tool. Whether you’re heading out on a family vacation or need to transport materials for your business, a cargo carrier can make all the difference. So what materials do you need to get started? First and foremost, you’ll need a sturdy cargo carrier that is designed to fit securely on your vehicle.
There are many different types and sizes available, so be sure to choose one that suits your needs and preferences. Additionally, you’ll want to invest in some high-quality tie-down straps to ensure that your cargo is securely fastened to the carrier. These straps will help prevent any shifting or movement during transportation, keeping your goods safe and intact.
Lastly, if your cargo carrier does not come with a lock, consider purchasing one to provide an extra layer of security. With these materials on hand, you’ll be well-equipped to transport your belongings with ease.
Bolts and Nuts
bolts and nuts, materials needed. When it comes to working with bolts and nuts, there are a few materials that you’ll need to have on hand. First and foremost, you’ll need the bolts and nuts themselves.
These come in a variety of sizes and types, so make sure you have the right ones for your project. Additionally, you’ll need a wrench or socket set to tighten and loosen the bolts. This will ensure that they are secure and won’t come loose over time.
Another important material is a lubricant. This can help make the process of tightening the bolts easier and also prevent rusting. Finally, safety should always be a priority, so don’t forget to wear gloves and safety glasses to protect yourself while working with bolts and nuts.
By having these materials on hand, you’ll be well-prepared to tackle any project that involves bolts and nuts.
Wrenches
When it comes to working on cars or completing household repairs, having the right tools is essential. One tool that is common in most toolboxes is a wrench. Wrenches come in a variety of sizes and types, but no matter what kind you need, there are a few materials that are necessary for their production.
One material that is commonly used to make wrenches is steel. Steel is a strong and durable material that can withstand the pressure and force that is often applied to a wrench. Another material that is often used in the construction of wrenches is rubber.
Rubber is used to create the handle of the wrench, providing a comfortable grip and reducing the strain on the hand when using the tool. Additionally, some wrenches may have plastic or rubber coatings on the jaws to protect the surfaces they are being used on. Overall, the materials used in the production of wrenches are chosen for their strength, durability, and grip.
So the next time you reach for a wrench, remember the materials that went into making it and appreciate the craftsmanship that went into its creation.
Drill and Drill Bits
“Drill and Drill Bits”
Step-by-Step Guide
If you’re in need of some extra storage space for your next road trip, a hitch mount cargo carrier is a great solution. Not only does it provide a convenient way to transport your belongings, but it also frees up valuable space inside your vehicle. Making your own hitch mount cargo carrier is a simple project that can be completed in just a few steps.
First, gather all the necessary materials and tools, including a hitch receiver, steel tubing, and a cargo carrier platform. Then, measure and cut the steel tubing to the desired length. Next, weld the tubing onto the hitch receiver to create the frame of the carrier.
Finally, attach the cargo carrier platform to the frame using bolts or welding. And voila! You’ve now created your very own hitch mount cargo carrier. It’s important to note that safety is a top priority when using a cargo carrier, so be sure to secure your items properly and follow all traffic laws and regulations.
Step 1: Measure and Prep Your Vehicle
vehicle prep, car detailing, measure your vehicle, auto detailing process Before you begin the auto detailing process, it’s essential to measure and prep your vehicle. This step ensures that you have accurate measurements and a clean surface to work on. First, measure the length, width, and height of your vehicle using a tape measure or ruler.
This will help you determine the amount of cleaning products you will need and the amount of time it will take to detail your car. Next, give your vehicle a thorough wash to remove any dirt, grime, or debris. Use a high-quality car wash soap and a microfiber cloth to gently clean the exterior of your car.
Pay close attention to areas that are prone to dirt buildup, such as the wheels, tires, and undercarriage. Finally, dry your vehicle thoroughly using a clean microfiber towel to prevent water spots and streaks. By measuring and prepping your vehicle, you set yourself up for a successful auto detailing session and ensure that your car looks its best.
Step 2: Assemble the Hitch Mount
hitch mount Step 2 in assembling a hitch mount involves following a simple step-by-step guide. Begin by laying out all the parts and pieces needed for the hitch mount. It’s essential to have everything organized and easily accessible to make the assembly process smoother.
Next, attach the main body of the hitch mount to the receiver tube of your vehicle. Make sure it fits snugly and securely, using any necessary bolts or screws provided. Then, connect the hitch mount tube to the main body, ensuring it is aligned properly.
This step may require some adjustments depending on the specific hitch mount model. Finally, tighten all the bolts and screws to ensure a sturdy and reliable hitch mount. Once assembled, check for any loose parts or connections and make any necessary adjustments.
By following this step-by-step guide, you’ll have your hitch mount ready in no time and be prepared for your next adventure on the road.
Step 3: Attach the Cargo Carrier
cargo carrier, attach, step-by-step guide
Step 4: Secure the Carrier with Bolts
Securing the carrier with bolts is an important step in ensuring the stability and safety of your carrier system. To begin, gather the necessary tools: bolts, a wrench, and possibly a drill if the carrier does not already have pre-drilled holes. Start by aligning the carrier with the pre-drilled holes on your vehicle’s roof rack.
Insert the bolts into the holes, making sure they are squarely positioned. Next, tighten the bolts using a wrench or drill, being careful not to overtighten as this can strip the threads or damage the carrier. It’s essential to ensure that the carrier is securely attached to prevent it from shifting or coming loose while in transit.
By following these steps, you can have peace of mind knowing your carrier is securely fastened and ready to transport your belongings.
Step 5: Test and Adjust
In the final step of the process, it’s time to put your marketing campaign to the test. This is where you’ll be able to see if all your hard work and planning has paid off. Begin by carefully monitoring the performance of your campaign and analyzing the data you collect.
Look at key metrics such as click-through rates, conversions, and engagement levels. This will give you insights into how your audience is responding to your messaging and whether or not your campaign is driving the desired actions. From there, you can make adjustments as needed.
Perhaps you notice that certain elements of your campaign are underperforming. This could be a sign that you need to tweak your messaging, targeting, or creative assets. Alternatively, you may find that certain elements are performing exceptionally well.
In this case, you can double down on what’s working and allocate more resources to those areas. The testing and adjusting phase is all about fine-tuning your campaign based on real-world data and feedback. It’s important to be open to changing course and trying new strategies if your initial approach isn’t delivering the results you desire.
Remember, marketing campaigns are not set in stone – they should be adaptable and responsive to the ever-changing needs and preferences of your target audience. By continually testing and adjusting, you’ll be able to optimize your campaign for maximum effectiveness. This iterative process allows you to make data-driven decisions and ensure that your marketing efforts are truly resonating with your audience.
Don’t be afraid to experiment, take risks, and learn from both your successes and failures. Through testing and adjusting, you’ll ultimately be able to create a marketing campaign that drives the results you’re looking for.
Tips for Using a Hitch Mount Cargo Carrier
Making a hitch mount cargo carrier is a practical and convenient solution for those who need extra storage space when traveling. These carriers are designed to attach to the hitch receiver on the back of your vehicle, allowing you to transport large or bulky items without taking up valuable interior space. To make your own hitch mount cargo carrier, you will need a few supplies and tools.
First, you will need a metal platform or tray that is compatible with your vehicle’s hitch receiver size. You can either purchase one pre-made or create your own using sturdy materials such as aluminum or steel. Next, you will need to attach the platform to the hitch receiver using a hitch pin or bolt.
Make sure it is securely fastened to prevent any movement while driving. Lastly, you may want to consider adding some additional features, such as sidewalls or a cargo net, to secure your items during transport. With some basic DIY skills and a little effort, you can create your very own hitch mount cargo carrier that will make your travels more efficient and organized.
Proper Weight Distribution
hitch mount cargo carrier, weight distribution, hauling capacity, vehicle stability, cargo management Blog Section : Proper Weight Distribution: When it comes to using a hitch mount cargo carrier, proper weight distribution is key. This not only ensures your payload stays secure during transportation but also maintains the stability of your vehicle. A well-balanced cargo carrier prevents any unnecessary weight from being concentrated in one area, which can strain your vehicle’s suspension and compromise its handling capabilities.
To achieve proper weight distribution, there are a few tips you should keep in mind. First, make sure to distribute the weight evenly across the cargo carrier. This means placing heavier items towards the center of the carrier and lighter items towards the edges.
By doing so, you minimize the chances of the cargo carrier becoming top-heavy, which can lead to swaying and instability on the road. Another tip is to consider the hauling capacity of your vehicle. Every vehicle has a maximum weight limit that it can safely carry, including both the cargo inside the vehicle and on the hitch mount cargo carrier.
It’s crucial to never exceed this limit, as it can put unnecessary strain on your vehicle’s suspension and compromise your safety. Additionally, proper cargo management is essential for maintaining weight distribution. Make sure to secure your items tightly to the cargo carrier using straps or bungee cords, preventing any shifting or movement.
This not only prevents damage to your belongings but also ensures that they stay in place throughout the journey. In conclusion, maintaining proper weight distribution when using a hitch mount cargo carrier is essential for both your vehicle’s stability and your peace of mind. By evenly distributing the weight, considering the hauling capacity of your vehicle, and properly securing your items, you can enjoy a safe and hassle-free journey.
So, next time you’re loading up your cargo carrier, remember to follow these tips for a smooth ride.
Securing Your Cargo
When it comes to securing your cargo on a hitch mount cargo carrier, it’s important to take the necessary precautions to ensure everything stays in place. One of the first things you should do is make sure the cargo carrier is properly installed and securely attached to your vehicle’s hitch. This will help prevent any wobbling or movement during travel.
Additionally, it’s a good idea to invest in some cargo straps or bungee cords to further secure your items. These can be used to tightly fasten your cargo to the carrier and minimize any potential shifting or sliding. It’s also important to distribute the weight of your cargo evenly to maintain balance and stability.
Avoid overloading one side of the carrier, as this could cause it to become unbalanced and potentially lead to accidents. Lastly, consider using a cargo net or cover to protect your items from the elements and potential theft. These simple tips will help ensure a safe and secure journey for your cargo when using a hitch mount carrier.
Regular Maintenance
hitch-mounted cargo carrier, regular maintenance Regular maintenance is key when it comes to using a hitch-mounted cargo carrier. Taking care of your cargo carrier not only prolongs its lifespan but also ensures that it functions properly when you need it most. One important tip for maintaining your hitch-mounted cargo carrier is to regularly inspect it for any signs of wear and tear.
Check for any loose or broken parts, as well as any signs of rust or corrosion. By catching these issues early on, you can address them before they become bigger problems. Additionally, it’s important to keep your cargo carrier clean and free of dirt and debris.
This not only keeps it looking good, but also helps prevent any damage from occurring. Lastly, always make sure to secure your cargo properly when using the carrier. This will help prevent any shifting or movement during transportation.
By following these tips for regular maintenance, you can ensure that your hitch-mounted cargo carrier is always ready to go when you need it.
Conclusion: Enjoy the Benefits of a Hitch Mount Cargo Carrier
In conclusion, crafting your very own hitch mount cargo carrier is like embarking on a rewarding and ingenious adventure. Not only will you save some hard-earned cash, but you’ll also enjoy the satisfaction of knowing that you’ve created something functional and stylish. By following our step-by-step guide, you’ll have the perfect companion for all your hauling needs, whether it’s carrying camping gear for an epic adventure or transporting holiday decorations for a festive extravaganza.
So unleash your inner DIY guru and hitch a ride on the creative train – your cargo carrier dreams await!”
FAQs
What is a hitch mount cargo carrier?
A hitch mount cargo carrier is a device that attaches to the hitch of a vehicle and provides additional storage space for carrying luggage, camping gear, or other items.
How do I choose the right hitch mount cargo carrier for my vehicle?
When choosing a hitch mount cargo carrier, consider factors such as weight capacity, dimensions, material, and compatibility with your vehicle’s hitch receiver size.
What are the advantages of using a hitch mount cargo carrier?
Hitch mount cargo carriers offer several advantages, including easy installation, increased storage space, convenient loading and unloading, and the ability to transport larger items such as bicycles or kayaks.
How do I install a hitch mount cargo carrier on my vehicle?
The installation process for a hitch mount cargo carrier may vary depending on the specific model, but generally involves inserting the carrier into the hitch receiver and securing it with a hitch pin or bolt.
Can I use a hitch mount cargo carrier on any type of vehicle?
Most hitch mount cargo carriers are designed to be compatible with standard 2-inch hitch receivers. However, there are also carriers available for vehicles with 1.25-inch receivers or for use with trailer hitches.
How much weight can a hitch mount cargo carrier hold?
The weight capacity of a hitch mount cargo carrier can vary, but most carriers can typically hold anywhere from 200 to 500 pounds, depending on the specific model and design.
Are hitch mount cargo carriers secure?
Hitch mount cargo carriers typically have features such as side rails, tie-down points, and anti-wobble devices to secure the cargo and minimize movement during transit. However, additional precautions such as using bungee cords or cargo nets may be advisable for extra security.