
Having a running board on your vehicle can be convenient for getting in and out, but what do you do when the motor that controls it starts to malfunction? Removing the running board motor may seem like a daunting task, but with the right steps and a little patience, you can easily get the job done. In this blog post, we will guide you through the process of removing a running board motor, giving you the confidence to take on this DIY project. So, if you’re ready to tackle this task and get your vehicle back in top shape, let’s dive in and learn how to remove a running board motor.
Table of Contents
Introduction
If you’re experiencing issues with your running board motor and need to have it removed, you may be wondering how to go about it. Removing a running board motor may seem intimidating, but with the right tools and knowledge, it can be a relatively straightforward process. First, you’ll need to locate the running board motor, which is usually located underneath the vehicle’s chassis.
Once you’ve found it, you’ll need to disconnect the power source by removing the battery cables. After that, you can begin removing the bolts and screws that secure the motor to the running board. Be sure to keep track of where each bolt and screw goes, as you’ll need to reattach them later.
Once all the fasteners are removed, you can gently pull the motor away from the running board and disconnect any wiring harnesses or cables that are attached. Finally, lift the motor out of the vehicle, being careful not to damage any surrounding components. With these steps, you should be able to successfully remove your running board motor.
What is a Running Board Motor?
“What is a Running Board Motor?” Introduction If you’ve ever wondered what a running board motor is, you’re not alone. While the term may seem unfamiliar, running board motors have been around for quite some time and are an essential part of certain vehicles. So, what exactly is a running board motor? In simple terms, it’s a motor that is usually located underneath a vehicle’s running boards or side steps.
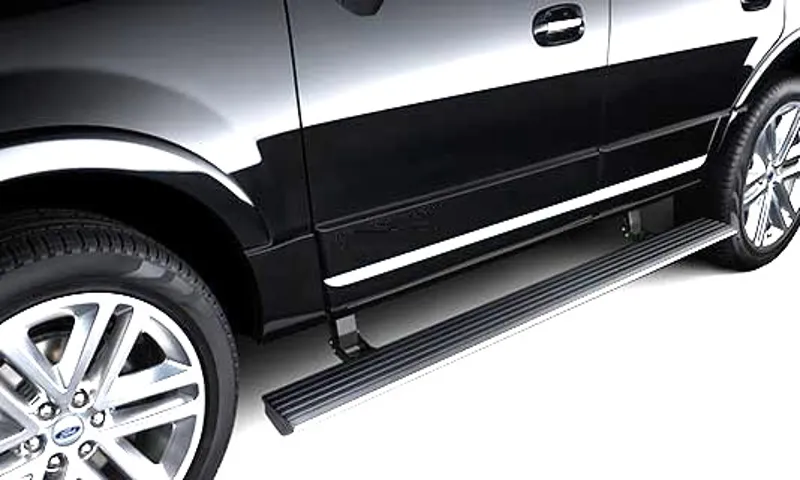
These motors provide automated assistance in extending and retracting the running boards, making it easier for passengers to get in and out of high vehicles. They are especially beneficial for trucks, SUVs, and other larger vehicles where the step height might be an inconvenience for some passengers.
Why would you want to remove a running board motor?
runnning board motor. Introduction: Removing a running board motor may seem like a daunting task, but there are several reasons why you might want to tackle this project. Whether it’s for maintenance purposes or to upgrade to a new motor, learning how to remove a running board motor can be a cost-saving and satisfying DIY endeavor.
In this blog post, we will explore the various reasons why you might want to remove a running board motor and discuss the steps involved in safely and effectively completing the task. So, let’s dive in and find out why you would want to remove a running board motor!
Tools and Materials Needed
When it comes to removing a running board motor, there are a few tools and materials that you will need to have on hand. First, you will need a set of screwdrivers, including both Phillips and flathead, to remove any screws that are securing the motor in place. You may also need a socket set or wrench to disconnect any electrical connections or bolts that are holding the motor in place.
It’s always a good idea to have a pair of gloves to protect your hands during the removal process. Additionally, you may need a jack or lift to raise the vehicle and access the running board motor. Finally, having a repair manual or guide specific to your vehicle can be helpful in understanding the steps involved in removing the motor.
With these tools and materials, you’ll be well-prepared to tackle the task of removing a running board motor.
List of tools needed
As you embark on your DIY journey, it is important to have the right tools and materials at hand. Here is a list of essential items that you will need to successfully complete your project. First and foremost, you will need a sturdy set of hand tools, including a hammer, screwdriver set, utility knife, tape measure, and pliers.
These tools will come in handy for a wide range of tasks, from hanging pictures to tightening screws. Additionally, it is important to have a good quality power drill on hand for drilling holes and driving screws. A good set of power tools can save you time and effort in many projects.
Other essential tools include a level to ensure your work is straight and even, as well as a stud finder to locate studs in the wall. In terms of materials, it is important to stock up on the basics like nails, screws, and adhesives. Depending on your project, you may also need various types of paints, brushes, and sandpaper.
Shopping for tools and materials can be overwhelming, but with a little research and preparation, you can ensure that you have everything you need to tackle your DIY project with confidence.
List of materials needed
In order to successfully complete a project, it is important to have all the necessary tools and materials on hand. Here is a list of the tools and materials you will need for this particular project. First and foremost, you will need a set of basic hand tools such as a hammer, screwdriver, and wrench.
These tools will come in handy for various tasks throughout the project. Additionally, you will need a measuring tape and level to ensure accuracy and precision. For cutting materials, a saw and utility knife will be necessary.
In terms of materials, you will need the specific items required for the project, such as wood, nails, screws, or paint. It is also important to have protective gear such as gloves and safety goggles to ensure your safety while working. By ensuring that you have all the necessary tools and materials before beginning the project, you will be able to work efficiently and effectively, saving you time and frustration in the long run.
Step-by-Step Guide
So you’ve decided to tackle the task of removing your running board motor yourself. Great! With a little know-how and the right tools, you can save yourself some money and get the job done. Here’s a step-by-step guide to help you through the process.
First, gather all the necessary tools. You’ll need a socket wrench set, a screwdriver, and possibly a pry bar or trim panel removal tool depending on your specific vehicle. Next, locate the running board motor.
It is usually located underneath the vehicle, mounted to the frame or the running board itself. You may need to lift the vehicle or remove some trim panels to access it. Once you have access to the motor, disconnect the wiring harness.
This is usually a simple plug-and-play connection that can be easily disconnected by hand. Be sure to secure any loose wires to prevent them from getting damaged or tangled. With the wiring disconnected, use your socket wrench and/or screwdriver to remove any mounting bolts or screws that are holding the motor in place.
Keep track of these fasteners so you don’t lose them. Once the motor is free from its mountings, carefully maneuver it out from under the vehicle. Be mindful of any obstacles or obstructions that may be in the way, and take your time to avoid damaging the motor or any other components.
Now that the old motor is removed, you can install the new one. Simply reverse the steps you took to remove the old motor, carefully sliding the new motor back into place and securing it with the mounting bolts or screws. After the motor is securely in place, reconnect the wiring harness, ensuring a tight connection.
Step 1: Disconnect the battery
One of the first steps in replacing a car battery is disconnecting it from the vehicle. This is an important safety precaution that should always be done before working on any electrical components. To disconnect the battery, you will need a few tools, including a wrench or socket set.
First, locate the battery in your vehicle. It is typically located in the engine bay, but it can also be found in the trunk or under a seat in some vehicles. Once you have located the battery, use the wrench or socket set to loosen the bolts or clamps that are holding the battery cables in place.
Start with the negative cable, which is usually black, and then move on to the positive cable, which is usually red. It is important to remove the negative cable first to avoid any accidental electrical sparks. Once both cables are loose, carefully lift them off the battery terminals and set them aside.
With the cables disconnected, the battery is now ready to be removed from the vehicle.
Step 2: Locate the running board motor
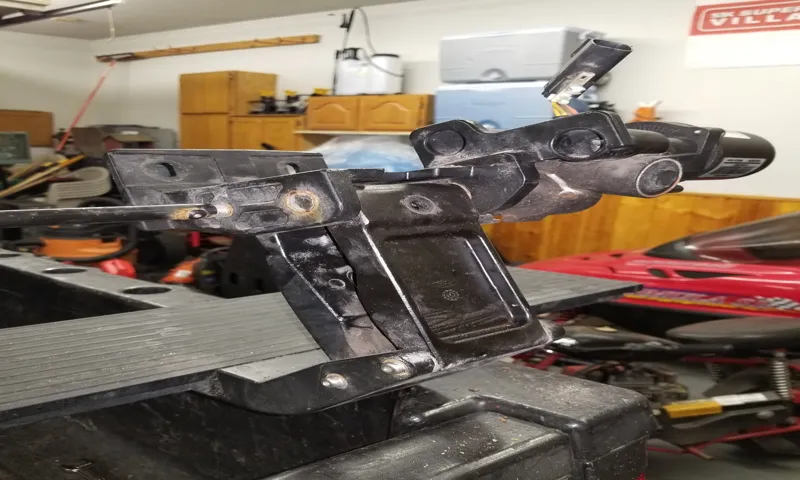
running board motor, locate, step-by-step guide So, you’ve decided to replace your running board motor, but you’re not quite sure where to start. Don’t worry, I’ve got you covered with this step-by-step guide. The first thing you need to do is locate the running board motor.
This motor is typically housed inside the running board itself and is responsible for extending and retracting the running board in response to your vehicle’s movements. To find the motor, you’ll need to locate the running board on your vehicle. This is the part that extends out when you open the door and retracts when you close it.
Once you’ve located the running board, take a closer look to see if you can spot the motor. It may be hidden behind a panel or cover, so you might need to remove some screws or clips to gain access to it. Remember to consult your vehicle’s manual for specific instructions on how to remove the running board panel.
Once you have access to the motor, you can move on to the next step in the replacement process.
Step 3: Remove the electrical connectors
In step 3 of our step-by-step guide on how to remove the electrical connectors, we will walk you through the process of detaching these connectors. This is a crucial step in many electrical repairs or replacements, as it allows you to disconnect the electrical components safely and effectively. To begin, locate the electrical connectors that need to be removed.
These connectors can come in different shapes and sizes depending on the specific component you are working with. They usually have a plastic housing and metal pins or terminals. Once you have located the connectors, you will need to carefully unplug them.
Start by inspecting the connector for any locking mechanisms or tabs. These locks or tabs are designed to secure the connection and prevent accidental disconnection. If there are any locking mechanisms, use a small flathead screwdriver or a pair of pliers to release them.
Gently pry the lock open or depress the tab while pulling the connector apart. Be careful not to apply too much force as you may damage the connectors or the wiring. If there are no locking mechanisms, you can simply pull the connectors apart.
However, it is important to grip the connector firmly and pull straight out to avoid any damage. Once the connectors are disconnected, you can proceed with your electrical repairs or replacements. Remember to handle the connectors with care and avoid pulling on the wires themselves, as this could lead to damage or breakage.
Removing electrical connectors may seem like a small step, but it is an important one in ensuring the success of your electrical repairs or replacements. By following these steps and taking your time, you can safely remove the connectors and continue with your project.
Step 4: Remove the mounting bolts
In this step of the guide, we will focus on removing the mounting bolts. This is an important part of the process, as it will allow you to detach the object or component that is being held in place. Before we begin, make sure you have the necessary tools handy, such as a wrench or socket set.
Start by locating the mounting bolts, which are typically located on the sides or bottom of the object. Once you have identified the bolts, use your wrench or socket set to loosen them. This may require some effort, especially if the bolts are tightly secured.
Take your time and apply steady pressure until the bolts begin to turn. Once the bolts are loose, continue turning them until they can be removed completely. Set the bolts aside in a safe place, as you will need them later when reinstalling the object.
Congratulations, you have successfully removed the mounting bolts!
Step 5: Remove the running board motor
running board motor, remove running board motor, step-by-step guide, automotive repairs. Now that you have accessed the running board motor following the previous steps in our guide, it’s time to remove it. Removing the running board motor may seem like a daunting task, but with the right tools and a step-by-step approach, it can be done.
First, locate the mounting bolts securing the motor to the running board. These bolts are usually located on the underside of the running board, near the motor. Use a wrench or socket set to loosen and remove these bolts.
Once the mounting bolts are removed, carefully disconnect the electrical wiring harness connected to the motor. This harness is responsible for supplying power to the motor, allowing it to operate. To disconnect the wiring harness, locate the connector near the motor and gently unplug it.
Be sure to support the wiring harness as you unplug it to avoid any damage. With the mounting bolts and wiring harness disconnected, you can now remove the running board motor. Gently lift the motor away from the running board, being mindful of any other components that may be in the way.
If necessary, you can use a flathead screwdriver or pry tool to help separate the motor from any adhesive or clips holding it in place. Once the motor is removed, take a moment to inspect it for any signs of damage or wear. If you are replacing the motor, now is the time to install the new one.
Follow these steps in reverse order to reinstall the motor and secure it back onto the running board. Removing the running board motor may require some patience and finesse, but with the right tools and this step-by-step guide, you can successfully complete this automotive repair task. Remember to take your time, be cautious, and consult any additional resources or professional advice if needed.
Tips and Precautions
If you’re facing issues with your running board motor and need to remove it for repairs or replacement, there are a few tips and precautions you should keep in mind. Firstly, always consult your vehicle’s manual for specific instructions tailored to your car make and model. It is important to follow the recommended steps provided in the manual to avoid causing any damage or injury.
Additionally, be sure to disconnect the power source before starting any work on the motor. This will prevent any accidental engagement of the motor and reduce the risk of electrical shocks. It is also advisable to wear appropriate protective gear such as gloves and safety goggles throughout the process.
Taking these precautions will ensure that you safely remove the running board motor without any mishaps.
Tip 1: Take pictures for reference
When it comes to capturing a moment, taking pictures for reference is an invaluable tool. Whether you’re an artist looking to recreate a scene or a traveler wanting to remember a breathtaking view, having a visual reference can make all the difference. But taking good reference photos requires a bit of thought and effort.
Here are some tips and precautions to keep in mind. First and foremost, make sure your photos are clear and well-lit. The more detail you capture, the better.
Consider the composition and framing of your shots, as this can greatly affect how useful they will be later on. Try taking photos from different angles and perspectives to give yourself a variety of options. And don’t forget to take multiple shots of the same subject, just to be safe.
Remember that your phone or camera is just a tool, and it’s up to you to use it effectively. Take the time to learn how to properly use your equipment, experiment with settings, and practice your photography skills. Finally, always be aware of your surroundings and respectful of others.
Some places may have restrictions on photography, so make sure you know the rules before snapping away. And if you’re taking photos of people, always ask for their permission first. Following these tips and precautions will ensure that you have a collection of high-quality reference photos that you can refer back to time and time again.
Tip 2: Handle the motor with care
motor, handle, care
Precaution: Keep the area clean and organized
clean and organized area Keywords that need to be naturally mentioned: precautions, clean environment, organization, benefits of cleanliness, clutter-free space, safety measures, productivity, hygiene, peace of mind. In order to maintain a clean and organized area, there are certain precautions that one must take. A clean environment not only looks pleasing to the eye but also has numerous benefits.
Firstly, keeping the area clean and organized helps in reducing clutter. When there is less clutter around, it becomes easier to find things, leading to increased productivity. Moreover, a clutter-free space promotes better organization and ensures that everything is in its proper place.
This not only saves time but also reduces stress as you no longer have to search for items or deal with messy surroundings. Keeping the area clean and organized is also important for safety reasons. Cluttered and messy areas can become a breeding ground for accidents and injuries.
By regularly cleaning and organizing the space, you can eliminate potential hazards and create a safe environment for everyone. Additionally, a clean area helps in maintaining hygiene. Regular cleaning ensures that dust, dirt, and germs are kept at bay, reducing the risk of illnesses and allergies.
Apart from these practical benefits, a clean and organized area also has a psychological impact. It brings a sense of order and peace of mind. When everything is in its place and the surroundings are clean, it promotes a sense of calmness and positivity.
On the other hand, a messy environment can lead to feelings of stress and unease. To maintain a clean and organized area, it is important to follow some simple safety measures. Always keep cleaning supplies handy and make it a habit to clean up any spills or messes immediately.
Conclusion
In conclusion, removing a running board motor is like saying goodbye to an uninvited guest at a party – it may take a bit of effort, but once they’re gone, you’ll have a smoother, sleeker ride. Just imagine the running board motor as that one friend who insists on hogging all the limelight, making it difficult for you to make an entrance or exit. But fear not, for with a few simple steps, you can bid farewell to this attention-stealing nuisance.
First, gather your tools and find a well-lit workspace. It’s essential to have a clear view of what you’re dealing with, just like shining a spotlight on our show-stealing friend. Next, locate the running board motor’s hiding spot, which is usually tucked away either under the vehicle or inside the door panel.
Think of it as tracking down our elusive guest who always manages to find the darkest corner to hide in. Once you’ve uncovered the motor, you’ll need to disconnect it from its power source. This is where things get truly exciting, like cutting off the music when it’s time for our nuisance friend to go home.
Typically, there will be a series of electrical connectors and bolts holding the motor in place. Carefully undo these, ensuring you keep track of each component, just as you would tactfully untangle our friend from their web of excuses for overstaying their welcome. Finally, you can remove the running board motor from its mounting bracket, releasing your vehicle from the burden of its weight.
This step can be metaphorically likened to parting the crowd, allowing you to make a grand entrance or exit without any unwanted assistance stealing the limelight. So there you have it, an entertaining and practical guide on how to remove a running board motor. By following these steps, you’ll successfully bid farewell to this attention-seeking guest and reclaim your vehicle’s smooth and sleek appearance.
Now you can confidently stride in and out of your vehicle, knowing that the spotlight is rightfully on you, not your running board motor.”
Final thoughts on removing a running board motor
When removing a running board motor, there are a few tips and precautions to keep in mind. Firstly, it’s important to disconnect the vehicle’s battery before starting any work. This will prevent any electrical surges or accidents while handling the motor.
Additionally, it’s a good idea to consult the vehicle’s manual or research online for specific instructions on how to safely remove the running board motor. Each vehicle may have slight variations in the process, so it’s important to follow the correct guidelines. Another tip is to have the necessary tools on hand, such as wrenches and screwdrivers, before starting the removal process.
This will ensure a smooth and efficient experience. Finally, always exercise caution and pay attention to your surroundings when working with a running board motor. It’s a delicate and complex piece of machinery, and any mistakes could cause damage to the vehicle or injury to yourself.
By following these tips and precautions, you can safely and effectively remove a running board motor.
FAQs
If you’re looking to remove a running board motor, you’ve come to the right place! Removing a running board motor may seem like a daunting task, but with the right tools and a little bit of know-how, it can be done. First, make sure you have all the necessary tools on hand, such as a socket wrench, screwdriver, and pliers. Start by disconnecting the negative terminal of the battery to ensure your safety.
Then, locate the running board motor, which is typically found underneath the running board itself. Remove any screws or bolts that are holding the motor in place. Once you’ve done that, disconnect any electrical connections or wiring connected to the motor.
Carefully remove the motor from its mounting bracket and set it aside. Voila! You have successfully removed the running board motor. Remember to follow the reverse steps when installing a new motor back in place.
What happens if I don’t disconnect the battery before removing the motor?
What happens if I don’t disconnect the battery before removing the motor? When it comes to removing a motor, it is important to disconnect the battery beforehand. Ignoring this crucial step can lead to a variety of potential issues and dangers. Without disconnecting the battery, there is a risk of electrical shock or short circuiting.
The battery’s electrical current can still be active and flowing, even when the motor is not running. This means that if any wires are accidentally touched or crossed during the removal process, it can result in a dangerous electrical discharge. In addition to the safety concerns, not disconnecting the battery can also cause damage to the motor and other electrical components.
Removing the motor without first cutting off the power source can result in unexpected electrical surges that can fry sensitive electronics or cause other malfunctions. By taking the time to disconnect the battery before removing the motor, you can ensure both your safety and the integrity of the motor and electronics. So, before you start tinkering under the hood, always remember to disconnect that battery!
Can I remove the running board motor myself or should I take it to a professional?
running board motor, remove running board motor, professional, FAQs.
FAQs
How do I remove a running board motor?
To remove a running board motor, you will first need to disconnect the power supply. Then, unbolt the motor from the running board and disconnect any wiring connections. Finally, remove the motor from the running board assembly.
What tools do I need to remove a running board motor?
To remove a running board motor, you will typically need basic hand tools such as a wrench and socket set. Additionally, you may need a power drill or screwdriver to remove any screws or bolts that are holding the motor in place.
Can I remove a running board motor by myself, or do I need professional help?
While it is possible to remove a running board motor by yourself, it is recommended to seek professional help, especially if you are not familiar with automotive electrical systems. This will ensure that the motor is removed safely and correctly.
How long does it usually take to remove a running board motor?
The time it takes to remove a running board motor can vary depending on the specific vehicle and the level of experience of the person performing the task. On average, it can take anywhere from 30 minutes to 2 hours to remove a running board motor.
Are there any precautions I should take when removing a running board motor?
Yes, there are a few precautions to keep in mind when removing a running board motor. First, always disconnect the power supply before starting the removal process to avoid any electrical shocks. Additionally, be careful when handling the motor and any surrounding components to prevent damage or injury.
Can I replace a running board motor with a different model or brand?
In most cases, it is recommended to replace a running board motor with the same model or brand that was originally installed. This ensures compatibility and proper functioning of the motor. However, if you are unsure, it is best to consult the manufacturer or a professional for guidance.
How do I know if my running board motor needs to be replaced?
There are a few signs that may indicate a faulty running board motor. These include the running board not deploying or retracting properly, unusual noises coming from the motor, or visible damage to the motor itself. If you experience any of these issues, it is likely that the motor needs to be replaced.