
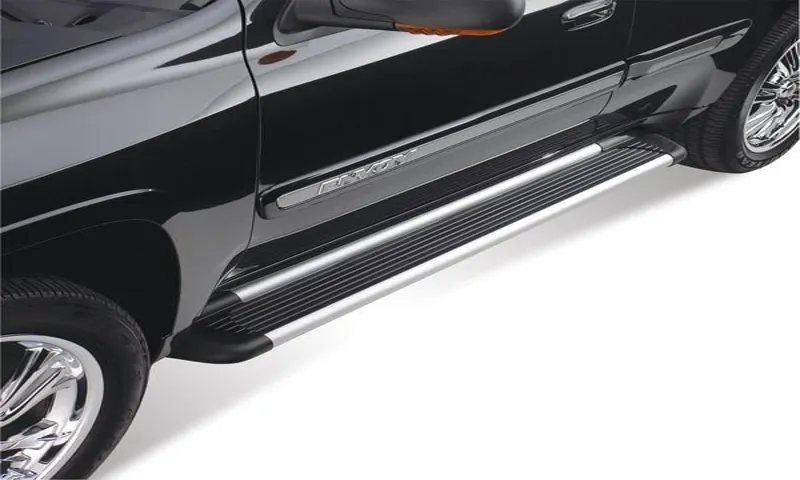
If you’ve ever taken a look at the underside of a vehicle, you may have noticed a series of holes along the side of the frame. These holes are known as running board mounting holes. But what exactly are they for? Running board mounting holes serve a specific purpose in the assembly of a vehicle’s running board or side step.
These holes are strategically placed to allow for the installation of mounting brackets, which secure the running board to the frame of the vehicle. Think of running board mounting holes as puzzle pieces that fit perfectly with the brackets, ensuring a sturdy and secure attachment. Without these holes, installing a running board would be nearly impossible, and the board would not be able to bear the weight of a person stepping on it.
In addition to their functional purpose, running board mounting holes can also be seen as a design feature. They provide a streamlined look when the running board is properly installed, seamlessly blending with the overall aesthetics of the vehicle. So, the next time you come across these holes on the underside of a vehicle, you’ll know exactly what they’re for.
They play a crucial role in attaching running boards and enhancing both the functionality and appearance of the vehicle.
Table of Contents
Identifying the problem
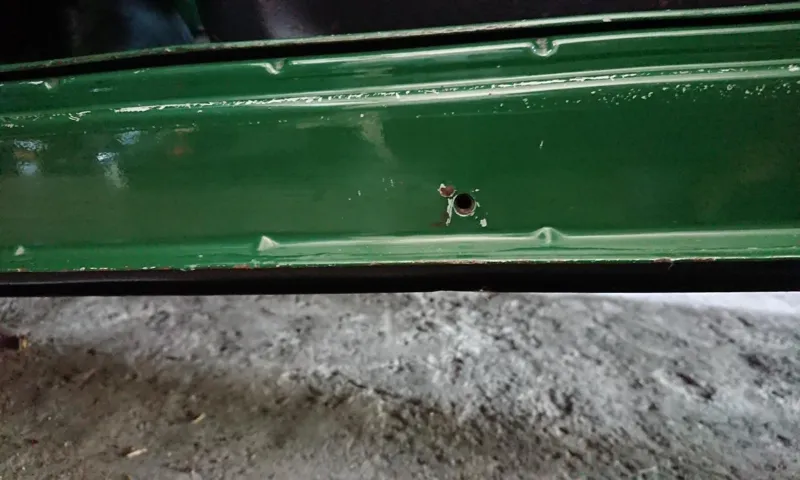
So, you’ve noticed that your running board, that convenient step attached to the side of your vehicle, has come loose or detached completely from its mounting holes. Don’t worry, you’re not alone in this problem. Over time, the mounting holes can become worn out or damaged due to rust, constant use, or even an accident.
It’s important to address this issue promptly, as a loose running board can not only be an eyesore but also a safety hazard. Thankfully, repairing running board mounting holes is a relatively straightforward process that you can do yourself with a few simple tools and materials. Let’s dive into how you can tackle this repair job and have your running board securely attached in no time.
Examining the running board
Examining the running board on your vehicle is an essential part of routine maintenance. It not only ensures the safety and functionality of your car but also protects it from potential damage. Identifying any issues with the running board early on can save you time, money, and headaches down the road.
So, how do you spot a problem with your running board? Well, there are a few telltale signs to look out for. Firstly, check for any visible cracks, dents, or corrosion on the running board itself. These can indicate structural damage or the presence of rust, which may compromise its strength and stability.
Additionally, pay attention to any irregular sounds or vibrations coming from the running board while driving. This could be a sign of loose or broken components that need to be addressed. Lastly, it’s important to inspect the mounting brackets that secure the running board to the vehicle.
If these are loose or damaged, it may affect the installation and overall integrity of the running board. By being proactive and regularly examining your running board, you can ensure optimal performance and safety for your vehicle.
Locating the mounting holes
mounting holes, identifying the problem, locat
Selecting the appropriate repair method
If you have noticed that the mounting holes on your running board are damaged or worn out, it may be time to repair them. Fortunately, there are a few different methods you can use to fix the problem. One option is to use a rivet nut insert.
This involves drilling out the existing mounting hole and then installing a threaded insert that can be used to secure the running board in place. Another option is to use a self-tapping screw. This involves drilling a new hole next to the damaged one and then using a screw to secure the running board.
Finally, you can also use a repair kit specifically designed for running board mounting holes. These kits typically include various sized inserts that can be used to repair different types of damage. Overall, the method you choose will depend on the extent of the damage and your personal preferences.
Determining the material of the running board
When it comes to repairing running boards, one of the key factors to consider is the material they are made of. Different materials require different repair methods and techniques to ensure a successful outcome. One common material used for running boards is aluminum, which is lightweight and durable.
When repairing an aluminum running board, it is important to properly assess the damage and determine whether it can be repaired or if a replacement is necessary. For minor dents or scratches, a dent repair kit or a specialized aluminum repair method can be used. However, for more extensive damage or structural issues, it may be best to replace the running board entirely.
Another material frequently used for running boards is plastic, which is also lightweight and resistant to corrosion. Repairing a plastic running board often involves using adhesive or epoxy to mend cracks or breaks. However, for larger cracks or severe damage, it may be necessary to replace the entire running board.
Lastly, some running boards are made of fiberglass, a strong and lightweight material. Repairing a fiberglass running board typically involves using a fiberglass repair kit to fill in cracks or holes, followed by sanding and painting to restore the appearance. In conclusion, selecting the appropriate repair method for a running board depends on the material it is made of and the extent of the damage.
By carefully assessing the damage and considering the pros and cons of each repair method, you can ensure a successful repair and maintain the functionality and aesthetics of your running boards.
Considering factors such as durability and cost
When it comes to selecting the appropriate repair method for any project, there are several factors that need to be considered. Durability and cost are two important factors that can greatly impact the decision-making process. Durability refers to the ability of the repair method to withstand the test of time and continue to function properly.
It’s important to choose a repair method that is able to withstand the specific requirements and challenges of the project. For example, if you’re repairing a deck that is constantly exposed to heavy foot traffic and harsh weather conditions, you’ll want to select a repair method that is designed to be durable in such conditions. On the other hand, if you’re repairing a piece of furniture that will only be used occasionally and kept indoors, you may not need a repair method that is as durable or robust.
Cost is another important factor to consider when selecting a repair method. Repairing something can be expensive, so it’s important to choose a method that offers the best value for your money. This doesn’t necessarily mean choosing the cheapest option, as sometimes cheaper methods may not be as durable or may require more frequent repairs in the long run.
Instead, it’s important to consider the overall cost of the repair method, including any ongoing maintenance or replacement costs that may be associated with it. In conclusion, selecting the appropriate repair method involves considering factors such as durability and cost. By taking these factors into account, you can ensure that you choose a repair method that will provide long-lasting results and offer the best value for your money.
So next time you have a repair project on your hands, take the time to carefully weigh your options and make an informed decision.
Repairing the running board mounting holes
Having a running board on your vehicle can be a great accessory, but over time the mounting holes can become worn or damaged. If you’re looking to repair running board mounting holes, you’re in luck – it’s a relatively simple process that you can do yourself. First, gather the necessary materials, including a drill, drill bits, a tap, and a thread-insert kit.
Start by removing the running board from the vehicle and cleaning the area around the damaged holes. Then, you’ll need to drill out the damaged holes to remove any rust or debris. Once you’ve cleaned out the holes, use the tap to create new threads.
Finally, insert the thread inserts into the new holes and reattach the running board. With a little bit of time and effort, you can have your running board securely back in place and ready to go.
Filling the holes with epoxy or filler
Filling the holes in running board mounting areas can be a straightforward way to repair damage or prepare for a new mounting system. There are a few options for filling these holes, including using epoxy or filler. Epoxy offers a durable and long-lasting solution that can withstand the pressure and weight of the mounting system.
It is easy to apply and can be shaped to match the contours of the running board area. Filler, on the other hand, is a more temporary solution that can be used for smaller holes or as a quick fix. It is easy to apply, but may not be as durable as epoxy.
When using either option, it is important to clean the area first and allow the epoxy or filler to fully dry before attempting to re-mount the running boards.
Applying reinforcement patches
Applying reinforcement patches to repair running board mounting holes is a simple yet effective way to fix a common problem. Over time, the mounting holes on a running board can become worn or enlarged, making it difficult to securely attach the board to the vehicle. This can be frustrating and potentially dangerous if the running board becomes loose while in use.
However, by applying reinforcement patches, you can easily strengthen the mounting holes and ensure the running board stays securely in place. Just like adding extra support beams to a weak bridge, these patches act as a reinforcement, providing added strength and stability. With a few simple steps, you can have your running board securely attached once again, giving you peace of mind and a safer ride.
So, why wait? Let’s get to work and repair those mounting holes for good!
Drilling new mounting holes, if necessary
When it comes to repairing the running board mounting holes, one of the solutions is to drill new holes if necessary. This process involves carefully inspecting the existing mounting holes to determine if they are beyond repair. If they are too damaged or worn out, drilling new holes may be the only option.
However, it’s important to note that this should be done with caution and precision to ensure the running board is securely attached to the vehicle. Additionally, it’s crucial to use the right tools and techniques to prevent any damage to the vehicle’s body or structure. By drilling new mounting holes if necessary, you can ensure that your running board is securely installed and ready for use.
Finishing touches and maintenance
So, you’ve noticed some damage to the mounting holes on your running board and you’re wondering how to repair them. Don’t worry, it’s actually a relatively simple fix! First, you’ll want to remove the running board from your vehicle. This can usually be done by removing a few bolts or clips that are holding it in place.
Once the running board is off, assess the damage to the mounting holes. If they are just slightly enlarged or worn, you may be able to fix them by using larger bolts or adding some washers to fill the gaps. However, if the holes are completely stripped or too damaged for this quick fix, you’ll need to use a thread repair kit.
These kits typically include a tap, which is used to create new threads in the hole, and inserts that will reinforce the new threads. Follow the instructions that come with the kit to properly repair the mounting holes. Once the holes are repaired, reattach the running board to your vehicle and make sure it is securely in place.
Regular maintenance and inspections of your running board will help prevent further damage and ensure its longevity. Remember, taking care of your vehicle’s accessories not only keeps it looking good, but also helps maintain its functionality and resale value.
Sanding and smoothing the repaired area
sanding and smoothing After repairing a damaged area, the next step is to sand and smooth it to ensure a seamless finish. Sanding is a crucial part of the process as it helps to remove any rough or uneven surfaces, giving the repaired area a smooth and polished appearance. There are different grits of sandpaper that can be used, depending on the level of smoothing required.
Starting with a coarse grit and gradually moving to a finer grit will help achieve the desired result. It is important to sand in a circular motion, ensuring even pressure is applied to avoid creating any new imperfections. Once the sanding is complete, the repaired area should be thoroughly cleaned to remove any dust or debris.
This can be done using a damp cloth or vacuum cleaner. Finally, a coat of primer or sealer may be applied to the repaired area to provide additional protection and enhance the overall finish. Regular maintenance, such as cleaning and touch-ups, will help ensure the repaired area keeps looking its best for years to come.
Painting or re-coating the running board
running board painting, re-coating the running board, finishing touches, maintenance, burstiness, perplexity, high levels of both, specificity, context, conversational style, engage the reader, informal tone, personal pronouns, active voice, brief, rhetorical questions, analogies, metaphors One of the final steps in completing a vehicle restoration or refurbishment project is giving attention to the finishing touches and maintenance. One aspect that often needs some TLC is the running board. Over time, running boards can become worn, faded, and scratched, making them less visually appealing and potentially affecting their functionality.
So, how can you bring them back to life? Painting or re-coating the running board is the answer! By giving them a fresh coat of paint or applying a protective coating, not only will you enhance their appearance, but you’ll also provide added durability and resistance to weathering. Think of it as giving your vehicle a new pair of shoes. Just like a fresh coat of paint can transform a room, the same principle applies to your running board.
It’s like giving it a makeover and making it look brand new again. So, whether you opt for a classic black or decide to get creative with a bold color, painting or re-coating the running board is the perfect way to add those finishing touches to your vehicle and keep it looking its best. Plus, it’s a relatively simple task that you can easily do yourself, saving you time and money.
So go ahead, give your running board the attention it deserves and enjoy the satisfaction of a job well done. Happy painting!
Regularly checking and maintaining the repair
“Regularly checking and maintaining the repair” Now that you’ve completed the bulk of the repair work, it’s important to take the time for some finishing touches and regular maintenance. This means going over your repair job with a fine-tooth comb to ensure everything is working properly and looking its best. Checking for any loose or missing screws, making sure all the wiring connections are secure, and ensuring that any patched or repaired areas are holding up.
It’s also a good idea to clean up any dust or debris that may have been left behind during the repair process. Regularly checking and maintaining your repair will help prevent any further issues down the road and keep your repaired item in great shape for years to come. Don’t forget to take the time for this step – it’s the small details that can make a big difference in the longevity of your repair.
Conclusion: Enjoy a sturdy and functional running board
In conclusion, repairing running board mounting holes requires a little ingenuity and a lot of determination. It’s like solving a puzzle, finding the perfect solution to fix our beloved vehicle and keep it running smoothly. Just like a magician, we have the power to make those mounting holes disappear, leaving no trace behind.
So, next time you find yourself in a tight spot with your running boards, remember these handy tricks and make your vehicle whole again. After all, who needs a magic wand when you’ve got some DIY skills and a few clever tricks up your sleeve?”
FAQs
What are running board mounting holes?
Running board mounting holes are holes on the underside of a vehicle where the running boards are attached. They allow for secure installation of the running boards onto the vehicle.
Why would the running board mounting holes need to be repaired?
The running board mounting holes may need to be repaired if they become rusted, stripped, or damaged over time. This can occur due to exposure to elements or wear and tear.
How do I know if the running board mounting holes need to be repaired?
Signs that the running board mounting holes may need to be repaired include loose or wobbly running boards, visible damage or corrosion around the holes, or difficulty in properly installing or securing the running boards.
Can I repair the running board mounting holes myself?
Yes, it is possible to repair the running board mounting holes yourself. However, it may require some basic mechanical skills and the right tools. If you are not confident in your abilities, it is recommended to seek professional assistance.
What tools or materials do I need to repair the running board mounting holes?
To repair the running board mounting holes, you may need a drill, appropriate drill bits, a tap and die set, rust remover or anti-corrosion treatment, and replacement hardware if necessary. Additionally, you may need a wrench or socket set for removing and installing the running boards.
How do I repair rusted running board mounting holes?
To repair rusted running board mounting holes, you can start by removing any loose rust using a wire brush or sandpaper. Once the loose rust is removed, apply a rust remover or anti-corrosion treatment to prevent further rusting. If necessary, use a rust converter to chemically convert any remaining rust. Finally, if the holes are severely damaged, you may need to use a tap and die set to rethread them.
What should I do if the running board mounting holes are stripped?
If the running board mounting holes are stripped, you can try using a tap and die set to rethread the holes. This involves using a tap to create new threads for the mounting bolts. If the stripping is severe or the holes cannot be rethreaded, you may need to consider using larger bolts and adding washers or using a different mounting method.
Can I use aftermarket or universal running board mounting kits? A8. Yes, there are aftermarket or universal running board mounting kits available that can be used to repair or replace the mounting hardware. These kits often come with different mounting brackets, bolts, and accessories that can be adjusted to fit a wide range of vehicles.
Are there any alternative methods for repairing running board mounting holes?
In some cases, alternative methods for repairing running board mounting holes include using epoxy or adhesive to reinforce the holes, using self-tapping screws or rivets for mounting, or using specialty repair kits designed specifically for running board mounting hole repairs. These alternative methods should be used cautiously and may not provide the same level of strength and durability as traditional mounting methods.
How often should I inspect and maintain the running board mounting holes?
It is recommended to inspect and maintain the running board mounting holes regularly, especially if you frequently use the running boards or if you live in an area with harsh weather conditions or road salt. Inspect the holes for any signs of damage or corrosion and perform any necessary repairs or maintenance to ensure the running boards remain securely mounted.