
Have you ever wondered why introductions are so important? Well, imagine this – you’re at a party, surrounded by strangers, and someone approaches you with the intention of starting a conversation. What’s the first thing they say? You guessed it, an introduction! Introductions are like the first impression we make on others – they set the tone for the rest of the interaction. Whether it’s a personal encounter or a piece of writing, a good introduction captivates the audience from the very beginning, leaving them curious to learn more.
In the world of blogging, introductions play a vital role in grabbing the reader’s attention and enticing them to explore further. It’s the gateway to your content, and if it fails to intrigue, chances are your audience will quickly lose interest and move on to something else. Think of a captivating introduction as a hook that reels in your readers, making them eager to delve deeper into what you have to offer.
It’s like the opening act of a grand performance – setting the stage, building anticipation, and leaving the audience craving for more. So, how can you create an introduction that leaves a lasting impact on your readers? Well, that’s where we come in! In this blog, we will uncover the secrets to crafting compelling and effective introductions that will keep your audience hooked. We’ll explore different techniques, provide examples, and offer tips and tricks to help you master the art of captivating your readers from the very beginning.
Whether you’re a seasoned blogger or just starting out, this blog will equip you with the tools you need to create introductions that leave your readers wanting more. Get ready to elevate your writing to new heights and make a lasting impression with every piece of content you create. Are you ready to captivate your audience and take your blogging game to the next level? Let’s dive in!
Table of Contents
- 1 Overview of the Ford running board motor
- 2 Tools and materials needed
- 3 Step-by-step instructions for replacing the motor
- 3.1 Step 1: Disconnect the power source
- 3.2 Step 2: Remove the running board panel
- 3.3 Step 3: Disconnect the wiring harness
- 3.4 Step 4: Remove the old motor
- 3.5 Step 5: Install the new motor
- 3.6 Step 6: Reconnect the wiring harness
- 3.7 Step 7: Reinstall the running board panel
- 3.8 Step 8: Reconnect the power source
- 4 Conclusion
- 5 FAQs
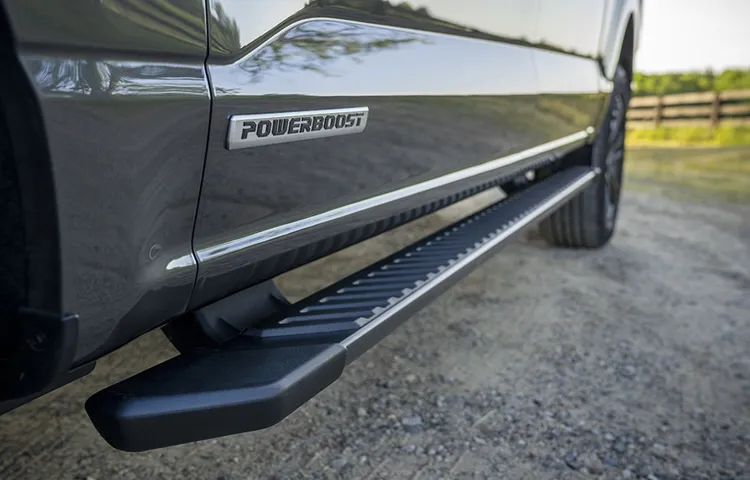
Overview of the Ford running board motor
Are you having trouble with your Ford running board? Maybe the motor has stopped working, and you’re wondering how to replace it. Well, don’t worry, we’ve got you covered. The Ford running board motor is responsible for the automatic extension and retraction of the running board.
Over time, this motor may wear out or become damaged, leading to malfunctions. To replace the motor, you’ll first need to locate it underneath the vehicle. It’s typically positioned near the front of the running board.
Once you’ve accessed the motor, you can disconnect the electrical connectors and remove any mounting bolts or brackets holding it in place. Then, simply install the new motor by securing it with the mounting bolts and reconnecting the electrical connectors. Finally, test the running board to ensure that the new motor is working properly.
With a little bit of effort, you’ll have your Ford running board back in working order in no time.
Tools and materials needed
If you’re experiencing issues with the motor on your Ford running board, don’t worry, it’s a problem that can be fixed. To replace the motor, you’ll need a few tools and materials. First, you’ll need a wrench or socket set to remove any bolts or screws that are holding the motor in place.
You’ll also need a multimeter to test the motor and make sure it’s functioning properly. Additionally, you’ll need a replacement motor specific to your Ford running board model. It’s important to make sure you have the correct motor to ensure a successful replacement.
Lastly, you’ll need some electrical tape or wire connectors to secure the electrical connections. With these tools and materials, you’ll be well-equipped to replace the motor on your Ford running board and get it back to full working order.

Step-by-step instructions for replacing the motor
Replacing the motor on a Ford running board may seem like a daunting task, but with the right tools and a step-by-step approach, it can be done easily. First, you will need to locate the motor, which is typically located underneath the running board. Once you have located it, disconnect the power by disconnecting the negative battery cable.
Next, remove the bolts or screws that are holding the motor in place. Carefully disconnect any wiring harnesses that may be connected to the motor. Once the old motor is removed, install the new motor by reversing the steps you took to remove the old one.
Connect any wiring harnesses, secure the motor with bolts or screws, and reconnect the negative battery cable. Test the running board to ensure that the motor is functioning properly. If you are unsure about any step, consult the vehicle’s manual or seek professional assistance.
By following these simple steps, you will be able to replace the motor on your Ford running board without any hassle.
Step 1: Disconnect the power source
When it comes to replacing a motor, step 1 is to disconnect the power source. This is an essential safety precaution that should never be overlooked. By disconnecting the power source, you can protect yourself from any electrical shocks or accidents while working on the motor.
To do this, simply locate the power switch or breaker for the motor and turn it off. It’s important to make sure that the power is completely disconnected before proceeding with any further steps. This will ensure a safe and secure working environment for the motor replacement process.
So remember, always disconnect the power source first before attempting to replace a motor.
Step 2: Remove the running board panel
Step 2: Remove the running board panel Now that you’ve gathered the necessary tools, it’s time to start replacing the motor. The next step is to remove the running board panel. This is the part that covers the motor and allows you to access it.
Begin by locating the screws or bolts that secure the running board panel in place. These are typically found at the edges of the panel or on the underside. Use your screwdriver or wrench to remove these screws or bolts and set them aside in a safe place.
Once the screws or bolts are removed, you can gently pry the running board panel away from the motor housing. Be careful not to force it or use excessive pressure, as this could damage the panel or the motor. If the panel doesn’t come off easily, double-check to make sure all the screws or bolts have been removed.
Once the running board panel is free, carefully set it aside. Be mindful of any wires or connections that may be attached to the panel. It may be necessary to disconnect these in order to fully remove the panel.
If this is the case, make sure to keep track of which wires go where for reassembly later on. With the running board panel removed, you now have clear access to the motor. This will make it much easier to replace and repair as needed.
Stay tuned for the next step, where we’ll walk you through the process of replacing the motor itself.
Step 3: Disconnect the wiring harness
“Now that you have removed the necessary components and accessed the motor, it’s time to disconnect the wiring harness. This step is crucial to ensure the safe and effective removal of the old motor and the installation of the new one. To disconnect the wiring harness, you will need to locate the electrical connectors that are attached to the motor.
These connectors are usually held in place by a locking tab or a clip. You will need to press or release this tab or clip to disconnect the connectors. It’s important to proceed with caution and gently wiggle the connectors apart to avoid damaging the wiring or the connectors themselves.
Once the connectors are disconnected, you can carefully remove the wiring harness from the motor. Make sure to keep track of any screws or clips that may be attached to the wiring harness, as you will need to reattach them later when installing the new motor. Take your time and be patient during this step to ensure a smooth transition and prevent any accidental damage to the wiring or connectors.
“
Step 4: Remove the old motor
When it comes to replacing a motor, one of the first steps is to remove the old motor. This can seem like a daunting task, but with the right instructions and a little bit of patience, it can be done. Before you begin, make sure you have all the necessary tools and equipment, such as a wrench, screwdriver, and a new motor.
Once you have everything you need, start by disconnecting the power supply to the motor. This is essential for safety reasons, as working with live electrical wires can be dangerous. Next, locate the mounting screws that hold the motor in place.
Use a wrench or screwdriver to loosen and remove these screws. Once the screws are removed, carefully lift the motor out of its housing, being mindful of any wires or connections that may still be attached. It’s important to note that some motors may have additional screws or bolts holding them in place, so be sure to check for any hidden fasteners.
Once the old motor is removed, you can then proceed with installing the new motor, following the reverse steps of this process. By taking your time and following these step-by-step instructions, you’ll be able to successfully replace the old motor and get your equipment up and running again.
Step 5: Install the new motor
Once you have successfully disconnected the old motor, it’s time to install the new one. This step is crucial to ensure that your appliance is functioning properly. Before you begin, take a moment to familiarize yourself with the new motor and make sure it matches the specifications of the old one.
Start by aligning the motor shaft with the shaft of the appliance. Then, carefully slide the motor into place, making sure it is securely seated. Once the motor is in position, reattach any screws or brackets that hold it in place.
Be sure to tighten them securely, but be careful not to overtighten, as this could damage the motor. After everything is securely fastened, it’s a good idea to double-check all of your connections to make sure they are tight and secure. Finally, plug in the appliance and give it a test run.
If everything is working properly, congratulations! You have successfully installed your new motor.
Step 6: Reconnect the wiring harness
In this step-by-step guide for replacing a motor, we have come to step 6: reconnecting the wiring harness. This is a crucial step to ensure that everything is in working order before completing the motor replacement. To reconnect the wiring harness, you will need to locate the matching connectors on both the motor and the wiring harness.
These connectors usually have a specific shape or color coding, making it easier to match them up correctly. Once you have identified the matching connectors, push them together firmly until you hear a click or feel them lock into place. It’s important to make sure that the connectors are securely attached to each other to ensure proper electrical connectivity.
If you encounter any resistance or difficulty in connecting the harness, double-check that you have the right connectors and that they are aligned correctly. Once all the connectors are securely attached, take a moment to inspect the wiring harness to make sure there are no loose or exposed wires. If you notice any issues, carefully repair or replace the affected wires before proceeding.
Once you have double-checked and secured the wiring harness, you are ready to move on to the next step in the motor replacement process. Keep in mind that electrical components can be delicate, so it’s crucial to handle them with care during this step. By properly reconnecting the wiring harness, you are ensuring that the motor and your appliance or machinery will work smoothly and safely.
So take your time, follow the instructions, and complete this step with confidence.
Step 7: Reinstall the running board panel
Replacing the motor on your vehicle can be a daunting task, but with the right instructions, it is definitely something you can do yourself. In this blog post, we will walk you through the step-by-step process of reinstalling the running board panel after replacing the motor. First, you will need to gather all the necessary tools and materials for the job, including a replacement motor, a socket set, and a screwdriver.
It’s always a good idea to have a friend or family member assist you with heavy lifting or holding parts in place. To begin, locate the mounting brackets for the running board panel. These can usually be found underneath the vehicle, near the front and rear wheels.
Use your socket set to remove any bolts or screws that are securing the brackets to the vehicle frame. Once the brackets are free, carefully remove the running board panel from the vehicle. Be sure to support the panel as you remove it to prevent any damage or injury.
Set the panel aside in a safe place. Next, take your replacement motor and carefully align it with the mounting brackets on the vehicle frame. Use your socket set to secure the motor in place, making sure it is tightly and securely fastened.
Double-check that all bolts or screws are properly tightened. With the motor installed, it’s time to reattach the running board panel. Line up the panel with the mounting brackets and carefully slide it back into place.
Once it is aligned, use your socket set or screwdriver to reattach any bolts or screws that were removed earlier. Finally, give the running board panel a gentle tug to make sure it is securely attached to the motor. If everything feels sturdy, congratulations! You have successfully installed the running board panel after replacing the motor.
Step 8: Reconnect the power source
In the previous steps, we’ve dismantled the faulty motor and safely replaced it with a new one. Now, we’re getting closer to the finish line with step 8: reconnecting the power source. This is the moment of truth when we see if our hard work pays off.
To reconnect the power source, we need to locate the wires that were previously disconnected. It’s important to pay attention to the colors of the wires, as they indicate their purpose. Take a moment to double-check that everything is securely connected and properly aligned.
Once you’re confident that everything is in place, it’s time to supply power to the motor. Turn on the power source and listen for the familiar hum of the motor turning on. If all goes well, you should see the motor spinning smoothly and doing its job.
Congratulations! You’ve successfully replaced the motor and brought your machine back to life. Give yourself a pat on the back for a job well done.
Conclusion
And there you have it, the complete and foolproof guide on how to replace the motor on a Ford running board. We hope you’ve enjoyed this little adventure into the world of automotive DIY. Remember, when tackling such challenges, it’s important to have the right tools, the right knowledge, and maybe just a touch of bravery.
And who knows, maybe this newfound skill will come in handy next time you find yourself in a tight spot – literally! So, go forth and conquer these mechanical marvels, leaving a trail of functioning running boards behind you. Your friends will be impressed, your enemies envious, and your Ford running boards forever grateful.
FAQs
How do I replace the motor on a Ford running board?
To replace the motor on a Ford running board, you will need to first disconnect the power source and remove the old motor. Then, install the new motor by securing it in place and reconnecting the power source. Finally, test the running board to ensure the motor is working properly.
What tools do I need to replace the motor on a Ford running board?
To replace the motor on a Ford running board, you will need basic tools such as a socket set, screwdriver, and wire cutters. Additionally, you may need a pry bar or trim removal tool to remove any panels or covers.
How long does it take to replace the motor on a Ford running board?
The time it takes to replace the motor on a Ford running board can vary depending on your level of experience and the specific model of the vehicle. On average, it may take around 1-2 hours to complete the task.
Can I replace the motor on a Ford running board myself?
Yes, you can replace the motor on a Ford running board yourself if you have some mechanical knowledge and the necessary tools. However, it’s always recommended to consult the vehicle’s manual or seek professional assistance if you are unsure about the process.
How much does it cost to replace the motor on a Ford running board?
The cost of replacing the motor on a Ford running board can vary depending on factors such as the specific model of the vehicle, the brand of the motor, and any additional parts needed. On average, the cost can range from $100 to $500.
Is there a warranty for the new motor on a Ford running board?
The warranty for the new motor on a Ford running board will depend on the manufacturer or supplier. It’s advisable to check the warranty information provided with the motor or contact the seller to inquire about the warranty coverage.
Are there any safety precautions I should take when replacing the motor on a Ford running board?
Yes, it’s important to observe safety precautions when replacing the motor on a Ford running board. Some precautions include disconnecting the power source, wearing protective gloves and eyewear, and following proper lifting techniques to avoid strain or injury. Additionally, always refer to the vehicle’s manual for specific safety guidelines.