
Are you looking for creative ideas to repurpose an old fiberglass tonneau cover? Look no further! In this blog post, we will explore 10 unique and innovative ways to give your tonneau cover a new lease of life. Whether you’re a DIY enthusiast or simply want to add a touch of flair to your outdoor space, there’s sure to be an idea here that catches your eye. So buckle up and let’s dive into the world of repurposing!
Table of Contents
Introduction
Do you have an old fiberglass tonneau cover lying around that you’re not sure what to do with? Instead of letting it collect dust in your garage, why not repurpose it and give it a second life? With a little creativity and some DIY skills, you can transform your old tonneau cover into something useful and unique. Whether you’re looking to create a custom storage solution, a greenhouse for your garden, or a creative piece of outdoor furniture, repurposing your old tonneau cover is a great way to reduce waste and add a personal touch to your space. In this blog section, we’ll explore different ideas and step-by-step guides on how to repurpose an old fiberglass tonneau cover, so let’s get started!
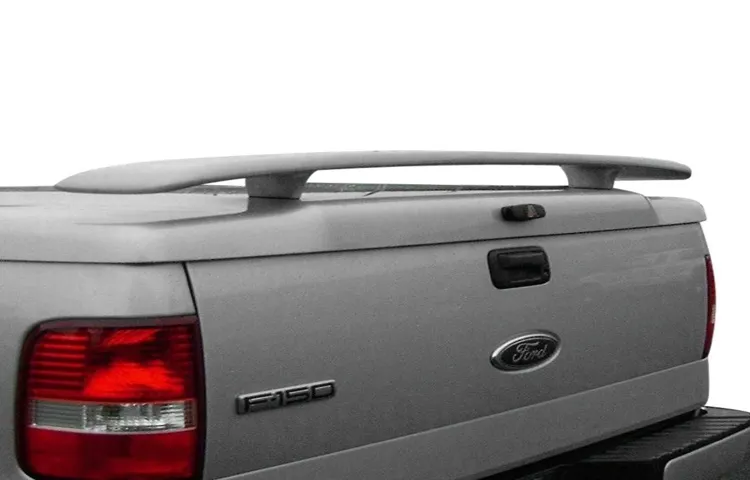
What is a fiberglass tonneau cover?
fiberglass tonneau cover
Why repurpose an old tonneau cover?
repurpose an old tonneau cover, tonneau cover, old tonneau cover. Introduction: Are you tired of looking at that old tonneau cover lying around in your garage? Instead of letting it collect dust and take up space, why not give it a new life? Repurposing an old tonneau cover is not only a great way to give it a second chance, but it can also be a fun and creative project that allows you to personalize your space. Whether you’re looking for functional ideas or simply want to add a unique touch to your home, repurposing an old tonneau cover can bring newfound purpose and style to your surroundings.
In this article, we’ll explore some creative ways to repurpose an old tonneau cover and discover the hidden potential of these versatile pieces. So, let’s roll up our sleeves and get started on this exciting transformation!
1. DIY Greenhouse
If you’re looking for an eco-friendly project that will not only repurpose an old fiberglass tonneau cover but also help you save money on groceries, why not turn it into a DIY greenhouse? With a little bit of creativity and some simple materials, you can easily transform your old cover into a functional and stylish greenhouse that will allow you to grow your own fruits, vegetables, and herbs all year round. To start this project, you’ll need to gather a few materials. Besides the old tonneau cover, you’ll also need some PVC pipes, zip ties or clamps, clear plastic sheeting, and a few basic tools like a saw and a drill.
Begin by cutting the tonneau cover into sections and attaching the PVC pipes to create the framework for the greenhouse. You can use zip ties or clamps to secure the pipes to the cover. Next, cover the framework with the clear plastic sheeting, making sure to leave one side open for ventilation.
Once your greenhouse is assembled, you can start filling it with pots or containers for your plants. Be sure to choose plants that will thrive in the conditions of your greenhouse, such as tomatoes, peppers, herbs, and leafy greens. Remember to water your plants regularly and monitor the temperature and humidity inside the greenhouse.
You may need to adjust the ventilation or add a small fan to keep the air circulating. Repurposing an old fiberglass tonneau cover into a DIY greenhouse is not only a fun and creative project but also a great way to reduce waste and contribute to a greener lifestyle. By growing your own food, you can save money and reduce your carbon footprint.
Plus, there’s something incredibly satisfying about eating fresh produce that you have grown yourself. So why not give it a try and start enjoying the benefits of your very own homemade greenhouse?
Materials needed
One of the most crucial aspects of building a DIY greenhouse is gathering the necessary materials. By having everything you need at the beginning, you can ensure a smoother and more efficient construction process. So, what exactly do you need? Firstly, you will require some basic tools such as a tape measure, hammer, screwdriver, and level.
These tools will come in handy for measuring, assembling, and securing various parts of the greenhouse. Additionally, you will need materials such as PVC pipes or metal tubing for the structure, plastic sheeting or greenhouse film for the walls, and either wood or metal for the base. It’s also important to consider ventilation, so you may need to purchase vents or fans to regulate the temperature inside the greenhouse.
Finally, don’t forget about the smaller details like screws, nails, and brackets to secure everything together. By gathering all these materials beforehand, you’ll be well-prepared to embark on your DIY greenhouse project.
Step-by-step instructions
DIY Greenhouse If you have a green thumb and love gardening, building your own greenhouse can be a great addition to your backyard. Not only does it provide a controlled environment for your plants to thrive, but it also extends the growing season, allowing you to enjoy fresh produce all year round. Building a greenhouse may sound intimidating, but with a bit of planning and some basic tools, you can create a functional and beautiful structure.
To start, you’ll need to choose the right location for your greenhouse. It should be a spot that receives plenty of sunlight throughout the day, as well as easy access to water and electricity if needed. Once you’ve found the perfect spot, you can begin gathering materials.
Some common materials for a DIY greenhouse include PVC pipes, wooden frames, or even repurposed windows. Next, you’ll need to decide on the size and shape of your greenhouse. Are you looking for a small structure to house a few plants, or do you want something larger to accommodate a variety of crops? Consider your needs and the space available before determining the dimensions of your greenhouse.
Once you have your materials and measurements, it’s time to start building. Begin by constructing the frame of your greenhouse, ensuring it is sturdy and level. If you’re using PVC pipes, you can easily connect them using fittings and adhesive.
For wooden frames, make sure to use treated lumber to prevent rotting. Once the frame is set, you can add the covering. This can be plastic sheeting, greenhouse film, or even glass.
Whatever material you choose, make sure it allows for proper ventilation and sunlight penetration. Secure the covering tightly to the frame, making sure there are no gaps. To complete your greenhouse, add any additional features you desire.
2. Garden Compost Bin
Are you looking for a creative way to repurpose an old fiberglass tonneau cover? Look no further than turning it into a garden compost bin! Recycling and reusing materials is not only good for the environment but can also save you money. With just a few simple steps, you can transform your old tonneau cover into a functional and eco-friendly addition to your garden. First, make sure to clean the tonneau cover thoroughly to remove any dirt or grime.
Next, drill some holes in the cover to allow for proper drainage and aeration. Place the tonneau cover in a sunny spot in your garden and fill it with organic waste such as food scraps, leaves, and grass clippings. Over time, the waste will break down and turn into nutrient-rich compost that can be used to fertilize your plants.
Not only will you be reducing waste and contributing to a greener planet, but you’ll also be improving the health and vitality of your garden. So why not put that old tonneau cover to good use and create your own garden compost bin?
Materials needed
When it comes to creating your own garden compost, having a compost bin is essential. This is where all your organic waste will decompose and turn into nutrient-rich compost for your plants. So what materials do you need for this? Well, first and foremost, you’ll need a suitable container for your compost.
It can be as simple as a wooden or plastic bin with a lid to keep pests out and moisture in. You can even make your own bin using materials like pallets or wire mesh. Next, you’ll need a mix of green and brown materials to compost.
Green materials include things like grass clippings, fruit and vegetable scraps, and coffee grounds, while brown materials include items like dried leaves, straw, and cardboard. You’ll also need a compost thermometer to monitor the temperature of your compost pile, as well as a pitchfork or shovel to turn the pile and aid in decomposition. With these materials, you’ll be well on your way to creating your own garden compost and giving your plants the nutrients they need to thrive.
So why wait? Start composting today and see the difference it makes in your garden!
Step-by-step instructions
garden compost bin
3. Raised Garden Bed
If you have an old fiberglass tonneau cover lying around, don’t throw it away just yet! With a little creativity, you can repurpose it into a raised garden bed. Imagine turning your unused truck accessory into a beautiful and productive green space for growing flowers, herbs, or even vegetables. The process is simple and straightforward.
First, you’ll need to gather some materials like soil, gardening tools, and plants or seeds. Then, remove the tonneau cover from your truck and find a suitable location for your garden bed. Next, clean the tonneau cover thoroughly and make sure it’s free from any debris or dirt.
Once clean, fill the bed with soil and start planting your chosen plants or seeds. With a repurposed tonneau cover, you’ll not only be giving it a new lease on life but also creating a unique and eco-friendly garden that will impress your friends and neighbors. So, why not add a touch of green to your outdoor space with this clever and resourceful DIY project?
Materials needed
One of the most essential materials needed to build a raised garden bed is lumber. You’ll need to choose the right type of lumber that is suitable for outdoor use and resistant to rot and decay. Cedar and redwood are popular choices due to their natural resistance to moisture and insects.
Look for boards that are straight and free from knots for the best results. In addition to lumber, you’ll also need screws or nails to assemble the bed. It’s important to use galvanized or stainless steel fasteners to prevent rusting over time.
Depending on the size of your garden bed, you may also need corner brackets or connectors to provide additional stability. Other materials you may need include a weed barrier or landscape fabric to prevent weed growth, gravel or pebbles for drainage, and soil to fill the bed. By gathering all the necessary materials, you’ll be well-prepared to create a raised garden bed that will thrive for years to come.
Step-by-step instructions
raised garden bed, gardening, step-by-step instructions
4. Outdoor Toy Chest
Have you ever wondered what to do with an old fiberglass tonneau cover? Instead of throwing it away, why not repurpose it into a unique outdoor toy chest? With a little bit of creativity and some DIY skills, you can transform your old tonneau cover into a functional and stylish storage solution for your kids’ outdoor toys. First, start by cleaning and sanding the tonneau cover to remove any dirt or imperfections. This will ensure a smooth surface for painting or staining later on.
Next, measure and mark the areas where you want to install hinges and a latch for the lid. This will allow easy access to the toys inside while keeping them secure when not in use. Once you have the necessary hardware, attach the hinges and latch to the marked areas on the tonneau cover.
Make sure they are securely fastened and can withstand the weight of the lid. You may need to use additional screws or bolts for added stability. To add a personal touch, consider painting or staining the tonneau cover in a color that complements your outdoor space.
You can also add decorative elements such as stencils or decals to make it more visually appealing. Finally, fill the toy chest with your kids’ outdoor toys and enjoy the organized and clutter-free space. The tonneau cover will not only protect the toys from the elements but also add a touch of creativity to your backyard.
Repurposing an old fiberglass tonneau cover into an outdoor toy chest is a great way to give new life to something that would otherwise end up in the landfill. It’s a fun and practical project that will not only benefit you but also the environment. So why not get started today and see what you can create from your old tonneau cover?
Materials needed
For creating an outdoor toy chest, you will need a few materials. First, you’ll need a sturdy wooden box or container. This will serve as the base for the toy chest.
Make sure it’s big enough to hold all your kids’ outdoor toys and durable enough to withstand the elements. Next, you’ll need some screws and a power drill to secure the box together. This will ensure that the toy chest won’t fall apart when it’s being used.
Additionally, you’ll need some weatherproof paint or stain to protect the wood from the sun and rain. This will help extend the life of the toy chest and prevent it from rotting or warping. Lastly, you’ll need some fun and colorful outdoor-themed decorations to add a touch of personality to the toy chest.
Consider adding things like cute stickers, stencils, or even your kids’ handprints. With these materials in hand, you’re ready to create a fun and functional outdoor toy chest for your kids to enjoy!
Step-by-step instructions
outdoor toy chest, DIY outdoor toy storage box, build an outdoor toy chest Are you tired of seeing your kids’ outdoor toys lying around in disarray? It’s time to build an outdoor toy chest to keep all those toys organized! With a DIY outdoor toy storage box, you can easily create a space for your kids to store their toys when they are not in use. Here’s a step-by-step guide on how to build your own outdoor toy chest. First, gather all the materials you will need for this project.
You will need plywood, screws, hinges, a latch, and a handle. Make sure to choose a plywood that will withstand outdoor weather conditions. Next, measure and cut the plywood into the desired dimensions for your toy chest.
Consider the size of the toys you need to store and make sure the chest is spacious enough to accommodate them. Once you have all the pieces cut, start assembling the toy chest. Use screws to attach the sides and the bottom of the chest together.
Make sure to pre-drill holes to prevent the wood from splitting. After the basic structure is assembled, attach the lid using hinges. This will allow easy access to the toys inside the chest.
Make sure the lid opens and closes smoothly. To secure the lid, install a latch on the front of the chest. This will keep the lid tightly closed when not in use, preventing any unwanted access to the toys.
Finally, add a handle to the front of the chest for easy portability. This will make it convenient for your kids to carry their toys around when they want to play. Once the construction is complete, you can add a coat of weather-resistant paint or stain to protect the wood from outdoor elements.
5. Dog House
If you have an old fiberglass tonneau cover lying around, why not transform it into a cozy dog house? Repurposing items not only helps reduce waste but also adds a unique touch to your home. First, start by cleaning the tonneau cover thoroughly to ensure it’s safe for your furry friend. Next, use a jigsaw or a similar cutting tool to create an entrance large enough for your dog to comfortably enter and exit.
Sand down any rough edges to prevent any accidents. You can also add a small window for ventilation. To make the inside cozy, add a soft cushion or blanket for your dog to nap on.
Consider placing the dog house in a shaded area to keep your pup cool during hot days. By repurposing your old tonneau cover, you’re not only being environmentally conscious but also providing a comfortable space for your beloved pet.
Materials needed
dog house, materials needed, construction project, weather-resistant, insulated, durable, dog’s size, plywood, pressure-treated lumber, roof shingles, screws, nails, hinges, latch, dog bed, carpet, paint, dog toys, water bowl, food dish, leash, collar, dog treats The construction of a dog house is an exciting and rewarding project that can provide your furry friend with a cozy and comfortable space of their own. When gathering the materials needed for this endeavor, it is important to consider the specific needs of your dog. Start by determining the size of the dog house based on your dog’s size and breed.
This will help you estimate the amount of plywood and pressure-treated lumber required. To ensure the dog house is weather-resistant and well-insulated, consider using roof shingles and insulation materials. Additionally, you will need screws, nails, hinges, and a latch to assemble the dog house securely.
Once the construction is complete, don’t forget to furnish the interior with a dog bed, carpet, and any other comfort items your pooch might enjoy. To add a personal touch, consider painting the dog house in a color that complements your home’s exterior. Finally, don’t forget to include some dog toys, a water bowl, a food dish, a leash, a collar, and some delicious dog treats to make the dog house feel like home for your furry friend.
Step-by-step instructions
dog house. Building a dog house can be a fun and rewarding project for any dog owner. It provides a cozy and safe space for your furry friend to relax and sleep.
Whether you’re a DIY enthusiast or simply looking for a way to give your dog some extra comfort, building a dog house is a great option. To get started, gather all the necessary materials including a sheet of plywood, 2×4 lumber, nails or screws, and a waterproof roof material. Measure and cut the plywood into four equal-sized panels to form the base and sides of the dog house.
Use the 2×4 lumber to create a frame for added stability and support. Attach the panels to the frame using nails or screws, making sure to leave an opening for the entrance. Finally, add the roof material to protect your dog from rain or snow.
You can also add insulation or a bed inside the dog house for added comfort. With a little bit of time and effort, you’ll have a beautiful and functional dog house that your furry friend will love. So why wait? Start building your dog’s dream house today!
6. Tool Shed
Are you looking for a creative way to repurpose your old fiberglass tonneau cover? Look no further than your tool shed! There are several ways you can transform this seemingly useless item into something functional and stylish. One idea is to turn it into a unique outdoor bar. Simply attach the tonneau cover to a sturdy base, add a countertop, and you’ve got yourself a one-of-a-kind drink station.
Another option is to repurpose it as a workbench. By adding legs and a sturdy surface, you can create a versatile workspace for all your DIY projects. You could even use it as a storage solution by attaching hooks or shelves to the inner side of the cover.
With a little creativity and some basic tools, your old tonneau cover can become a useful and eye-catching addition to your backyard or workshop.
Materials needed
For anyone who loves tackling DIY projects around the house, having a well-stocked tool shed is essential. When it comes to materials needed, there are six key tools that every DIY enthusiast should have. The first tool is a good quality power drill, which can be used for a wide range of tasks, from drilling holes to screwing in screws.
Next is a sturdy set of screwdrivers, both flathead and Phillips head, as these are the most commonly used types of screws. A tape measure is also a must-have, as accurate measurements are crucial for many projects. A level is another important tool, ensuring that everything is straight and aligned.
For cutting tasks, a utility knife and a handsaw should be on hand. Finally, a set of pliers, both regular and needle-nose, are useful for gripping and manipulating various objects. With these six tools in your tool shed, you’ll be ready to tackle a variety of DIY projects with confidence.
Step-by-step instructions
In the tool shed, you’ll find everything you need to tackle those DIY projects and home repairs. This dedicated space is like a treasure trove of tools and equipment, waiting to be put to use. From hammers and screwdrivers to saws and drills, the tool shed is your go-to place for all your handyman needs.
But beyond just having the right tools, it’s important to keep your tool shed organized and well-maintained. This will not only make it easier to find what you’re looking for, but it will also help prolong the life of your tools. So let’s dive into some step-by-step instructions on how to create a functional and efficient tool shed.
First things first, you’ll want to assess the space you have available for your tool shed. Measure the area and take note of any obstructions or limitations. This will help you determine the size and layout of your shed, as well as any additional storage solutions you may need.
Next, gather all of your tools and equipment and sort them into categories. This will make it easier to create designated areas for each type of tool. You can use pegboards, wall hooks, and shelving units to keep everything organized and easily accessible.
Don’t forget to label each section so you know where everything belongs. Now it’s time to make sure your tool shed is equipped with all the essentials. This includes a sturdy workbench, proper lighting, and ventilation.
You may also want to consider adding some power outlets for charging batteries or using power tools. Once you have all the basics in place, it’s time to think about tool maintenance. Keep your tools clean and free from rust by wiping them down after each use.
7. Chicken Coop
Are you looking for a creative way to repurpose an old fiberglass tonneau cover? One fun idea is to use it to build a chicken coop! With a little bit of DIY skills and some basic materials, you can transform that old tonneau cover into a functional and stylish home for your feathered friends. The waterproof nature of fiberglass will help protect your chickens from the elements, while the sturdy construction will ensure that the coop stands up to the test of time. Plus, the sleek, modern look of fiberglass will add a touch of style to your backyard.
So why spend money on an expensive chicken coop when you can repurpose an old tonneau cover and create something unique and practical? Give it a try, and soon you’ll have happy, healthy chickens happily clucking away in their new home.
Materials needed
In order to build a chicken coop, there are several materials that you will need. Let’s start with the basics. You’ll need lumber for the frame of the coop, as well as for any walls or partitions you plan to include.
It’s a good idea to use pressure-treated lumber, as this will help prevent rot and extend the life of your coop. You’ll also need wire mesh to keep your chickens safe from predators. Chicken wire is a popular option, but be sure to choose a gauge that is appropriate for the size and strength of the predators in your area.
You’ll need roofing materials to protect your chickens from the elements. Corrugated metal is a common choice, but you could also consider using shingles or even a tarp if you’re on a tighter budget. Additionally, you’ll need hinges and latches for any doors on your coop, as well as screws or nails to secure everything in place.
Finally, don’t forget about bedding material for the inside of the coop. Pine shavings or straw are both popular options. With these materials in hand, you’ll be well on your way to building a cozy and secure home for your feathered friends.
Step-by-step instructions
chicken coop
8. Vehicular Storage
Are you looking for a creative way to repurpose an old fiberglass tonneau cover? Look no further! One great option is to convert it into vehicular storage. With a little bit of creativity and know-how, you can transform this old tonneau cover into a functional storage solution that will help you maximize space in your vehicle. Whether you use your vehicle for work or play, having extra storage can be a game-changer.
You can use the repurposed tonneau cover to store tools, camping gear, sports equipment, or anything else you need to take on your adventures. By repurposing your old tonneau cover, you’re not only giving it new life but also saving money by avoiding the need to purchase additional storage options. So why not give it a try and see how this simple yet effective solution can make your life easier and more organized.
Materials needed
Vehicular storage is a crucial consideration for anyone who owns a vehicle, whether it’s a car, truck, or motorcycle. Having the right materials on hand can make all the difference when it comes to keeping your vehicle safe and in optimal condition. One essential item is a quality car cover, which helps protect your vehicle from the elements, such as rain, sun, and even bird droppings.
Additionally, investing in a sturdy car or bike lock can provide peace of mind, especially if you live in an area with high theft rates. Other important materials for vehicular storage include a tire inflator, jumper cables, and a portable battery charger. These items can come in handy when you need to jump-start your vehicle or inflate a flat tire while on the go.
Having them readily available can save you time and prevent stressful situations. So, when it comes to vehicular storage, don’t forget to stock up on the right materials to keep your vehicle in top-notch condition and ready for any adventure.
Step-by-step instructions
In this blog section, we will guide you through the process of vehicular storage step by step. When it comes to storing your vehicle, there are a few important factors to consider. First, make sure you choose a suitable location.
Ideally, you want a space that is dry, clean, and temperature-controlled. This will help protect your vehicle from the elements and prevent any damage that could occur from extreme temperatures or humidity. Next, it’s important to prepare your vehicle for storage.
This includes cleaning it thoroughly and removing any perishable items or valuables. You should also top up the fuel tank and add a fuel stabilizer to prevent any damage to the engine. Additionally, it’s a good idea to place a cover over your vehicle to protect it from dust and debris.
Finally, when it comes time to store your vehicle, make sure to properly secure it. This may involve using wheel locks or parking it in a secure facility. By following these steps, you can ensure that your vehicle is stored safely and protected until you’re ready to use it again.
So, let’s get started on ensuring the best storage for your vehicle!
9. DIY Workstation
Are you looking for a unique DIY project that can breathe new life into your old fiberglass tonneau cover? Why not repurpose it into a functional and stylish workstation? With a little creativity and some basic tools, you can transform your old tonneau cover into a versatile workspace that is both practical and visually appealing. Start by cleaning and sanding the surface of the tonneau cover to ensure a smooth finish. Then, apply a fresh coat of paint or stain to give it a fresh look.
Next, attach legs to the underside of the cover to provide stability. You can use a variety of materials for the legs, such as metal pipes or wooden dowels. Finally, add some additional features to make your workstation even more functional, such as a built-in shelf or storage compartments.
This DIY project is a great way to repurpose an old tonneau cover and create a unique and personalized workstation for your home or office.
Materials needed
When it comes to setting up a DIY workstation, there are a few essential materials you’ll need to ensure productivity and comfort. First and foremost, you’ll need a sturdy desk that provides enough surface area for your computer, paperwork, and any other materials you may need for your work. Look for a desk that has adjustable height options to accommodate different sitting or standing preferences.
Additionally, a comfortable and supportive chair is crucial for long hours at your workstation. Invest in one that offers good lumbar support and is adjustable to your preferred sitting position. Lighting is another important element to consider.
Make sure you have adequate and adjustable lighting to reduce eye strain and improve visibility. In terms of organization, having storage solutions such as drawers, shelves, or filing cabinets is essential for keeping your workspace neat and clutter-free. Lastly, make sure you have all the necessary technology, including a computer or laptop, monitor, keyboard, and mouse.
Don’t forget about additional accessories such as a mousepad, a desk organizer, and cable management systems to keep everything tidy and easily accessible. With these materials in place, you’ll be well on your way to creating an efficient and comfortable DIY workstation.
Step-by-step instructions
If you’re looking for a budget-friendly way to create your own workspace at home, then a DIY workstation is the perfect solution for you. Creating your own workstation not only allows you to customize it to your liking but also gives you the opportunity to save money. To get started, you’ll need a sturdy desk or table that can accommodate your work equipment.
If you don’t already have one, you can easily find one at a thrift store or online marketplace. Once you have your desk, gather all your work essentials such as a computer, monitor, keyboard, and mouse. Position your equipment in a way that feels comfortable and ergonomic for you.
Next, organize your desk by adding storage options such as shelves or drawers to keep your workspace clutter-free. Don’t forget to add personal touches like plants or artwork to make your workstation feel inviting and inspiring. Finally, make sure you have proper lighting to reduce eye strain and enhance your productivity.
With a little creativity and some basic tools, you can create a DIY workstation that is both functional and aesthetically pleasing.
10. Waterproof Storage Container
If you have an old fiberglass tonneau cover lying around and you’re looking for a creative way to repurpose it, why not turn it into a waterproof storage container? Fiberglass tonneau covers are designed to keep your truck bed protected from the elements, so they’re already built to be waterproof. By repurposing the cover and adding some additional sealing, you can transform it into a sturdy and reliable storage container for your outdoor gear, tools, or anything else you need to keep dry and protected. This is a great way to give new life to an old tonneau cover and create a functional storage solution at the same time.
Whether you’re a camping enthusiast looking for a place to store your gear or a DIY-er in need of a waterproof toolbox, repurposing your old tonneau cover is a smart and practical solution.
Materials needed
When it comes to outdoor activities like camping, hiking, or boating, having a waterproof storage container is essential. This handy item ensures that your belongings stay dry and protected from moisture, whether it’s a sudden rainstorm or accidental water splashes. Waterproof storage containers come in various sizes and designs, allowing you to choose one that suits your needs.
They are typically made from durable and waterproof materials like plastic or rubber, with a secure lid or closure system to keep the contents safe and dry. So, whether you want to store your phone, wallet, clothes, or camping gear, a waterproof storage container is a must-have item for any outdoor adventure. Don’t let unexpected showers or water mishaps ruin your belongings – invest in a reliable waterproof storage container and have peace of mind wherever you go.
Step-by-step instructions
waterproof storage container
Conclusion
In conclusion, repurposing an old fiberglass tonneau cover is not only a practical and cost-effective solution, but it is also a chance to unleash your creative genius. From transforming it into a unique coffee table that will be the envy of all your friends, to creating a stunning wall art piece that will make your room pop, the possibilities are endless. So, don’t let that old tonneau cover gather dust in your garage any longer – grab some tools, put on your thinking cap, and let your imagination run wild.
Who knew that repurposing could be so stylish and fun?
FAQs
How can I repurpose an old fiberglass tonneau cover?
There are several creative ways to repurpose an old fiberglass tonneau cover. You could turn it into a unique coffee table by adding legs and a glass top. Alternatively, you can transform it into a stylish outdoor bench by attaching wooden slats for seating. Another option is to repurpose the tonneau cover into a raised garden bed for growing plants. Get creative and explore different possibilities based on your needs and interests!
Can an old fiberglass tonneau cover be used as a roof for a shed?
Yes, repurposing an old fiberglass tonneau cover as a roof for a shed is a great idea. The fiberglass material is durable and weather-resistant, making it suitable for protecting the shed from the elements. Ensure proper installation to ensure a watertight seal and consider reinforcing the support structure to accommodate the weight of the tonneau cover.
What tools and materials do I need to repurpose an old fiberglass tonneau cover?
To repurpose an old fiberglass tonneau cover, you may need the following tools and materials: a saw or power tools for cutting the tonneau cover, sandpaper for smoothing edges, screws or bolts for securing the tonneau cover in its new form, additional materials such as wood or metal (depending on your project), and any additional hardware or accessories specific to your intended purpose.
Can I repurpose an old fiberglass tonneau cover into a DIY dog bed?
Absolutely! Repurposing an old fiberglass tonneau cover into a DIY dog bed is a creative and practical idea. You can cut the tonneau cover to the desired size, remove any sharp edges, and create a comfortable cushioned area for your furry friend. Consider adding foam padding, fabric upholstery, and non-slip materials to ensure a cozy and safe sleeping space for your beloved pet.
Is it possible to repurpose an old fiberglass tonneau cover into a makeshift greenhouse?
Yes, repurposing an old fiberglass tonneau cover as a makeshift greenhouse is an excellent idea for extending your growing season and protecting delicate plants. The fiberglass material allows sunlight to pass through while providing insulation. You can create a simple frame to support the tonneau cover and consider incorporating ventilation features to regulate temperature and humidity within the greenhouse.
Can I repurpose an old fiberglass tonneau cover to create outdoor storage?
Absolutely! Repurposing an old fiberglass tonneau cover as outdoor storage is a practical and efficient solution. You can modify the tonneau cover by adding hinges and latches to transform it into a weatherproof storage box. This serves as a great place to store tools, gardening equipment, or any other items you want to keep protected while outdoors.
How can I repurpose an old fiberglass tonneau cover into a unique wall art piece?
Repurposing an old fiberglass tonneau cover into a unique wall art piece allows you to display your creativity and add an interesting focal point to any space. Consider painting the tonneau cover with vibrant colors or using stencils to create patterns or designs. Mount the tonneau cover securely on the wall or frame it to create a distinctive artwork that reflects your personal style.