
Hey there! Are you ready to dive into the exciting world of “Introduction”? Well, you’re in the right place! In this blog, we’ll be exploring the importance of a strong introduction and how it can make or break your writing. Think of an introduction as the gateway to your content. Just like the entrance to a party sets the mood for the entire evening, a well-crafted introduction grabs the reader’s attention and sets the tone for what’s to come.
It’s your chance to make a memorable first impression. Imagine you’re at a concert, waiting for the band to come on stage. The lights dim, the crowd roars, and the bass starts thumping.
That moment right before the band appears is like the anticipation you create with your introduction. It builds excitement and hooks your readers, urging them to keep reading. But what makes a great introduction? It should be concise and captivating, giving readers a taste of what’s to come without giving away all the juicy details.
Just like a movie trailer, it should leave them wanting more. The introduction should also provide a clear roadmap of what your content will cover. It acts as a guide, helping readers navigate through the main points and arguments you’ll be presenting.
Without a roadmap, your readers might get lost or lose interest along the way. So, whether you’re writing an essay, a blog post, or even a novel, don’t underestimate the power of a strong introduction. It’s your chance to make a lasting impression, captivate your readers, and keep them hooked from start to finish.
Now that we’ve covered the importance of introductions, let’s dive deeper into the art of crafting the perfect one. Stay tuned for our next blog post, where we’ll be sharing tips and tricks on how to write a captivating introduction that will leave your readers wanting more. Happy writing!
Table of Contents
- 1 What is an equalizer hitch?
- 2 Why do you need an equalizer hitch?
- 3 What tools do you need?
- 4 Step 1: Measure and level your trailer
- 5 Step 2: Install the hitch head
- 6 Step 3: Attach the spring bars
- 7 Step 4: Connect the weight distribution bars
- 8 Step 5: Adjust the tension
- 9 Test the setup
- 10 Practice makes perfect
- 11 Conclusion
- 12 FAQs
What is an equalizer hitch?
Setting up an equalizer hitch can be a bit confusing if you’ve never done it before, but don’t worry, it’s not as complicated as it may seem. An equalizer hitch is a device that helps distribute the weight of a trailer evenly across the towing vehicle and trailer. This is important because it helps improve stability and control while towing.
So, how do you set it up? First, you’ll need to attach the hitch head to your tow vehicle’s receiver hitch. Make sure it is securely attached and properly tightened. Next, you’ll need to adjust the height of the hitch head to match that of your trailer’s coupler.
This is crucial for ensuring that the weight is distributed evenly. Once the height is set, you can then connect the trailer hitch coupler to the hitch head. Don’t forget to lock it in place for added security.
Finally, attach the weight distribution bars to the hitch head and adjust them to the correct tension. This will help keep the trailer level and distribute the weight evenly. Remember to double-check all connections and make any necessary adjustments before hitting the road.
With a properly set up equalizer hitch, you can enjoy a smoother, safer towing experience. So, don’t be intimidated by the setup process, it’s easier than it looks!
Why do you need an equalizer hitch?
Setting up an equalizer hitch is crucial for a safe and smooth towing experience. But why do you need an equalizer hitch in the first place? Well, towing a trailer puts a lot of weight on the back of your vehicle, which can cause it to sag and affect steering and braking control. An equalizer hitch helps distribute this weight evenly between the trailer and the tow vehicle, ensuring a level ride and preventing the rear end of your vehicle from sagging.
So, how do you set up an equalizer hitch? First, you’ll need to attach the hitch to your tow vehicle’s receiver. Make sure it is securely locked in place. Then, position the spring bars onto the hitch head and attach them to the trailer’s frame using the chains provided.
Adjust the tension on the spring bars using the weight distribution brackets, ensuring they are level and not angled upwards or downwards. This will help distribute the weight evenly between the tow vehicle and the trailer. Once the hitch is set up, you’ll need to check the weight distribution by measuring the fender heights of your tow vehicle.
Ideally, the front and rear fender heights should be the same when the trailer is connected. If there is a difference, you may need to adjust the tension on the spring bars to achieve a level ride. Lastly, make sure to check the ball height and trailer’s tongue weight.
The ball height should be adjusted so that the trailer is level when connected to the tow vehicle. The tongue weight, which is the downward force exerted on the hitch ball by the trailer, should be within the specified range for your tow vehicle and hitch. By following these steps, you can ensure a safe and stable towing experience with your equalizer hitch.
Remember, it’s important to regularly inspect and maintain your hitch to ensure it continues to function properly. Happy towing!
What tools do you need?
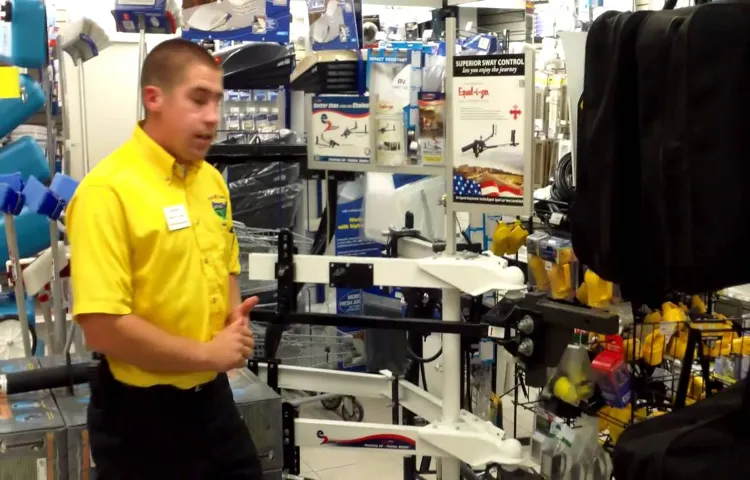
When it comes to setting up an equalizer hitch, having the right tools is essential. You’ll need a few key items to ensure that the hitch is installed correctly and securely. First and foremost, you’ll need the actual equalizer hitch kit, which typically includes the hitch head, spring bars, and a weight distribution system.
This kit is designed to evenly distribute the weight of your trailer across the tow vehicle, reducing sway and improving stability. In addition to the hitch kit, you’ll also need a few basic tools. A socket set with various sizes will come in handy for tightening bolts and nuts, while a torque wrench will enable you to tighten them to the proper specifications.
A measuring tape or ruler can be useful for ensuring that the hitch is set up at the correct height and angle. And let’s not forget about a good old-fashioned level to make sure everything is straight and balanced. Of course, it’s always a good idea to have some additional tools on hand, just in case.
A jack and jack stands can be useful for lifting and stabilizing the trailer while you’re working on the hitch. A set of pliers or a wrench may be necessary for adjusting and fine-tuning the hitch components. And don’t forget about some lubricant or grease to keep everything running smoothly.
Setting up an equalizer hitch may seem a bit daunting at first, but with the right tools and a little patience, you’ll be ready to hit the road with confidence in no time.
Hey there! Are you ready to learn something new? Today, we’re going to dive into the world of step-by-step guides. Whether you’re a beginner or just looking to brush up on your skills, this blog post is for you. Step-by-step guides are an amazing tool for breaking down complex tasks into manageable chunks.
They provide a clear roadmap to success, ensuring that you never feel lost or overwhelmed. So, let’s get started and discover the power of step-by-step guides together!
Step 1: Measure and level your trailer
Setting up an equalizer hitch is an important step in ensuring a safe and smooth towing experience. To begin, you’ll want to measure and level your trailer. This is crucial because any imbalance or improper weight distribution can affect the handling and stability of your trailer.
Start by measuring the height of your trailer’s coupler from the ground. Then, measure the height of your vehicle’s hitch receiver. The goal is to have the trailer and the vehicle’s hitch receiver at the same height when properly attached.
Use a leveling tool or a measuring tape to make sure the heights align. If they don’t, you may need to adjust the hitch height by either raising or lowering it. Once the trailer and vehicle are at the same height, double-check that they are level from side to side using a bubble level.
This will ensure that the weight is distributed evenly and reduce the chances of sway or fishtailing while towing. By taking the time to measure and level your trailer, you’re laying the foundation for a safer and more comfortable towing experience.
Step 1.1: Measure the height of your trailer tongue
One of the first steps in leveling your trailer is to measure the height of your trailer tongue. This is an important step because it allows you to determine the necessary adjustments needed to make your trailer level. To measure the height of the tongue, you will need a tape measure or a leveling device.
Simply place the tape measure or leveling device at the front of the trailer, where the tongue meets the hitch. Then, extend the tape measure or adjust the leveling device until it is level with the ground. Record the measurement and make a note of it for later reference.
This measurement will help you determine if your trailer is level or if it needs to be adjusted. It’s crucial to have a level trailer to ensure proper weight distribution and safe towing. So, take the time to measure the height of your trailer tongue before proceeding to the next step.
Step 1.2: Level your trailer
trailer leveling In order to ensure a smooth and safe towing experience, it’s important to properly level your trailer. Step 2 of this process involves measuring and adjusting the level of your trailer.
This is necessary because an unlevel trailer can cause issues such as poor weight distribution, tire wear, and difficulty in controlling the trailer while on the road. To level your trailer, you’ll need a few tools including a tape measure and a leveling device. Start by placing the leveling device on a flat surface inside your trailer and check the reading.
This will give you an idea of how much adjustment is needed. Next, measure the height of the coupler from the ground and compare it to the height of the hitch on your towing vehicle. If the heights don’t match, you may need to adjust the height of the hitch or the coupler to achieve a level trailer.
To adjust the height of the hitch, you can use a hitch riser or drop. These are devices that attach to the hitch and allow you to raise or lower the height as needed. Simply attach the appropriate hitch riser or drop and secure it in place.
Once the hitch is properly adjusted, you can move on to adjusting the height of the coupler. This can be done by using a coupler height adjustment device or by moving the wheel or jack on your trailer. Again, make sure to measure the height after making adjustments to ensure a level position.
Leveling your trailer may seem like a small detail, but it can make a big difference in the overall towing experience. By taking the time to properly level your trailer, you can improve stability, control, and reduce the risk of accidents while on the road. So the next time you’re getting ready to hit the road, don’t forget to measure and level your trailer for a safe and smooth journey.
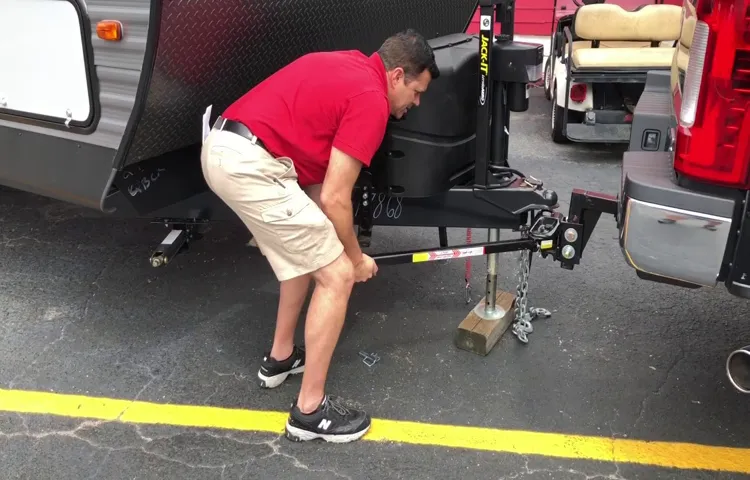
Step 2: Install the hitch head
So, you’ve decided to take on the task of setting up an equalizer hitch for your trailer? Good for you! It can seem a bit daunting at first, but don’t worry, I’m here to walk you through it step by step. The first step, which we’ve already covered in a previous blog post, is to ensure that your trailer and tow vehicle are properly matched in terms of weight. Now, let’s move on to step two: installing the hitch head.
The hitch head is the main component of the equalizer hitch. It’s the part that connects the trailer to the tow vehicle and helps distribute the weight evenly between the two. To install the hitch head, you’ll need to have a few tools on hand, including a wrench and a torque wrench.
First, make sure the trailer is parked on a level surface and the tow vehicle is securely in place. Then, locate the hitch receiver on the tow vehicle. This is the square-shaped opening at the back of the vehicle where the hitch head will be inserted.
Slide the hitch head into the hitch receiver and line up the holes in the receiver with the holes in the hitch head. Once they are aligned, insert the appropriate size bolts into the holes and tighten them with a wrench. Be sure to tighten them securely, but not so tight that you strip the threads or damage the bolts.
Next, attach the spring bars to the hitch head. These are the bars that will help distribute the weight of the trailer to the tow vehicle. There should be two spring bars, one on each side of the hitch head.
Insert the end of each spring bar into the designated slot on the hitch head and secure them in place with the included pins. Now, it’s time to check the tightness of everything. Use a torque wrench to ensure that the bolts on the hitch head are tightened to the manufacturer’s specifications.
Step 2.1: Attach the hitch head to the shank
To complete the installation of your hitch, you need to attach the hitch head to the shank. This is an important step that ensures the stability and proper functioning of your towing setup. The hitch head is the part of the hitch that will hold the trailer coupler and secure it in place.
The shank, on the other hand, is the piece that slides into the receiver hitch on your vehicle. To attach the hitch head to the shank, you will typically need a pair of wrenches or sockets. Start by placing the hitch head onto the shank, making sure that the holes on the head align with the holes on the shank.
Once aligned, insert the bolts into the holes and tighten them securely using the wrenches or sockets. It is important to make sure that the bolts are tightened properly to ensure a secure connection between the hitch head and the shank. Once you have attached the hitch head to the shank, you can then proceed with the rest of the hitch installation process.
This may include attaching the weight distribution bars, installing the sway control system, and connecting the safety chains and electrical connectors. Following the manufacturer’s instructions is crucial to ensure that the hitch is installed correctly and safely. By properly attaching the hitch head to the shank, you are ensuring that your towing setup is secure and stable.
This is crucial for safe towing and minimizing the risk of accidents or trailer sway. Taking the time to properly install your hitch will give you peace of mind knowing that you have taken the necessary steps to ensure a safe and enjoyable towing experience.
Step 2.2: Tighten the bolts or pins to secure the hitch head
When it comes to installing a hitch head on your trailer, one important step is to tighten the bolts or pins to secure the hitch head in place. This ensures that the hitch head is tightly attached to your trailer and provides the necessary stability and security for towing. To tighten the bolts or pins, you’ll first need to locate them on the hitch head.
They are usually located on the sides or at the top of the hitch head. Once you’ve found them, use a wrench or socket set to firmly tighten them. Make sure to use the appropriate size tool for the bolts or pins.
As you tighten the bolts or pins, you’ll want to make sure they are securely fastened but be careful not to overtighten them as this can cause damage to the hitch head or the trailer. Use a moderate amount of force to tighten the bolts or pins until they are snug. After tightening the bolts or pins, give the hitch head a gentle shake to ensure it is securely attached.
If there is any movement or play, go back and check the bolts or pins to ensure they are tightened properly. By taking the time to properly tighten the bolts or pins on your hitch head, you can ensure that it is securely attached to your trailer. This will give you peace of mind while towing and help prevent any accidents or damage.
So don’t forget this important step when installing your hitch head!
Step 3: Attach the spring bars
Now that you have properly mounted the trailer ball to your tow vehicle and adjusted the hitch head, it’s time to move on to the next step: attaching the spring bars. These bars are a crucial component of an equalizer hitch system as they help distribute the weight of the trailer evenly across all axles, resulting in a more stable and controlled towing experience. To attach the spring bars, locate the ends of the bars and insert them into the brackets on the hitch head.
Make sure they are securely seated in the brackets to prevent any slippage during towing. Then, using a wrench or ratchet, tighten the bolts on the brackets to hold the spring bars in place. It’s important to note that the tension on the spring bars should be adjusted according to the weight of your trailer.
This can be done by turning the tension adjusting bolts on the brackets. For heavier trailers, you may need more tension, while lighter trailers may require less. As you adjust the tension, be sure to check the trailer’s level to ensure it is properly balanced.
Once the spring bars are securely attached and the tension is properly adjusted, you’re ready to hit the road with your equalizer hitch system in place!
Step 3.1: Slide the spring bars into the hitch head
Once you have properly positioned and secured the hitch head onto your trailer’s tongue, it’s time to attach the spring bars. These bars are an essential component of a weight distribution hitch as they help distribute the weight evenly between your trailer and towing vehicle, ensuring a safe and stable ride. To attach the spring bars, start by sliding them into the hitch head.
Make sure the bars are aligned with the holes on the hitch head before sliding them in. This may require a bit of force, but be careful not to use excessive pressure as it can damage the hitch head or the spring bars. Once the bars are in place, you will need to insert a pin or clip into the hole to secure them.
This will prevent the bars from sliding out while you’re towing. Remember to double-check that the spring bars are properly attached and securely in place before hitting the road. By following these steps, you can ensure that your weight distribution hitch is set up correctly and functioning effectively.
Happy towing!
Step 3.2: Lock the spring bars into place
When it comes to attaching spring bars to your watch, one important step is locking them into place. So, how exactly do you do that? Well, it’s actually quite simple. Once you have inserted the spring bars into the watch lugs, you need to press them down and inwards towards the center of the watch.
This will engage the notches on the spring bars with the inside of the watch lugs, creating a secure and tight fit. It’s kind of like when you lock a puzzle piece into place. The spring bars will click into position, ensuring that your watch strap or bracelet is securely attached to your watch.
And just like that, you have successfully attached the spring bars to your watch. It may seem like a small step, but it’s an important one that ensures your watch strap stays in place.
Step 4: Connect the weight distribution bars
Now that you have properly adjusted the height of your equalizer hitch, the next step is to connect the weight distribution bars. These bars play a crucial role in evenly distributing the weight of your trailer or camper across all four tires of your towing vehicle, ensuring a safe and smooth towing experience. To connect the weight distribution bars, start by placing the appropriate size wrench on the bolt located on the end of the weight distribution bar.
Tighten the bolt by turning it clockwise until the bar is securely in place. Next, locate the L-brackets on the trailer frame and attach the chains or brackets from the weight distribution bars to these L-brackets. Make sure to tighten the chains or brackets securely to ensure maximum stability and weight distribution.
Once the weight distribution bars are securely attached, it’s important to check that they are level and parallel to the ground. This can be done by using a level or simply eyeballing it. Adjust the chains or brackets as needed to achieve a level and parallel position.
Remember to always refer to the manufacturer’s instructions for your specific weight distribution hitch system, as the attachment process may vary slightly. It’s also a good idea to periodically check the tightness of the bolts and chains throughout your trip to ensure they remain secure. By properly connecting the weight distribution bars, you are taking an important step in maintaining a properly balanced and safe towing setup.
Step 4.1: Attach the chains to the spring bars
In Step 4 of connecting weight distribution bars, the next sub-step is to attach the chains to the spring bars. These chains play a crucial role in distributing the weight of the trailer evenly on the tow vehicle. They connect the spring bars to the trailer’s frame and help to provide stability and balance while towing.
To attach the chains, start by securing the spring bars to the trailer’s frame using the provided hardware. Make sure they are securely in place before proceeding. Then, attach the chains to the hooks on the spring bars.
The chains should be long enough to allow for some flexibility but not too loose that they drag on the ground. Adjust the chains accordingly to achieve the proper tension. It’s important to properly attach the chains to ensure that the weight distribution system functions effectively.
If the chains are too loose, the weight of the trailer may not be distributed evenly, putting additional strain on the tow vehicle. On the other hand, if the chains are too tight, it may restrict the movement of the trailer, leading to instability. A good way to check if the chains are properly attached is to measure the distance between the chains and the ground on both sides of the trailer.
The measurements should be the same, indicating that the weight distribution system is balanced. If there is any discrepancy, adjust the chains accordingly until the measurements match. Remember, proper weight distribution is crucial for safe and smooth towing.
Taking the time to accurately attach the chains to the spring bars will help to ensure a comfortable and secure towing experience.
Step 4.2: Tighten the chains to distribute the weight
When it comes to towing heavy loads, it’s essential to distribute the weight evenly to ensure safe and stable towing. One important step in this process is connecting the weight distribution bars. These bars help to tighten the chains and distribute the weight more evenly between the towing vehicle and the trailer.
By doing so, they help to reduce the amount of weight being placed on the rear axle of the towing vehicle, which can cause it to sag and impact the vehicle’s handling and braking capabilities. The weight distribution bars work by transferring some of the weight from the rear axle of the towing vehicle to the front axle and the axle of the trailer, creating a more balanced load. This not only improves the stability of the towing setup but also helps to improve overall control and handling while towing.
So, when connecting the weight distribution bars, be sure to adjust them properly to ensure that the weight is evenly distributed and that your towing setup is safe and secure.
Step 5: Adjust the tension
Setting up an equalizer hitch can greatly improve the towing experience by distributing weight evenly between the towing vehicle and the trailer. One important step in this process is adjusting the tension of the hitch. This ensures that the weight is properly distributed and the towing vehicle and trailer are level.
To adjust the tension, start by measuring the height of the front and rear of the towing vehicle with and without the trailer attached. If the front of the vehicle is lower when the trailer is hitched, you will need to increase the tension. On the other hand, if the rear of the vehicle is lower, you will need to decrease the tension.
Adjust the tension by turning the jackscrews on both sides of the hitch head. Keep adjusting and measuring until the towing vehicle and trailer are level. It’s important to note that the tension may need to be readjusted once you start driving and get a feel for how the combination handles.
Step 5.1: Measure the height of the front and rear fenders
When it comes to adjusting the tension on a vehicle’s suspension system, one important step is to measure the height of the front and rear fenders. This step is crucial in ensuring that the vehicle is properly leveled and balanced. The height of the fenders can give you an indication of how the suspension is performing and if any adjustments need to be made.
To measure the height of the fenders, you’ll need a tape measure or ruler. Start by measuring the distance from the ground to the top of the front fenders. Then, move to the rear of the vehicle and measure the distance from the ground to the top of the rear fenders.
Ideally, the front and rear fenders should be at around the same height. If one side is higher than the other, it could indicate that the suspension is too tight or too loose on that side. In this case, you’ll need to make adjustments to the suspension to level out the vehicle.
Adjusting the tension on a suspension system can greatly improve the performance and handling of a vehicle. It can help to reduce body roll, improve traction, and provide a smoother ride. By taking the time to measure the height of the front and rear fenders, you can ensure that your suspension is properly adjusted and that your vehicle is performing at its best.
Step 5.2: Adjust the tension of the weight distribution bars
In Step 2 of adjusting the tension of the weight distribution bars, it’s important to find the right balance to ensure proper weight distribution for your towing setup. The tension of the weight distribution bars can be adjusted by either increasing or decreasing the tension on the spring bars.
This can be done by adjusting the number of links that are engaged with the trailer tongue and the hitch head. By increasing the tension, the weight can be distributed more evenly between the trailer and the towing vehicle. Conversely, by decreasing the tension, more weight will be placed on the towing vehicle and less on the trailer.
Finding the optimal tension will depend on the weight of the trailer, the weight of the towing vehicle, and how they are connected. It may take some trial and error to find the right tension, but it’s important to ensure a safe and stable towing experience.
Conclusion: A Comprehensive Guide to Writing an Effective Conclusion Have you ever struggled with crafting a compelling conclusion for your essays or articles? If so, you’re not alone. Writing a strong conclusion can be a challenging task, as it requires summarizing your main points, leaving a lasting impression on the reader, and providing a sense of closure. But fear not, because in this comprehensive guide, we will take you through the steps to writing an effective conclusion that will leave your readers satisfied and impressed.
So, grab your pen and paper, and let’s dive in! Picture your conclusion as the final piece of a jigsaw puzzle – it’s the missing piece that completes the picture. Just as the puzzle can’t be fully appreciated without this piece, your piece of writing won’t be complete without a well-crafted conclusion. It’s the last opportunity to make a lasting impression on your reader and leave them with a sense of fulfillment.
So, how do you write an effective conclusion? The first step is to summarize your main points. Remind your reader of the key ideas and arguments you have presented throughout your piece. However, make sure not to repeat them verbatim.
Instead, rephrase and condense your main points, emphasizing the most important aspects. But a good conclusion is more than just a summary. It should also provide a sense of closure, tying up any loose ends and leaving your reader with a feeling of satisfaction.
Think of it like the end of a movie – you want to leave your audience with a sense of resolution and fulfillment. To achieve this, consider the larger implications of your work. How does it connect to larger themes or ideas? What are the broader implications or potential future developments? By addressing these questions, you can give your conclusion a sense of depth and significance.
Another important aspect of a strong conclusion is leaving your reader with a memorable final thought. This can be achieved through a thought-provoking question, a compelling quote, or an impactful statement. It’s your chance to leave a lasting impression on your reader and ensure that your piece sticks in their mind long after they’ve finished reading.
Test the setup
Are you ready to hit the road with your trailer, but not sure how to properly set up an equalizer hitch? Don’t worry, we’ve got you covered. Setting up an equalizer hitch is essential for a smooth and safe towing experience. First, you’ll want to start by positioning your tow vehicle and trailer on a flat surface.
Next, attach the hitch ball to the ball mount on your tow vehicle and ensure it is securely tightened. Then, connect the trailer coupler to the hitch ball, making sure it is properly locked in place. Now it’s time to adjust the weight distribution bars.
These bars help distribute the weight evenly between your tow vehicle and trailer. Start by tightening the brackets on the bars, making sure they are secure. Then, use a pry bar or tension wrench to lift the weight distribution bars up and engage the brackets.
Finally, tighten the bolts on the brackets to secure the bars in place. Once everything is set up, take a test drive to ensure the hitch is working properly. Pay attention to how the trailer feels, making sure it is level and not swaying excessively.
If you notice any issues, such as excessive bouncing or instability, you may need to make further adjustments. By following these steps and taking the time to properly set up your equalizer hitch, you can have peace of mind knowing that you are towing your trailer safely and securely.
Practice makes perfect
Setting up an equalizer hitch may seem daunting at first, but with a little practice, you’ll become a pro in no time. An equalizer hitch is a device that helps distribute the weight of a trailer evenly onto the towing vehicle. This helps with stability and control while towing, especially if you’re hauling a heavy load.
To set up an equalizer hitch, start by attaching the hitch to your vehicle’s receiver. Then, adjust the height of the hitch ball so that it is level with the trailer coupler when the vehicle is on a level surface. Next, attach the spring bars to the hitch head and adjust the tension, making sure there is enough weight on the front of the tow vehicle.
Finally, double-check all connections and make any necessary adjustments before hitting the road. Remember, practice makes perfect, so don’t be discouraged if it takes a few tries to get it just right. With a little patience and persistence, you’ll soon be towing like a pro.
Conclusion
And there you have it, folks! Setting up an equalizer hitch is like finding the perfect balance in life – it may take a little time and effort, but the end result is worth it. Just like a good relationship, this hitch ensures that your trailer and tow vehicle are in sync, working together harmoniously to create a smooth ride. So next time you hit the road, remember to embrace the art of balance and set up your equalizer hitch like a pro.
Happy towing!
FAQs
What is an equalizer hitch and why do I need one?
An equalizer hitch is a device used in towing trailers to distribute the weight evenly between the trailer and the towing vehicle. It helps improve stability, control, and safety while towing.
How does an equalizer hitch work?
An equalizer hitch uses tensioned spring bars to transfer part of the tongue weight of the trailer to the front axle of the towing vehicle. This helps level the trailer and the tow vehicle, creating a more balanced and stable towing experience.
How do I know what size equalizer hitch I need for my trailer?
The size of the equalizer hitch needed depends on the weight of the trailer and the towing capacity of your vehicle. It is recommended to consult the owner’s manual of your trailer and the manufacturer’s guidelines for the hitch to determine the correct size.
Can I install an equalizer hitch myself?
While it is possible to install an equalizer hitch yourself, it is recommended to have it done by a professional to ensure it is installed correctly and safely. Improper installation can lead to improper weight distribution and potential towing issues.
How often should I inspect and maintain my equalizer hitch?
It is important to regularly inspect and maintain your equalizer hitch to ensure its proper functioning. This includes checking for any signs of wear on the spring bars, chains, and other components, as well as lubricating the necessary parts as per the manufacturer’s instructions. It is recommended to inspect and maintain your equalizer hitch before each towing trip.
Can I use an equalizer hitch for any type of trailer?
Equalizer hitches are designed for specific weight capacities and trailer types. It is important to choose the correct hitch that is compatible with your trailer’s weight and towing requirements. There are different types of equalizer hitches available for different trailer setups, such as travel trailers, fifth-wheel trailers, and boat trailers.
Are there any additional accessories or modifications needed for using an equalizer hitch?
In some cases, additional accessories or modifications may be required depending on the specific setup of your towing vehicle and trailer. These can include sway control devices, frame brackets, or hitch shanks with appropriate drop or rise to achieve a level towing setup. It is recommended to consult with a professional or the manufacturer to determine if any additional accessories or modifications are necessary for your setup.