
Are you ready to take your towing experience to the next level? If you want to ensure a smooth and safe journey while towing a heavy load, then setting up an equalizer hitch is a must. This step-by-step guide will walk you through the process, making it easy for even beginners to set up a hitch like a pro. Just like a well-tuned instrument, an equalizer hitch balances the weight between your towing vehicle and the trailer, resulting in improved stability, control, and overall towing performance.
So, grab your wrench and let’s dive into the world of equalizer hitches!
Table of Contents
Introduction to Equalizer Hitches
Setting up an equalizer hitch can make a significant difference in the towing experience and safety of your vehicle. But how exactly do you set up an equalizer hitch? Well, it’s not as complicated as it may seem. First, you’ll need to properly assemble the hitch, making sure all the components are in place and securely tightened.
Next, attach the hitch head to the trailer ball and adjust it to the proper height. This will ensure that the weight of the trailer is distributed evenly across the tow vehicle and trailer axles. Then, connect the spring bars to the hitch head and adjust the tension to achieve the desired amount of weight distribution.
Finally, double-check all the connections and make sure everything is secure before hitting the road. By following these simple steps, you’ll be able to set up an equalizer hitch and enjoy a smoother, safer towing experience.
What is an equalizer hitch?
equalizer hitch. An equalizer hitch is a device used to distribute the weight of a trailer evenly across the towing vehicle. It is particularly useful when towing heavy trailers, such as travel trailers or caravans, as it helps to improve stability and control.
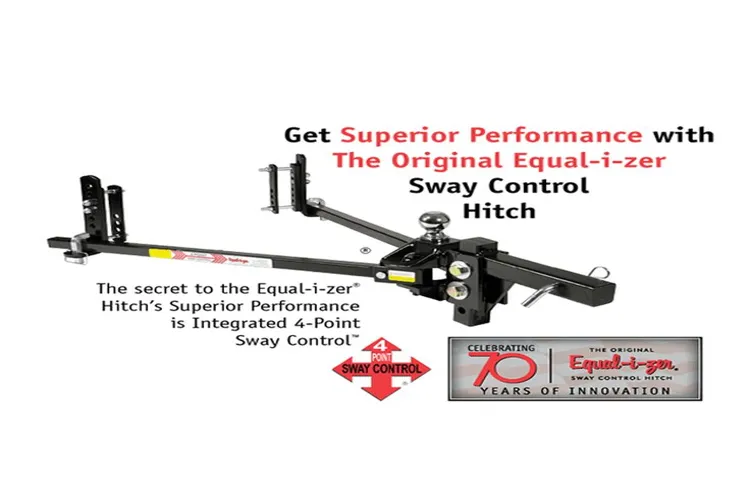
The hitch consists of a receiver, a weight distribution head, spring bars, and brackets. When a trailer is attached to a vehicle, it can cause the front of the vehicle to lift, reducing steering control and increasing the risk of swaying. An equalizer hitch solves this problem by transferring some of the trailer’s tongue weight to the front of the vehicle and the trailer’s axles.
This weight distribution helps to maintain the balance between the vehicle and the trailer, making it easier to control the entire rig. One of the key features of an equalizer hitch is its ability to reduce sway. This is achieved through the use of sway control devices such as friction sway bars or integrated sway control.
These devices work by dampening the side-to-side movement of the trailer, allowing for a smoother and more controlled towing experience. In addition to weight distribution and sway control, an equalizer hitch also helps to improve the overall ride quality while towing. By evenly distributing the weight, it reduces the strain on the towing vehicle’s suspension and brakes, resulting in a smoother and more comfortable ride.
This is especially important when towing over long distances or on uneven terrain. In conclusion, an equalizer hitch is a valuable tool for towing heavy trailers. It helps to distribute the weight evenly, improve stability, control sway, and enhance the overall towing experience.
If you are planning on towing a trailer, especially a heavy one, investing in an equalizer hitch is definitely worth considering.
Why do you need an equalizer hitch?
equalizer hitch
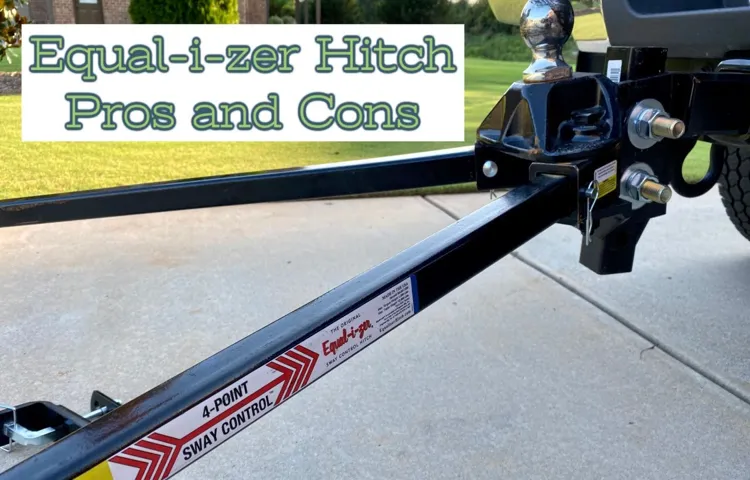
Benefits of using an equalizer hitch
Equalizer hitch An equalizer hitch is a device that is used to distribute the weight of a trailer evenly across the axles of the towing vehicle. This helps to improve stability and control while towing, making it a valuable tool for anyone who frequently tows heavy loads. One of the main benefits of using an equalizer hitch is that it helps to reduce the amount of sway that can occur when towing a trailer.
Sway can be extremely dangerous, especially at high speeds, as it can lead to loss of control and potentially cause an accident. By evenly distributing the weight of the trailer across the axles of the towing vehicle, an equalizer hitch helps to minimize sway and keep the trailer in line with the vehicle. Another benefit of using an equalizer hitch is that it helps to improve braking performance.
When towing a heavy load, the additional weight can put a strain on the towing vehicle’s braking system, making it more difficult to stop quickly and safely. An equalizer hitch can help to alleviate this strain by evenly distributing the weight across all of the axles, ensuring that each wheel is able to contribute to the braking process effectively. This can help to reduce stopping distances and improve overall safety while towing.
Additionally, an equalizer hitch can help to improve the overall ride quality while towing. By evenly distributing the weight of the trailer, an equalizer hitch can help to reduce the amount of bouncing and bouncing that can occur while driving, leading to a smoother and more comfortable towing experience. Overall, using an equalizer hitch is a smart decision for anyone who frequently tows heavy loads, as it can help to improve stability, control, braking performance, and overall ride quality.
Choosing the Right Equalizer Hitch
If you’re towing a trailer, it’s crucial to properly set up an equalizer hitch to ensure a safe and smooth ride. An equalizer hitch is a device that helps distribute the weight of the trailer evenly across all four wheels of the towing vehicle. This not only improves stability but also helps prevent swaying or bouncing during the journey.
So, how do you set up an equalizer hitch correctly? First, you need to determine the proper tongue weight for your particular trailer. This can usually be found in the trailer’s owner’s manual or by contacting the manufacturer. Once you have this information, you can adjust the tension on the equalizer bars to match the tongue weight.
It’s important to start with a level towing vehicle and trailer, as this will make it easier to achieve the right tension. Remember, it may take a few adjustments to get it just right, so be patient and take your time. Ultimately, setting up an equalizer hitch correctly will greatly enhance your towing experience and give you peace of mind on the road.
Determining your trailer weight and tongue weight
Choosing the Right Equalizer Hitch When it comes to towing a trailer, it’s important to choose the right equalizer hitch for your needs. An equalizer hitch is designed to distribute the weight of the trailer evenly across the axles of the towing vehicle, helping to improve stability and control. This is especially important when towing larger trailers or carrying heavy loads.
To determine the right equalizer hitch for your trailer, you need to consider its weight and tongue weight. The trailer weight refers to the total weight of the trailer, including everything that is being towed. The tongue weight, on the other hand, refers to the downward force exerted on the hitch ball by the trailer’s coupler.
This weight should typically be around 10-15% of the trailer’s total weight. Once you know the weight and tongue weight of your trailer, you can choose the right equalizer hitch. Different hitches are rated for different weight capacities, so it’s important to find one that can handle the weight of your specific trailer.
The hitch should also have adjustable spring bars that can be tensioned to distribute the weight evenly. When selecting an equalizer hitch, it’s also important to consider the towing vehicle’s weight and capacity. The hitch should be rated to handle the combined weight of the trailer and the towing vehicle.
Additionally, the hitch should be compatible with the towing vehicle’s hitch receiver and ball size. In conclusion, choosing the right equalizer hitch is crucial for safe and stable towing. Make sure to consider the weight and tongue weight of your trailer, as well as the towing vehicle’s weight and capacity.
Finding the right hitch will help improve your towing experience and give you peace of mind on the road.
Understanding weight distribution and sway control
equalizer hitch, weight distribution, sway control, choosing the right hitch
Considering the vehicle and trailer compatibility
“equalizer hitch” Choosing the right equalizer hitch is crucial when it comes to vehicle and trailer compatibility. This is because the equalizer hitch plays a significant role in distributing the weight between the vehicle and the trailer, ensuring a balanced and safe towing experience. So, how do you choose the right one? Well, there are a few factors to consider.
First and foremost, you need to know the weight of your trailer and the towing capacity of your vehicle. These numbers will help you determine the appropriate weight rating for your equalizer hitch. It’s also essential to consider the type of trailer you have.
Different trailers have different hitching systems, so you want to make sure your equalizer hitch is compatible with your trailer’s coupler. Additionally, the type of terrain you’ll be towing on should be taken into account. If you’re planning on towing through rough terrains, you might want to opt for a more heavy-duty equalizer hitch.
Finally, don’t forget about ease of installation. Look for an equalizer hitch that is easy to set up and adjust, as this will make your towing experience hassle-free. By considering these factors, you can ensure that you choose the right equalizer hitch for your vehicle and trailer combination, providing you with a safe and smooth towing journey.
Gathering the Necessary Tools and Equipment
So, you’ve finally decided to invest in an equal-izer hitch for a smoother towing experience. That’s great! But now comes the step of setting it up. Don’t worry; it’s not as complicated as it may seem.
The first thing you’ll need to do is gather the necessary tools and equipment. The most important tool you’ll need is a wrench or socket set, as you’ll be using this to tighten the bolts on the equal-izer hitch. You’ll also need a measuring tape to ensure that everything is set up properly and aligned correctly.
Additionally, you’ll want to have some lubricant on hand to make it easier to install and adjust the hitch. And finally, a jack and jack stands will be essential for lifting and stabilizing your trailer while you’re working on the hitch. With these tools and equipment at the ready, you’ll be well-prepared to set up your equal-izer hitch and start enjoying a smoother towing experience in no time.
List of tools and equipment needed
When it comes to starting a new DIY project, gathering the necessary tools and equipment is a crucial first step. Having the right tools at hand can make your project go smoothly and efficiently. So, what exactly do you need? Firstly, a basic toolkit is essential.
This should include a hammer, screwdrivers (both flathead and Phillips), pliers, adjustable wrenches, and a measuring tape. Additionally, you may need specific tools depending on the project. For example, if you’re working with wood, you’ll need a saw, chisels, and a sander.
If you’re doing electrical work, you’ll need wire cutters, wire strippers, and electrical tape. Safety equipment is also important, such as safety glasses, gloves, and a mask. It’s important to assess your project and make a comprehensive list of all the tools and equipment you’ll need before you get started.
This way, you won’t face any surprises halfway through and you’ll be fully prepared to tackle your DIY project head-on.
Tips for preparing your workspace
When it comes to setting up your workspace, it’s essential to gather the necessary tools and equipment that will help you be productive and organized. One of the first things to consider is having a suitable desk or table that provides enough space for your work activities. Additionally, invest in a comfortable chair that supports your posture and allows you to work for extended periods without discomfort.
Other tools to consider include a computer or laptop, mouse, keyboard, and monitor. These are essential for most modern work tasks. If your work requires writing or drawing, you may also need a notepad, pens, and pencils.
Depending on your job, you may need additional tools such as a printer, scanner, or specialized software. Think about what tasks you perform regularly and ensure you have all the necessary tools and equipment to support your work.
Installation Steps
Setting up an equal-izer hitch may seem like a daunting task, but it’s actually quite straightforward. Here is a step-by-step guide to help you get started. First, begin by positioning your tow vehicle and trailer on level ground and make sure they are in a straight line.
Next, insert the shank into the hitch receiver on your tow vehicle, ensuring that it is secure and locked in place. Then, adjust the height of the hitch head to match the trailer’s coupler height. This can be done by tightening or loosening the bolts on the hitch head.
Once the height is adjusted, attach the spring bars to the hitch head and coupler using the provided clips or pins. Make sure they are securely fastened. Finally, connect the chains to the brackets on both sides of the hitch head, ensuring that they are crossed and have enough slack to allow for turns.
And voila! Your equal-izer hitch is now properly set up and ready for towing. Happy travels!
Attaching the receiver and ball mount to the tow vehicle
When it comes to attaching the receiver and ball mount to your tow vehicle, there are a few important installation steps to follow. First, you’ll want to make sure you have the correct receiver for your vehicle. This is the part that attaches to the frame of your vehicle and provides the connection point for the ball mount.
It’s important to choose a receiver that is compatible with the weight capacity of your vehicle and the trailer you’ll be towing. Once you have the receiver, you can start the installation process. This usually involves removing any existing parts from the rear of your vehicle, such as a bumper or hitch cover.
Once these are removed, you can attach the receiver to the frame using the provided hardware. Make sure to tighten the bolts securely to ensure a strong and stable connection. Once the receiver is installed, you can attach the ball mount.
This is the part that connects to the receiver and provides the attachment point for the trailer. Simply slide the ball mount into the receiver and secure it with a pin or lock. It’s important to choose the correct size ball for your trailer’s coupler, as this will ensure a proper fit.
With the receiver and ball mount securely attached, you’re ready to tow! Remember to always double-check your connections and make sure everything is properly secured before hitting the road.
Securing the weight distribution bars to the hitch head
When it comes to securing weight distribution bars to the hitch head of your trailer, it’s important to follow the proper steps to ensure a safe and secure connection. The first step is to make sure the hitch head is properly aligned with the trailer coupler and that both are at the right height. Once they are aligned, the next step is to lock the hitch head into place using the locking pin or bolt provided.
This will keep the hitch head from coming loose during transit. Once the hitch head is secure, you can then attach the weight distribution bars to the hitch head. These bars are designed to evenly distribute the weight of the trailer across all axles, improving stability and control while towing.
To attach the bars, simply slide them into the brackets on the hitch head and secure them in place using the clips or pins provided. It’s important to make sure the bars are properly seated in the brackets and that they are secure before hitting the road. Once everything is secure, double-check all connections and make any necessary adjustments before towning.
This will help ensure a safe and smooth towing experience.
Adjusting the height and angle of the hitch head
When it comes to towing a trailer, properly adjusting the height and angle of the hitch head is crucial for a safe and smooth towing experience. The installation process involves a few simple steps to ensure that the hitch head is set at the optimal height and angle for both your vehicle and trailer. Firstly, you will need to determine the correct height by measuring the height of your trailer’s coupler and subtracting it from the height of your vehicle’s hitch receiver.
This will give you an idea of how much you need to adjust the hitch head. Next, you will need to loosen the bolts or pins that secure the hitch head to the hitch receiver. Once the bolts or pins are loosened, you can adjust the height of the hitch head using the built-in adjustment mechanism.
It’s important to make small adjustments and check the height frequently to ensure that it is level. Additionally, you may need to adjust the angle of the hitch head to ensure that it is properly aligned with the trailer’s coupler. This can be done by loosening the angle adjustment bolts and pivoting the hitch head as needed.
Once you have adjusted the height and angle to your satisfaction, tighten the bolts or pins to secure the hitch head in place. It’s always a good idea to double-check your adjustments and make any necessary tweaks before hitting the road. With the height and angle of the hitch head properly adjusted, you can tow your trailer with confidence, knowing that it is securely attached to your vehicle.
Connecting the weight distribution bars to the hitch receiver
“Connecting the weight distribution bars to the hitch receiver” Installation steps Installing weight distribution bars to your hitch receiver is a crucial step in ensuring a smooth and safe towing experience. These bars help distribute the weight of your trailer evenly across all axles, improving stability and reducing strain on your vehicle. To connect the weight distribution bars, follow these simple steps:
Begin by aligning the hitch receiver with the trailer tongue. Ensure that the hitch ball is properly secured and locked into place.
Attach the weight distribution shank to the hitch receiver, making sure it is tightly secured. Use the appropriate wrench or socket to tighten the bolts and ensure a firm connection.
Slide the weight distribution bars onto the weight distribution shank. These bars should fit snugly onto the shank and be parallel to the ground when the trailer is unhitched. Make sure they are evenly spaced on both sides of the shank.
Use the provided clips or pins to secure the weight distribution bars to the shank. These clips or pins should be inserted through the holes on the shank and the bars, ensuring a tight fit.
Adjust the tension on the weight distribution bars using the built-in tensioning system. This system allows you to control the amount of weight distribution and should be adjusted according to the manufacturer’s guidelines.
Setting the torque for the bolts and nuts
Setting the torque for the bolts and nuts is an important step in installing various mechanical components. Torque refers to the twisting force that is applied to tighten a bolt or nut. It is crucial to set the correct torque to ensure that the bolt or nut is securely fastened without being over-tightened or under-tightened.
This is especially important for parts that experience high levels of vibration or those that carry heavy loads. To set the torque for bolts and nuts, it is essential to refer to the manufacturer’s specifications. These specifications can usually be found in the installation manual or technical documentation provided by the manufacturer.
It is important to note that different components may have different torque requirements, so it is crucial to use the correct specifications for each specific application. One common tool used to set the torque for bolts and nuts is a torque wrench. A torque wrench allows the user to apply a specific amount of force to tighten the fastener accurately.
When using a torque wrench, it is important to set the wrench to the appropriate torque setting as specified by the manufacturer. This can usually be done by adjusting the tension on the wrench or by using a preset torque wrench. To set the torque correctly, it is important to follow the proper tightening sequence.
This sequence ensures that the load is evenly distributed across the fasteners and prevents uneven stress on the component. When tightening bolts and nuts in a sequence, it is important to tighten each one incrementally, moving from one to the next until the desired torque is reached. Setting the torque for bolts and nuts is a critical step in the installation process.
By following the manufacturer’s specifications and using the appropriate tools, you can ensure that the fasteners are properly tightened and the component is securely installed. This not only helps to prevent failures and damage but also ensures the safety and functionality of the equipment or machinery. So next time you’re working on installing a mechanical component, don’t forget to set the torque for the bolts and nuts!
Proper Adjustment and Testing
Setting up an equalizer hitch can be a bit daunting if you’ve never done it before, but with the right knowledge and a little practice, it can be a relatively easy process. The first step is to ensure that your trailer and tow vehicle are on level ground. This will help to keep the weight distribution equal between the two and prevent any potential balance issues while towing.
Next, you’ll want to attach the hitch head to the trailer’s tongue, making sure it is secure and tight. Once the hitch head is attached, you can begin adjusting the spring bars to achieve the proper weight distribution. This is where the equalizer part comes into play.
You’ll want to adjust the tension on the bars so that the front and rear axles of your tow vehicle are level. This will help to prevent sagging or swaying while towing. Finally, it’s important to test the setup by taking a short test drive.
Pay attention to how the trailer feels and handles, and make any necessary adjustments to the spring bars if needed. Overall, setting up an equalizer hitch may take a little bit of time and practice, but once you get the hang of it, it will become second nature. So, don’t be afraid to give it a try and hit the road with confidence knowing that your trailer is properly adjusted and secure.
Leveling the trailer and tow vehicle
Proper adjustment and testing are essential when it comes to leveling the trailer and tow vehicle. When setting up your trailer, it’s important to ensure that it is level from front to back and side to side. This will help with weight distribution and improve stability while towing.
To level your trailer, start by hitching it to your tow vehicle and parking on a level surface. Use a leveling tool, such as a bubble level or smartphone app, to check the level of your trailer. Adjust the height of your hitch or add leveling blocks under the tires as needed to achieve a level position.
Once the trailer is level, it’s important to test the weight distribution. A properly distributed load will help prevent swaying and improve overall towing performance. To test the weight distribution, load your trailer as you normally would for a trip and measure the distance between the hitch and the ground.
This measurement should be the same both before and after loading. If the measurement is significantly different, you may need to adjust the weight distribution by redistributing items or adding weight to the front or back of the trailer. When everything is properly adjusted, take your trailer and tow vehicle for a short test drive.
Pay attention to how the trailer feels while driving, making note of any swaying or instability. If you experience any issues, you may need to readjust the weight distribution or consider using a weight distribution hitch. Taking the time to properly level your trailer and adjust the weight distribution will greatly enhance your towing experience.
It will improve stability, control, and overall safety while on the road. So, don’t skip these important steps and ensure a smooth and enjoyable journey.
Verifying the weight distribution and eliminating sway
When it comes to towing heavy loads, ensuring proper weight distribution and eliminating sway are crucial for a safe and stable journey. One of the most important steps is adjusting the weight distribution hitch correctly. This involves making sure that the weight of the trailer is evenly distributed between the tow vehicle and the trailer axles.
By doing so, you can prevent the front or rear of the towing vehicle from being weighed down, which can lead to instability and sway. Once you have adjusted the weight distribution hitch, it is important to test it to ensure that it is working effectively. This can be done by taking a test drive and paying attention to how the trailer feels.
If you notice any sway or instability, it may be necessary to make further adjustments to the weight distribution or to address any other potential issues. By properly adjusting and testing the weight distribution, you can enjoy a safer and more stable towing experience.
Making final adjustments and testing out the hitch
“Making final adjustments and testing out the hitch” When it comes to hitching up your trailer, it’s important to make sure you’ve got everything set up properly before hitting the road. This includes making the necessary adjustments to ensure a secure and safe connection between your vehicle and the trailer. One of the key adjustments you’ll need to make is ensuring that the hitch ball height matches the coupler height on the trailer.
This is crucial for maintaining a level and balanced towing experience. You can adjust the hitch ball height by either raising or lowering the hitch ball mount. It’s also important to double-check that the hitch ball is securely tightened onto the ball mount.
The last thing you want is for it to come loose while you’re on the road. Once you’ve made these adjustments, it’s time to put them to the test. Hook up your trailer to your vehicle and take it for a short test drive.
Pay attention to how the trailer responds and make any necessary fine-tuning adjustments. This can include checking the trailer’s stability, brake lights, and turning radius. By taking the time to make these final adjustments and thoroughly test your hitch setup, you can ensure a smooth and stress-free towing experience.
Maintenance and Inspection
Setting up an equal-izer hitch is an essential step in ensuring a safe and smooth towing experience. To begin, you’ll want to make sure you have all the necessary tools and equipment on hand. This typically includes the equal-izer hitch itself, as well as a hitch ball and a wrench.
The first step is to position the trailer and tow vehicle in a straight line, making sure they are on level ground. Next, attach the equal-izer hitch head to the trailer hitch receiver using the appropriate sized tightening bolt. It’s important to ensure that the hitch is securely attached and tightened to prevent any movement during towing.
Once the hitch head is in place, you’ll need to attach the spring bars to the hitch head. These bars are responsible for distributing the weight of the trailer evenly across all four wheels of the tow vehicle, improving stability and control. To attach the spring bars, simply insert them into the hitch head and secure them with the provided pins or clips.
After the spring bars are attached, it’s time to connect the trailer to the tow vehicle. Back the tow vehicle up until the hitch ball is directly under the trailer coupler. Lower the trailer coupler onto the hitch ball, ensuring that it is fully seated and locked into place.
Finally, it’s important to properly tension the spring bars. This can be done using the provided tension adjustment tool. Start by loosening the tension and then gradually tighten it until the trailer and tow vehicle are level.
It’s important to not over-tighten the bars, as this can put unnecessary stress on the hitch and towing system. Once everything is properly set up, it’s a good idea to do a final inspection of all the connections and ensure that everything is secure. Additionally, be sure to check the tire pressure and overall condition of both the tow vehicle and trailer before hitting the road.
Regular maintenance tasks for the equalizer hitch
equalizer hitch, regular maintenance tasks, maintenance and inspection Blog Section: When it comes to towing heavy loads with your vehicle, having an equalizer hitch can make all the difference in ensuring a safe and smooth ride. However, like any other mechanical component, it requires regular maintenance to keep it in optimal working condition. Regular maintenance and inspection of your equalizer hitch will not only extend its lifespan but also help prevent any accidents or breakdowns on the road.
One of the most important tasks in maintaining your equalizer hitch is lubrication. It’s crucial to keep all the moving parts well lubricated to reduce friction and prevent excessive wear and tear. Apply grease to the spring bars, hinge points, and any other areas where metal components rub against each other.
Make sure to use a high-quality grease that is specifically designed for trailer hitches. Another key aspect of maintenance is checking for any signs of damage or wear. Inspect the equalizer hitch for any cracks, dents, or bent components.
Pay close attention to the spring bars, as they bear the brunt of the load and can be prone to wear. If you notice any signs of damage, it’s essential to address them promptly to avoid any issues while towing. Additionally, make sure to inspect the weight distribution system.
Check the tension on the chains or spring bars to ensure they are properly distributing the weight between your trailer and vehicle. Adjust the tension as needed to maintain a level ride and prevent excessive sway. Lastly, always clean your equalizer hitch after every use.
Washing off any dirt, debris, or road salt will help prevent corrosion and rust. Use a mild soap and water solution to clean the hitch thoroughly, and make sure to dry it off completely to prevent moisture from causing damage. By following these regular maintenance tasks and performing thorough inspections, you can ensure that your equalizer hitch is always in top-notch condition.
Performing safety inspections before every trip
Performing safety inspections before every trip is crucial for maintaining the overall safety and condition of your vehicle. By taking the time to inspect your vehicle before hitting the road, you can identify any potential issues or maintenance needs that could pose a threat to your safety. During these inspections, it’s important to check all the key areas of your vehicle, such as the tires, brakes, lights, and fluid levels.
Are the tires properly inflated and in good condition? Are the brakes functioning properly and not showing any signs of wear? Are all the lights – including headlights, taillights, and turn signals – working as they should? Are the fluid levels, such as oil, coolant, and washer fluid, at the appropriate levels? By thoroughly inspecting these areas and addressing any issues or maintenance needs before your trip, you can help prevent potential breakdowns or accidents on the road. Plus, it’s a good practice to develop as part of your regular maintenance routine. In the long run, performing safety inspections can save you time, money, and potentially even your life.
So, before you hop in your vehicle for your next adventure, take a few minutes to perform a quick safety inspection – you’ll be glad you did!
Troubleshooting common issues and solutions
When it comes to maintaining and inspecting your equipment, there are a few common issues that you may come across. One of the most common issues is wear and tear. Over time, equipment can become damaged or worn out, which can affect its performance.
It’s important to regularly inspect your equipment for any signs of damage, such as cracks, leaks, or loose parts. By catching these problems early, you can prevent further damage and avoid costly repairs. Another issue that you may encounter is improper lubrication.
Many types of equipment require regular lubrication to function properly. If you neglect to lubricate your equipment or use the wrong type of lubricant, it can lead to increased friction and wear. Make sure to follow the manufacturer’s recommendations for lubrication and regularly check the levels to ensure that they are at the appropriate levels.
Electrical issues are also common problems that can arise with equipment. Faulty wiring, loose connections, or power surges can all affect the performance of your equipment. Regularly inspecting the electrical components of your equipment and checking for any signs of damage or wear can help prevent these issues.
It’s also a good idea to have a qualified electrician inspect your electrical system on a regular basis to ensure that everything is in proper working order. In addition to these common issues, it’s also important to regularly clean and maintain your equipment. Dirt, dust, and debris can accumulate over time, which can clog filters, vents, and other vital components.
Regular cleaning can help prevent these blockages and ensure that your equipment is functioning at its best. By conducting regular maintenance and inspections, you can catch any issues early on and prevent further damage or performance issues. Taking the time to properly care for your equipment will not only extend its lifespan but also ensure that it continues to work efficiently and effectively.
Conclusion
So, there you have it – the not-so-secret guide to setting up an equalizer hitch. Now that you’ve navigated through the world of hitches, weight distribution, and tension bars, you too can achieve the perfect balance of towing prowess and adventurous flair. Setting up an equalizer hitch is like finding the perfect dance partner – it takes skill, finesse, and some smooth moves.
Just as an orchestra conductor ensures that every instrument plays in harmony, an equalizer hitch ensures that your trailer and vehicle work together in perfect harmony. Think of your equalizer hitch as the magic wand that transforms your towing experience from chaotic to enchanting. By redistributing weight, distributing tension, and ensuring a balanced connection, it whispers sweet symphonies of stability and control.
By following these steps, you’ll be setting up your equalizer hitch like a pro – a pro who’s ready to conquer the open road with confidence and style. So let your adventurous spirit soar, knowing that your trailer will be riding smoothly, and your vehicle will be handling like a dream. With your equalizer hitch in place, you’ll hear the whispers of envy as fellow travelers marvel at your towing prowess.
They’ll see you gliding effortlessly down the highway, with no sway, no fishtailing, and a smile that says, “I’ve got this.” So go forth, fellow road warrior, and conquer the world with your perfectly set-up equalizer hitch. May your journeys be smooth, your adventures be wild, and your hitch be the envy of all who lay eyes upon it.
Accompanied by the sweet sounds of balance and stability, there’s no limit to where your towing endeavors will take you. Happy trails!”
FAQs
Setting up an equalizer hitch may seem daunting at first, but with a little guidance, it can be a straightforward process. First, determine the correct hitch size and weight rating for your trailer. Once you have the right equipment, begin by leveling your tow vehicle and trailer.
Next, attach the hitch head to the shank and make sure it is securely tightened. Connect the spring bars to the hitch head and adjust them to the correct tension based on your trailer’s weight. Finally, attach the trailer coupler to the hitch ball and secure it with a locking mechanism.
Double-check all connections and make any necessary adjustments before hitting the road. Remember, it’s important to follow the manufacturer’s instructions and consult with a professional if you have any doubts or concerns. With a little practice, you’ll be setting up your equalizer hitch like a pro in no time!
FAQs
What is an equalizer hitch and why is it important for towing?
An equalizer hitch is a device that is used to distribute the weight of a trailer evenly across the tow vehicle and trailer axles. It is important for towing because it helps improve stability, control, and handling by keeping the tow vehicle and trailer level.
How do I choose the right size equalizer hitch for my trailer?
To choose the right size equalizer hitch for your trailer, you need to consider the weight of your trailer and the tongue weight. The general rule is to choose a hitch with a weight capacity that is equal to or greater than the tongue weight of your trailer.
How do I install an equalizer hitch on my tow vehicle?
To install an equalizer hitch on your tow vehicle, you first need to attach the hitch head to the receiver on your vehicle. Then, you need to align the spring bars with the hitch head and insert them into the sockets. Finally, you need to adjust the tension and height of the hitch to ensure a level and balanced towing setup.
Can I use an equalizer hitch with any type of trailer?
Yes, an equalizer hitch can be used with most types of trailers, including travel trailers, fifth-wheel trailers, and utility trailers. However, it is important to choose the right size hitch and make sure it is compatible with your specific type and weight of trailer.
How often should I inspect and maintain my equalizer hitch?
It is recommended to inspect and maintain your equalizer hitch before each towing trip. This includes checking for any signs of wear, lubricating the moving parts, and ensuring all bolts and connections are tightened properly. Regular maintenance will help ensure the hitch functions properly and safely.
Can I tow without an equalizer hitch?
It is possible to tow without an equalizer hitch, especially if you are towing a small or lightweight trailer. However, using an equalizer hitch is highly recommended for towing larger trailers or in situations where weight distribution and stability are important, such as traveling at higher speeds or on uneven terrain.
Can I install an equalizer hitch myself, or do I need professional help?
While it is possible to install an equalizer hitch yourself, it is recommended to have it installed by a professional if you are unsure or inexperienced. Proper installation is crucial for the safe and effective use of an equalizer hitch, and a professional can ensure it is set up correctly for your specific towing setup.