
Are you having trouble with your ATV winch not working properly? One common issue that ATV owners face is a faulty winch solenoid. The solenoid is responsible for controlling the winch’s motor, so if it is not working correctly, your winch may not function at all. But how can you test if your winch solenoid is the problem? In this blog post, we will walk you through the steps to test your ATV winch solenoid and determine if it needs to be replaced.
So, put on your mechanic hat and let’s get started!
Table of Contents
Introduction
So, you’ve got yourself a Warn ATV winch with a solenoid, and you’re wondering how to test it. Well, you’re in luck because I’ve got some tips for you! Testing your winch solenoid is essential to ensuring that it’s working properly and will be able to handle those tough towing jobs. The solenoid is responsible for controlling the current flow to the winch motor, so if it’s not working correctly, your winch won’t be able to do its job.
One way to test the solenoid is by using a multimeter. Simply disconnect the wires from the solenoid, connect the multimeter to the two terminals, and check for continuity. If the multimeter beeps or shows a low resistance reading, then the solenoid is working fine.
Another method is to use a 12-volt power source and some jumper cables. Connect the positive cable from the power source to the positive terminal of the solenoid, and the negative cable to the negative terminal. If you hear a clicking sound, then the solenoid is engaging properly.
These are just a couple of ways to test your Warn ATV winch solenoid, but they should give you a good starting point. Remember to always consult your winch’s user manual for specific instructions, and happy winching!
What is a Solenoid?
solenoid, electromagnet, magnetic field, mechanical motion, electric current Introduction: Have you ever wondered how certain devices can convert electrical energy into mechanical motion? One such device is called a solenoid. A solenoid is essentially an electromagnet that produces a magnetic field when an electric current is passed through it. This magnetic field can then create a mechanical force that can be used to perform various tasks.
Think of it like a magical hand that can move objects without actually touching them. But how does it work? And what are some common applications of solenoids? Let’s dive deeper into the world of solenoids and uncover their secrets.
Importance of Testing the Solenoid
solenoid testing Introduction: When it comes to electrical systems, one crucial component that often goes unnoticed is the solenoid. The solenoid plays a vital role in many devices and machines, from car engines to door locks. It is responsible for controlling the flow of electrical current and converting it into mechanical motion.
Given its significance, it is important to test the solenoid regularly to ensure that it is functioning correctly. In this blog post, we will explore the importance of testing the solenoid and how it can help prevent potential issues and failures. So, let’s dive in and discover why solenoid testing is so crucial!
Step-by-Step Guide
Are you having trouble with your WARN ATV winch solenoid? Don’t worry, we’ve got you covered! In this step-by-step guide, we’ll show you how to test your ATV winch solenoid to determine if it’s working properly. First, you’ll need to gather a few tools for the job. You’ll need a multimeter, which is used to measure electrical current, and a set of jumper cables.
Once you have your tools ready, you can begin testing your solenoid. To start, disconnect the solenoid from the winch and the battery. Then, use your multimeter to check for continuity between the solenoid’s terminals.
This will help you determine if there is a break in the electrical circuit. Next, you’ll want to test the solenoid’s coil resistance. Set your multimeter to the resistance setting and touch the probes to the solenoid’s coil terminals.
The multimeter should display a reading within the manufacturer’s specified range. If the reading is significantly higher or lower, it could indicate a problem with the solenoid. Now it’s time to test the solenoid’s switch terminals.
Attach the positive jumper cable to the battery’s positive terminal, and the negative jumper cable to the solenoid’s switch terminal. The solenoid should click and engage when a current is applied. If it doesn’t, it could be a sign of a faulty switch.
Finally, you’ll want to test the solenoid’s power terminals. Attach the positive jumper cable to the battery’s positive terminal, and the negative jumper cable to the solenoid’s power terminal. The winch should start operating when the current is applied.
Step 1: Prepare the Necessary Tools
In order to successfully complete any task or project, it’s important to have the right tools on hand. The same goes for fixing a leaky faucet. Before you begin, gather all the necessary tools to make the job easier and more efficient.
First, you’ll need an adjustable wrench or a plumber’s wrench to loosen and tighten the fittings. This will enable you to remove the faucet and install a new one if needed. Next, grab a pair of channel-lock pliers, which will come in handy for gripping and twisting pipe fittings.
A basin wrench is also helpful for reaching those hard-to-reach nuts and bolts. Additionally, make sure you have a bucket or a towel to catch any water that may spill during the repair. Finally, it’s a good idea to have some plumber’s tape or thread sealant on hand to ensure a watertight seal.
With these tools at the ready, you’ll be well-prepared to tackle any faucet repair job that comes your way.
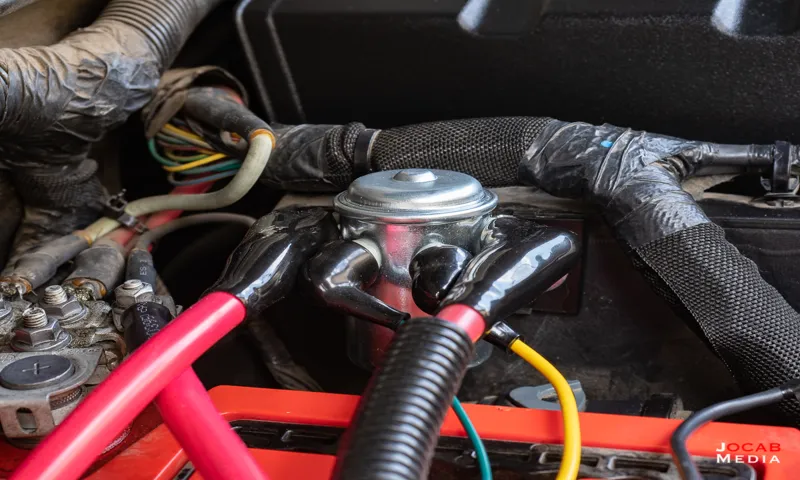
Step 2: Locate the Solenoid
To successfully locate the solenoid, you’ll need to follow a step-by-step process. The solenoid is a crucial component of various devices, including automobiles and appliances. It is responsible for converting electrical energy into mechanical energy by using an electromagnetic coil.
So, let’s dive into the second step of locating the solenoid. After you have gathered the necessary information about the solenoid’s position, the next step is to physically locate it. First, you need to identify where the solenoid is typically installed in the device or system you are working with.
The solenoid is usually a cylindrical or rectangular-shaped device that contains the coil and a movable plunger or armature. To locate the solenoid, you may need to refer to the device’s user manual or consult online resources specific to your device’s make and model. These resources can provide you with detailed diagrams and instructions on where the solenoid is located.
Once you have a general idea of where the solenoid is located, you can start visually inspecting the device. Look for any wires or cables connected to the solenoid, as this can give you a clue about its location. Additionally, keep an eye out for any labels or markings on the device that indicate the presence of a solenoid.
If you are still having trouble locating the solenoid, you may need to remove any covers or panels that are obstructing your view. Be sure to take proper safety precautions and consult any relevant manuals or guides before attempting to remove any parts. Remember, locating the solenoid may require some patience and persistence, especially if it is hidden or tucked away in a hard-to-reach area.
But with the right information and some careful inspection, you’ll be able to find the solenoid and continue with your troubleshooting or repair process.
Step 3: Inspect the Connections
When it comes to inspecting the connections of your electronic devices, it’s essential to follow a step-by-step guide to ensure everything is in working order. In this blog post, we’ll walk you through the process of inspecting the connections of your devices so you can identify any issues and fix them accordingly. One of the first steps in this process is to visually inspect the cables and connectors that are connecting your devices.
Look for any signs of damage or wear, such as frayed wires or bent pins. These can indicate a problem with the connection and may require repair or replacement. Additionally, make sure that all cables are securely plugged into their respective ports.
Sometimes a loose connection can cause issues with functionality or performance. Take the time to check each connection and make sure they are all snug and secure. By visually inspecting and ensuring the proper connections of your devices, you’ll be able to prevent any potential issues and have peace of mind knowing that everything is in working order.
Step 4: Test the Solenoid’s Continuity
In this step-by-step guide, we will be discussing how to test the continuity of a solenoid. Testing the continuity of a solenoid is an important step in troubleshooting any issues with the solenoid. Continuity refers to the flow of electrical current through the solenoid, which indicates whether it is functioning properly or not.
Testing continuity will help you determine if there are any breaks or interruptions in the circuit, which could be causing the solenoid to malfunction. To test the continuity of a solenoid, you will need a multimeter. Start by setting the multimeter to the continuity or resistance setting.
Then, touch the probes of the multimeter to the two terminals of the solenoid. If there is a continuous flow of current, the multimeter will emit a beep or display a low resistance reading. If there is no continuity, the multimeter will not emit a beep or display a high resistance reading.
Testing continuity will help you determine if the solenoid is functioning properly, and if not, you can proceed with further troubleshooting or consider replacing the solenoid.
Step 5: Check the Voltage
voltage, electrical safety, multimeter, voltage measurement Step 5: Check the Voltage Now that you have a functioning multimeter and have learned the basics of using it, it’s time to move on to the next step in our guide to checking electrical safety: checking the voltage. This step is crucial in ensuring that the electrical circuits and devices you’re working with are operating within safe levels. To check the voltage, you’ll need to select the appropriate voltage range on your multimeter.
Most multimeters have a dial or a button that allows you to switch between different ranges. Make sure to choose a voltage range that is higher than the expected voltage to avoid damaging the multimeter. To measure the voltage, start by turning on the power to the circuit or device you want to test.
Then, take the probes of your multimeter and touch them to the points where you want to measure the voltage. The red probe should be placed on the positive terminal, and the black probe should be placed on the negative terminal. Once the probes are in place, read the voltage measurement on the multimeter’s display.
It’s important to note that voltage is measured in volts (V). Make sure to pay attention to the decimal point and any additional digits displayed on the multimeter’s screen. If the voltage reading falls within the expected range for the circuit or device, then everything is functioning as it should be.
However, if the voltage reading is higher or lower than expected, it could indicate a problem with the circuit or device. In this case, it’s best to consult with a trained professional or an electrician to identify and fix the issue. Remember, working with electricity can be dangerous, so always prioritize your safety.
Use insulated gloves and goggles when handling live electrical components, and never attempt to check the voltage of a circuit or device if you’re unsure or uncomfortable. It’s always better to be safe than sorry. Now that you’ve mastered the art of checking the voltage, you’re one step closer to becoming an electrical safety expert.
Step 6: Test the Solenoid’s Functionality
To test the functionality of the solenoid, follow these step-by-step instructions. First, ensure that the power is disconnected from the solenoid. This is crucial for your safety.
Next, connect a power source, such as a battery, to the solenoid. Make sure the positive and negative terminals are correctly connected. Once the power is connected, observe the solenoid to see if it moves or vibrates.
This motion indicates that the solenoid is functioning correctly. If there is no movement, check the connections and verify that the power source is supplying the correct voltage. Troubleshoot any issues that arise until the solenoid is operational.
Remember to always follow safety precautions when working with electrical components.
Conclusion
So there you have it, a comprehensive guide on how to test a WARN ATV winch solenoid. Remember, the winch solenoid is the heart and brain of your winch, so it’s essential to make sure it’s functioning properly. By following these steps, you can easily determine if your solenoid is in good working condition or if it needs to be replaced.
Testing the solenoid is like giving it a mental fitness exam, making sure it’s firing on all cylinders and ready for action. Just like we exercise our bodies and challenge our minds, we must also put our winch solenoid to the test to ensure it’s up for the challenges that lie ahead. So grab your multimeter and get ready for a winching workout of the electrical kind.
With a little knowledge and a few simple tests, you can diagnose any solenoid issues and be back to winching adventures in no time. Remember, a winch is only as strong as its weakest link, so don’t let a faulty solenoid hold you back from conquering any off-road obstacle. Now go forth, fellow off-roaders, and test those winch solenoids with the confidence and swagger of a seasoned adventurer.
And if you ever find yourself stuck in a sticky situation, remember that your trusty WARN winch solenoid has your back – ready to pull you out and save the day. Happy winching!”
Importance of Regular Solenoid Testing
Solenoid testing is a crucial aspect of routine maintenance for any system that relies on solenoids. A solenoid is an electromechanical device that converts electrical energy into mechanical motion. It is commonly used in various industries, including automotive, manufacturing, and HVAC systems.
Regular testing ensures that the solenoid is functioning correctly and prevents unexpected failures that could lead to downtime and costly repairs. In this step-by-step guide, we will walk you through the process of testing a solenoid to help you maintain the efficiency and longevity of your systems. So let’s get started!
Summary of the Testing Process
testing process, step-by-step guide, software testing, quality assurance, testing strategy, bug tracking, test cases, test execution, defect reporting, test results. In order to ensure that software functions properly and meets the required standards of quality, a thorough testing process is essential. This step-by-step guide will walk you through the key stages of the testing process, enabling you to understand the importance of each step and how it contributes to the overall quality assurance of the software.
The first step is to develop a testing strategy, which involves determining the scope of testing, the resources required, and the objectives to be achieved. Once the strategy is in place, test cases are created, specifying the desired outcomes and the steps to be taken to achieve those outcomes. After the test cases are developed, the next step is the execution of the tests, where each test case is run to identify any issues or bugs.
Any defects that are detected during the testing process are then reported in a structured manner, usually through the use of bug tracking tools. Finally, the results of the testing process are analyzed to determine whether the software meets the predefined quality standards. By following this step-by-step guide, you can ensure that your software undergoes a thorough testing process and is of high quality.
Final Thoughts
“Final Thoughts on the Step-by-Step Guide” So, there you have it – a step-by-step guide to achieving your goals! We’ve covered everything from setting clear objectives to breaking them down into manageable tasks. We’ve talked about the importance of staying focused and motivated, and we’ve explored the power of tracking your progress. But remember, this guide is just a starting point.
It’s up to you to take action and put these strategies into practice. It won’t always be easy, and there may be setbacks along the way, but don’t let that discourage you. Keep pushing forward, learning from your mistakes, and never lose sight of your ultimate goal.
With determination and perseverance, there’s no limit to what you can achieve. So go out there and make it happen!
FAQs
How do I test a warn ATV winch solenoid?
To test a warn ATV winch solenoid, you can start by disconnecting the winch cables and removing the solenoid cover. Use a multimeter to check the resistance across the solenoid terminals. A good solenoid should have low resistance, typically around 2-4 ohms. If the resistance is significantly higher or if the multimeter shows an open circuit, it indicates a faulty solenoid that needs to be replaced.
Can a bad winch solenoid prevent the winch from working?
Yes, a bad winch solenoid can prevent the winch from working. The solenoid is responsible for completing the electrical circuit to power the winch motor. If the solenoid is faulty or not functioning properly, it will disrupt the flow of electricity and prevent the winch from working.
What are the signs of a failing ATV winch solenoid?
Some common signs of a failing ATV winch solenoid include the winch not responding or working intermittently, a clicking sound when trying to engage the winch, or the winch not pulling with the same strength as before. If you experience any of these symptoms, it may indicate a problem with the solenoid.
How often should I test my ATV winch solenoid?
It is recommended to test your ATV winch solenoid at least once a year or whenever you notice any issues with the winch’s performance. Regular testing can help identify any potential problems early on and prevent further damage.
Can I replace the winch solenoid myself?
Yes, you can replace the winch solenoid yourself if you have some basic mechanical knowledge and the right tools. However, it is important to follow the manufacturer’s instructions and guidelines to ensure proper installation and avoid any damage to the winch or other components.
How much does it cost to replace an ATV winch solenoid?
The cost of replacing an ATV winch solenoid can vary depending on the make and model of your ATV, as well as the brand of the solenoid. On average, you can expect to spend around $50 to $100 for a replacement solenoid.
Are all winch solenoids compatible with any ATV winch?
No, not all winch solenoids are compatible with any ATV winch. It is important to check the specifications and compatibility information provided by the manufacturer before purchasing a replacement solenoid. Using an incompatible solenoid can lead to compatibility issues and may cause damage to the winch or other electrical components.