
So, you’ve got a power inverter and you’re ready to hook it up. But wait, how exactly do you go about doing that? Don’t worry, I’ve got you covered. In this blog post, I’m going to walk you through the step-by-step process of hooking up a power inverter.
Whether you’re looking to power your electronics on a road trip or you want a backup power source for emergencies, knowing how to properly connect your inverter is essential. So, let’s dive in and get you hooked up!
Table of Contents
- 1 What is a Power Inverter?
- 2 Step-by-Step Guide to Hooking up a Power Inverter
- 2.1 Step 1: Determine Power Requirements
- 2.2 Step 2: Select a Proper Power Inverter
- 2.3 Step 3: Check Your Vehicle’s Battery
- 2.4 Step 4: Locate a Suitable Mounting Location
- 2.5 Step 5: Connect the Power Inverter to the Battery
- 2.6 Step 6: Ground the Power Inverter
- 2.7 Step 7: Connect the Inverter to the Load or Appliance
- 3 Safety Precautions and Tips
- 4 Conclusion
- 5 FAQs
What is a Power Inverter?
If you’re looking to power your electronics or appliances on the go, a power inverter is the perfect solution. So, how do you hook up a power inverter? Well, it’s actually quite simple. First, you’ll need to connect the inverter to your vehicle’s battery.
Make sure to use the designated positive and negative terminals for a secure connection. Once you have that set up, you can plug in your devices or appliances directly into the inverter’s AC outlets. It’s like having a portable electrical outlet wherever you go! Just keep in mind that the capacity of your power inverter should be sufficient for the devices you plan to connect to it.
So, whether you’re going on a road trip or simply need to power your devices during a camping trip, a power inverter is a must-have accessory.
Understanding the Basics
power inverter, inverter, electricity, DC, AC, conversion, appliances, car battery, power outage Paragraph: So, you want to know what a power inverter is? Well, let me break it down for you. A power inverter is a device that takes direct current (DC) power from a source, such as a car battery, and converts it into alternating current (AC) power that can be used to run household appliances and gadgets. It’s like having a magic wand that can transform the electricity you have into the electricity you need.
You see, most of our everyday devices are designed to run on AC power, and when we experience a power outage or want to use our devices on the go, we need a way to convert the DC power from our car battery into usable AC power. That’s where the power inverter comes in handy. It’s like a superhero that saves the day when you need to charge your phone, power your laptop, or even run a small refrigerator.
Just think of it as a translator between the different languages of electricity. So, the next time you face a power outage or want to go off the grid, remember that a power inverter is your new best friend.
Choosing the Right Power Inverter
power inverter, power conversion, DC to AC power In today’s modern world, power inverters have become an essential device for many households and businesses. But what exactly is a power inverter? Simply put, a power inverter is a device that converts DC (direct current) power from a battery or solar panel into AC (alternating current) power that can be used to power household appliances and electronics. This conversion process allows you to use devices that require AC power even when you only have access to DC power sources.
Think of a power inverter as a translator for electricity. It takes the language of DC power and translates it into the language of AC power, allowing devices that “speak” AC to understand and use it. This is particularly useful when you are off the grid or during power outages, as it gives you the ability to tap into stored or renewable energy sources and power your essential devices.
When choosing the right power inverter, there are several factors to consider. The first is the power rating or wattage. You’ll need to determine the total wattage of the devices you plan to power and choose an inverter that can handle that load.
It’s also important to consider the inverter’s efficiency, as a more efficient inverter will waste less power during the conversion process. Another consideration is the type of inverter. There are two main types: modified sine wave and pure sine wave.
Modified sine wave inverters are more affordable but may not be compatible with certain sensitive or high-tech devices. Pure sine wave inverters, on the other hand, produce a cleaner and more reliable power output that is compatible with all devices. Finally, think about the input voltage and output voltage of the inverter.
Make sure the inverter has the appropriate input voltage range to match your power source, whether it’s a battery or solar panel. The output voltage should match the requirements of your devices. In conclusion, power inverters are a valuable tool for converting DC power into AC power, allowing you to use electronics and appliances that require AC power even when you only have access to DC sources.
Step-by-Step Guide to Hooking up a Power Inverter
So, you’ve got yourself a power inverter and you’re wondering how to hook it up. Well, you’ve come to the right place! Hooking up a power inverter is actually pretty straightforward. First things first, you’ll want to find a suitable location for your inverter.
It needs to be close to the battery, but also in a well-ventilated area to prevent overheating. Once you’ve found the perfect spot, it’s time to connect the cables. Start by connecting the positive (+) cable from the inverter to the positive (+) terminal on the battery.
Then, connect the negative (-) cable from the inverter to the negative (-) terminal on the battery. Make sure the connections are tight and secure. Next, you’ll want to connect your electronic devices to the inverter.
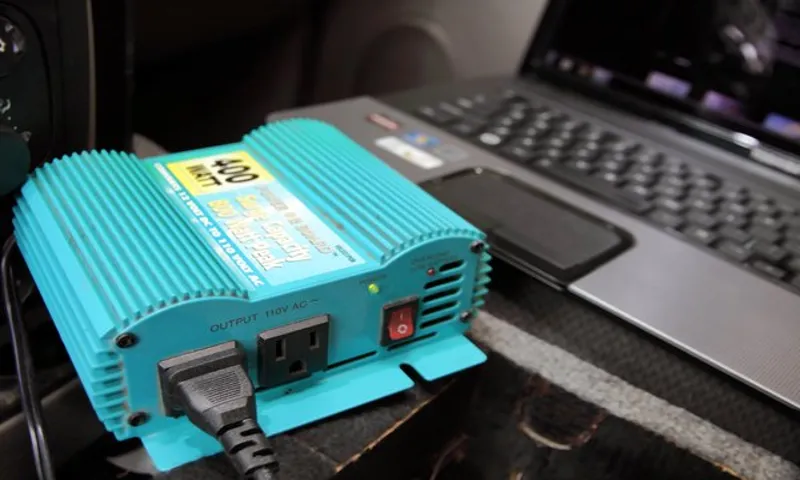
Simply plug them into the AC outlets on the inverter. It’s important to note that you should only plug in devices that are compatible with the inverter’s wattage. Finally, it’s a good idea to test your setup before relying on it for any important tasks.
Turn on your inverter and check that your devices are receiving power. And that’s it! You’re all set up and ready to enjoy the benefits of your power inverter. Happy powering!
Step 1: Determine Power Requirements
power inverter, determine power requirements
Step 2: Select a Proper Power Inverter
power inverter, select a power inverter, guide to hooking up a power inverter, power inverter installation So you’ve decided to invest in a power inverter to enjoy the convenience of using your electronic devices in your vehicle. Now comes the important step of selecting the right power inverter for your needs. Power inverters come in various sizes and power capacities, so it’s essential to choose one that can handle the electrical load you plan to connect to it.
Start by considering the power rating of the devices you wish to use with the inverter. Make a list of the wattage requirements and add them up to determine the power capacity you need. It’s always a good idea to choose an inverter with a slightly higher power capacity than you think you’ll need to account for any fluctuations or future needs.
Additionally, consider the type of power waveform the inverter produces. Pure sine wave inverters are more expensive but offer a clean and smooth power output, making them suitable for sensitive electronics. Modified sine wave inverters, on the other hand, are more budget-friendly and can handle most basic electronic devices.
Once you have determined your power requirements and considered the type of waveform, it’s time to make your selection. Look for reputable brands and read reviews from other users to ensure you’re getting a reliable and long-lasting power inverter. With the right power inverter selected, you’re ready to move on to the next step of installing and hooking it up in your vehicle.
Step 3: Check Your Vehicle’s Battery
power inverter
Step 4: Locate a Suitable Mounting Location
There are a few key factors to consider when choosing the best mounting location for your power inverter. First, you’ll want to find a spot that is easily accessible and close to your vehicle’s battery. This will minimize the length of the cables needed and ensure maximum efficiency.
Additionally, you’ll want to choose a location that is well-ventilated to prevent overheating. The inverter can generate a significant amount of heat, so placing it in a location with good airflow is crucial. Another consideration is the potential for vibrations and shocks.
Make sure the mounting location is secure, so the inverter doesn’t get damaged while driving. Finally, it’s essential to consider the wiring and cable routing when choosing a mounting location. You’ll want to find a spot that allows for neat, organized cable management to ensure safety and avoid any potential hazards.
By taking these factors into account, you can find the perfect mounting location for your power inverter.
Step 5: Connect the Power Inverter to the Battery
power inverter, connect, battery. Now that you have your power inverter and battery ready, it’s time to connect them. This step is crucial to ensure that your power inverter functions properly and efficiently.
Before you begin, make sure that both the power inverter and battery are turned off. Start by locating the positive and negative terminals on your battery. The positive terminal is usually indicated by a plus sign while the negative terminal is indicated by a minus sign.
Next, take the positive cable from the power inverter and connect it to the positive terminal of the battery. Make sure the connection is tight by fastening the cable securely. Repeat this step for the negative cable, connecting it to the negative terminal of the battery.
Once both cables are securely connected, you can switch on the power inverter and start enjoying the benefits of portable power. Remember to follow all safety precautions and consult the manufacturer’s instructions for specific details on connecting your power inverter to the battery.
Step 6: Ground the Power Inverter
power inverter, ground the power inverter, hooking up a power inverter So, you’ve finally decided to invest in a power inverter for your vehicle or home. Congratulations! Now comes the fun part: setting it up. One crucial step in the installation process is grounding the power inverter.
Grounding ensures that any excess electrical energy or static discharge is safely redirected into the ground instead of causing potential damage or hazards. To ground your power inverter, start by locating a suitable grounding point, such as a dedicated grounding rod or the chassis of your vehicle. Using a wrench or screwdriver, securely attach the grounding wire from the inverter to the grounding point.
Make sure the connection is tight and free of any corrosion or dirt that might impede conductivity. Once you’ve completed this step, you can proceed with the rest of the installation process, knowing that your power inverter is properly grounded and ready to go.
Step 7: Connect the Inverter to the Load or Appliance
power inverter, connect inverter, load, appliance So you’ve successfully installed your power inverter and now it’s time to connect it to the load or appliance that you want to power. This step is crucial because it ensures that the electricity generated by the inverter is properly utilized. First, identify the load or appliance that you want to connect to the inverter.
It could be anything from a television to a refrigerator or even power tools. Make sure to check the power requirements of the load or appliance to ensure that it is compatible with the inverter. Next, locate the AC outlet on the inverter.
This is where you will plug in the power cord of your load or appliance. Most inverters have a standard AC outlet that allows you to easily connect your devices. Before connecting the load or appliance, double-check that the inverter is turned off.
This is an important safety precaution to avoid any electrical accidents. Once the inverter is turned off, plug the power cord of the load or appliance into the AC outlet on the inverter. Make sure the connection is secure and the plug is inserted fully.
After the load or appliance is connected, switch on the power inverter. Depending on the type of inverter you have, it may have an on/off switch or a power button. Refer to the manufacturer’s instructions for the specific model of your inverter.
Once the inverter is turned on, it will start converting DC power from the batteries into AC power that can be used by your load or appliance. You should now be able to use your load or appliance just as you would when connected to a regular power outlet. It’s important to note that connecting a load or appliance to a power inverter requires careful consideration of power requirements and safe usage.
Safety Precautions and Tips
If you’re wondering how to hook up a power inverter, there are a few steps you need to follow to ensure your safety. First, make sure to read the instruction manual that comes with your inverter. This will provide you with specific guidelines and precautions for your particular model.
Before connecting the inverter to your vehicle’s battery, it’s important to turn off the engine and disconnect the negative battery cable. This will prevent any accidental electrical shocks. Next, connect the positive cable from the inverter to the positive terminal of the battery, and then connect the negative cable from the inverter to the negative terminal.
Double-check that all connections are secure and tight. Once everything is properly connected, you can turn on the inverter and start using it to power your devices. Remember to always follow safety guidelines and never overload the inverter beyond its recommended wattage.
By taking these precautions, you can safely and effectively use a power inverter to power your electronics while on the go.
Installing a Fuse or Circuit Breaker
installing a fuse or circuit breaker. Installing a fuse or circuit breaker may seem like a daunting task, but with the right safety precautions and tips, it can be a straightforward process. First and foremost, always remember to turn off the main power supply before attempting any electrical work.
This will help prevent any accidents or injuries. Additionally, make sure to wear protective gear such as insulated gloves and safety goggles to protect yourself from electric shocks. Once you’ve taken the necessary safety precautions, it’s important to understand the difference between a fuse and a circuit breaker.
A fuse is a small metal strip or wire that melts when too much current flows through it. This cuts off the power supply and prevents any potential damage to the electrical system. On the other hand, a circuit breaker functions similarly but can be reset manually.
To install a fuse, locate the fuse box in your home or building. It is usually found near the main electrical panel. Open the fuse box cover and identify the blown fuse by checking for any dark spots or a broken wire inside the fuse.
Remove the blown fuse and replace it with a new one that has the same rating. Make sure to push it in securely. If you are installing a circuit breaker, start by turning off the main power supply.
Remove the panel cover and identify the breaker that needs to be replaced or added. Carefully remove the wires connected to the existing breaker or install new wires if you are adding a new breaker. Attach the wires to the new breaker and secure it in place.
Using Proper Gauge Wire
Using the proper gauge wire is crucial when it comes to electrical safety. It’s important to understand that different gauges of wire are designed to carry different amounts of current. If you use a wire that is too thin for the amount of current it needs to carry, it can overheat and potentially cause a fire.
On the other hand, using a wire that is too thick for the current can lead to inefficiency and wasted energy. So how do you know which gauge wire to use? Well, it depends on a few factors. Firstly, you need to consider the amperage of the circuit.
This information can usually be found on the circuit breaker or fuse that controls the circuit. Once you know the amperage, you can refer to a wire gauge chart to determine the appropriate wire size. It’s always better to err on the side of caution and use a slightly larger wire gauge than is strictly necessary.
This will ensure that the wire can handle any potential increases in current without overheating. By taking these safety precautions and using the proper gauge wire, you can help prevent electrical hazards and ensure the safety of yourself and others.
Securing Loose Cables
securing loose cables When it comes to securing loose cables, safety should always be a top priority. Loose cables not only create a messy and cluttered environment, but they can also pose a serious hazard. Tripping over a loose cable can lead to falls and injuries, and exposed wires can cause electric shocks or even fires.
Luckily, there are a few simple precautions you can take to ensure that your cables are secure and out of harm’s way. First and foremost, it’s important to do a thorough evaluation of your workspace or home to identify any loose cables that need attention. Look for cables that are hanging down or lying across walkways, and make a note of any areas where cables are tangled or snaked around furniture or equipment.
Once you’ve identified these problem areas, it’s time to take action. One effective way to secure loose cables is by using cable management solutions. These come in a variety of forms, such as cable clips, cable ties, or cable sleeves.
Cable clips can be attached to walls or desks and hold the cables neatly in place. Cable ties can be used to bundle cables together, preventing them from getting tangled or tripping someone. Cable sleeves, on the other hand, encase multiple cables in a flexible tube, keeping them organized and protected.
Another important aspect of securing loose cables is proper placement. Try to route cables along walls or behind furniture to keep them out of the way. Avoid running cables across the floor or across areas where people walk frequently.
If you need to run a cable across a walkway temporarily, make sure to use cable covers or protective mats to prevent tripping. Additionally, it’s crucial to check the condition of your cables regularly. Over time, cables can become worn or damaged, increasing the risk of electrical hazards.
Regularly Checking and Maintaining the Power Inverter
Regularly checking and maintaining your power inverter is crucial for its efficiency and longevity. Not only does it ensure that the inverter is working properly, but it also helps prevent any potential hazards or accidents. To ensure your safety, there are a few key precautions and tips you should keep in mind when handling your power inverter.
Firstly, always make sure to switch off and disconnect the power source before inspecting or cleaning the inverter. This will prevent any electric shocks or accidents. Secondly, avoid touching any of the internal components of the inverter unless you are a trained professional.
It’s best to leave any repairs or maintenance to the experts. Additionally, make sure to clean the inverter regularly, using a soft cloth to remove any dust or debris that may have accumulated. This will prevent overheating and ensure proper airflow.
Lastly, keep the inverter away from any flammable materials or objects that may pose a fire risk. By following these simple safety precautions and regularly checking on your power inverter, you can ensure its optimal performance and enhance its overall lifespan.
Conclusion
So, now you know the ins and outs of hooking up a power inverter! It’s like giving your electronics a magical genie lamp to summon electricity from thin air. Just remember to be safe and follow the manufacturer’s instructions, because the last thing you want is to end up with a power inverter that’s more tangled than a bowl of spaghetti. And if all else fails, just remember that sometimes the best solution is to call a tech-savvy friend and ask them to work their sorcery.
Happy inverting!”
FAQs
How do you install a power inverter in your car?
To install a power inverter in your car, start by finding a suitable location to mount it, preferably close to the battery. Then, connect the inverter’s positive cable to the positive terminal of the battery and the negative cable to the car’s chassis. Finally, connect the inverter to the car’s electrical system and secure any loose cables.
What size power inverter do I need for my appliances?
The size of the power inverter you need for your appliances depends on their power requirements. Add up the wattage of all the appliances you plan to connect to the inverter and choose an inverter with a continuous power output that matches or exceeds that total wattage.
Can I use a power inverter with my car’s cigarette lighter socket?
It depends on the power requirements of your appliances. Car cigarette lighter sockets typically have lower power output, usually around 150 watts. If your appliances have a combined wattage that exceeds this limit, you may need to directly connect the inverter to the car battery.
Can I use a power inverter with my solar panel system?
Yes, you can use a power inverter with your solar panel system to convert the DC power generated by the panels into AC power that can be used to run your appliances. Make sure to choose an inverter that is compatible with your solar panel system’s voltage and power output.
How do I properly ground a power inverter?
To properly ground a power inverter, connect the inverter’s ground wire to a metal part of the vehicle’s chassis using a grounding lug or bolt. This helps protect against electrical shocks and reduces the risk of damage to the inverter or other electrical components.
Can I run sensitive electronic devices with a power inverter?
Yes, you can run sensitive electronic devices with a power inverter, but it is important to choose a pure sine wave inverter. Pure sine wave inverters produce a clean and stable power output similar to the power supplied by utility companies, making them safe for sensitive electronics like laptops, TVs, and medical devices.
How can I prevent my power inverter from draining my car battery?
To prevent your power inverter from draining your car battery, you can use a battery isolator or an automatic shut-off switch. These devices prevent the inverter from drawing power from the battery when the engine is turned off or the battery voltage drops below a certain level.