
Have you ever been driving down the road, minding your own business, when suddenly you hear a loud “ping” and notice a small chip in your windshield? It’s frustrating, and it can be quite distracting. But don’t worry, because in this blog post, we’re going to show you how to repair a windshield chip like a pro. Think of your windshield as a protective barrier between you and the outside world.
It shields you from flying debris, bugs, and even harsh weather conditions. So when a chip or crack appears, it’s important to address it quickly before it spreads and becomes more expensive to fix. Repairing a windshield chip may sound intimidating, but with the right tools and a little bit of patience, you can do it yourself.
Just like a minor scratch on your car’s paint, a small chip in your windshield can be fixed with some TLC. Plus, it’s a much more affordable option than replacing the entire windshield. Now, you might be wondering, why should I take the time to repair a chip instead of just leaving it be? Well, let’s think of it this way.
If you have a small cut on your finger, you wouldn’t just ignore it and hope it heals on its own, right? No, you would clean it, dress it, and help it heal. The same goes for your windshield. By repairing a chip, you’re preventing it from worsening and potentially turning into a full-on crack.
In this blog post, we’ll provide you with step-by-step instructions on how to repair a windshield chip, along with some helpful tips and tricks to make the process as smooth as possible. We’ll also discuss the materials you’ll need and where to find them. So grab a cup of coffee, put on your DIY hat, and let’s get started on giving your windshield the TLC it deserves.
Table of Contents
Introduction
Do you have a small chip on your windshield? Don’t panic! It’s a common problem that can be easily fixed. By repairing the chip as soon as it happens, you can prevent it from spreading and avoid having to replace the entire windshield. The process for repairing a windshield chip is relatively simple and can be done at home with a few basic tools.
In this article, we will walk you through the steps of how to repair a windshield chip, so you can get back on the road quickly and safely.
What is a Windshield Chip
windshield chip, Introduction
Why Should You Repair a Windshield Chip
windshield chip repair, repair a windshield chip
Types of Windshield Chips
windshield chip, types of windshield chips
Tools and Materials
If you discover a chip in your windshield, you might be wondering how to repair it before it turns into a larger crack. Fortunately, there are some tools and materials you can use to fix the chip yourself. One essential tool you’ll need is a windshield repair kit.
This typically includes a resin, applicator, and curing film. The resin is designed to fill in the chip and prevent it from spreading, while the applicator allows you to apply the resin evenly. The curing film helps to harden the resin and provide a smooth finish.
Additionally, you may need a razor blade or glass cleaner to remove any debris from the chip before applying the resin. With these tools and materials, you can easily repair a windshield chip and save yourself the cost and hassle of replacing the entire windshield.
Safety Precautions
When it comes to tackling a DIY project, having the right tools and materials is essential. Not only will it make your job easier and more efficient, but it will also help ensure your safety. Before you even start a project, take the time to gather all the necessary tools and materials.
This might include a drill, screws, a hammer, safety glasses, gloves, and a measuring tape, among other things. By having these items on hand, you’ll be prepared for any situation that may arise during your project. Additionally, remember to use the tools and materials properly and safely.
Follow any instructions and guidelines provided by the manufacturer to avoid accidents. It’s better to take a few extra minutes to familiarize yourself with the tools and their functions than to risk injury or damage to your project. By taking these safety precautions and using the right tools and materials, you’ll be well on your way to a successful DIY project.
Tools Needed for Repairing a Windshield Chip
windshield chip repair tools, tools for repairing a windshield chip, windshield chip repair materials. When it comes to repairing a windshield chip, having the right tools and materials is crucial. One of the most essential tools you’ll need is a windshield repair kit, which typically includes a bridge assembly, resin, curing strips, and a syringe.
The bridge assembly is used to secure the bridge to the damaged area and keep it stable during the repair process. The resin is a crucial component that fills the chip and prevents further damage from occurring. Curing strips are used to cover the repair after the resin has been applied, helping to create a smooth surface.
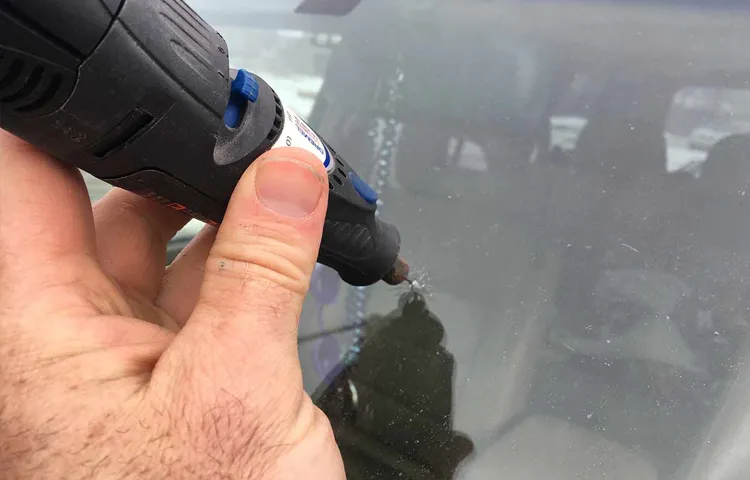
Additionally, a syringe is used to inject the resin into the chip. Other essential tools include a drill with a carbide-tipped bit for drilling into the chip, as well as a razor blade or scraper for removing any excess resin. It’s also important to have a pair of safety glasses and gloves to protect yourself while working on the windshield.
With these tools and materials, you’ll be well-equipped to repair a windshield chip and prevent further damage.
Materials Needed for Repair
When it comes to repairing things around the house, having the right tools and materials is essential. Whether you’re fixing a leaky faucet, patching a hole in the wall, or repairing a broken chair, having the right tools can make all the difference. Some basic tools that you’ll need for most repairs include a screwdriver set, a hammer, pliers, and an adjustable wrench.
Additionally, it’s always a good idea to have a tape measure, a level, and a utility knife on hand. These tools will come in handy for measuring, leveling, and cutting materials. In terms of materials, it will depend on the specific repair you’re doing.
For small repairs, you may just need some sandpaper, wood filler, and paint. For larger repairs, you may need drywall, joint compound, and insulation. It’s always a good idea to do some research and make a list of the materials you’ll need before starting a repair project.
By having the right tools and materials on hand, you’ll be well-equipped to tackle any repair job that comes your way.
Step-by-Step Guide
Have you ever been driving down the road and suddenly heard a loud “ping” as a rock hits your windshield? It’s a frustrating experience, especially when you see that it has left a chip or crack in your windshield. But don’t worry, repairing a windshield chip is actually a lot easier than you might think. With a few simple steps and the right materials, you can fix that chip and avoid having to replace the entire windshield.
First, you’ll need to gather the necessary tools. This includes a windshield repair kit, which typically includes a resin, a curing film, and a suction cup applicator. Once you have your kit, you can begin the repair process.
Start by cleaning the chip and the surrounding area with glass cleaner to ensure a proper bond. Then, place the applicator over the chip and apply gentle pressure to create a vacuum seal. This will help draw the resin into the chip.
Next, inject the resin into the chip using the provided syringe. Be sure to follow the instructions on the kit for the proper amount of resin to apply. After the resin is applied, place the curing film over the repair and use a UV lamp to cure the resin.
This will harden it and make it strong enough to withstand the pressure of driving. Finally, remove the curing film and scrape away any excess resin with a razor blade. And just like that, your windshield chip is repaired! With a little time and effort, you can restore your windshield to its former glory and avoid the cost and hassle of replacing it.
So next time you find yourself with a windshield chip, don’t panic. Follow these easy steps and get back on the road in no time!
Step 1: Assess the Damage
In the unfortunate event of damage to your home, it’s important to assess the situation before moving forward. This step-by-step guide will help you navigate the process and ensure a smooth recovery. The first step is to assess the damage.
This involves taking a comprehensive look at all areas of your home that may have been affected. Start by inspecting the exterior, checking for any visible damage such as broken windows, loose siding, or damaged roof shingles. Then, move inside and closely examine each room, paying attention to any structural issues, water damage, or other signs of trouble.
Take photos or videos of the damage as evidence for insurance claims. It’s important to be thorough in your assessment so that you can accurately report the extent of the damage to your insurance company and take the necessary steps to begin the repair process. Remember, the key here is to gather as much information as possible to ensure a successful recovery.
Step 2: Clean and Dry the Area
clean and dry the area. Now that you’ve identified the stain and determined the best method for removal, it’s time to move on to the next step: cleaning and drying the area. Before you begin, make sure you have all the necessary supplies on hand.
This may include a cloth or sponge, mild detergent, warm water, and a clean towel or paper towels. First, start by gently blotting the stain with a cloth or sponge to remove any excess liquid or debris. Be careful not to rub the stain, as this can cause it to spread or embed further into the material.
Instead, use a dabbing motion to lift the stain away. Next, mix a small amount of mild detergent with warm water. Dip a clean cloth or sponge into the soapy water and gently scrub the stained area.
Work in a circular motion, starting from the outer edges of the stain and moving towards the center. This will help to prevent the stain from spreading. Once you’ve thoroughly cleaned the area, rinse the cloth or sponge with clean water and go over the area again to remove any soap residue.
Make sure to wring out the cloth or sponge well, as excess moisture can prolong the drying process. After you’ve finished cleaning, it’s important to allow the area to dry completely. This may involve opening windows, turning on fans, or using a hairdryer on a low setting.
It’s important to be patient and allow the area to air dry naturally, as using excessive heat can damage certain materials. In conclusion, cleaning and drying the area is an important step in stain removal. By following these simple steps, you can effectively clean and dry the area without causing further damage.
Step 3: Apply the Repair Kit
car scratch repair kit So you followed the first two steps and assessed the damage on your car’s paintwork. Now it’s time to apply the repair kit and work towards restoring that flawless finish. Don’t worry, it’s easier than you might think! First, make sure you have all the necessary tools and materials from your car scratch repair kit within easy reach.
This typically includes a tube of touch-up paint, a primer, a clear coat, sandpaper, and a microfiber cloth. Start by gently sanding the scratched area with the sandpaper provided in the kit. This will help smooth out any rough edges and create a clean surface for the touch-up paint to adhere to.
Make sure to follow the instructions on the kit for the correct sanding technique and pressure to apply. Next, use the touch-up paint to carefully fill in the scratch. Start with small amounts and gradually build up the layers until the scratch is level with the surrounding paintwork.
Use a small brush or applicator provided in the kit for precise application. Once the touch-up paint has dried, it’s time to apply the primer. This will provide a protective barrier and help the touch-up paint blend seamlessly with the rest of the car’s paint.
Apply a thin layer of primer using a brush or applicator, and let it dry according to the instructions on the kit. Finally, apply the clear coat to give your repair job a glossy, professional finish. The clear coat also helps protect the touch-up paint from further damage and ensures its longevity.
Use the brush or applicator provided in the kit and apply a thin, even layer of clear coat. Allow it to dry fully before touching or washing the area. And there you have it – a step-by-step guide to using a car scratch repair kit! Remember to always follow the instructions provided with the kit and take your time to ensure a high-quality repair.
Step 4: Cure the Resin
cure the resin Now that you’ve successfully poured the resin and let it settle, it’s time to move on to the next crucial step in the resin-making process: curing the resin. Curing refers to the process of hardening the resin so that it becomes solid and durable. This step is essential as it ensures that the resin will maintain its shape and integrity over time.
To cure the resin, you’ll need to give it time to react and undergo a chemical process known as polymerization. This process involves the resin molecules bonding together and forming a solid material. The curing time can vary depending on the type of resin you’re using, but most resins require at least 24 hours to fully cure.
During the curing process, it’s important to provide the right conditions for the resin to cure properly. This means keeping the resin in a clean, dust-free environment and maintaining a consistent temperature. Too much dust or fluctuating temperatures can interfere with the curing process and affect the final result.
One common method for curing resin is to use a UV lamp. UV lamps emit ultraviolet light, which triggers the polymerization process and speeds up the curing time. Simply place the resin under the lamp and let it cure for the recommended amount of time.
Be sure to follow the manufacturer’s instructions for the specific UV lamp you’re using. Another method for curing resin is to let it cure naturally over time. This method requires patience, as it can take several days for the resin to fully cure.
During this time, it’s important to keep the resin in a controlled environment to minimize any external factors that may affect the curing process. Once the resin is fully cured, it should be hard and solid to the touch. You can test the hardness of the resin by gently pressing your fingernail into it.
Post-Repair Care
So you’ve just gotten your windshield repaired from that annoying chip that was obstructing your view while driving, but now what? Well, just like any other repair, there are a few things you should keep in mind to ensure that your windshield stays in tip-top shape. First off, it’s important to avoid any harsh chemicals or cleaning products for at least 48 hours after the repair. These can potentially interfere with the adhesive used to seal the chip and compromise the integrity of the repair.
Secondly, try to avoid driving on rough terrain or going through car washes for a few days to allow the adhesive to fully cure. Lastly, it’s always a good idea to keep an eye on the repaired area for any signs of damage. If you notice any cracks or leaks, it’s best to contact a professional as soon as possible to prevent any further issues.
Taking these simple precautions can ensure that your windshield repair lasts as long as possible, keeping you safe on the road.
Avoiding Car Washes and Rough Roads
“Post-Repair Care: Avoiding Car Washes and Rough Roads” After your vehicle has undergone repairs, it’s important to take extra care to ensure the longevity of the repairs. One common mistake many people make is immediately taking their freshly repaired car through a car wash. While it may be tempting to get that shiny, clean finish, car washes can actually cause damage to the newly repaired areas.
The harsh brushes and high-pressure water can potentially scratch or dislodge any recently installed parts or paintwork. It’s best to wait at least a week before taking your car for a wash, allowing sufficient time for the repairs to fully cure and set. Another factor to consider is the condition of the roads you drive on.
Rough and bumpy roads can put additional stress on the repaired areas, potentially causing them to loosen or become damaged again. While it’s not always possible to avoid every rough road, it’s a good idea to be mindful of the routes you take immediately after repairs. Try to choose smoother roads whenever possible to minimize the risk of further damage.
Taking care of your vehicle after repairs is crucial to ensure the work done remains intact and to avoid any additional costs or inconveniences. So, next time your car has undergone repairs, remember to hold off on the car wash for a little while and pay attention to the roads you drive on. By doing so, you’ll be helping to protect the investment you made in getting your car repaired and keeping it in optimal condition for the long run.
Monitoring the Repair
“Once your device has been repaired, it’s crucial to give it the proper post-repair care to ensure its longevity and performance. Think of it like taking care of yourself after recovering from an illness or injury – you wouldn’t go straight back to your normal routine without taking precautions, would you? Similarly, your repaired device needs a little extra attention to get back to full health. Firstly, make sure to clean the device regularly to remove any dust or debris that may have accumulated.
This will help prevent any further damage or issues. Secondly, be mindful of the way you handle and use the device – avoid putting unnecessary strain on it and handle it with care. Lastly, stay up to date with any software updates or patches that may be released.
These updates often contain bug fixes and improvements that can enhance the overall performance of your device. By following these post-repair care steps, you can ensure that your repaired device will continue to serve you well for a long time to come.”
Conclusion
In conclusion, the process of repairing a windshield chip is like performing a delicate dance with destiny. With a steady hand, a quick wit, and a touch of wizardry, you can transform a seemingly catastrophic blemish into a mere memory. Just imagine Harry Potter repairing his broomstick with a flick of his wand – well, that might be a bit of an exaggeration, but you get the point.
So, next time you find yourself faced with a chipped windshield, embrace your inner magician and tackle the task head-on. With the right tools and techniques, you’ll be able to make that chip disappear faster than a rabbit in a magic hat. Abracadabra, and poof! Your windshield is as good as new.
“
FAQs
How can I repair a windshield chip myself?
You can repair a small windshield chip yourself by purchasing a windshield repair kit from an auto parts store. Follow the instructions provided with the kit to fill in the chip with a clear resin.
Is it necessary to repair a windshield chip?
Yes, it is important to repair a windshield chip as soon as possible. If left untreated, the chip can spread and become a larger crack, compromising the integrity of the windshield.
Can I use a DIY repair kit for a larger windshield chip?
DIY repair kits are generally recommended for small chips and cracks. If you have a larger chip, it is best to consult with a professional auto glass repair technician to assess the damage and determine the best course of action.
How much does it cost to repair a windshield chip?
The cost of repairing a windshield chip can vary depending on several factors, such as the size and location of the chip, the type of vehicle, and the repair method. On average, the cost can range from $50 to $150.
Will my car insurance cover the cost of windshield chip repair?
Many comprehensive auto insurance policies cover windshield chip repairs without a deductible or with a low deductible. Check with your insurance provider to see if this coverage is included in your policy.
Can a repaired windshield chip become visible over time?
In some cases, a repaired windshield chip may become slightly visible over time. However, proper repair techniques and high-quality materials minimize the visibility of the repair and prevent further damage.
How long does it take to repair a windshield chip?
The time it takes to repair a windshield chip can vary depending on the complexity of the repair and the experience of the technician. On average, the process takes about 30 minutes to an hour.