
Have you ever wondered how to change the power inverter in your RV? Well, you’re in luck because we’re about to dive into all the details you need to know. Your RV’s power inverter is an essential component that converts DC (direct current) power from your battery into AC (alternating current) power that can be used to run your RV’s appliances and electronics. Without a functioning inverter, you may find yourself without power while on the road.
So, if you’re experiencing any issues with your RV’s power supply or simply want to upgrade to a more efficient model, it’s time to learn how to change your RV power inverter. In this guide, we’ll walk you through the steps required to successfully complete this task. Whether you’re a seasoned RVer or just starting out, this information will come in handy when you’re in need of a power upgrade.
So, let’s get started and take a look at how to change your RV power inverter.
Table of Contents
Introduction
If you own an RV and are looking to change your power inverter, you’ve come to the right place. The power inverter is an essential component of your RV’s electrical system, as it converts the DC power from your batteries into AC power that can be used to run your appliances and electronics. Changing the power inverter may be necessary if it becomes faulty or if you want to upgrade to a more powerful or efficient model.
To change your RV power inverter, you’ll need a few tools and some basic knowledge of electrical systems. In this article, we’ll walk you through the steps involved in changing your RV power inverter, so you can continue to enjoy all the comforts of home while on the road. So let’s get started!
What is an RV Power Inverter?
RV power inverters are an essential component of any recreational vehicle (RV) that allows you to convert direct current (DC) power from your RV’s battery into alternating current (AC) power that can be used to run various electronic devices. In simple terms, an RV power inverter acts as a middleman between your RV’s battery and the devices you want to power, like TVs, microwaves, or phone chargers. It takes the 12-volt DC power from the battery and converts it into the 120-volt AC power that your devices require.
This enables you to enjoy the comforts of home even when you’re on the road. Whether you’re camping in the wilderness or traveling across the country, an RV power inverter is a must-have accessory for any RV enthusiast.
Why would you need to change an RV Power Inverter?
power inverter, RV power inverter, change RV power inverter, replace RV power inverter, upgrading RV power inverter
Things to consider before changing your RV Power Inverter
RV power inverters are essential for converting DC power stored in your RV’s batteries into AC power that can be used to run appliances and charge electronic devices. However, there may come a time when you need to consider changing your RV power inverter. This could be due to various reasons, such as the need for more power, a malfunctioning inverter, or simply wanting to upgrade to a more efficient model.
Before making this decision, there are a few things you should consider to ensure you make the right choice.
Step-by-Step Guide to Changing RV Power Inverter
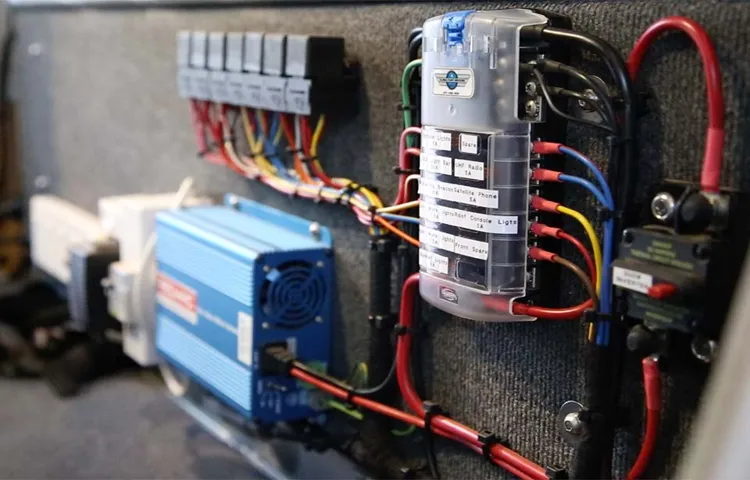
Changing the power inverter in your RV may seem like a daunting task, but with the right tools and a step-by-step guide, it can be a relatively straightforward process. First, ensure that you have all the necessary tools, including a screwdriver, wire cutters, and electrical tape. Next, locate the old power inverter, which is typically found in a cabinet or storage compartment of the RV.
Once located, disconnect the power supply by turning off the main breaker and disconnecting the batteries. Carefully remove the old power inverter by unscrewing it from its mounting bracket and disconnecting the wiring. Take note of the wire connections, as you will need to reconnect them later.
After removing the old inverter, install the new one by mounting it to the bracket and connecting the wiring using the noted connections. Be sure to secure the connections with electrical tape for added safety. Once everything is securely connected, reattach the batteries and turn on the main breaker.
Test the new power inverter to ensure it is functioning properly. With these simple steps, you can easily change the power inverter in your RV and get back to enjoying your travels with reliable power.
Step 1: Gather the necessary tools and materials
Changing an RV power inverter can seem like a daunting task, but with the right tools and materials, it can be a relatively straightforward process. The first step is to gather everything you’ll need for the job. Here’s a step-by-step guide to help you through the process.
To begin, you’ll need a few basic tools. These include a set of screwdrivers, wire cutters, wire strippers, and a multimeter. It’s also important to have new batteries and a replacement power inverter on hand.
Once you have your tools ready, you’ll want to make sure you have a safe and comfortable work area. This could be a garage, carport, or any other covered space where you can easily access your RV’s power system. Next, you’ll want to disconnect the power from your RV.
This means turning off the main breaker and disconnecting the negative battery cable. It’s always a good idea to wear gloves and eye protection while working with electrical systems, just to be safe. Now it’s time to remove the old power inverter.
Start by locating it, which is usually in the same compartment as your batteries. Depending on the type of inverter you have, you may need to remove a few screws or nuts to disconnect it from the batteries. Use your screwdrivers to carefully remove the inverter.
Once the old inverter is removed, it’s time to install the new one. Take extra care when handling the new inverter, as it is delicate electronic equipment. Follow the manufacturer’s instructions for installation, making sure to connect the positive and negative battery cables securely.
Step 2: Turn off the power supply
power supply, RV power inverter, turn off, step-by-step guide, changing, burstiness
Step 3: Disconnect the old power inverter
power inverter, disconnect, step three, changing RV power inverter, old inverter, replace, remove, electrical connections, circuit breaker, DC cables, AC cables, battery terminals. In step three of changing an RV power inverter, it’s time to disconnect the old inverter. This is a crucial step to ensure a safe and successful replacement.
To begin, you’ll need to locate the old inverter, which is typically installed in a convenient and easily accessible location. Once you’ve located it, make sure to turn off any power sources connected to the inverter and disconnect any electrical connections. This may involve removing the circuit breaker, DC cables, AC cables, and battery terminals.
It’s important to do this carefully and methodically, following the manufacturer’s instructions or seeking professional guidance if needed. Remember to always prioritize safety and double-check that all power sources are disconnected before proceeding. By disconnecting the old inverter properly, you’ll be one step closer to installing the new one and enjoying efficient power supply in your RV.
Step 4: Install the new power inverter
“Changing the power inverter in an RV can be a daunting task, but with the right instructions, it can be a smooth process. In this step-by-step guide, we will walk you through the process of installing a new power inverter. The power inverter is responsible for converting the DC power from your RV’s batteries into AC power that can be used to power your appliances and devices.
If your current power inverter is not functioning properly or is outdated, it may be time for a replacement. Here’s how to do it.” To begin, start by ensuring that all electrical power in the RV is turned off and disconnected from any external power sources.
This is important for safety reasons and to avoid any electrical damage. Next, locate the current power inverter in your RV. It is usually mounted in a cabinet or storage compartment and may be connected to the RV’s wiring system.
Carefully disconnect any wires or cables connected to the power inverter. Now, carefully remove the old power inverter from its mounting location. This may involve unscrewing or unfastening any brackets or screws holding it in place.
Use caution when handling the old power inverter, as it may still have electrical power stored in it. Once the old power inverter is removed, it is time to install the new inverter. Take the new power inverter and position it in the same location as the old one.
Make sure it is securely mounted and fastened in place, using any necessary brackets or screws. Next, reconnect the wires and cables to the new power inverter, following any instructions or diagrams provided by the manufacturer. Double-check that all connections are secure and properly tightened.
Step 5: Reconnect the power supply
rv power inverter, reconnect power supply
Tips and Recommendations
Changing the power inverter in your RV may sound like a daunting task, but with a few simple steps, you can do it yourself. First, make sure to disconnect your RV from any power source and turn off all appliances. Locate the power inverter, which is typically installed near the batteries.
Using a wrench or screwdriver, remove the screws or bolts holding the inverter in place. Carefully disconnect the cables from the old inverter, taking note of their positions for reinstallation. Next, connect the cables to the new inverter in the same positions as before.
Once everything is securely connected, reattach the inverter to its mounting location and tighten the screws or bolts. Make sure all connections are tight and secure. Finally, turn on the power source and test the inverter to ensure it is working properly.
By following these steps, you can easily change the power inverter in your RV and ensure reliable power for your travels.
Safety precautions to follow
safety precautions
Consulting an expert
consulting an expert, tips and recommendations
Conclusion
In conclusion, changing your RV power inverter is a bit like giving your RV a brain transplant. Just as the brain controls all the functions of the body, the power inverter controls all the electrical systems in your RV. So, when it starts acting up and causing issues, it’s time to swap it out for a fresh one.
But fear not, for this is not a task reserved solely for the techno-savvy. With a little knowledge and a small arsenal of tools, you can conquer this electrical beast and restore power to your kingdom on wheels. First, size up your adversary.
Determine the wattage and voltage requirements of your RV’s electrical system and choose an inverter that matches. Remember, you want an inverter that can handle the demands of your gadgets and gizmos, without frying itself in the process. Next, gather your tools.
You’ll need a trusty screwdriver, wire cutters, electrical tape, and a healthy dose of confidence. With these tools in hand, you can tackle the inverter like a seasoned warrior. Now comes the moment of truth: disconnecting and removing the old inverter.
But be warned, dear adventurer, for electrical currents lurk behind those plastic panels. Safety first! Cut the power by disconnecting the battery and double-check that all circuits are dead before proceeding. With the old inverter out of the way, it’s time to usher in the new champion.
Connect the cables, matching positive to positive and negative to negative, ensuring a secure and snug fit. Use your electrical tape to wrap and seal the connections, protecting them from the elements and keeping them in line. Lastly, bring your RV back to life by reconnecting the battery and powering up the system.
FAQs
How does an RV power inverter work?
An RV power inverter works by converting DC (direct current) power from the RV’s batteries into AC (alternating current) power that can be used to run household appliances and electronics.
What size power inverter do I need for my RV?
The size of the power inverter you need for your RV depends on the power requirements of the appliances and electronics you plan to use. It is recommended to choose an inverter that can handle a slightly higher wattage than what you anticipate needing.
Can I run my RV air conditioner with a power inverter?
It is generally not recommended to run an RV air conditioner with a power inverter, as air conditioners require a large amount of power and can quickly drain the RV’s batteries. It is more practical to use a generator or shore power to run the air conditioner.
How do I install a power inverter in my RV?
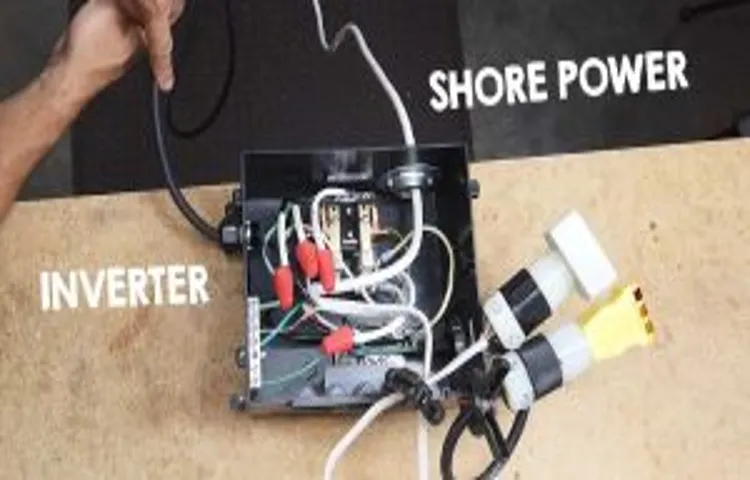
To install a power inverter in your RV, you will need to connect it to the RV’s batteries and the AC electrical system. It is recommended to consult the manufacturer’s instructions or seek the help of a professional to ensure proper installation and avoid any electrical hazards.
What are the benefits of using an RV power inverter?
Using an RV power inverter allows you to use your RV’s batteries to power household appliances and electronics, providing more flexibility and convenience while on the road. It also eliminates the need for a separate generator for powering AC devices.
Can I connect multiple batteries to my RV power inverter?
Yes, you can connect multiple batteries to your RV power inverter in parallel to increase the available power capacity and extend the battery runtime. However, it is important to ensure that the batteries are properly matched and connected to avoid uneven charging and potential damage.
How can I prolong the lifespan of my RV power inverter?
To prolong the lifespan of your RV power inverter, you should regularly check and maintain the RV’s batteries to ensure they are in good condition. Avoid overloading the inverter by not exceeding its power capacity, and protect it from excessive heat and moisture. Regularly inspect and clean the connections to prevent corrosion.