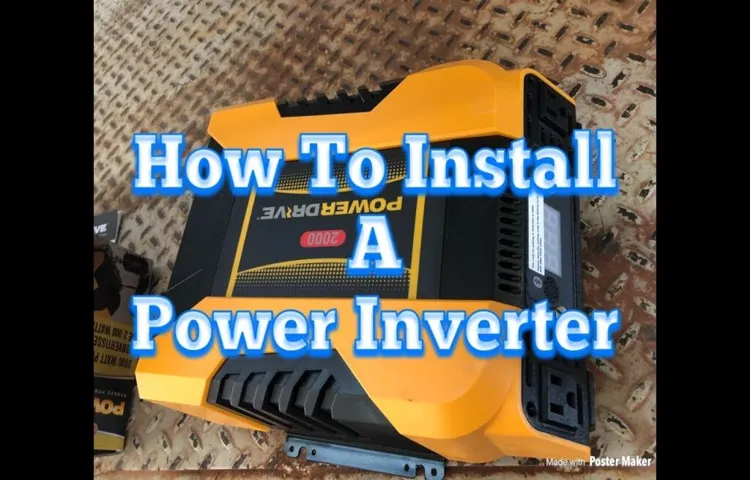
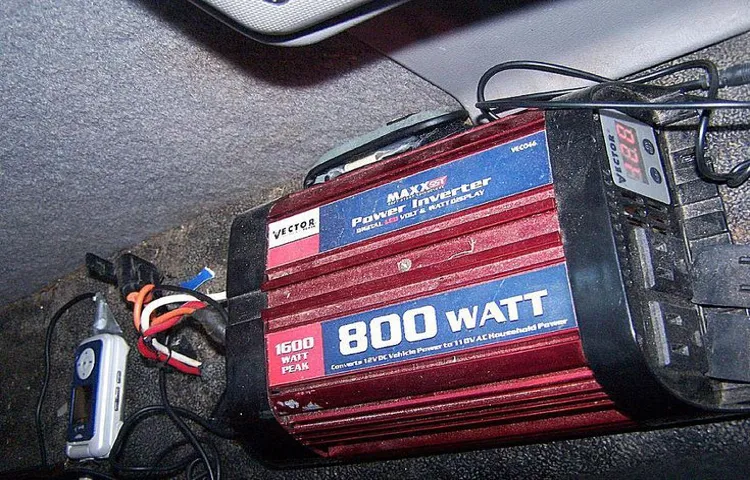
Have you ever found yourself wishing you had a power source in your truck to charge your devices or power small appliances? Well, installing a power inverter might be the solution you’ve been looking for. A power inverter allows you to convert the DC power from your truck’s battery into AC power that can be used to run a wide range of devices and appliances while you’re on the go. Whether you’re a truck driver who spends long hours on the road or a weekend adventurer looking for an extra level of comfort during your trips, installing a power inverter in your truck can greatly enhance your overall experience.
In this blog post, we’ll guide you through the step-by-step process of installing a power inverter in your truck, so you can enjoy the convenience of having a portable power source wherever you go. So, let’s get started and power up your truck!
Table of Contents
- 1 Introduction
- 2 Step 1: Gather the necessary tools and materials
- 3 Step 2: Determine the location for the power inverter
- 4 Step 3: Disconnect the negative battery cable
- 5 Step 4: Mount the power inverter
- 6 Step 5: Connect the power inverter to the battery
- 7 Step 6: Secure and organize the wiring
- 8 Step 7: Test the power inverter
- 9 Conclusion
- 10 FAQs
Introduction
Installing a power inverter in a truck can be a great way to have access to electrical power on the go. Whether you need to charge your smartphone, power a laptop, or run small appliances, a power inverter can come in handy. But how do you go about installing one in your truck? Well, it’s actually easier than you might think.
First, you’ll need to choose the right power inverter for your needs. Consider factors such as the wattage you require and any specific features you may want, like USB ports or surge protection. Once you have your power inverter, you’ll need to decide where to mount it in your truck.
This will depend on factors such as the size of your inverter and where the electrical connections are located in your truck. Once you’ve found a suitable location, you’ll need to connect the inverter to your truck’s battery. This usually involves connecting the positive and negative power cables to the corresponding terminals on the battery.
It’s important to make sure all connections are secure and the cables are properly insulated to prevent any accidents. Finally, test your power inverter to make sure it’s working properly before hitting the road. Plug in a device or appliance and ensure that it receives the necessary power.
With a little bit of time and effort, you’ll have a power inverter installed in your truck, ready to provide electricity wherever you go.
Why install a power inverter in your truck?
power inverter in truck, install power inverter in truck, truck power inverter, benefits of power inverter, truck accessories, electrical power in truck

Types of power inverters
types of power inverters
Step 1: Gather the necessary tools and materials
Installing a power inverter in your truck can make all the difference when it comes to powering your devices on the go. But before you can start enjoying the convenience of having AC power in your truck, you’ll need to gather a few tools and materials. The first thing you’ll need is a power inverter.
Make sure to choose one that is compatible with the voltage and power requirements of your truck. You’ll also need a wrench or socket set to disconnect the negative battery cable, as well as wire cutters and crimping tools to connect the inverter to the battery. Additionally, you’ll need an appropriately sized fuse and fuse holder to protect the electrical system, as well as electrical tape or heat shrink tubing to secure your connections.
And finally, don’t forget a good set of wire strippers and a wire crimper to properly connect the wires to the inverter. With all the tools and materials in hand, you’ll be ready to proceed to the next step in installing your power inverter in your truck.
List of tools and materials needed
In order to complete a project successfully, it is important to gather all the necessary tools and materials before getting started. This ensures that you have everything you need within reach and can work efficiently without any unnecessary interruptions. For this particular project, you will need a few key items.
First and foremost, you will need a measuring tape to accurately measure your materials and ensure precise cuts. A level will also come in handy to ensure that everything is aligned and straight. Next, you will need a power drill with appropriate drill bits for making holes.
A screwdriver set is essential for driving in screws, while a hammer will be useful for any nails that need to be hammered in. Additionally, you will need a pencil or marker for marking measurements and cuts. As for materials, you will need the actual All of these tools for this project, together with some patience and determination, will ensure that your project goes smoothly and the end result is something to be proud of.
So let’s get everything together and start build something amazing!
Step 2: Determine the location for the power inverter
So, you’ve decided to install a power inverter in your truck. That’s a great choice! Now, it’s time to determine the best location for your power inverter. You want a spot that is easily accessible and won’t interfere with your driving or passenger comfort.
One popular option is to install the power inverter underneath the seats. This allows for easy access and keeps the inverter out of the way. Another option is to mount the inverter in the trunk or bed of the truck.
This is a good choice if you have a larger inverter or if you want to keep it completely out of sight. Just make sure to secure it properly so it doesn’t slide around during driving. Regardless of where you choose to install your power inverter, make sure it is easily accessible and securely mounted to prevent any issues while on the road.
Considerations for choosing the location
When it comes to determining the location for your power inverter, there are a few key considerations to keep in mind. First and foremost, you’ll want to choose a location that is easily accessible and allows for proper ventilation. Power inverters generate heat, so it’s important to place them in a well-ventilated area to prevent overheating.
Additionally, you’ll want to choose a location that is relatively close to the batteries or power source, as this will minimize voltage drop and ensure efficient power conversion. It’s also important to consider the proximity to other electrical components and wiring, to minimize the length of the wiring required and reduce the risk of interference or damage. Lastly, you’ll want to choose a location that is safe and secure, to protect the inverter from potential damage or theft.
By taking these factors into account, you can ensure that your power inverter is installed in the optimal location for optimal performance and longevity.
Step 3: Disconnect the negative battery cable
Now that you’ve gathered all the necessary tools and materials, it’s time to begin installing a power inverter in your truck. The first step in this process is to disconnect the negative battery cable. This is an important safety measure to prevent any accidental electrical shocks or damage to your truck’s electrical system.
To do this, locate the negative terminal on your truck’s battery, usually marked with a (-) symbol. Use a wrench or socket to loosen the bolt that holds the cable in place. Once it is loose, carefully remove the cable from the terminal and move it away from the battery.
This will completely disconnect the electrical current from your truck and ensure you can work safely on the next steps of the installation process. Remember, safety always comes first!
Procedure for disconnecting the negative battery cable
When it comes to disconnecting the negative battery cable, it’s important to follow a specific procedure to ensure safety and avoid any damage. Step 3 in this process is the actual disconnection of the negative battery cable. This step involves locating the negative terminal on the battery, typically marked with a “-” sign, and using a wrench or socket to loosen the nut on the cable clamp.
Once the nut is loose, you can carefully wiggle the cable off the terminal. It’s crucial to be cautious and avoid touching any metal surfaces with the cable or wrench, as this can cause a short circuit or electrical shock. Disconnecting the negative battery cable is an essential step in various automotive tasks, such as replacing the battery, conducting repairs, or performing maintenance on electrical components.
So, the next time you need to disconnect your negative battery cable, remember to follow this procedure for a safe and smooth process.
Step 4: Mount the power inverter
Now that you have successfully installed the power inverter in your truck, it’s time to mount it in place. Mounting the power inverter securely is important to ensure its stability and prevent any damage while driving. Begin by selecting a suitable location for the power inverter.
Ideally, it should be mounted in a location that is easily accessible and safe. You can choose to mount it under the seat, in the trunk, or even on a custom-made bracket. Make sure to use appropriate mounting hardware, such as screws or bolts, to secure the power inverter in place.
Additionally, consider using rubber or foam padding to provide added protection and reduce vibrations. Once mounted, double-check that all connections are secure and that the power inverter is in a position where it won’t interfere with any other components in your truck. With the power inverter securely mounted, you are now ready to enjoy the convenience of using your truck’s electrical power to charge devices and run appliances while on the road.
Mounting options and instructions
power inverter mounting options, mount power inverter, installing a power inverter Once you’ve chosen the perfect power inverter for your needs, it’s time to mount it in your vehicle. Mounting your power inverter securely is crucial to ensure its safety and proper functioning. There are several mounting options available, depending on your preference and the type of vehicle you have.
One common mounting option is to use a bracket or mounting plate. These can be easily attached to a solid surface in your vehicle, such as the floor or the side of a cabinet. Make sure to use strong screws or bolts to secure the bracket or mounting plate in place.
Another option is to use adhesive Velcro or double-sided tape. This is a good choice if you want a more temporary or flexible mounting solution. Simply attach one side of the Velcro or tape to the power inverter and the other side to a clean and dry surface in your vehicle.
This option is especially useful if you need to remove the power inverter frequently or if you’re renting a vehicle. If you have limited space in your vehicle, you may consider mounting the power inverter vertically. This can be done using L-brackets or other similar mounting hardware.
Just make sure to secure the power inverter tightly to prevent it from moving around during vehicle vibrations. When mounting your power inverter, it’s important to consider its ventilation needs. Power inverters generate heat, so they need proper airflow to prevent overheating.
Make sure to mount the power inverter in an open area with sufficient airflow, away from direct sunlight or sources of heat. Before mounting the power inverter, carefully read the manufacturer’s instructions to ensure you’re following their specific requirements. They may provide additional guidelines or recommendations for mounting options.
Step 5: Connect the power inverter to the battery
Now that you’ve got everything ready, it’s time to connect the power inverter to the battery in your truck. This is a crucial step because the power inverter needs a direct connection to the battery to work properly. First, locate the positive and negative terminals on your truck’s battery.
The positive terminal is usually marked with a “+” sign, and the negative terminal is marked with a “-” sign. Next, identify the cables that came with your power inverter. Most power inverters have a set of cables with red and black connectors.
The red connector is for the positive terminal, and the black connector is for the negative terminal. Connect the red cable to the positive terminal of the battery and make sure it is securely attached. Then, connect the black cable to the negative terminal of the battery in the same manner.
Once the cables are securely connected, you can turn on the power inverter and test it to make sure it’s working properly. You can do this by plugging in a device or appliance into one of the power outlets on the inverter and seeing if it powers on. Remember, safety is important when working with electricity, so always take precautions such as wearing gloves and protective eyewear.
Also, make sure the power inverter is turned off before connecting it to the battery. Now you’re ready to enjoy the convenience of having a power inverter in your truck. With a power inverter, you can power up your devices and appliances on the go, making road trips and outdoor adventures even more enjoyable.
So go ahead, connect that power inverter and start experiencing the benefits today!
Proper wiring and connection
power inverter, battery, proper wiring, connection
Step 6: Secure and organize the wiring
Now that you have successfully installed the power inverter in your truck, it’s time to secure and organize the wiring. This step is crucial to ensure the safety and efficiency of your power inverter setup. Start by carefully securing the wires using zip ties or wire clips.
Make sure they are not loose or hanging, as this can lead to potential hazards or damage. Next, neatly organize the wires by grouping them together and using wire looms or cable sleeves to keep them organized and protected. This will not only make your setup look professional but also prevent any damage or accidents that can occur from tangled or exposed wires.
Additionally, consider using wire trays or mounts to keep the wires in place and prevent them from shifting or getting in the way of other components in your truck. Taking the time to secure and organize the wiring will ensure a clean and hassle-free power inverter installation.
Tips for cable management and securing the wiring
Secure and organize the wiring is an essential step in cable management. After all the cables have been routed and connected, it is important to ensure that they are properly secured and organized to prevent any accidents or damage. One way to do this is by using cable ties or Velcro straps to bundle the cables together.
This not only keeps the cables neat and tidy but also helps to prevent them from getting tangled or caught on anything. Additionally, it is a good idea to label the cables so that you know exactly what each one is for. This can be done using color-coded tags or labels.
By taking the time to properly secure and organize the wiring, you can ensure that your setup is not only functional but also safe and visually appealing.
Step 7: Test the power inverter
Once you’ve installed your power inverter in your truck, it’s important to test it to ensure everything is working correctly. To do this, start by connecting the inverter to your truck’s battery. Make sure to connect the positive and negative cables to the corresponding terminals on the battery.
Once everything is connected, turn on the inverter and try using a small electronic device, like a phone charger or a laptop, with it. If the inverter is working properly, the device should power on and charge as it normally would. If the inverter isn’t working, double-check your connections and make sure everything is securely fastened.
If you’re still having issues, it may be a problem with the inverter itself and you may need to consult the manufacturer’s instructions or seek professional help.
Procedure for testing the power inverter
The final step in testing a power inverter is to actually test it out. This step is crucial as it will determine whether the inverter is functioning properly or not. To test the power inverter, you will need to connect it to a power source and then connect a device to it.
This device can be anything that requires a power source, such as a laptop or a phone charger. Once the device is connected, turn on the inverter and see if the device powers up. If it does, then the inverter is working correctly.
However, if the device does not power up or if there are any issues with the power supply, then there may be a problem with the inverter. In this case, you may need to troubleshoot or consult a professional for further assistance. Overall, testing the power inverter is a critical step in ensuring that it is functioning properly and providing the necessary power for your devices.
Conclusion
Now that you know how to install a power inverter in your truck, you’ll never have to worry about running out of power on the go. With just a few simple steps and some basic tools, you can harness the power of your vehicle’s battery and transform it into a portable electrical outlet. No longer will you need to rely on expensive adapters or search for available charging stations – you’ll have the convenience and flexibility of electricity wherever your truck takes you.
So go forth and embrace the power (literally) – charge your laptop, power your tools, or even brew a cup of coffee in the middle of nowhere. Installing a power inverter in your truck is a small investment that will pay off in big ways, providing you with the freedom to stay connected and productive while on the road. And remember, with great power comes great responsibility – always make sure to use the inverter safely and follow the manufacturer’s instructions.
Happy trucking and may your electrical adventures be electrifying!”
Benefits of having a power inverter in your truck
power inverter, test a power inverter, benefits of having a power inverter, truck, portable power source. Having a power inverter in your truck can provide numerous benefits, such as being a reliable and convenient portable power source. But how do you know if your power inverter is working correctly? Step 7 of testing a power inverter is crucial to ensure its functionality.
To test your power inverter, start by connecting it to your truck’s battery and turning it on. Then, plug in a small device like a phone charger or laptop charger into the inverter’s AC outlet and see if it powers up. If the device charges or turns on, it means that your power inverter is working properly.
On the other hand, if the device doesn’t charge or turn on, you may need to check the connections or consult the user manual for troubleshooting tips. Testing your power inverter is essential because it gives you peace of mind and ensures that you can rely on it when you need it the most. Whether you’re on a road trip and need to charge your electronic devices or in an emergency situation where you require a power source, a properly functioning power inverter can be a lifesaver.
It allows you to have access to electricity for various purposes, such as powering lights, tools, and appliances. Moreover, a power inverter in your truck can also be beneficial for camping trips, tailgating events, or any outdoor activity where electricity is limited. It allows you to bring along your small appliances or gadgets and use them even when you’re away from a traditional power source.
From charging your phone to using a blender or a mini-fridge, a power inverter brings convenience and comfort to your on-the-go lifestyle. In conclusion, testing your power inverter is a crucial step in ensuring its functionality and reliability. By performing a simple test, you can determine if it’s working properly and troubleshoot any potential issues.
Having a power inverter in your truck offers a range of benefits, from being a portable power source during emergencies to providing convenience and comfort during road trips or outdoor activities. So, don’t forget to test your power inverter and enjoy the peace of mind that comes with knowing you have a reliable source of power in your truck.
FAQs
What is a power inverter and why would I need one in my truck?
A power inverter is a device that converts DC (direct current) power from your truck’s battery to AC (alternating current) power that can be used to run household appliances and electronics. You would need a power inverter in your truck if you want to use devices that require AC power while on the road.
How do I choose the right power inverter for my truck?
When choosing a power inverter for your truck, you should consider the power needs of the devices you plan to run, the size and capacity of your truck’s battery, and any potential electrical limitations of your truck’s electrical system. It is also important to consider the inverter’s efficiency and safety features.
How do I install a power inverter in my truck?
The installation process for a power inverter in a truck may vary depending on the make and model of your truck and the specific inverter you are using. Generally, the installation involves connecting the inverter to the truck’s battery, securing it in a safe location, and properly grounding it to prevent electrical issues.
Can I use a power inverter while my truck is in motion?
Yes, you can use a power inverter while your truck is in motion. However, it is important to ensure that the inverter is securely installed and that any devices connected to it are properly secured to prevent them from becoming a hazard in the event of sudden stops or accidents.
Is it safe to leave a power inverter connected to my truck’s battery when the engine is off?
It is generally safe to leave a power inverter connected to your truck’s battery when the engine is off. However, it is recommended to turn off or disconnect any devices connected to the inverter to avoid draining the truck’s battery. Some inverters also have built-in safety features that automatically shut them off when the battery reaches a certain voltage level.
Can I use a power inverter to charge my laptop or other sensitive electronics?
Yes, you can use a power inverter to charge your laptop or other sensitive electronics. However, it is important to choose an inverter with a sine wave output, as this provides a clean and stable power supply that is suitable for sensitive electronic devices.
How can I ensure the longevity of my power inverter in my truck?
To ensure the longevity of your power inverter in your truck, it is important to follow the manufacturer’s instructions for installation, use, and maintenance. This includes regularly checking and cleaning the inverter’s ventilation system, avoiding overloading the inverter with excessive power demands, and replacing any worn-out components or wiring promptly.


