
Hey there, welcome to our blog! In this post, we’re diving into the fascinating world of “Introduction” – a concept that holds immense importance in various aspects of our lives. Whether it’s meeting new people, starting a new job, or even writing a blog like this, introductions play a crucial role in creating connections, setting the tone, and capturing attention. Think about it – when you meet someone for the first time, what’s the first thing you do? You introduce yourself, right? Well, the same goes for any piece of writing, especially a blog.
The introduction serves as the gateway to your content, the hook that grabs the reader’s attention and entices them to keep reading. Just as a captivating story begins with an engaging opening line, a well-crafted blog introduction sets the stage for what’s to come. It’s the perfect opportunity to pique your readers’ curiosity, make them feel like they’re part of the conversation, and leave them wanting more.
But how do you strike that perfect balance between informative, engaging, and concise? How do you seamlessly integrate keywords and optimize your introduction for search engines, while still keeping it natural and conversational? Don’t worry, we’ve got you covered. In this blog post, we’ll share some invaluable tips and techniques to help you craft compelling and effective introductions that leave a lasting impression. From the power of storytelling to the art of asking rhetorical questions, we’ll explore various strategies that will take your introductions to the next level.
So if you’re ready to grab your readers’ attention from the get-go, captivate them with your words, and leave a lasting impact, then let’s jump in and master the art of introductions together!
Table of Contents
Explanation of 110v Power Inverter
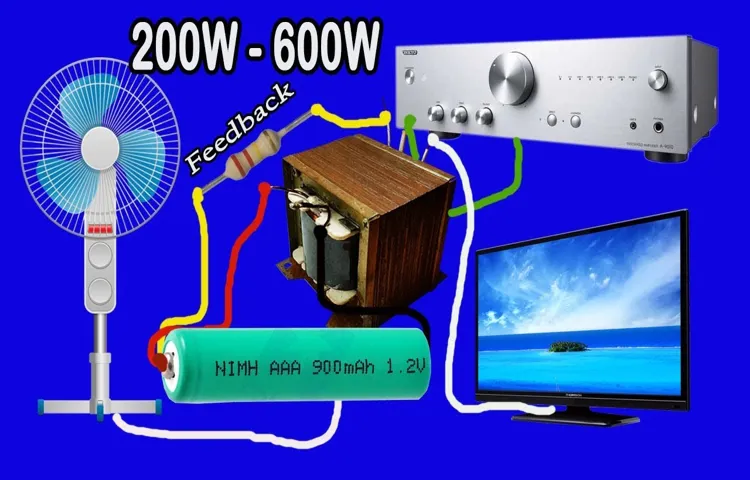
Are you tired of running out of power on your camping trips or road trips? Well, making your own 110v power inverter can be the perfect solution for you! A power inverter is a device that converts DC (direct current) power from a battery into AC (alternating current) power, which is what most household appliances and electronics require. With a 110v power inverter, you can use your car battery to power up your laptop, phone charger, or even a small TV while on the go. It’s like having a portable power outlet wherever you are! Making a 110v power inverter may sound complicated, but it’s actually quite simple.
All you need is a few basic components like a transformer, a diode, capacitors, and resistors. You can easily find these components at your local electronics store or online. Once you have all the necessary components, you can follow a step-by-step guide or watch a tutorial video to assemble them all together.
The end product will be a compact and portable power inverter that you can use whenever you need a power source on the go. So why wait? Start creating your own 110v power inverter today and never worry about running out of power again!
What is a 110v Power Inverter?
110v power inverter
Why do you need a 110v Power Inverter?
110v power inverter, Explanation of 110v Power Inverter. Hey there! So, you’re probably wondering why you need a 110v power inverter, right? Well, let me break it down for you. A 110v power inverter is a device that allows you to convert the DC power from your car’s battery into AC power.
This means that you can use your car’s battery to power appliances and electronics that typically require a standard household outlet. Think about it like this – you’re on a road trip and you want to charge your laptop or use a small portable fan in the car. Without a power inverter, you would be out of luck.
But with a 110v power inverter, you can plug in your devices and use them just like you would at home. Not only is a 110v power inverter great for road trips, but it can also come in handy in emergency situations. Let’s say there’s a power outage at your home and you need to charge your phone or use a small appliance.
With a power inverter, you can simply plug into your car’s battery and have access to electricity. Now, you might be thinking, why not just use the car’s cigarette lighter adapter? Well, while the cigarette lighter adapter can power some devices, it’s not designed to handle larger appliances or electronics. That’s where a 110v power inverter comes in.
It allows you to safely power a variety of devices, from laptops and TVs to power tools and even small kitchen appliances. So, whether you’re planning a road trip, need backup power during a storm, or simply want to be prepared for any situation, a 110v power inverter is definitely a must-have. It gives you the freedom to use your car’s battery as a power source and ensures that you never have to worry about being without electricity again.
Trust me, once you start using a power inverter, you’ll wonder how you ever lived without it.
Benefits of making your own 110v Power Inverter
110v power inverter, making your own power inverter, benefits of DIY power inverter
Safety considerations
110v power inverter. “Are you tired of being limited when it comes to using your electronic devices while on the go? Well, look no further than a 110v power inverter! This nifty little device allows you to convert the DC power from your car’s battery into the AC power that your devices require. It’s like having an electrical outlet in your car! But before you rush out to buy one, there are a few safety considerations to keep in mind.
Firstly, it’s important to make sure that your car’s battery can handle the extra load that the power inverter will place on it. You don’t want to drain your battery and end up stranded! Secondly, you’ll need to be mindful of the power requirements of your devices. While a 110v power inverter can handle most low-power electronics like laptops and smartphones, it may not be suitable for high-power devices like refrigerators or power tools.
Lastly, it’s crucial to ensure that the power inverter is properly installed and grounded to prevent any electrical accidents. By taking these safety precautions, you can confidently enjoy the convenience of a 110v power inverter without compromising your safety on the road.”
Materials and Tools
If you want to have the ability to convert DC power to AC power on the go, then making a 110v power inverter is a great DIY project. To make a 110v power inverter, you will need a few materials and tools. First, you will need a DC power source, such as a battery or a car’s alternator.
Next, you will need an inverter module, which is the main component that will convert the DC power into AC power. You will also need a set of wires to connect the DC power source to the inverter module. Additionally, you will need a heat sink to dissipate the heat generated by the inverter module.
Finally, you will need some basic tools such as wire cutters, wire strippers, soldering iron, and heat shrink tubing. With these materials and tools in hand, you are ready to start building your 110v power inverter.
List of Materials
List of Materials When it comes to starting a new DIY project, having the right materials and tools is crucial. As a DIY enthusiast, you want to make sure you have everything you need before getting started. So, what exactly do you need? Let’s take a look at some essential materials and tools that every DIYer should have on hand.
First and foremost, you’ll need the appropriate materials for your project. This could include things like wood, metal, or fabric, depending on what you’re working on. Make sure to choose materials that are suitable for the task at hand and of good quality.
It’s also a good idea to have some extra supplies on hand in case of any mistakes or accidents along the way. Next, you’ll need a variety of tools to help you bring your project to life. Some basic tools that every DIYer should have include a hammer, screwdriver set, measuring tape, and a level.
These tools will come in handy for a wide range of projects and tasks. Depending on the complexity of your project, you may also need more specialized tools such as a power drill, saw, or sander. Additionally, it’s important to have safety equipment on hand.
This includes things like safety glasses, gloves, and a dust mask. Safety should always be a top priority when working on any DIY project, so make sure to protect yourself properly. Lastly, don’t forget about adhesives and fasteners.
Depending on the materials you are working with, you may need glue, nails, screws, or other fasteners to hold everything together. It’s a good idea to have a variety of adhesives and fasteners on hand so that you’re prepared for any situation that may arise. In conclusion, having the right materials and tools is essential for any DIY project.
List of Tools
When it comes to any DIY project, having the right materials and tools is crucial for success. Whether you’re building a piece of furniture, repairing a leaky faucet, or working on a home improvement project, having the right tools can make all the difference. Some must-have tools for DIY enthusiasts include a hammer, screwdrivers (both flathead and Phillips), pliers, a tape measure, a level, and a utility knife.
These basic tools are versatile and can be used in a variety of projects. However, depending on the specific project you’re working on, you may also need more specialized tools such as a power drill, a saw, or a wrench set. It’s essential to have a well-stocked toolbox so you can tackle any project with confidence.
So, before you start your next DIY endeavor, make sure you have all the necessary materials and tools at your disposal.
Step-by-Step Instructions
If you’re tired of relying on battery power or generators for your portable electronics, creating your own 110v power inverter can be a game-changer. By converting the DC power from a battery into AC power, you can easily power up your devices wherever you go. But how exactly do you make one? Well, first you’ll need a number of materials, including a transformer, a diode, capacitors, resistors, and a circuit board.
Once you have all the necessary components, it’s time to start assembling. Begin by connecting the transformer to the circuit board, being mindful of the input and output connections. Next, attach the diode, capacitors, and resistors in their respective places, following the circuit diagram provided with your components.
Finally, double-check all of your connections and make sure everything is securely in place. Once you’ve completed these steps, you’ll have your very own 110v power inverter ready to go! So go ahead, power up your electronics and enjoy the freedom of having a reliable power source wherever you are. It’s as easy as that!
Step 1: Gather all the materials and tools
“Step 1: Gather all the materials and tools” Before you start your DIY project, it’s important to gather all the materials and tools you will need. This step ensures that you have everything you need at your fingertips, maximizing efficiency and reducing the chance of interruptions during the project. So, what exactly do you need to gather? Well, it depends on the specific project you are undertaking, but some common items include measuring tape, screwdrivers, nails, hammer, level, drill, saw, paintbrushes, and safety equipment like goggles and gloves.
Take some time to make a list of all the materials and tools required and check off each item as you gather them. This way, you won’t have to run back and forth to the hardware store or search for tools in the middle of your project.
Step 2: Plan your power inverter design
power inverter design, plan power inverter design, step-by-step instructions
Step 3: Build the circuit board
Step 3 of building a DIY circuit board involves assembling the components onto a circuit board. This step is crucial as it brings all the pieces together and turns them into a functioning electrical circuit. To start, gather all the necessary components such as resistors, capacitors, transistors, and integrated circuits.
Carefully refer to the circuit diagram to ensure correct placement of each component. Begin by inserting the components into the corresponding holes on the circuit board. Make sure to align the polarity markings on the components with the markings on the board.
Once all the components are in place, it’s time to tidy up the connections. Use a soldering iron to solder the leads of each component to the circuit board. Be sure to apply the soldering iron tip to both the lead and the copper pad on the board to create a strong bond.
Take your time and be careful not to overheat the components or create solder bridges between pads. After soldering all the connections, carefully trim off any excess leads to ensure a neat appearance. Finally, give the circuit board a visual inspection to check for any shorts or missing connections.
If everything looks good, congratulations! You have successfully built your own circuit board.
Step 4: Connect the components
To connect the components in your electronics project, you will need to follow a series of steps. First, gather all the necessary components, such as resistors, capacitors, and wires. Make sure you have a clear understanding of the circuit diagram for your project, as this will guide you in connecting the components correctly.
Next, start by connecting the power source to the circuit. This typically involves connecting the positive terminal of the power source to the positive terminal of the first component in the circuit, and the negative terminal to the negative terminal of the last component. Use wires to make these connections, ensuring that they are securely attached.
Finally, connect the remaining components in the circuit, following the circuit diagram carefully. This may involve connecting components in series or parallel, depending on the requirements of your project. Double-check all the connections to ensure they are secure before powering on your project.
By following these step-by-step instructions, you will be able to successfully connect the components in your electronics project.
Step 5: Test the power inverter
power inverter, testing power inverter. In step 5 of the installation process, it’s time to test the power inverter. This step is crucial to ensure that everything is working properly before connecting it to the electrical system.
To test the power inverter, start by connecting the positive and negative cables from the inverter to a 12-volt battery. Make sure to connect the positive cable to the positive terminal of the battery and the negative cable to the negative terminal. Once the connections are secure, turn on the power inverter.
You should see lights indicating that the inverter is receiving power. You can also test the inverter by plugging in a small electronic device, like a phone charger, and see if it powers on. If everything is working as it should, you are ready to move on to the next step.
Troubleshooting Tips
Want to know how to make a 110v power inverter? Well, you’ve come to the right place! Making your own power inverter can be a great DIY project that allows you to have a portable source of power when you’re on the go or in a remote location. To get started, you’ll need a few key components, including a direct current (DC) power supply, an inverter transformer, and some basic electrical connections. It’s important to keep safety in mind throughout the process, so be sure to have the necessary tools and equipment on hand.
Once you have all the materials, you can start by connecting the DC power supply to the inverter transformer. Make sure to follow the specific wiring diagram for your transformer to ensure proper connections. Once everything is connected, you can test your inverter by plugging in a small appliance or device.
If it works, congratulations – you’ve successfully created a 110v power inverter! If not, don’t worry, troubleshooting can often solve the issue. Check all your connections to make sure they are secure and properly connected, and double-check that you have the correct wiring configuration. If you’re still having trouble, it may be best to consult a professional or seek advice from online forums or communities dedicated to DIY electronics.
Making a power inverter can be a rewarding project, but it’s important to approach it with caution and ensure you have a thorough understanding of electrical safety. So, what are you waiting for? Start your DIY adventure and enjoy the convenience of a homemade 110v power inverter!
Conclusion
And there you have it, a step-by-step guide on how to make your very own 110v power inverter! Now you can bring the power of electrifying innovation right into your own hands. But remember, with great power comes great responsibility. So before you start plugging in all your shiny gadgets, be sure to double-check your connections and triple-check your circuitry.
After all, the last thing you want is to inadvertently create the world’s first portable disco party circuit breaker. So go forth, fellow inventors, and let your creativity shine like the wattage of a thousand light bulbs. Happy inventing!”
Final Thoughts
Have you ever found yourself in a situation where you needed a power source but only had access to a 110v outlet? If so, you’re not alone. Many people find themselves in need of a 110v power inverter, but don’t know how to make one. Luckily, it’s easier than you might think! By following a few simple steps, you can create your own 110v power inverter and never be without a power source again.
With just a few basic materials and some basic electrical knowledge, you can have your own homemade power inverter up and running in no time. So why wait? Start making your own 110v power inverter today and never be without power again.
Additional Resources
If you’re interested in learning how to make a 110v power inverter, there are several resources available to help you get started. One option is to check out online forums and communities dedicated to DIY electronics projects. These forums often have members who have successfully built their own power inverters and are willing to share their knowledge and experiences.
You can learn from their tips and tricks, as well as ask any questions you may have along the way. Another option is to look for step-by-step guides or tutorials on websites or YouTube channels that specialize in DIY electronics projects. These resources can provide you with detailed instructions and even provide visual demonstrations to guide you through the process.
By utilizing these additional resources, you can gain the knowledge and confidence needed to successfully build your own 110v power inverter.
FAQs
What is a 110v power inverter?
A 110v power inverter is a device that converts DC (direct current) power from a battery or solar panel into AC (alternating current) power that can be used to run various household appliances and electronic devices.
How does a 110v power inverter work?
A 110v power inverter works by using electronic components to convert the DC power from a battery or solar panel into AC power. This is done through a process called inversion, where the DC power is converted to AC power by switching the polarity of the current.
What can a 110v power inverter be used for?
A 110v power inverter can be used for a variety of applications, including powering small household appliances like laptops, TVs, and smartphones, as well as tools and equipment that require AC power in remote locations or during power outages.
How do I choose the right size 110v power inverter for my needs?
When choosing the right size 110v power inverter, you need to consider the total wattage of the devices or appliances you plan to power. Make sure to choose an inverter that can handle the total wattage requirements, and also consider any surge or starting currents that may be required for certain devices.
Can I connect a 110v power inverter directly to my car battery?
Yes, you can connect a 110v power inverter directly to your car battery, as long as the inverter is rated for the maximum amperage of your car’s electrical system. However, it is recommended to use a fuse or circuit breaker to protect both the inverter and your car’s electrical system.
Is it possible to make a DIY 110v power inverter?
Yes, it is possible to make a DIY 110v power inverter, but it requires a good understanding of electronics and electrical circuits. It is generally easier and more cost-effective to purchase a pre-made power inverter, especially for higher wattage requirements.
What safety precautions should I take when using a 110v power inverter?
When using a 110v power inverter, it is important to follow safety precautions such as ensuring proper ventilation for the inverter, using the correct gauge of wires for the DC and AC connections, and avoiding overloading the inverter beyond its rated capacity. It is also recommended to use a ground fault circuit interrupter (GFCI) outlet for added safety.