
Are you tired of dealing with a leaking windshield every time it rains? Nothing can be more frustrating than driving with water dripping onto your dashboard or having your visibility impaired by a constant stream of water. But don’t worry, repairing a leaking windshield doesn’t have to be a daunting task. In fact, with a few simple steps and some basic tools, you can fix the problem yourself and save yourself a trip to the auto shop.
Think of your windshield as a protective barrier between you and the outside world. It shields you from debris, wind, and rain, ensuring your safety and comfort while driving. However, over time, the seal around your windshield can deteriorate, causing leaks.
This can be the result of age, temperature fluctuations, or even small rocks hitting your windshield. Regardless of the cause, a leaking windshield needs to be fixed promptly to prevent further damage to your car’s interior. Repairing a leaking windshield is a relatively straightforward process.
First, you’ll need to identify where the leak is coming from. This can be done by inspecting the inside of your car for dampness or water stains. Once you’ve pinpointed the location of the leak, you can proceed with the repair.
One common DIY method involves using a sealant specifically designed for windshields. This sealant is typically applied to the area where the leak is occurring, creating a watertight barrier that prevents any water from getting in. Repairing a leaking windshield not only saves you money, but it also ensures your safety on the road.
A leaking windshield can compromise your visibility, making it difficult to see other vehicles or obstacles in your path. Additionally, water damage to your car’s interior can lead to mold and mildew growth, which can be harmful to your health. By addressing the issue promptly, you can avoid these potential hazards and drive with peace of mind.
Table of Contents
Identifying the Leak
So, you’ve noticed water leaking into your car from the windshield. It’s frustrating, but don’t panic. Identifying the source of the leak can help you determine the best way to repair it.
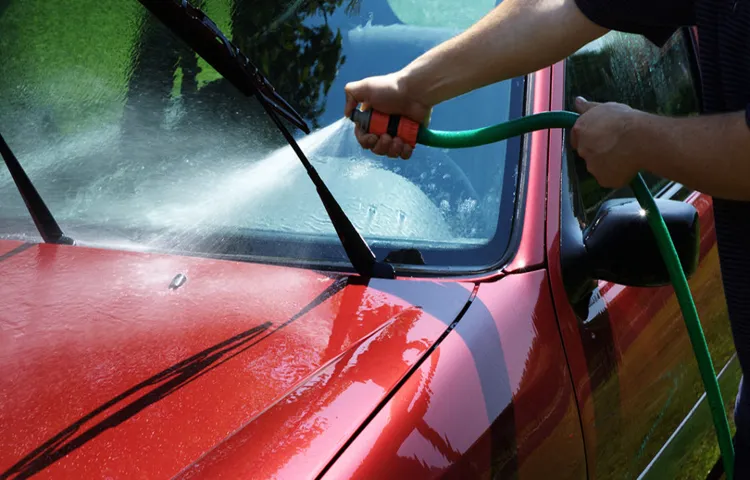
Start by checking for any visible cracks or chips in the windshield. Sometimes, even a small defect can allow water to seep through. If you don’t see any obvious damage, try using a hose to simulate rain and see if you can spot the leak.
Begin at the bottom of the windshield and slowly work your way up, paying close attention to the seals and molding around the glass. If you still can’t find the source, it may be necessary to remove the windshield for a more thorough inspection. Remember, repairing a leaking windshield is important to prevent further damage and ensure your safety while driving.
1. Inspect for visible cracks or chips
When it comes to identifying a leak in your home, the first thing you should do is inspect for visible cracks or chips. These can often be the telltale signs that water is seeping through and causing damage. Look around windows, doors, and any other areas where there may be openings in the walls or floors.
These cracks and chips may be small and easy to overlook, so it’s important to take a close look and even run your hand over them to see if you can feel any moisture. If you do find any cracks or chips, it’s important to address them right away to prevent further leaks and damage to your home.
2. Check for water stains on the interior of the car
If you’re trying to identify a leak in your car, one telltale sign to look for is water stains on the interior. Water stains can appear on the ceiling, seats, or floor, depending on where the leak is coming from. These stains may look like dark patches or discoloration on your car’s interior.
It’s important to note that not all water stains are the result of a leak. Spilled drinks or wet shoes could also cause water stains. However, if you notice water stains without any obvious cause, it’s likely that you have a leak.
Water stains can be difficult to remove and may lead to mold and foul odors if not addressed promptly. So, if you come across any water stains in your car, it’s essential to locate and fix the source of the leak as soon as possible.
3. Look for signs of water pooling on the dashboard
water pooling, leak, dashboard, signs, identifying. “Identifying a leak in your dashboard can be a tricky task, but one telltale sign to look out for is water pooling. When water leaks into your car, it can often collect on the dashboard, creating small puddles or wet spots.
These puddles may not be immediately visible, so it’s important to thoroughly inspect the entire dashboard. Check for any areas that appear damp or discolored, as this could be a sign of water damage. Another thing to look out for is a musty or moldy smell, which can indicate that water has been sitting in your car for some time.
If you notice any of these signs, it’s important to address the issue as soon as possible, as water damage can lead to further problems down the line. Whether it’s a faulty seal or a blocked drainage system, identifying the leak early on can save you time, money, and potential headaches in the future.”
Determining the Cause of the Leak
So you’ve noticed a pesky leaking windshield and you’re wondering how to fix it. Well, the first step in repairing a leaking windshield is determining the cause of the leak. There are several potential culprits that could be causing the problem.
One common cause is a damaged or worn-out windshield seal. Over time, the seal around your windshield can become cracked or deteriorated, allowing water to seep in. Another possible cause is a clogged or blocked drain tube.
Your car’s windshield is equipped with drain tubes that help funnel excess water away from the windshield and out of the vehicle. If these tubes become clogged with debris, the water can back up and leak into your car. Additionally, leaks can also occur if there is damage to the windshield itself, such as cracks or chips.
These damaged areas can provide an entry point for water to seep through. By identifying the specific cause of the leak, you can take the necessary steps to fix it and keep your windshield watertight.
1. Assess if the leak is coming from the glass or the seal
If you have a leak in your glass shower enclosure, the first step in fixing the problem is to determine where the leak is coming from. Is it the glass itself, or is it the seal around the edges? One way to assess this is to carefully inspect the area around the leak. Look for any cracks or chips in the glass that could be allowing water to escape.
If you don’t see any obvious damage, then it is likely that the leak is coming from the seal. In this case, you will need to examine the seal for any signs of wear or deterioration. Over time, the seal can become brittle and start to break down, causing leaks to occur.
Once you have identified the source of the leak, you can then take the necessary steps to fix it and prevent any further damage.
2. Examine the condition of the windshield seal
windshield seal, determine cause of leak If you suspect that your car is leaking water from the windshield, one possible cause could be a faulty windshield seal. The windshield seal is the rubber strip that surrounds the edge of the windshield and provides a barrier between the glass and the frame of the car. Over time, this seal can wear out or become damaged, allowing water to seep through and into the interior of the car.
To determine if the windshield seal is the cause of the leak, you can visually inspect the seal for any signs of damage or wear. Look for cracks, tears, or gaps in the seal that could be allowing water to enter. Additionally, you can use a hose to simulate rain and see if water is entering the car at the windshield.
If you notice any water coming in through the seal, it’s likely that the seal is the source of the leak and will need to be repaired or replaced.
3. Check for damage or wear on the wiper blade seals
In order to determine the cause of a leak in your wiper blade seals, there are a few things you can check for. First, take a close look at the rubber seals themselves. Are there any signs of damage or wear? Over time, the rubber can dry out and become cracked or brittle, which can lead to leaks.
If you notice any damage, it may be time to replace the seals. Another thing to check for is any debris or build-up on the wiper blade itself. Sometimes, leaves, dirt, or other particles can get trapped in the seals and prevent them from creating a tight seal.
If this is the case, a good cleaning may be all that’s needed to fix the leak. Lastly, consider the overall condition of the wiper blade assembly. If the blades are worn or damaged, they may not be able to create a proper seal, leading to leaks.
In this case, it may be necessary to replace the entire assembly. By checking these potential problem areas, you can determine the cause of the leak and take the appropriate steps to fix it.
Fixing a Small Crack or Chip
Windshield cracks and chips are not only unsightly but can also lead to leaks and further damage if left untreated. Luckily, repairing a small crack or chip in your windshield is a relatively simple process that you can do yourself. To begin, you will need a windshield repair kit, which can be purchased at most auto parts stores.
Start by cleaning the damaged area with glass cleaner and a soft cloth to remove any dirt or debris. Next, apply the resin from the repair kit to the crack or chip, making sure to fill it completely. Then, place a small strip of clear tape over the repaired area to hold the resin in place while it cures.
Allow the resin to dry according to the instructions provided with the repair kit. Once the resin is dry, remove the tape and use a sharp razor blade to carefully scrape away any excess resin. Finally, clean the windshield again to remove any remaining residue.
By following these simple steps, you can easily repair a small crack or chip in your windshield and prevent it from turning into a larger problem.
1. Clean the damaged area
auto glass crack repair. If you’ve noticed a small crack or chip in your car’s windshield, it’s important to take care of it as soon as possible to prevent further damage. One of the first steps in fixing a small crack or chip is to clean the damaged area.
This is important because it allows for better adhesion of the repair material and ensures a smooth and seamless repair. To clean the area, you can use a glass cleaner and a microfiber cloth. Start by spraying the glass cleaner on the affected area and then wipe it clean with the microfiber cloth.
Make sure to remove any dirt, debris, or moisture that may be present. Once the area is clean, you’re ready to move on to the next step in the repair process.
2. Apply a windshield repair kit
Windshield repair kits can be a convenient and cost-effective way to fix small cracks or chips in your car’s windshield. These kits are widely available at auto parts stores and online, and they typically include everything you need to repair the damage yourself. Using a windshield repair kit is relatively simple and can save you the time and expense of having to replace the entire windshield.
First, you’ll need to clean the damaged area with a glass cleaner and remove any loose glass or debris. Then, apply the adhesive resin from the repair kit to the crack or chip, filling it in completely. Next, place a curing strip over the resin and use a curing lamp to harden it.
Once the resin is fully cured, you can remove the strip and scrape away any excess resin. The result is a smooth, repaired windshield that is both safe and visually appealing. So, the next time you notice a small crack or chip in your windshield, consider using a windshield repair kit to fix it yourself.
3. Allow the repair to dry and cure
Fixing a small crack or chip in your wall can be a simple DIY project that can save you money and time. Once you have filled the crack or chip with a patching compound, it is essential to allow it to dry and cure properly. This step is crucial because if the repair is not fully dry, it can lead to future problems such as cracking or peeling.
To ensure that the repair dries and cures effectively, you should follow the manufacturer’s instructions on the patching compound. Typically, the drying time can vary depending on the compound’s type and the size of the crack or chip. It is essential to be patient and allow the repair to dry fully before moving on to the next step.
During the drying process, it is crucial to keep the area well-ventilated to help speed up the drying time. You can open windows or use fans to promote air circulation. It is also important to avoid touching or applying pressure on the repair until it is completely dry.
Curing is the next step after drying. It involves allowing the patching compound to fully bond with the wall surface. This process usually takes longer than drying, and it is crucial not to rush it.
Curing time can range from a few hours to several days, depending on the product. While waiting for the repair to dry and cure, it is important to keep the area free from any excess dust or debris. You can gently sweep or dust the area to prevent any particles from settling onto the drying repair.
Once the repair is fully dry and cured, you can proceed with sanding and painting the area to match the rest of the wall. By following these simple steps and allowing the repair to dry and cure properly, you can ensure a long-lasting and seamless fix for your small crack or chip.
Repairing a Damaged Windshield Seal
Is the windshield in your car leaking? Don’t worry, you can fix it yourself! One of the most common causes of windshield leaks is a damaged seal. Over time, the seal around your windshield can become worn or cracked, allowing water to seep in. Luckily, repairing a damaged windshield seal is a relatively simple process.
First, you’ll want to gather the necessary materials: a tube of windshield sealant, a scraper or knife for removing old sealant, and some masking tape. Start by thoroughly cleaning the area around the damaged seal with glass cleaner. Once the area is clean and dry, use the scraper or knife to remove any old sealant.
Be careful not to scratch the glass! Next, apply a thin bead of the new windshield sealant along the damaged area, making sure to cover the entire length of the seal. Use the masking tape to hold the sealant in place while it dries. Finally, allow the sealant to fully cure according to the manufacturer’s instructions.
And voila! Your windshield seal should be as good as new, and you can say goodbye to those pesky leaks.
1. Remove the old seal
windshield seal If you notice water leaking into your car or hear a whistling noise while driving, it’s possible that your windshield seal may be damaged. The windshield seal is a rubber strip that surrounds your windshield and prevents water, dirt, and noise from entering your vehicle. Over time, the seal can become dried out, cracked, or worn, leading to leaks and other issues.
Repairing a damaged windshield seal is an important task to ensure the integrity of your windshield and the safety of your vehicle. The first step in the repair process is to remove the old seal. This can be done by carefully prying it away from the windshield using a flathead screwdriver or a seal removal tool.
Take care not to damage the windshield or surrounding paint as you remove the seal. Once the old seal is removed, you can proceed with installing a new one to restore the seal’s effectiveness.
2. Clean and prep the windshield frame
In order to repair a damaged windshield seal, the first step is to thoroughly clean and prep the windshield frame. This is an important step because a clean and smooth surface will ensure that the new seal adheres properly. To clean the windshield frame, start by removing any dirt or debris with a soft brush or cloth.
Next, use a mild detergent or glass cleaner to remove any stubborn dirt or grime. Be sure to clean both the inside and outside of the frame. Once the frame is clean, use a fine sandpaper to gently sand down any rough or uneven areas.
This will help create a smooth surface for the new seal to adhere to. After sanding, wipe down the frame with a clean cloth to remove any dust or particles. Now the frame is ready for the next step in the repair process.
3. Apply a new windshield seal
windshield seal repair, damaged windshield seal, apply new windshield seal. If you have a damaged windshield seal on your vehicle, it’s important to address the issue as soon as possible. A damaged seal can lead to a host of problems, including leaks and drafts inside your car.
One way to repair a damaged windshield seal is to apply a new one. This can be done by removing the old seal and cleaning the surface thoroughly. Then, you can apply a new seal using a high-quality sealant or adhesive.
Make sure to follow the manufacturer’s instructions for the specific product you are using. Once the new seal is applied, give it ample time to dry and set before driving your vehicle. By taking the time to repair a damaged windshield seal, you can ensure that your car remains comfortable and protected from the elements.
So don’t delay – address that damaged seal today.
Replacing Wiper Blade Seals
Are you tired of constantly dealing with a leaking windshield? One common cause of windshield leaks is worn-out wiper blade seals. Over time, these seals can become cracked or damaged, allowing water to seep into your car. Luckily, replacing wiper blade seals is a relatively simple and inexpensive fix that you can do yourself.
To start, make sure you have the correct replacement seals for your specific wiper blades. Then, carefully lift the wiper blades away from the windshield and locate the old seals. Gently remove them and clean the area where the new seals will be placed.
Next, simply slide the new seals onto the wiper blades and press them securely into place. Make sure they are aligned properly and that there are no gaps where water could leak through. Finally, lower the wiper blades back onto the windshield and test them out to ensure a tight seal.
With a little time and effort, you can say goodbye to that annoying windshield leak and enjoy a dry and comfortable ride.
1. Remove the old wiper blade seals
Replacing wiper blade seals is an important part of maintaining the functionality of your windshield wipers. Over time, the old seals can become worn, causing them to lose their effectiveness and not properly seal against your windshield. This can lead to streaks and missed spots when using your wipers, reducing your visibility in inclement weather.
To replace the old wiper blade seals, start by lifting the wiper arm away from the windshield and locating the small plastic tabs that hold the seal in place. Gently push these tabs inwards and slide the old seal out of the wiper arm. Make sure to note the orientation of the seal so you can install the new one correctly.
Once the old seal is removed, you can easily slide the new one into place, ensuring it is correctly aligned. Push the tabs back into place to secure the seal, and then gently lower the wiper arm back onto the windshield. By replacing your wiper blade seals, you can ensure that your windshield wipers are working at their best, providing you with clear visibility even in the worst weather conditions.
2. Clean the wiper blade and arm
Replacing wiper blade seals is an important task to keep your windshield wipers working efficiently. Over time, the rubber seals on the wiper blades can become worn out and cracked, leading to decreased performance and potential damage to your windshield. To replace the seals, start by removing the old wiper blade from the wiper arm.
This can typically be done by pulling up on the blade and sliding it off the arm. Once the old blade is removed, inspect the arm for any dirt or debris that may have built up. Clean the arm thoroughly before installing the new wiper blade.
Next, take the new wiper blade and slide it onto the wiper arm, ensuring that it is securely attached. Finally, test the new blade to make sure it is functioning properly. By regularly replacing the wiper blade seals, you can ensure that your windshield wipers are in top-notch condition and ready to keep your windshield clear in any weather conditions.
3. Install new wiper blade seals
wiper blade seals, replacing wiper blade seals, install new wiper blade seals Paragraph: So you’ve noticed that your wiper blades aren’t working as well as they used to. They’re leaving streaks on your windshield and not clearing away the rain like they should. Well, before you rush to replace the entire wiper blade assembly, there’s one small part you might want to check first – the wiper blade seals.
These little seals are responsible for keeping the wiper blades in place and creating a tight seal against the windshield. Over time, they can become worn or damaged, leading to a decrease in performance. But fear not! Replacing wiper blade seals is a relatively simple task that you can do yourself with just a few basic tools and some patience.
To replace the wiper blade seals, start by lifting the wiper arm away from the windshield and finding the small tab on the side of the wiper blade assembly. Gently press down on the tab and slide the old seal off the wiper arm. Take a moment to inspect the old seal for any signs of wear or damage.
If it looks worn or cracked, it’s definitely time for a new one. Next, take your new wiper blade seal and slide it onto the wiper arm, making sure it fits snugly into place. You may need to use a bit of force to get it into position, but be careful not to bend or break the wiper arm in the process.
Once the seal is in place, give it a test run by turning on your wipers and watching how they perform. If everything looks good, repeat the process for the other wiper blade and seals. Remember, it’s important to replace these seals regularly to ensure your wiper blades are functioning at their best.
By taking the time to install new wiper blade seals, you can extend the life of your wiper blades and improve their performance in inclement weather conditions. So don’t let those streaky wipers spoil your driving experience – get those new wiper blade seals installed and enjoy clear visibility on the road once again.
Preventing Future Leaks
If you’re faced with a leaking windshield, you’re probably wondering how to repair it and prevent future leaks. The good news is, there are a few steps you can take to fix the issue and ensure it doesn’t happen again. First, assess the extent of the damage.
If it’s a small crack or chip, you may be able to fix it yourself with a windshield repair kit. These kits typically include a resin that you can apply to the damaged area to seal it up. However, if the damage is more severe or if the crack is spreading, it’s best to seek professional help.
A reputable auto glass repair shop will be able to assess the damage and offer the best solution, whether it’s a repair or a full windshield replacement. Additionally, it’s important to keep up with regular maintenance to prevent future leaks. Make sure your windshield is properly sealed and check for any signs of damage or wear.
Taking these proactive steps can help keep your windshield in top shape and prevent any future leaks. So don’t ignore a leaking windshield – take action and get it fixed as soon as possible to ensure your safety on the road.
1. Keep your windshield clean and free of debris
windshield, debris, preventative maintenance, leaks Paragraph: Keeping your windshield clean and free of debris is an essential step in preventing future leaks. A dirty windshield not only impairs your visibility on the road, but it can also lead to water leakage inside your vehicle. Debris like leaves, twigs, and dirt can accumulate along the edges of your windshield and compromise the integrity of the seal.
When it rains, water can seep through these vulnerable areas and find its way into your car. To avoid this problem, make it a habit to regularly clean your windshield and remove any debris that may have collected. Use a soft cloth or sponge and a mild soapy solution to gently remove dirt and grime.
Pay extra attention to the edges and corners of your windshield where debris tends to accumulate the most. By keeping your windshield clean and free of debris, you can ensure a tight seal and prevent water leaks from becoming an issue down the road. So, the next time you notice dirt or debris on your windshield, take a few minutes to clean it off and protect your vehicle from potential leaks.
2. Avoid slamming car doors
Preventing Future Leaks in your car is crucial to maintaining its condition and ensuring a comfortable driving experience. One way to achieve this is by avoiding slamming car doors. When we are in a rush or simply not paying attention, it’s easy to close the car door with excessive force.
However, this can cause damage to the rubber seals around the doors, leading to leaks in the future. Instead, try closing the doors gently yet firmly, ensuring a proper seal without putting excessive pressure on the seals. By taking this simple step, you can prevent potential leaks and prolong the life of your car’s interior.
So, next time you close your car door, remember to take a moment and close it gently to preserve the integrity of your vehicle.
3. Regularly inspect the windshield for damage
One of the best ways to prevent future leaks in your windshield is by regularly inspecting it for damage. Over time, small cracks and chips in the glass can develop into larger issues that may cause water to seep into your car. By taking the time to visually inspect your windshield on a regular basis, you can catch any potential issues early on and have them repaired before they become a major problem.
It doesn’t take much time or effort to give your windshield a quick once-over, and it can save you a lot of frustration and money down the road. So the next time you’re cleaning your car or stopping for a bathroom break on a long drive, take a quick look at your windshield and make sure there are no signs of damage. Your wallet will thank you!
4. Replace your wiper blades regularly
One simple yet often overlooked maintenance task that can help prevent leaks in your car is replacing your wiper blades regularly. Many people may not realize it, but worn-out or damaged wiper blades can actually cause leaks in your car. When your wiper blades become worn down, they may not be able to effectively clear water from your windshield, leading to excess water seeping into your car.
Over time, this can cause damage to your car’s interior and potentially even lead to leaks. By replacing your wiper blades regularly, you can ensure that they are always in good condition and able to effectively clear water from your windshield. This simple step can go a long way in preventing future leaks and keeping your car dry and protected.
So, next time you’re giving your car some maintenance TLC, don’t forget to give your wiper blades some attention too!
Conclusion
In conclusion, repairing a leaking windshield is like solving a mystery. You must channel your inner detective, armed with a trusty magnifying glass (or preferably a flashlight) to locate the source of the leak. Once identified, you become an agile handyman, armed with a roll of tape or a tube of waterproof sealant, sealing the cracks and crevices like a superhero fighting off raindrops.
This delicate repair job requires the precision of a surgeon, the resourcefulness of MacGyver, and the composure of a tightrope walker. So, don your cape (or at least grab a pair of gloves), and get ready to conquer the mysterious leaky windshield. Happy repairing!”
FAQs
How do I know if my windshield is leaking?
You can check for windshield leaks by looking for water stains or wet spots on the interior of your car, especially near the windshield.
What are the common causes of a leaking windshield?
Common causes of windshield leaks include cracked or damaged windshield seals, improper installation, and damage to the windshield itself.
Can I repair a leaking windshield on my own?
It is possible to repair a leaking windshield on your own depending on the cause of the leak. However, it is recommended to seek professional help to ensure proper repair and to prevent further damage.
How much does it cost to repair a leaking windshield?
The cost of repairing a leaking windshield can vary depending on the extent of the damage and the type of repair needed. It is best to consult with a professional for an accurate estimate.
What are the dangers of driving with a leaking windshield?
Driving with a leaking windshield can lead to water damage to your car’s interior, electrical components, and even structural damage. It can also impair visibility, making it unsafe to drive.
How long does it take to repair a leaking windshield?
The time it takes to repair a leaking windshield can vary depending on the extent of the damage and the availability of the necessary repair materials. In some cases, it can be done within a few hours.
Can a leaking windshield cause mold or mildew inside the car?
Yes, a leaking windshield can lead to the growth of mold or mildew inside the car if the water is not properly removed and the interior is not dried out thoroughly.
What should I do if I notice water leaking through my windshield? A8. If you notice water leaking through your windshield, it is important to address the issue as soon as possible. Contact a professional auto glass repair service to assess the situation and provide the necessary repairs.
Can a leaking windshield affect the structural integrity of my vehicle?
Yes, a leaking windshield can compromise the structural integrity of your vehicle, especially if the water seeps into the car’s frame or other important components. It is essential to address the issue promptly.
Are there temporary solutions to stop a windshield from leaking?
There are temporary solutions, such as using clear silicone sealant to seal the leaking area. However, these should only be considered as temporary fixes until a professional repair can be performed.
Can I still drive my car if I have a leaking windshield?
It is not recommended to drive your car if you have a leaking windshield, as it can lead to further damage and compromise your safety. It is best to have the issue addressed before driving.
How can I prevent my windshield from leaking in the future?
To prevent windshield leaks, make sure your windshield is properly installed, check and replace damaged seals, regularly inspect for any signs of leaks, and avoid using high-pressure car washes that can damage seals.