
Have you ever experienced a flat tire? It’s one of the most inconvenient things that could happen while driving. One of the culprits of flat tires is a damaged bead. The bead is the part of the tire that holds it securely onto the rim of the wheel.
When the bead is damaged, air could easily escape, causing a flat tire. But don’t worry, sealing the bead can fix the issue! In this blog, we’ll show you step-by-step how to seal the bead on your tire and get back on the road in no time. So grab your gloves and let’s get started!
Table of Contents
Introduction
If you’re looking to extend the life of your tires and ensure optimal performance, learning how to seal a bead on a tire is a crucial skill to have. Sealing a bead on a tire involves tightly securing the tire to the rim, which helps to prevent air leaks and promotes better overall handling. To get started, you’ll need to gather some tools such as tire levers and a tire sealant.
First, remove any dirt or debris from the rim and tire bead using a wire brush. Then, apply the sealant around the tire bead, ensuring to cover it entirely. Next, use your tire levers to place the tire back onto the rim, taking care not to damage the sealant.
Finally, inflate the tire to the recommended pressure and check for any leaks. With these steps, you’ll be able to properly seal a bead on your tire, promoting safety and longevity on the road.
Explanation of a Bead Seal
A bead seal is a mechanical seal used in large industrial processes to prevent leaks and maintain pressure in pipes and vessels. The seal is composed of a metal ring with grooves in it that hold rubber or other elastic materials in place. When the two surfaces of the seal are pressed together, the elastic material forms a tight seal, preventing any fluid or gas from escaping.
Bead seals are commonly used in the oil and gas industry to seal wellheads and prevent leaks in pipelines. They are also used in pharmaceutical manufacturing and other industries where maintaining sterile conditions is critical. With the help of a bead seal, industrial processes can run smoothly without the danger of leaks and contamination.

Importance of a Proper Bead Seal
When it comes to maintaining the integrity of your vehicle’s tires, a proper bead seal is essential. A bead seal refers to the tight seal between the tire and the wheel, which prevents air from escaping. If this seal is compromised, even slightly, it can lead to a host of problems.
For instance, improper inflation can wear out your tires unevenly, causing them to wear out faster and potentially leading to blowouts and accidents on the road. That’s why it’s crucial to ensure that your tires are properly inflated and that the bead seal is securely in place. By doing so, you not only preserve the integrity of your tires but also enhance the safety and performance of your vehicle.
So, the next time you’re checking your tire pressure, take a moment to inspect the bead seal as well. It’s a small step that can make a big difference in protecting your ride.
Materials Needed
If you own a bicycle or a motorbike, you know how important it is to maintain your tires. A bead sealant can help protect your tires against leaking, so it’s a great investment for anyone who wants to keep their tires in prime condition. However, applying a bead sealant can be tricky, especially if you’ve never done it before.
To get started, you’ll need a few materials. First, you’ll need a tire bead sealant, which you can order online or find at your local automotive or bike shop. You’ll also need a valve stem remover, a tire pump, and a spray bottle filled with soapy water.
Before applying the sealant, make sure your tire is clean and dry. Then, remove the valve stem, pump up the tire, and apply the sealant around the bead of the tire. Finally, use the spray bottle to check for leaks by spraying soapy water around the bead.
If the bead forms soap bubbles, you’ll need to start over or reapply the sealant. With these materials and some patience, you can easily apply a bead sealant and protect your tires from leaks.
Tire Sealant
Tire Sealant is an essential product for anyone who wants to keep their tires protected from punctures and leaks. Whether you’re a car enthusiast or just a regular driver, having a tire sealant in your car can come in handy in emergency situations. When it comes to using a tire sealant, there are a few materials you need to have on hand.
First, you’ll need a tire sealant bottle, which typically comes with the sealant itself. You’ll also need a tire inflator or air compressor to pump air into the tire after you’ve added the sealant. A tire gauge is also important to ensure you inflate the tire to the correct pressure.
Finally, make sure you have gloves and a rag on hand to protect your hands and clean up any spills. By having all of these materials available, you can quickly and easily seal a punctured tire without the need for expensive repairs or replacements.
Commercial Bead Sealer
If you are considering purchasing a commercial bead sealer, there are a few materials you will need to make sure you have on hand. First and foremost, you will need the bead sealer itself, which can come in a variety of sizes and models depending on your needs. Along with the sealer, you will also need safety equipment such as gloves and goggles to protect yourself while using the machine.
In addition, you will need a source of compressed air to power the bead sealer and a supply of sealing beads to feed through the machine. It’s important to ensure that you have all of the necessary materials before beginning a sealing project, as this will help to ensure a smooth and efficient process from start to finish. With the right materials on hand, you’ll be able to use your commercial bead sealer to create airtight seals and protect your products against moisture, dust, and other contaminants.
Steps to Seal Bead on Tire
If you’re experiencing air loss in your tire, it may be due to a poor seal between the tire bead and the rim. Luckily, sealing the bead on a tire is a relatively simple process that you can do at home with a few basic tools. First, make sure your tire is properly inflated.
Next, remove the valve cap and deflate the tire completely. Apply tire sealant to the bead of the tire and place it back onto the rim, making sure it’s seated properly. Use a tire iron to lever the bead over the rim flange and add more sealant if necessary.
Finally, inflate the tire to the recommended pressure and check for leaks. With these steps, your tire should have a tight seal and be ready to hit the road again. Remember, keeping your tires properly maintained can prolong their lifespan and keep you safe on the road.
Step 1: Inspect Bead Area of Tire
When it comes to sealing the bead on a tire there are a few steps you should follow. The first step is to inspect the bead area of the tire. Make sure it is clean and free of any debris or damage.
If there is any dirt or rust, use a wire brush to clean the area. It’s important to get as much of the dirt and debris out of the area as possible before attempting to seal the bead. It’s also important to inspect the bead itself.
Make sure there are no cracks or cuts that could prevent the sealant from adhering properly. Once you’ve inspected the bead area and ensured it’s clean and undamaged, you can move on to the next step in the process. Remember that properly sealing the bead is crucial for maintaining tire pressure and ensuring a safe ride.
So take the time to do it right the first time.
Step 2: Clean the Bead Area
Once you’ve removed the old bead sealant, it’s time to clean the area surrounding the bead. This step is crucial to ensure the new sealant has a clean surface to adhere to and provides a secure seal. Begin by using a tire-cleaning solution to remove any dirt, grime, or debris from the tire and wheel.
Avoid using harsh chemicals that can damage the rubber or alloy, which can result in leaks or compromises the structural integrity of the tire. Next, use a wire brush or sandpaper to scrub away any visible oxidation or rust on the wheel. This will promote a smoother surface and enable better adhesion.
After thoroughly cleaning and sanding the area, use a clean cloth to wipe away any remaining debris. Now you’re ready to proceed with sealing the bead!
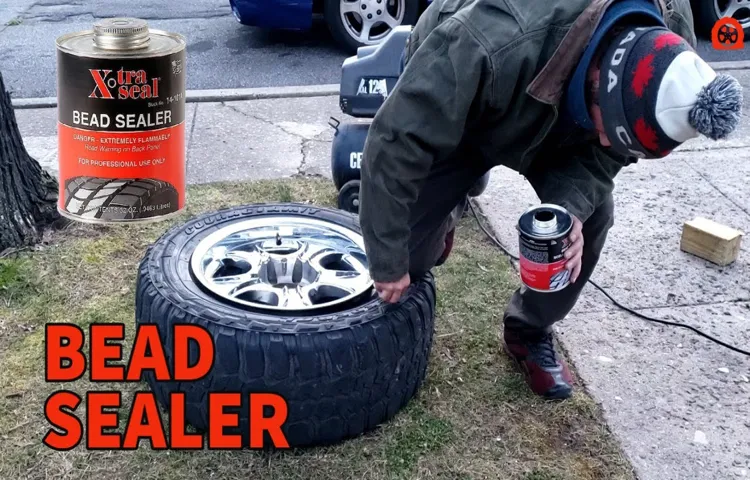
Step 3: Apply Bead Sealer or Sealant
seal bead on tire Now that you have properly cleaned and inspected the area around the bead of your tire, it’s time to move on to the next step – applying bead sealer or sealant. This is a crucial step in ensuring the best seal possible between the tire and the rim. Bead sealer is a special type of sealant that is designed to fill any small gaps or imperfections on the surface of the bead, creating a tight and secure seal.
To apply bead sealer, use a brush or roller to spread the sealant evenly around the perimeter of the tire bead. Make sure to cover the entire circumference of the bead, and avoid getting the sealant on the sidewall of the tire. Once the bead sealer has been applied, allow it to dry completely before re-mounting your tire onto the rim.
Remember that proper tire maintenance, including using bead sealer when necessary, can help minimize the risk of tire damage or failure while driving.
Tips and Tricks
One common issue that many off-road drivers face is tire bead leaks. Fortunately, sealing bead leaks on your tires is an easy task that can be done with a few simple steps. First, deflate the tire completely and remove the wheel.
Clean the area where the tire meets the rim with a wire brush and soapy water to remove any dirt or debris. Next, apply a bead sealer to the rim along the entire circumference where it meets the tire. Be sure to work in small sections and allow each section to dry before moving on to the next.
Finally, re-inflate the tire and check for leaks. If any leaks are found, repeat the process until the tire is properly sealed. With these simple tips and tricks, you’ll be back on the trails in no time!
Don’t Over-Apply Bead Sealer
Bead sealer is an essential tool for sealing tires, but overusing it can lead to problems down the line. The trick to proper application is knowing just how much bead sealer to use to seal the tire effectively without going overboard. It’s vital to understand that too much bead sealer can cause the tire’s bead to become too rigid, making it difficult to mount and dismount the tire from the rim.
This is especially important if you have a high-performance vehicle where frequent tire changes are common. The best approach is to read the manufacturer’s instruction for correct application and follow them to the letter. With the correct amount of bead sealer applied, the tire will seal correctly, and you can have the peace of mind that your tires are safe to hit the road.
Recheck Seal After a Few Days
Keeping a recheck on your seal is essential, especially after a few days have passed. Conducting a regular inspection ensures that the seal is functioning correctly and no leaks have occurred. It is a common misconception to assume that once a seal is installed, it will perform its function without any problems for an extended period.
However, harsh weather conditions or continuous exposure can weaken the seal and cause it to fail, resulting in water leakage. Therefore, it is crucial to take timely action if you detect any issues with the seal. Keep in mind that this simple check can save you from more significant expenses in the future.
Make it a habit to inspect your seal from time to time and focus on the well-being of your property.
Conclusion
In summary, sealing a bead on a tire may seem like a daunting task, but with a few simple steps and the right tools, it can be easily accomplished. Just remember to clean the bead thoroughly, use the proper sealant, and apply a healthy amount of pressure during the inflation process. And if all else fails, just call in the professionals.
Because as they say, when in doubt, don’t let the air out!”
FAQs
What materials do I need to seal a bead on a tire?
To seal a bead on a tire, you’ll need a bead sealer, a tire patch, and a tire lever.
Why is it important to seal a bead on a tire?
Sealing a bead on a tire is important because it ensures proper inflation and stability, which helps prevent accidents and tire damage.
Can I seal a bead on a tire at home?
Yes, you can seal a bead on a tire at home using a bead sealer and tire patch. However, if you’re not confident in your ability to do so, it’s best to take your tire to a professional.
How do I know if the bead on my tire needs sealing?
If you notice your tire is losing air or wobbling while driving, it may be a sign that the bead needs to be sealed.
Can I drive on a tire with a damaged bead?
No, it’s not safe to drive on a tire with a damaged bead. It’s important to get it repaired or replaced as soon as possible.
How long does it take to seal a bead on a tire?
The time it takes to seal a bead on a tire can vary depending on the severity of the damage and your level of experience. It can take anywhere from 30 minutes to an hour.
What’s the cost of sealing a bead on a tire?
The cost of sealing a bead on a tire can vary depending on the severity of the damage and the cost of materials. It’s best to contact a professional for an estimate.