
Are you tired of looking up at your car’s headliner near the windshield and seeing it sagging or falling apart? It’s not only an eyesore but also a safety hazard. Don’t worry, though – repairing a headliner near the windshield is easier than you might think! Imagine your car’s headliner as the ceiling of your car. Just like any other part of your car, it can wear out over time and start to show signs of damage.
From extreme heat and age to moisture and wear and tear, there are many factors that can contribute to a damaged headliner near the windshield. However, you don’t have to be an expert to fix it. With a little bit of know-how and some simple tools, you can have your car looking brand new again.
In this blog post, we’ll guide you through the step-by-step process of repairing a headliner near the windshield. We’ll cover everything from understanding the cause of the damage to finding the right materials and tools for the job. Whether you’re a seasoned DIY enthusiast or a beginner, we’ve got you covered.
With our tips and tricks, you’ll be able to tackle this repair project and have your car’s headliner looking as good as new. So, if you’re ready to take matters into your own hands and save some money on costly repairs, keep reading. We’ll show you how to repair a headliner near the windshield with ease.
Let’s get started!
Table of Contents
Introduction
Are you tired of staring at that sagging and ripped headliner near your windshield? Don’t worry, you’re not alone! Many car owners face this issue, and luckily, there are ways to repair it without breaking the bank. The headliner, which is the fabric material that lines the interior roof of your car, can become loose or damaged over time. This is particularly common near the windshield, as the constant exposure to sunlight and temperature changes can take a toll on the adhesive holding it in place.
So, how can you fix this problem? Well, the first step is assessing the damage. If the headliner is only sagging and not torn or ripped, you may be able to fix it yourself with some simple tools and materials. However, if the damage is extensive, it might be best to seek professional help.
Explaining what a headliner is and its purpose
A headliner, in the context of content creation or journalism, refers to the main or top headline in an article, blog post, or news story. It is typically the most important or attention-grabbing part of the content and serves the purpose of capturing the reader’s interest and summarizing the main point or theme of the piece. Think of it as the “hook” that draws in the reader and entices them to continue reading.
It is often used as a brief summary or preview of what the content entails, giving readers a glimpse of what to expect. The headliner can also be used to generate curiosity, evoke emotions, or provoke thought. Its goal is to grab the reader’s attention and make them want to delve deeper into the content.
So, whether it’s a catchy title, a thought-provoking question, or a tantalizing teaser, the headliner is your first chance to make a strong impression on your audience.
Highlighting the common issues with headliners
headliners, common issues
Assessing the Damage
If you’ve noticed that the headliner near your windshield is starting to sag or show signs of damage, you might be wondering how to repair it. The headliner is the fabric or material that lines the interior roof of your car, and it can be a bit tricky to fix when it starts to come loose. One option is to use adhesive to reattach the headliner to the roof, but this can be a temporary fix and may not hold up over time.
Another option is to remove the headliner altogether and replace it with a new one, which can be a bit more involved but will provide a more long-lasting solution. Whichever option you choose, it’s important to take your time and be careful during the repair process to avoid causing any further damage to your car’s interior.
Step-by-step guide on evaluating the headliner damage near the windshield
evaluating headliner damage near the windshield Assessing the Damage When it comes to evaluating headliner damage near the windshield, there are a few key steps you can take to assess the extent of the problem. First, take a close look at the headliner itself. Is it sagging or drooping? Are there any visible tears or rips? These signs can indicate that the headliner has been damaged and may need to be repaired or replaced.
Next, check for water stains or discoloration on the headliner. This could be a sign of a leak in the windshield or sunroof, which can lead to further damage if not addressed promptly. To get a better idea of the overall condition of the headliner, run your hand along its surface.
If you feel any rough spots, bumps, or lumps, this could indicate that the headliner has been damaged and is in need of repair. Finally, evaluate the headliner’s functionality. Does it still provide adequate insulation and soundproofing? Are there any noticeable odors or signs of mold or mildew? These issues can indicate that the headliner has been compromised and may need to be replaced.
By following these steps, you can effectively evaluate the headliner damage near the windshield and determine the best course of action for repair or replacement. Remember, it’s important to address headliner damage promptly to prevent further issues and maintain the integrity of your vehicle’s interior.
Identifying the cause of the damage
Identifying the cause of the damage is essential when assessing the damage to a property. It’s crucial to determine the underlying factors that led to the damage in order to effectively address and prevent it from happening again in the future. This process involves thoroughly examining the affected area and considering various possibilities.
Was the damage caused by a natural disaster like a storm or flooding? Or was it a result of human error, such as faulty construction or improper maintenance? By asking these questions and conducting a detailed investigation, professionals can pinpoint the cause of the damage and develop a plan to rectify the situation.
Understanding the potential risks of not repairing the headliner
Having a damaged headliner in your vehicle may seem like a minor issue, but it can actually lead to potential risks if left unaddressed. Assessing the damage is the first step in understanding the extent of the problem. A damaged headliner can be caused by a variety of factors, such as wear and tear, moisture damage, or even accidents.
Signs of damage may include sagging or loose fabric, stains, or even mold growth. These issues not only affect the aesthetics of your vehicle, but they can also pose safety hazards. For example, a sagging headliner can obstruct your vision while driving, potentially leading to accidents.
Additionally, if there is moisture damage or mold growth, it can affect the air quality within your vehicle and pose health risks to you and your passengers. Therefore, it’s important to assess the damage and address any issues with your headliner as soon as possible to ensure your safety and the longevity of your vehicle.
Gathering the Necessary Tools and Materials
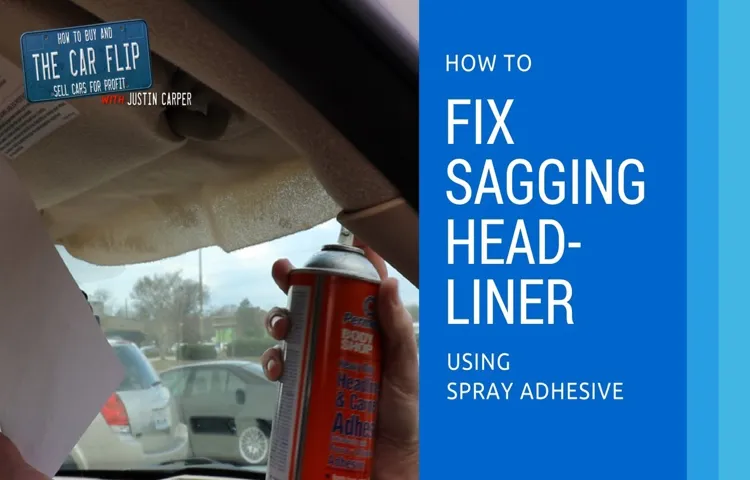
When it comes to repairing a headliner near the windshield, it’s important to gather all the necessary tools and materials before getting started. First, you’ll need a trim removal tool or a flathead screwdriver to carefully remove the headliner from the car. It’s also a good idea to have a can of adhesive spray on hand to reattach the headliner once it’s been repaired.
Additionally, you’ll want to have some fabric or upholstery adhesive ready for any tears or loose spots on the headliner fabric. A brush or roller can be useful for even application of the adhesive. Finally, it’s always a good idea to have a clean cloth or towel nearby for wiping away any excess adhesive or dirt.
By gathering these tools and materials ahead of time, you’ll be well-prepared to tackle your headliner repair job.
Listing the tools and materials needed for the repair
In order to effectively repair your item, it is essential to gather all the necessary tools and materials beforehand. This will ensure that you have everything you need to complete the repair without any unnecessary delays. The specific tools and materials you will need will depend on the type of repair you are undertaking, but some common items include screwdrivers, wrenches, pliers, and adhesive or soldering materials.
It’s important to take stock of what you already have on hand and make a list of any additional items you may need to purchase. By having everything readily available, you can save yourself time and frustration during the repair process. So before you jump in, take a moment to gather up all the tools and materials you will need to get the job done right.
Explaining the importance of using the right materials
The first step in any DIY project is gathering the necessary tools and materials. It might seem like an obvious step, but it’s often overlooked and can lead to frustrating and time-consuming mistakes down the line. Using the right materials is crucial for the success of your project, as they will determine the quality and longevity of the finished product.
For example, if you’re building a wooden deck, using low-quality wood or nails that aren’t meant for outdoor use could result in a deck that warps or falls apart after just a few seasons. On the other hand, using high-quality materials specifically designed for outdoor use will ensure that your deck stands the test of time. So, before you dive into any project, take the time to research and gather the right tools and materials.
It may require a little extra effort upfront, but it will save you a lot of headaches in the long run.
Preparing the Area
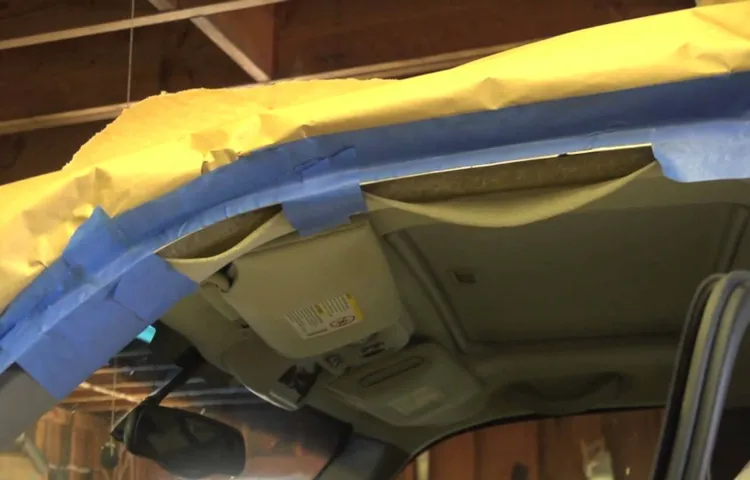
When it comes to repairing the headliner near the windshield, preparation is key. Start by cleaning the area around the damaged headliner. Use a mild detergent or upholstery cleaner to remove any dirt or grime.
It’s important to have a clean surface to work with before you begin any repairs. Next, carefully remove any trim or molding that may be covering the headliner. This will give you better access to the damaged area and make the repair process easier.
Take your time and be gentle when removing the trim to avoid any further damage. Once the trim is removed, you can assess the extent of the damage and determine the best course of action for repairing the headliner. Whether you choose to patch the damaged area or replace the entire headliner, having a clean and prepared area will ensure a successful repair.
Guide on removing any accessories or components attached to the headliner near the windshield
When it comes to removing any accessories or components attached to the headliner near the windshield, it’s essential to prepare the area properly. This will help ensure a smooth and hassle-free removal process. Before starting, gather all the necessary tools and equipment that you’ll need for the job.
This may include basic hand tools like screwdrivers, pliers, and trim removal tools. Additionally, make sure you have a clean and well-lit workspace to work in. To begin, it’s crucial to disconnect the power source to any electrical components that may be attached to the headliner.
This can include things like interior lights or sunroof controls. Consult your vehicle’s owner manual for specific instructions on how to disconnect these components safely. Once they are disconnected, carefully remove any screws or bolts that may be securing the accessory or component to the headliner.
Use the appropriate tools and take your time to avoid damaging any surrounding areas. After removing the fasteners, you may need to gently pry or wiggle the accessory or component to loosen it from the headliner. Take caution and be patient to avoid any unnecessary force or damage.
If there are any clips or connectors holding the accessory in place, carefully disconnect them before fully removing the item. Lastly, always inspect the area around the accessory or component to ensure there are no additional fasteners or connections that need to be removed. Once everything is disconnected and removed, take a moment to clean the area and remove any dirt or debris.
This will help ensure a clean start when it’s time to reinstall or replace the accessory or component. By following these steps and taking your time, you can prepare the area properly and safely remove any accessories or components attached to the headliner near the windshield.
Cleaning the area to ensure proper adhesion of the repair materials
cleaning, area, adhesion, repair materials, preparing the area When it comes to repairing something, whether it’s a cracked wall, a broken piece of furniture, or even a damaged car, preparation is key. And one crucial step in preparing the area for repair is cleaning it thoroughly to ensure proper adhesion of the repair materials. Imagine trying to put a bandage on a dirty wound – it simply won’t stick properly.
The same principle applies when it comes to repairing things. By cleaning the area beforehand, you remove dust, dirt, and any other debris that could hinder the repair process. It’s like starting with a clean canvas before you paint a masterpiece.
So, grab your cleaning supplies and get to work! Sweep away the dust, wipe down the surface, and make sure it’s nice and clean before moving on to the next step. Your repair job will be much more successful if you take the time to properly prepare the area.
Repairing the Headliner
If you’ve noticed that the headliner near your windshield is starting to sag or come loose, don’t worry – it’s a common problem that can be easily fixed. Before tackling the repair, it’s essential to gather the right materials and tools: a headliner adhesive, a clean cloth, a putty knife, and some utility clips. First, remove any handles or lights that may be attached to the headliner.
Next, carefully remove the old headliner fabric, being mindful not to damage the foam beneath. Clean the surface of the headliner board with a cloth to ensure proper adhesion. Then, generously apply the headliner adhesive to both the foam and the new fabric.
Press the fabric firmly onto the board, smoothing out any wrinkles or bubbles as you go. Finally, reattach any handles or lights and use utility clips to hold the fabric in place while the adhesive dries. In just a few simple steps, you can have a headliner that looks as good as new!
Step-by-step instructions on repairing the damaged headliner near the windshield
If you’ve noticed a sagging or damaged headliner near your windshield, don’t worry! With a few simple steps, you can repair it and have your car looking as good as new. First, gather your materials: adhesive spray, a clean cloth, and a flathead screwdriver. Start by gently prying the damaged area away from the windshield using the screwdriver.
Be careful not to damage the headliner further. Once you have a gap, use the adhesive spray to apply a generous amount to both the headliner and the area near the windshield. Press the headliner firmly against the adhesive and hold it in place for a few minutes to let it dry.
Afterward, use the cloth to wipe away any excess adhesive. And there you have it! Your headliner is repaired and ready to go. Just remember to take your time and be gentle when handling the headliner to avoid causing any more damage.
Providing tips and tricks to ensure a successful repair
Repairing the headliner in your vehicle can be a daunting task, but with the right tips and tricks, you can ensure a successful repair. First, you’ll want to start by removing the headliner from your vehicle. This can usually be done by unscrewing any screws or bolts that are holding it in place.
Once the headliner is removed, you’ll want to carefully inspect it for any tears or damage. If you find any, you’ll want to patch them up with a headliner repair kit. These kits usually come with adhesive and fabric pieces that can be cut to size and adhered to the damaged areas.
After the patches have been applied, you’ll want to let the adhesive dry completely before re-installing the headliner. Finally, when re-installing the headliner, make sure to line it up properly and secure it with screws or bolts. By following these tips and tricks, you can successfully repair your headliner and have it looking good as new.
Reinstalling the Headliner
If you’re dealing with a sagging or damaged headliner near the windshield of your car, don’t worry – it’s a problem that can be fixed. Reinstalling the headliner may seem like a daunting task, but with a little time and patience, you can have your car looking like new again. The first step is to remove the old headliner, which is typically held in place by adhesive or clips.
Once the old headliner is removed, you’ll need to clean the surface of the roof to ensure proper adhesion for the new headliner. After cleaning, you can apply a high-quality adhesive to the back of the new headliner and carefully position it in place, smoothing out any wrinkles or bubbles. Finally, you’ll need to reattach any trim or molding that was removed during the process.
With a bit of effort, you’ll have your headliner looking sleek and secure once again, making your car look and feel brand new.
Guide on properly reinstalling the repaired headliner near the windshield
reinstalling the headliner
Ensuring proper alignment and attachment of the headliner
After removing the headliner for repairs or replacement, it’s important to reinstall it properly to ensure that it aligns correctly and is securely attached to the roof of the vehicle. The headliner plays a crucial role in the overall aesthetics and functionality of the interior, so it’s important to take the time and care to reinstall it correctly. Begin by carefully aligning the headliner with the roof of the vehicle and making sure it is centered and evenly positioned.
Use clips or adhesive to secure the headliner in place, ensuring that it is taut and free from any wrinkles or sagging. Take the time to smooth out any imperfections and ensure a clean and professional-looking finish. Properly reinstalling the headliner is important not only for the overall appearance of the interior, but also for the longevity and durability of the headliner itself.
By taking the time to align and attach it correctly, you can ensure that it will stay in place and continue to provide a comfortable and visually appealing interior for years to come.
Maintenance Tips
Do you have a sagging headliner near the windshield of your car? Don’t worry, you’re not alone. Many car owners face this issue at some point. Thankfully, repairing the headliner near the windshield is not as challenging as it may seem.
First, you will need to gather a few tools: adhesive spray, a screwdriver, and upholstery clips. Start by removing any accessories or trim pieces that may be in the way. Then, carefully peel back the sagging headliner, being mindful not to tear it further.
Once the headliner is removed, clean the exposed area with a cloth and some mild detergent. Next, apply adhesive spray to both the headliner and the area near the windshield. Press the headliner firmly onto the area, using the upholstery clips to hold it in place while the adhesive dries.
Finally, let the adhesive dry for the recommended time, usually around 24 hours, before reattaching any accessories or trim pieces. This simple maintenance tip will have your headliner looking as good as new in no time!
Tips for maintaining the repaired headliner and preventing future damage
After getting your headliner repaired, it’s important to take steps to maintain it and prevent future damage. One of the first things you can do is keep your vehicle clean and free from dirt and debris. Regularly vacuuming the interior and wiping down the headliner with a damp cloth can help remove any built-up dirt or stains.
Additionally, try to avoid putting excessive weight or pressure on the headliner, as this can cause it to sag or detach. Be mindful when loading and unloading large items, and avoid resting heavy objects directly on the headliner. Another tip for maintaining your repaired headliner is to park your vehicle in a shaded area to minimize exposure to sunlight.
The sun’s UV rays can fade and damage the fabric, so keeping it out of direct sunlight can help prolong its lifespan. Finally, be cautious when using cleaning products on the headliner. Harsh chemicals or abrasive cleaners can cause damage, so opt for gentle and non-abrasive options.
By following these maintenance tips, you can keep your repaired headliner looking great for years to come.
Advice on regular cleaning and inspections
Maintaining a regular cleaning and inspection routine is essential for keeping your home in top shape. Not only will it ensure a clean and healthy living environment, but it can also help to identify any potential issues before they become major problems. When it comes to cleaning, make sure to tackle both the visible and hidden areas of your home.
Dusting, vacuuming, and mopping should be done regularly, while windows, curtains, and upholstery should also be cleaned on a regular basis. Additionally, don’t forget about the often overlooked areas such as air vents, ceiling fans, and behind large appliances. When it comes to inspections, it’s important to check for any signs of damage or wear and tear.
This includes inspecting the roof for leaks or missing shingles, checking the plumbing for leaks or clogs, and ensuring that electrical outlets and wiring are in good condition. By staying on top of regular cleaning and inspections, you can ensure that your home remains a safe and comfortable place for you and your family for years to come.
Conclusion
And there you have it, folks! A step-by-step guide on how to repair the headliner near the windshield. With just a few tools, some adhesive, and a little bit of patience, you can restore your car’s interior to its former glory. So why spend a fortune at the auto shop when you can tackle this DIY project yourself? Not only will you save money, but you’ll also have the satisfaction of a job well done.
Just remember, when it comes to repairing your headliner, think outside the box – or, in this case, above it! Happy repairing!”
Recap of the steps for repairing a headliner near the windshield
headliner near the windshield, headliner repair, car maintenance tips Have you noticed that the headliner near your car’s windshield is starting to sag or come loose? Don’t worry, it’s a common problem that many car owners encounter. Luckily, repairing a headliner near the windshield is a relatively simple task that you can do yourself with just a few tools and some patience. The first step in repairing a sagging or loose headliner is to remove the trim pieces that are holding it in place.
These pieces are typically located around the windshield and can be easily removed with a screwdriver or trim removal tool. Once you’ve removed the trim pieces, gently pull down on the headliner material to remove it from its clips or hooks. Next, you’ll want to clean the area where the headliner was attached.
Use a mild cleaner and a soft brush to remove any dirt or grime. This will help ensure a clean and secure bond when you reattach the headliner. Now it’s time to apply the adhesive.
There are many different types of adhesive that you can use for this task, but it’s important to choose one specifically designed for headliner repair. Apply the adhesive to both the headliner material and the area where it will be reattached. Allow the adhesive to become tacky before carefully pressing the headliner back into place.
Once the headliner is securely attached, you can begin reattaching the trim pieces. Make sure to line them up correctly and use the same screws or clips that you removed earlier. It’s a good idea to test the trim pieces to ensure that they are secure and won’t come loose while you’re driving.
Finally, take a step back and admire your handiwork. You’ve successfully repaired the sagging or loose headliner near your car’s windshield. Not only does it look better, but it will also help improve the overall aesthetics and resale value of your car.
Reiterating the importance of addressing headliner issues promptly
When it comes to keeping our cars running smoothly, regular maintenance is key. Many of us are guilty of putting off small repairs or ignoring warning signs, but doing so can lead to bigger problems down the line. That’s why it’s crucial to address headliner issues promptly.
Our car’s headliner plays a vital role in providing insulation, reducing noise, and enhancing the overall aesthetic of the interior. Over time, however, the headliner can sag or become damaged due to wear and tear. If left unaddressed, a sagging headliner not only looks unsightly but can also pose safety risks.
A loose headliner can obstruct the driver’s view or even fall down while driving, potentially causing accidents. So, what can we do to prevent these issues? Regularly inspecting the headliner for any signs of sagging or damage is a good start. If you notice any issues, it’s best to consult a professional to address the problem promptly.
They can replace the headliner or undertake any necessary repairs to ensure your car remains safe and comfortable. Remember, taking care of small issues now can save you from more significant problems and expenses in the future.
FAQs
How to repair a sagging headliner near the windshield?
To repair a sagging headliner near the windshield, you will need to remove the headliner, clean the area, apply adhesive, and reattach the headliner securely.
Why is my headliner near the windshield sagging?
The headliner near the windshield may sag due to the deteriorated or weakened adhesive, excessive heat exposure, or age-related wear and tear.
Can I fix a sagging headliner near the windshield without professional help?
Yes, you can fix a sagging headliner near the windshield without professional help by following some DIY methods, such as using adhesive glue or headliner repair kits.
What are the common tools required to repair a headliner near the windshield?
Common tools required to repair a headliner near the windshield include a flathead screwdriver, adhesive spray, adhesive glue, a fabric scraper, and a bristle brush.
How long does it take to repair a headliner near the windshield?
The time required to repair a headliner near the windshield may vary depending on the complexity of the issue and your level of experience. On average, it may take around 2-3 hours.
Can a damaged headliner near the windshield be repaired or does it need to be replaced?
In most cases, a damaged headliner near the windshield can be repaired without the need for replacement. However, if the damage is severe or extensive, replacement may be necessary.
Are there any precautions to take while repairing a headliner near the windshield?
Yes, some precautions to take while repairing a headliner near the windshield include wearing protective gloves, ensuring proper ventilation during adhesive application, and being careful not to damage any other components during the repair process.