
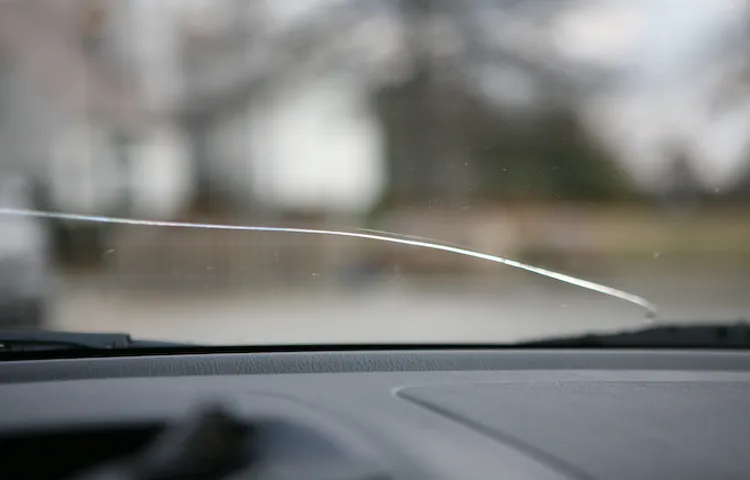
Have you ever found yourself driving along, minding your own business, when suddenly a rock or debris comes flying at your windshield, leaving a long crack behind? It can be frustrating and even dangerous, as these cracks can impair your vision and compromise the integrity of your windshield. But fear not, because in this blog post, we will show you how to repair a long crack on your windshield and save you the hassle and expense of replacing the entire thing. Think of it as giving your windshield a much-needed CPR to bring it back to life.
So grab your tools and let’s get to work!
Table of Contents
Introduction
Hey there! So you’ve unfortunately found a long crack on your windshield and you’re not sure what to do. Don’t worry, I’ve got some tips on how to repair it! First off, it’s important to note that repairing a long crack on a windshield is not an easy task and might require some professional help. However, if the crack is not too extensive (around 12 inches or less), you might be able to fix it yourself using a windshield repair kit.
These kits typically come with a resin that you can apply to the crack. The process involves cleaning the area around the crack with a glass cleaner and then applying the resin using a syringe or applicator tool. The resin will fill in the crack and harden, preventing it from spreading further.
Before attempting any repairs, make sure to read and follow the instructions carefully. You don’t want to make any mistakes that could further damage your windshield. It’s also important to note that this method might not completely hide the crack, but it can help prevent it from getting worse.
If the crack is longer than 12 inches or if it extends beyond the windshield’s outer layer, it’s best to take your car to a professional. They have the tools and expertise to properly assess the damage and determine the best course of action. In some cases, they might recommend a windshield replacement rather than a repair.
Remember, it’s always better to be safe than sorry when it comes to your windshield. If you’re unsure about repairing a long crack yourself, it’s best to consult a professional. They’ll be able to provide the necessary guidance and help you make the right decision for your windshield’s longevity and safety.
Overview of windshield cracks
windshield cracks, cracked windshields, types of windshield cracks, windshield crack repair

Importance of prompt repair
Prompt repair is highly important for various reasons. First and foremost, prompt repairs can prevent further damage and costly problems. For example, if a small leak in a plumbing system is left unattended, it can gradually lead to a burst pipe, which can cause extensive water damage to the surrounding areas.
By addressing the issue promptly, the leak can be fixed before it escalates into a major problem. Furthermore, prompt repairs can also ensure the safety and well-being of individuals. Whether it’s a damaged electrical wire or a faulty door lock, these issues can pose potential risks and hazards.
By taking immediate action to repair them, accidents and injuries can be prevented. Additionally, prompt repairs can help to maintain the value and aesthetics of a property. Whether it’s a broken window or a damaged paintwork, addressing these issues promptly can prevent them from worsening and affecting the overall appearance of the property.
In conclusion, prompt repair is crucial for preventing further damage, ensuring safety, and preserving the value of a property.
Assessing the Crack
Have you noticed a long crack on your windshield? It can be quite concerning, but don’t panic just yet. There are solutions available to repair the crack and prevent it from spreading further. The first step is to assess the severity of the crack.
Is it a small crack or a larger one? If it’s only a small crack, you may be able to repair it yourself using a windshield repair kit. These kits usually come with clear resin that you can inject into the crack to fill and seal it. However, if the crack is longer or more severe, it’s best to consult a professional.
They have the expertise and tools to accurately assess the crack and determine the best course of action. In some cases, they may recommend replacing the entire windshield to ensure your safety on the road. So, don’t delay and address that long crack on your windshield today!
Determining the severity of the crack
crack severity, assessing the crack, determining the severity of the crack
Measuring the size of the crack
crack assessment, crack measurement, crack size, crack evaluation, crack severity Assessing the crack is an important step in determining its severity and potential risks. Measuring the size of the crack can help us understand its impact on the structure and determine the necessary repairs or interventions. There are various methods and techniques available for crack assessment, each with its own advantages and limitations.
One common approach is visual inspection, where we carefully examine the crack and its surrounding area to gather information about its width, length, and depth. This method is relatively simple and cost-effective but may not provide accurate measurements, especially for small or concealed cracks. Another method is using measuring tools such as crack gauges or calipers to quantify the crack dimensions.
These tools allow us to obtain precise measurements, which can be useful in determining the crack’s severity and tracking its progress over time. Additionally, more advanced techniques like laser scanning or digital imaging can provide detailed 3D representations of the crack, enabling a comprehensive analysis of its shape and size. These methods often require specialized equipment and expertise but offer valuable insights into the crack’s characteristics.
Overall, assessing the crack’s size is an essential step in understanding its impact and planning appropriate measures to address it effectively.
Identifying any underlying damage
When it comes to assessing a crack, it’s important to identify any underlying damage that may be causing the problem. Cracks in walls or other structures can be a sign of a deeper issue, such as foundation problems or structural damage. One way to assess the crack is by looking at its size and shape.
Is it a hairline crack that is barely noticeable, or is it a wide crack that goes deep into the material? The size and shape can give you clues about the severity of the damage. Additionally, you should also consider the location of the crack. Is it near a window or door? Is it running horizontally or vertically? This information can help determine what may be causing the crack.
For example, a horizontal crack near a window may indicate a foundation issue, while a vertical crack near a door may be caused by something as simple as settling of the building. By assessing the crack and considering these factors, you can get a better understanding of any underlying damage that may need to be addressed.
Preparing for the Repair
If you’ve noticed a long crack on your windshield, you may be wondering how to repair it yourself. While it’s always best to consult a professional for major repairs, there are a few steps you can take to temporarily fix the crack and prevent it from spreading further. First, clean the crack and the surrounding area with glass cleaner and a soft cloth.
This will ensure that the repair materials adhere properly. Next, apply a windshield repair resin to the crack, following the instructions on the packaging. Use a curing lamp or direct sunlight to cure the resin, and then use a razor blade to carefully scrape off any excess.
While this DIY repair may not be a permanent solution, it can buy you some time until you can have the crack professionally repaired.
Choosing a repair kit
Choosing a repair kit can greatly determine the success of your repair job. There are a few factors to consider when preparing for a repair project. Firstly, it is important to assess the extent of the damage and choose a repair kit that is suitable for the specific type of damage you are dealing with.
For example, if you have a cracked windshield, you will need a repair kit specifically designed for repairing glass. On the other hand, if you have a rusty surface, you will need a repair kit that includes rust remover and primer. Secondly, consider the quality of the repair kit.
It is essential to invest in a high-quality repair kit to ensure that the repair is long-lasting and effective. Look for repair kits that are made by reputable brands and have positive customer reviews. Lastly, consider the price of the repair kit.
While it is important to invest in a quality kit, it is also important to consider your budget. With some research, you can find repair kits that offer a good balance between quality and affordability. By taking these factors into consideration, you can select the right repair kit for your specific repair needs and increase the chances of a successful outcome.
Gathering necessary tools
Preparing for the Repair: Gathering necessary tools Before you can dive into fixing that broken appliance, it’s important to have all the necessary tools at your disposal. Just like a chef needs their knives or a painter needs their brushes, you’ll need a set of tools specifically designed for appliance repair. These tools can range from simple screwdrivers and pliers to more specialized instruments like multimeters and voltage testers.
Having these tools on hand before you start the repair will not only make the process smoother, but it will also ensure your safety. Imagine trying to tighten a screw without a screwdriver or testing electrical connections without a multimeter. It would be like driving a car without tires – not only impossible but also extremely dangerous! So take a moment to gather all the necessary tools before you start your appliance repair project.
Trust me, it’ll save you time, frustration, and potentially even injury down the line.
Setting up a clean workspace
Setting up a clean and organized workspace is crucial when preparing for a repair. Before diving into any repairs, it’s important to create an environment that will help streamline the process and make it easier to focus on the task at hand. Start by clearing the area of any clutter or unnecessary items.
This will help create a clean and open space to work in, allowing for better mobility and reducing the chances of accidentally knocking something over. Additionally, gathering all the necessary tools and equipment beforehand will save you time and frustration later on. Having everything readily accessible and organized will make the repair process much smoother and more efficient.
Remember, a clean and well-organized workspace can greatly contribute to the success of your repair project.
Repairing the Crack
So, you’ve found yourself with a long crack on your windshield. Don’t panic! It’s actually quite common for windshields to get cracked due to road debris or temperature changes. But the good news is that you can repair it yourself without having to go to a professional.
First, you’ll need to gather some supplies. You’ll need a windshield repair kit, which you can easily find at an automotive store or online. These kits usually consist of resin and a syringe-like applicator.
You’ll also need a razor blade or a sharp knife to clean the crack and remove any loose glass. And lastly, grab some rubbing alcohol and a cloth to clean the area before applying the resin. Now that you have your supplies ready, it’s time to get to work.
Start by cleaning the windshield and the crack with the rubbing alcohol and cloth. This will remove any dirt or debris that could interfere with the repair process. Once the area is clean, use the razor blade or knife to gently scrape away any loose glass around the crack.
Next, take the syringe-like applicator from the windshield repair kit and fill it with the resin. Carefully insert the applicator into the crack, making sure it is placed directly over the crack. Apply some pressure to the applicator to inject the resin into the crack.
Once the resin is in the crack, use a UV light (usually included in the repair kit) to cure the resin. This may take a few minutes, so be patient. The UV light will harden the resin and bond it to the glass, sealing the crack and preventing it from spreading further.
Cleaning the windshield
windshield repair, crack in windshield
Applying resin on the crack
If you’ve noticed a crack in your favorite vase or a prized piece of furniture, don’t panic! With a little bit of time and effort, you can repair it and have it looking as good as new. One of the most effective methods for repairing cracks is by applying resin. Resin is a type of liquid plastic that hardens when exposed to air or heat.
It acts as a glue, holding the cracked pieces together and creating a seamless finish. To apply resin on the crack, first, you’ll need to clean the area thoroughly with a gentle cleaner and let it dry completely. Then, mix the resin according to the manufacturer’s instructions.
Using a small brush or a toothpick, carefully apply the resin to the crack, making sure to fill it completely. You can also apply the resin to the surrounding area to reinforce the repair. Once the resin is set, usually after a few hours or overnight, you can sand it down and polish the surface to make it smooth and shiny.
This method is ideal for small cracks and can restore the strength and stability of the object. So, next time you spot a crack, don’t fret – just grab some resin and get to work!
Using a bridge or clamp
Using a bridge or clamp is a common method for repairing cracks in different materials, such as wood, metal, or concrete. This technique involves applying pressure to the cracked area to bring the separated parts together and hold them in place until they are fully repaired. A bridge or clamp is usually made of sturdy materials like steel or aluminum and consists of two or more arms that can be tightened using screws or bolts.
These arms are placed on either side of the crack, and the screws or bolts are tightened to apply pressure and bring the separated parts closer together. This pressure helps to align the cracked edges and promotes the bonding of the repair material. When using a bridge or clamp, it is essential to ensure that the pressure applied is sufficient to hold the cracked parts in place but not excessive, as this can further damage the material.
It is also important to choose the right size and type of bridge or clamp, depending on the size and location of the crack. In addition to holding the cracked parts together, a bridge or clamp also helps to provide stability during the repair process. It prevents any slight movements that could disturb the bonding of the repair material and ensures a strong and durable fix.
Overall, using a bridge or clamp is an effective method for repairing cracks in various materials. By applying pressure and holding the cracked parts in place, it promotes proper alignment and bonding, resulting in a sturdy and long-lasting repair.
Curing the resin
resin crack repair, curing resin, resin repair techniques So, you’ve found a crack in your resin creation. Don’t worry, it happens to the best of us! Luckily, there are a few steps you can take to repair the crack and get your resin creation looking as good as new. The first step in repairing the crack is to prepare the area.
Start by cleaning the surface around the crack with a mild soap and water. This will help remove any dirt or debris that could interfere with the repair process. Once the area is clean, dry it thoroughly with a clean cloth to ensure that the resin sticks properly.
Next, you’ll want to apply the repair resin. There are a few different techniques you can use depending on the size and location of the crack. For small cracks, you can use a toothpick or a small paintbrush to carefully apply the repair resin.
Start by applying a thin layer of resin over the crack, making sure to fill it completely. Then, use a heat gun or a hairdryer on low heat to gently cure the resin. This will help it harden and bond with the surrounding resin.
For larger cracks, you may need to use a technique called “bridge” or “layering.” This involves creating multiple layers of resin to reinforce the cracked area. Start by applying a thin layer of resin over the crack and allow it to cure.
Then, apply another layer of resin and repeat the process until the crack is fully filled and reinforced. Finally, once the repair resin is fully cured, you’ll want to sand and polish the area to make it blend in with the rest of the resin creation. Use a fine-grit sandpaper to gently sand down any excess resin until it is smooth and even.
Removing excess resin
Removing excess resin is an important step when repairing a crack in an item. Once the resin has been applied and allowed to harden, there may be some excess that needs to be removed in order to achieve a smooth and seamless repair. One method for removing excess resin is to gently sand it away using fine-grit sandpaper.
This can help to smooth out any rough edges and create a uniform surface. Another option is to use a small, sharp tool such as a craft knife or scraper to carefully scrape away the excess resin. It’s important to be gentle and take your time when removing the excess resin to avoid causing any further damage to the item.
Once the excess resin has been removed, you can then move on to the next step in the repair process.
Finishing Touches
Dealing with a long crack on your windshield can be a frustrating situation. However, with the right techniques, you can repair it and have it looking good as new. One method is using a windshield repair kit, which usually comes with a resin that helps fill in the crack.
Start by cleaning the crack and the surrounding area with a glass cleaner. Then, apply the resin to the crack, making sure to fill it completely. Use a curing light to harden the resin, and then polish the area with a glass polishing compound for a smooth finish.
Another option is to use a windshield repair resin that is specifically designed for long cracks. This resin is more flexible and can better repair larger cracks. Again, clean the crack and apply the resin, making sure to fill it completely.
Use a curing light to harden the resin, and then polish the area for a seamless repair. Whether you choose to use a windshield repair kit or a long crack-specific resin, it’s important to carefully follow the instructions and take your time to ensure a successful repair. Remember, repairing a long crack on your windshield can save you money in the long run by avoiding the need for a costly replacement.
Sanding the repaired area
Once you have repaired the damaged area on your wooden furniture, it’s time to give it some finishing touches to ensure it looks good as new. One important step in this process is sanding the repaired area. Sandpaper comes in different grits, and it’s important to start with a lower grit and work your way up to a higher grit for a smooth and even finish.
The gentle rubbing motion of sanding smooths out any imperfections, such as bumps or excess glue, and helps blend in the repaired area with the rest of the furniture. It’s important to be careful not to apply too much pressure while sanding, as you don’t want to damage the wood or create uneven patches. Take your time and be patient, checking the progress frequently to ensure you achieve the desired result.
Polishing the windshield
In the final stages of restoring a car to its former glory, one of the last tasks that needs to be done is polishing the windshield. This may seem like a small detail, but it can make a big difference in the overall appearance of the vehicle. By removing any dirt, grime, or scratches from the windshield, the car will look more polished and refined.
It’s like putting the finishing touches on a work of art. But polishing the windshield isn’t just about aesthetics; it’s also about safety. A clean and clear windshield helps to improve visibility when driving, reducing the risk of accidents.
So, whether you’re a car enthusiast or just want to make sure your daily ride is looking its best, don’t forget to give your windshield some extra attention. It’s the final step in the restoration process that will leave your car shining bright and ready to hit the road.
Checking for any remaining damage
cars that have been involved in accidents, it’s important to thoroughly inspect the vehicle for any remaining damage before considering it fully repaired and safe to drive. While the initial repairs may have addressed the obvious issues, there could still be hidden damage that could pose a risk to both the driver and the car. One commonly overlooked area is the suspension system, which can be easily damaged in an accident.
This includes components such as the shocks, struts, and control arms, which all play a crucial role in providing a smooth and stable ride. A damaged suspension can affect the handling of the car, leading to a less responsive and potentially dangerous driving experience. Additionally, it’s essential to check for any structural damage that may have occurred during the accident.
This includes inspecting the frame for any signs of bending or twisting, as this can compromise the overall integrity of the vehicle. Finally, it’s crucial to ensure that all safety features, such as airbags and seat belts, are in proper working order. These features play a vital role in protecting occupants in the event of another accident.
By conducting a thorough inspection and addressing any remaining damage, you can rest assured that your car is truly safe to drive after an accident.
Conclusion
In conclusion, repairing a long crack on a windshield is like performing delicate surgery on a patient. You need steady hands, a sharp eye for detail, and a touch of wizardry to bring that glass back to life. Just like a skilled magician, you’ll be casting a spell over the crack, making it disappear into thin air.
But fear not, aspiring windshield wizards! With the right tools and a dash of patience, you can conquer this seemingly daunting task. Remember, cracks may be long, but they don’t stand a chance against your repair skills. So roll up your sleeves, grab your magic wand (also known as a repair kit), and get to work.
With a clever mixture of resin, pressure, and a sprinkle of determination, you’ll be able to turn that shattered windshield into a seamless work of art once again. But beware, young repair apprentice, for this task is not for the faint of heart. Just like any magic trick, there’s always a risk involved.
A crack could refuse to cooperate or, heaven forbid, decide to grow longer on a whim. But fear not, for even in the face of adversity, with your newfound windshield repair skills, you shall prevail! In the end, repairing a long crack on a windshield is not just about restoring visibility and functionality. It’s about defying the laws of nature, outsmarting the forces that seek to destroy our precious glass, and embracing the power to take matters into your own hands.
So go forth, my friends, and embark on this enchanting journey of windshield repair. Become the master of cracks, the conqueror of shattered glass, and the hero of all windshield owners. And remember, if you ever find yourself in need of a witty conclusion, turn to these words of wisdom and let them guide your repair adventures.
May the cracks be ever in your favor!”
Importance of professional repair for large or complex cracks
large or complex cracks, professional repair, finishing touches. When it comes to repairing large or complex cracks, the finishing touches are crucial. While it may be tempting to try and fix the problem yourself, it’s important to understand the importance of professional repair.
Large cracks can be tricky to handle, and if not repaired correctly, they can lead to further damage and costly repairs down the line. By hiring a professional, you can ensure that the job is done right the first time, giving your walls or floors the finishing touches they need to look brand new again. Professional repair technicians have the knowledge and expertise to assess the severity of the crack and determine the best course of action.
They will use the appropriate tools and techniques to ensure a durable and long-lasting repair. Rather than risk causing more harm than good with a DIY approach, trust in the professionals to give your home the finishing touches it deserves.
Tips for preventing future cracks
crack prevention tips
Final thoughts and recommendations
Finishing Touches Now that you’ve put in the hard work of planning and executing your home renovation project, it’s time for the finishing touches that will truly bring your vision to life. These final details can make all the difference in creating a space that not only looks great but also feels cozy and welcoming. One of the most important aspects of finishing touches is lighting.
The right lighting can completely transform a room, creating different moods and highlighting certain features. Consider installing dimmer switches so you can easily adjust the intensity of the light, and choose fixtures that match the overall style of your renovated space. Another often overlooked finishing touch is the selection of hardware for cabinets and doors.
Upgrading your hardware can instantly modernize a space and add a touch of elegance. Whether you prefer sleek, modern handles or more traditional knobs, be sure to choose hardware that complements the overall design aesthetic of your home. When it comes to decorating your newly renovated space, consider adding some personal touches.
Displaying family photos or artwork that holds special meaning to you can add warmth and personality to a room. Incorporating soft furnishings like throw pillows and blankets can also make a space feel more inviting and comfortable. Finally, don’t forget about the power of plants.
Adding some greenery to your home can improve air quality and create a sense of tranquility. Whether you choose large potted plants or a collection of smaller ones, incorporating nature into your space can have a positive impact on your overall well-being. In conclusion, paying attention to the finishing touches can take your home renovation project to the next level.
By focusing on lighting, hardware, personal touches, and greenery, you can create a space that not only looks beautiful but also feels like a true reflection of your personal style. So go ahead and add those final details that will make your home feel complete.
FAQs
How do I repair a long crack on my windshield?
To repair a long crack on your windshield, you can try using a windshield repair kit. Start by cleaning the area around the crack, then apply the resin provided in the kit. Use a curing device to harden the resin and smooth it out. Finally, polish the surface for a clear finish.
Can I repair a long crack on my windshield myself?
Yes, it is possible to repair a long crack on your windshield yourself using a windshield repair kit. However, keep in mind that the success of the repair may depend on the severity and length of the crack. If the damage is extensive, it is recommended to consult a professional.
How long does it take to repair a long crack on a windshield?
The time it takes to repair a long crack on a windshield can vary depending on several factors, such as the size and complexity of the crack and the type of repair kit used. On average, it may take anywhere from 30 minutes to a few hours to complete the repair.
What should I do if the crack on my windshield is too long to repair?
If the crack on your windshield is too long to repair, it may require a windshield replacement. In such cases, it is recommended to seek the assistance of a professional technician who can properly assess the damage and replace the windshield if necessary.
Can I still drive with a long crack on my windshield?
It is generally not recommended to drive with a long crack on your windshield, as it can compromise the structural integrity of the glass and increase the risk of further damage or shattering. Additionally, driving with a cracked windshield may be considered illegal in some jurisdictions.
How much does it cost to repair a long crack on a windshield?
The cost of repairing a long crack on a windshield can vary depending on factors such as the size and location of the crack, the type of repair kit used, and whether you choose to repair it yourself or seek professional assistance. On average, a DIY repair kit can range from $10 to $30, while professional repairs can cost between $50 and $200.
Does insurance cover the repair of a long crack on a windshield?
In many cases, insurance policies may cover the repair or replacement of a cracked windshield, depending on the type of coverage you have. It is recommended to contact your insurance provider to inquire about the specifics of your coverage and whether it includes windshield repairs.