
Hey there! Have you ever noticed that pesky little crack or chip in your windshield molding? It may not seem like a big deal at first, but ignoring it can lead to some serious consequences. Not only does a damaged windshield molding affect the overall appearance of your vehicle, but it also compromises the structural integrity of your windshield. We all know that a strong windshield is essential for the safety of you and your passengers.
So, what should you do if you find yourself in this situation? Well, fear not! In this blog post, we will guide you through the process of repairing your windshield molding, ensuring that your vehicle looks great and stays safe on the road. So, let’s dive in and get your windshield looking brand new!
Table of Contents
Introduction
Are you wondering how to repair windshield molding? Well, you’ve come to the right place! Windshield molding plays an important role in keeping your windshield secure and protected. Over time, however, it can become cracked, brittle, or even start to peel away. Not only can this be unsightly, but it can also be a safety hazard as it can compromise the integrity of your windshield.
Thankfully, repairing windshield molding is not as difficult as it may seem. With a few simple tools and some patience, you can have your windshield molding looking as good as new. So let’s dive in and learn how to get your windshield molding back in shape!
What is windshield molding?
windshield molding. Introduction: Have you ever noticed a strip of rubber or plastic running along the edges of your car’s windshield? That’s windshield molding! It may seem like a small and inconspicuous part of your vehicle, but it plays a crucial role in maintaining the integrity of your windshield and keeping it securely in place. Windshield molding acts as a protective barrier, preventing water, debris, and wind from seeping into your car’s interior.
Without it, you might find yourself dealing with leaks, rattling noises, and even a loose windshield. In short, windshield molding is an unsung hero that ensures your windshield stays firmly in place and your driving experience remains safe and comfortable.
Importance of repairing windshield molding
windshield molding, repairing windshield molding. Introduction: Your car’s windshield molding may seem like a small and insignificant part of your vehicle, but it plays a crucial role in ensuring your safety on the road. Windshield molding, also known as windshield trim or weatherstripping, is the rubber gasket that surrounds the edges of your windshield.
It serves a vital purpose by keeping your windshield securely in place, protecting it from damage, and preventing water, debris, and wind noise from entering your vehicle. Over time, however, the windshield molding can become worn, cracked, or damaged, which can compromise its effectiveness. In this blog post, we will discuss the importance of repairing windshield molding and how it can help keep you safe on the road.
Assessing the Damage
If you notice that the molding around your windshield is damaged, it’s important to address the issue promptly to prevent further damage and ensure your safety on the road. Fortunately, repairing windshield molding is a relatively simple process that you can do yourself with a few basic tools. First, you’ll want to assess the extent of the damage.
Is the molding cracked, chipped, or completely missing in certain areas? Once you have identified the problem areas, you can purchase replacement molding from an auto parts store or online. Installing the new molding is usually as easy as removing the old molding and snapping the new one into place. Be sure to clean the area around the windshield thoroughly before installing the new molding to ensure a secure fit.
With a little time and effort, you can have your windshield looking good as new and ready to hit the road again.
Inspecting the windshield molding
windshield molding, assessing the damage. When it comes to inspecting the windshield molding, it’s important to closely assess the damage before taking any further action. The windshield molding, or the rubber seal that runs around the edge of the windshield, plays a critical role in keeping the windshield securely in place and preventing water and debris from entering the vehicle.
Over time, the molding can wear down or become damaged, compromising its effectiveness. To assess the damage, start by visually inspecting the molding for any signs of cracking, peeling, or excessive wear. If you notice any of these issues, it’s a clear indication that the molding needs attention.
Additionally, check for any gaps between the molding and the windshield, as this could indicate that the molding is not properly sealing the windshield. By thoroughly assessing the damage to the windshield molding, you’ll be able to determine the appropriate course of action to ensure the safety and functionality of your vehicle.
Identifying common issues
Assessing the damage is a crucial step in identifying common issues in any situation. Whether it’s a broken appliance, a leaking pipe, or a damaged car, understanding the extent of the problem is essential for finding the right solution. Assessing the damage involves carefully examining the affected area, looking for any visible signs of wear and tear or malfunction.
It also requires assessing the impact of the damage on the overall functioning of the object or system. This could involve testing different components, measuring performance levels, or consulting relevant experts. By assessing the damage thoroughly, we can gain a clearer understanding of the problem at hand, which can then guide our efforts in finding the most effective solution.
Whether it’s a minor issue or a major problem, taking the time to assess the damage is a crucial first step in the troubleshooting process.
Removing the Damaged Molding
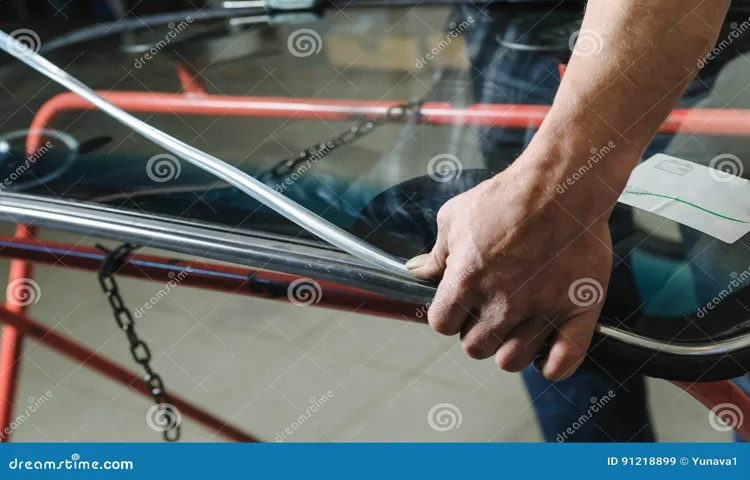
If you notice that your windshield molding is damaged, it’s important to remove it and replace it as soon as possible. The molding serves as a protective barrier between your windshield and the frame of your car, so it’s crucial that it’s in good condition. To remove the damaged molding, start by carefully prying it away from the windshield using a trim removal tool or a flathead screwdriver.
Take your time and be gentle to avoid scratching or damaging the windshield. Once the molding is removed, clean the area thoroughly to remove any dirt or debris. It’s also a good idea to inspect the windshield for any signs of damage or cracks while you have the molding removed.
Once the area is clean, you can then install the new molding by simply pressing it into place. Make sure it fits snugly and securely before finishing the job. With a little patience and the right tools, repairing your windshield molding can be a fairly straightforward process.
Gathering necessary tools
In order to remove damaged molding, it’s important to gather the necessary tools first. One of the most important tools you’ll need is a putty knife or a pry bar. This will allow you to gently pry the molding away from the wall without causing any damage.
It’s also helpful to have a pair of pliers handy to grip and remove any nails or fasteners that may be holding the molding in place. Additionally, a mallet or hammer can be useful if the molding is particularly stubborn and needs some extra persuasion to come loose. Once you have all your tools gathered, you’ll be ready to tackle the task of removing the damaged molding and getting your space ready for a fresh update.
Step-by-step process to remove molding
If you have damaged molding in your home, don’t worry! Removing it is easier than you might think. The first step in the process is to assess the damage. Look for any cracks, chips, or breaks in the molding.
Once you’ve identified the problem areas, you can begin removing the molding. Start by gently prying it away from the wall or surface using a putty knife or a small pry bar. Be careful not to damage the wall or surface underneath.
Once you have loosened the molding, continue to work your way along its length, prying it away until it is completely removed.
Tips to avoid damaging the windshield
Windshield molding is an important part of your car’s windshield as it helps to seal and secure the glass in place. Over time, the molding can become worn or damaged, which not only affects the appearance of your car but also its functionality. Removing damaged molding is a necessary step in replacing it and ensuring the windshield is properly sealed.
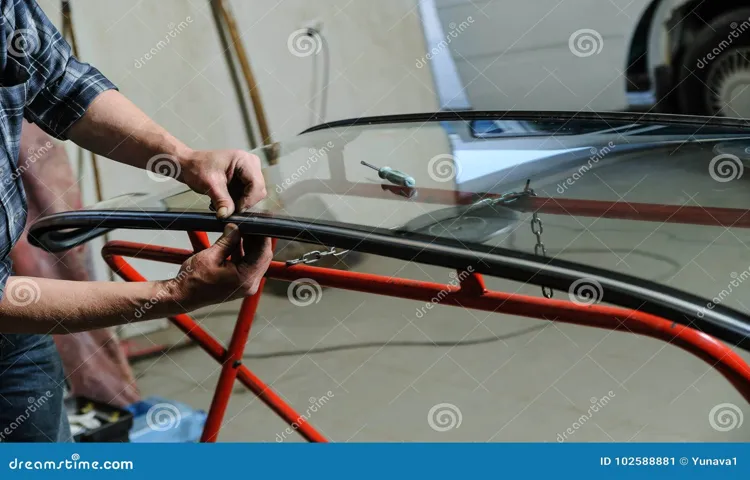
To remove the damaged molding, start by carefully prying it away from the windshield using a plastic trim tool or a flathead screwdriver wrapped in electrical tape to avoid scratching the glass. Work your way around the windshield, gently releasing the molding from its clips. Once the molding is removed, you can clean the area and prepare it for the installation of the new molding.
Taking care during this process will help avoid any further damage to your windshield.
Preparing the Surface
When it comes to repairing your windshield molding, one of the first steps is to properly prepare the surface. This is important because it ensures that the new molding will adhere properly and provide a secure seal. To prepare the surface, start by thoroughly cleaning the area around the molding.
Use a mild detergent and water to remove any dirt, grime, or residue. It’s important to avoid using any harsh chemicals or abrasive cleaners, as these can damage the molding or the windshield itself. Once the area is clean, use a microfiber cloth or a soft brush to gently dry it off.
Next, carefully inspect the surface for any cracks, chips, or other damage. These will need to be repaired before the new molding can be installed. Use a windshield repair kit or consult a professional if you need assistance with this step.
Once the surface is clean and any damage has been repaired, you can move on to the next step in the process.
Cleaning the windshield
Cleaning the windshield is an essential part of maintaining clear visibility while driving. However, before you grab that bottle of glass cleaner, it’s important to prepare the surface properly. Think of it as prepping a canvas before painting a masterpiece.
First, you’ll want to remove any loose dirt or debris from the windshield. This can be done by using a soft brush or your hand to sweep away any leaves, dust, or other particles that may have accumulated on the glass. Once the surface is free from loose debris, you’ll want to give it a good rinse with water.
This will help to remove any stubborn dirt or grime that may be stuck to the windshield. After rinsing, it’s time to apply a cleaning solution specifically designed for glass. These solutions are formulated to cut through dirt, grease, and other residues, leaving your windshield sparkling clean.
Gently wipe the solution onto the glass, making sure to cover the entire surface. Allow the solution to sit for a few moments to break down any tough stains or spots. Then, using a clean microfiber cloth or sponge, begin gently scrubbing the windshield in circular motions.
This will help to loosen any remaining dirt, making it easier to remove. Once you’ve scrubbed the entire windshield, rinse off the cleaning solution with water. Be sure to thoroughly rinse the glass, as any residue left behind can leave streaks or smudges.
Finally, dry the windshield using a clean, lint-free cloth or a squeegee. This will help to remove any remaining moisture and prevent streaks from forming. Now that your windshield is clean and clear, you can hit the road with confidence, knowing that you’ll have a clear view of the road ahead.
Removing adhesive residue
When it comes to removing adhesive residue, it’s important to start by preparing the surface. This is a crucial step that will make the cleaning process easier and more effective. One way to prepare the surface is by using a mild detergent or soap and warm water.
Simply mix the detergent with water and use a sponge or cloth to apply it to the area with adhesive residue. Gently scrub the surface in a circular motion to loosen the residue. Rinse the area thoroughly with clean water and dry it completely before moving on to the next step.
Another way to prepare the surface is by using a commercial adhesive remover. These products are specifically designed to dissolve adhesive residue and make it easier to remove. Follow the instructions on the product label to apply the adhesive remover to the surface.
Allow it to sit for a few minutes to penetrate the residue, then use a cloth or sponge to scrub the area. Rinse with water and dry thoroughly. By preparing the surface before attempting to remove adhesive residue, you’ll have a much better chance of success.
Installing the New Molding
When it comes to repairing your windshield molding, it’s important to follow the right steps to ensure a proper installation. First, remove the old molding by carefully prying it away from the windshield. Be cautious not to damage the windshield itself or any surrounding parts.
Once the old molding is removed, clean the area thoroughly to ensure a good adhesion for the new molding. Next, carefully line up the new molding with the windshield and press it into place. It may be necessary to use a small rubber mallet or a soft cloth to gently tap the molding into position.
Take your time to ensure a snug fit and avoid any gaps or unevenness. Finally, check for any excess adhesive or trim any excess molding that may be sticking out. With a little patience and attention to detail, you can easily repair your windshield molding and have it looking brand new in no time.
Choosing the right molding
“When it comes to installing new molding in your home, it’s important to choose the right type of molding for your particular space. There are numerous options to choose from, including crown molding, baseboard molding, and chair rail molding, each with its own unique style and purpose. Crown molding, for example, can add an elegant touch to any room, while baseboard molding can help define the space and protect the walls.
Chair rail molding, on the other hand, serves a more decorative purpose and can add a touch of sophistication to your home. Before making a decision, consider the style of your home, the size of the room, and the overall look and feel you want to achieve. By carefully selecting the right molding, you can transform any space and add a beautiful finishing touch to your home.
“
Applying adhesive
Applying adhesive to install the new molding on your wall is a crucial step in the process. It’s like the glue that holds everything together! Before you begin, make sure you have the right adhesive for the type of molding you’re working with. There are different adhesives available, such as liquid nails or construction adhesive, so choose the one that’s best suited for your project.
Start by cleaning the surface where the molding will be installed. Dust and debris can prevent the adhesive from adhering properly, so make sure the area is clean and dry. Then, apply a generous amount of adhesive to the back of the molding, spreading it evenly with a putty knife or a caulk gun.
Be sure to cover the entire back surface to ensure a strong bond. Once you’ve applied the adhesive, press the molding firmly onto the wall, making sure it’s aligned with your markings. You can use a rubber mallet or a hammer with a block of wood to gently tap the molding into place and secure the bond.
Allow the adhesive to dry according to the manufacturer’s instructions before adding any additional finishing touches to your newly installed molding. And there you have it – with some adhesive and a little bit of patience, you can easily install new molding to give your room a fresh, updated look!
Attaching the molding
To complete the installation of your new molding, you’ll need to attach it securely to your walls or ceilings. This step is crucial to ensure that the molding stays in place and adds to the overall aesthetic of the room. There are a few different methods you can use to attach the molding, depending on the type of molding and the surface it will be attached to.
One common method is to use finishing nails or brads to secure the molding to the wall or ceiling. These small nails can be easily hammered into place and are barely noticeable once installed. Another option is to use construction adhesive to bond the molding to the surface.
This adhesive creates a strong hold and eliminates the need for nails or brads. Whichever method you choose, make sure to take your time and measure carefully to ensure that the molding is installed evenly and straight.
Finishing Touches
If you’re dealing with a damaged windshield molding, don’t panic! There are some simple steps you can take to repair it yourself. First, assess the extent of the damage. Is the molding cracked or just loose? If it’s cracked, you may need to replace it altogether.
However, if it’s just loose, you can try to repair it. Start by removing the old molding carefully. Next, clean the area thoroughly to ensure that the new molding adheres properly.
Now comes the fun part – installing the new molding! Make sure to line it up correctly and press it firmly in place. If it’s not sticking, you can use a strong adhesive to secure it. Once the molding is in place, give it a good cleaning and voila! Your windshield will look as good as new.
Just remember to take your time and be gentle to avoid causing further damage.
Trimming excess molding
Trimming excess molding can be a great way to add those perfect finishing touches to any room. Molding is a decorative feature that can really enhance the overall look and feel of a space. However, sometimes it can be a bit too much and look overwhelming.
That’s where trimming comes in. By carefully cutting away any excess molding, you can create a clean and polished look that will make your room feel more balanced and put-together. It’s like giving your room a haircut – removing the extra bits that distract from the overall style.
So, if you find yourself with molding that’s a little too much, grab your tools and start trimming! You’ll be amazed at the difference it can make.
Checking for proper fit
One of the most important steps in the process of purchasing new clothing is checking for proper fit. After all, nobody wants to invest in a new outfit only to find that it is uncomfortable or ill-fitting. When it comes to finishing touches, it’s all about making sure that the clothing sits just right on your body.
This means checking things like sleeve length, pant inseam, and waist size to ensure that the garment fits properly. It’s also important to consider the overall silhouette and proportion of the clothing, as this can greatly affect how it looks on you. By taking the time to check for proper fit, you can ensure that you look and feel your best in your new outfit.
So go ahead, give it a try, and see how the finishing touches can make all the difference in your style.
Cleaning up the area
cleaning up the area After all the hard work of organizing and decluttering, it’s time for the finishing touches to really make the area shine. Cleaning up the area is an essential step in creating a clean and welcoming environment. Start by dusting all surfaces, including shelves, furniture, and decorations.
Use a microfiber cloth or duster to capture dust and avoid spreading it around. Next, wipe down any hard surfaces with a damp cloth and a gentle cleaner. This will remove any smudges or stains and leave everything looking fresh and clean.
Don’t forget to vacuum or sweep the floors to remove any dirt or debris that may have accumulated during the organizing process. Finally, add some final touches to make the area feel complete. This could be as simple as arranging some fresh flowers in a vase or adding a scented candle for a cozy ambiance.
By taking the time to clean up the area, you’ll be able to fully enjoy the fruits of your organizing efforts and create a space that is both functional and aesthetically pleasing.
Conclusion
In conclusion, repairing windshield molding is a lot like solving a puzzle – it requires patience, precision, and a touch of creativity. Much like reuniting a jigsaw puzzle, repairing this small but crucial part of your car’s exterior can make all the difference in the overall appearance and functionality of your vehicle. But fear not, my fellow DIY enthusiasts, for I have shared with you the secrets to mastering this skillful task.
From gathering the necessary materials to carefully removing and cleaning the old molding, to strategically placing and securing the new molding in place, it’s safe to say you’ve now unlocked the secret to a well-molded windshield. So, the next time you find yourself in a predicament with unsightly or damaged windshield molding, remember these simple steps. Embrace your inner puzzle solver, dare to be witty, and show your windshield some much-needed love and care.
Who knows, your newfound expertise might just earn you the title of “Molding Maestro” amongst your friends and family. Remember, a well-maintained windshield molding not only protects your precious glass from the elements but also adds a touch of style and sophistication to your ride. So, go forth, my clever companions, and let your repairing skills shine bright like the morning sun on your newly molded windshield.
You’ve got this!”
Importance of timely repair
timely repair The finishing touches are often the most important part of any project. Whether it’s completing a painting, putting the final stitches in a quilt, or adding the last details to a sculpture, these final steps can make all the difference in the end result. The same goes for repairs in our everyday lives.
When something breaks or gets damaged, it’s crucial that we address the issue quickly and efficiently. A timely repair can prevent further damage, save us money in the long run, and ensure that our belongings stay in good working order. Just like putting the final brushstroke on a masterpiece, taking care of repairs promptly gives us that sense of satisfaction and completion.
So the next time something goes awry, don’t put off fixing it. Give it the finishing touch it needs and reap the benefits of a job well done.
Tips to maintain windshield molding
One often overlooked aspect of vehicle maintenance is the upkeep of the windshield molding. This may seem like a small detail, but it plays an important role in protecting your windshield and providing a finished look to your car. So, how can you maintain the windshield molding and keep it in good condition? Here are some tips to help you with this important finishing touch.
First and foremost, regular cleaning is essential for maintaining the windshield molding. Over time, dirt, dust, and grime can accumulate on the molding, causing it to lose its shine and appearance. To prevent this, make it a habit to clean the molding regularly with a mild detergent and water.
Use a soft cloth or sponge to gently clean the surface, being careful not to scratch or damage the molding. Secondly, it’s important to inspect the molding for any signs of damage. The molding may become cracked, warped, or loose over time, and these issues can affect its performance and appearance.
Look for any visible signs of damage and address them promptly. If you notice any cracks or warping, it may be necessary to replace the molding to ensure a proper fit and seal. Another important tip is to avoid using harsh chemicals or abrasive cleaners on the molding.
While it may be tempting to use strong chemicals to remove stubborn stains or dirt, these can damage the molding and lead to premature deterioration. Stick to mild cleaning solutions and gentle cleaning techniques to keep the molding in top shape. Finally, consider using a protective product on the molding to prevent fading and discoloration.
There are various products available on the market specifically designed for protecting automotive trim and molding. These products can help to maintain the appearance and longevity of the molding, keeping it looking new and fresh for longer. By following these simple tips, you can maintain the windshield molding and ensure that it remains in good condition.
FAQs
What is windshield molding and why is it important for the car’s structural integrity?
Windshield molding refers to the rubber or plastic trim that is attached to the edges of the windshield. It helps to seal and protect the edges of the windshield, preventing water, dirt, and debris from entering the cabin. It also provides support to the windshield and contributes to the overall structural integrity of the car.
How can I tell if my windshield molding needs repair or replacement?
There are a few signs that indicate windshield molding may need repair or replacement. These include visible cracks, gaps between the molding and the windshield, water leaks during rainfall, or excessive wind noise while driving. If you notice any of these signs, it is best to have a professional inspect and repair the molding.
Can I repair the windshield molding myself or should I seek professional help?
While some minor molding issues can be repaired by DIY methods, it is generally recommended to seek professional help for windshield molding repair or replacement. Professionals have the necessary expertise and tools to ensure the job is done correctly and that the molding provides proper sealing and support for the windshield.
How much does it cost to repair or replace windshield molding?
The cost of repairing or replacing windshield molding can vary depending on various factors such as the make and model of the car, the condition of the molding, and the labor costs in your area. It is best to consult with a few reputable auto body shops or windshield specialists to get an accurate estimate for your specific situation.
Can damaged windshield molding affect the overall safety of the vehicle?
Yes, damaged windshield molding can compromise the structural integrity of the car. If the molding is not sealing properly, it can allow water, dirt, and debris to enter the cabin, potentially obstructing the driver’s view or damaging electrical components. It can also weaken the windshield’s stability during impacts or accidents, increasing the risk of injury to the occupants.
Is it possible to prevent windshield molding damage?
While it is not entirely possible to prevent all types of windshield molding damage, there are some precautions you can take. Regularly cleaning the molding and checking for any signs of wear or damage can help identify issues early on. Avoid using harsh chemicals or abrasive materials when cleaning the windshield area to prevent damage to the molding.
How long does windshield molding typically last before needing repair or replacement?
The lifespan of windshield molding can vary depending on various factors such as the quality of the molding material, climate conditions, and how well it is maintained. On average, windshield molding can last anywhere from 5 to 10 years. However, it is important to have it regularly checked during routine vehicle inspections to catch any signs of wear or damage early on.