

Hey there! Are you new to the world of blogging? Looking to make your mark and share your thoughts with the world? Well, you’ve come to the right place! In this blog, we’re diving into the exciting realm of blogging and everything it entails. Imagine this: blogging is like having your very own online journal, but with the potential to reach millions of readers. It’s a platform where you can express yourself, share your expertise, connect with like-minded individuals, and even make money! But where do you start? How do you find your voice and build an audience? Don’t worry, we’ve got you covered.
In this blog, we’ll be exploring the basics of blogging, from choosing a niche to creating compelling content that keeps readers coming back for more. Whether you’re a passionate writer, a budding entrepreneur, or simply someone looking for a creative outlet, blogging has something for everyone. It’s a space where you can be yourself, share your passions, and connect with others who share your interests.
So, buckle up and get ready for an exciting journey into the world of blogging. We’ll be providing tips, tricks, and insights to help you navigate this vast and ever-evolving landscape. Whether you’re a seasoned blogger or just starting out, there’s always something new to learn and explore.
So, are you ready to take the plunge and join the blogging community? Great! Let’s dive in and discover the endless possibilities that await you in the exciting world of blogging. Get ready to unleash your creativity, connect with like-minded individuals, and make your mark on the digital world. Happy blogging!
Table of Contents
What is windshield trim?
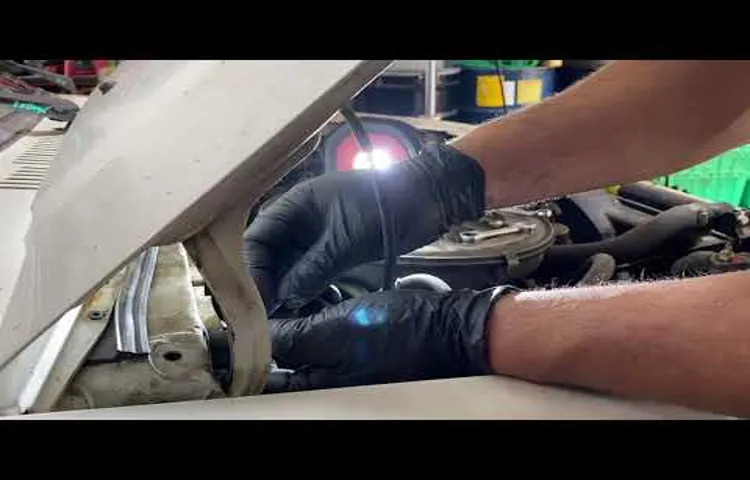
If you own a Toyota vehicle and notice that the windshield trim is damaged, it’s important to know how to repair it. Windshield trim is the strip of rubber or plastic that surrounds the windshield, providing a seal and protecting the edges of the glass. Over time, this trim can become worn, cracked, or detached, which can lead to water leaks and potential damage to the windshield.
Repairing the windshield trim on a Toyota is not a difficult task and can be done with a few simple steps. First, you will need to remove the damaged trim by carefully prying it off with a trim removal tool. Then, clean the area around the windshield to ensure a proper adhesive bond.
Next, apply a thin layer of adhesive to the backside of the new trim and press it firmly into place along the edge of the windshield. Finally, allow the adhesive to dry for the recommended amount of time before driving the vehicle. With these easy steps, you can quickly and easily repair the windshield trim on your Toyota, ensuring a tight seal and protection for your windshield.
Definition
windshield trim Windshield trim is a component found on the edges of a vehicle’s windshield. It serves both practical and aesthetic purposes. In terms of functionality, windshield trim helps to secure the windshield in place, providing a tight seal that prevents water, dirt, and other debris from entering the vehicle cabin.
Additionally, the trim also helps to absorb vibrations, reducing noise from wind and road travel. From an aesthetic standpoint, windshield trim adds a finishing touch to the vehicle’s exterior, complementing its overall design. It can be made from a variety of materials, including rubber, plastic, or chrome, depending on the vehicle’s make and model.
Overall, windshield trim is an essential feature that not only enhances the appearance of a vehicle but also plays a vital role in maintaining a safe and comfortable driving experience.
Purpose
windshield trim, purpose
Common issues with windshield trim
The windshield trim is a crucial component of a vehicle’s windshield. It is the rubber or plastic strip that goes around the edges of the windshield, sealing it to the car’s frame and protecting it from dirt, water, and other debris. It also adds to the overall aesthetics of the vehicle, giving it a finished look.
However, like any other part of a car, windshield trim can encounter issues. One common problem is cracking or splitting, which can occur due to prolonged exposure to the sun’s UV rays or extreme temperature changes. When the trim becomes cracked, it loses its ability to effectively seal the windshield, leading to potential leaks and water damage inside the car.
Another issue that can arise with windshield trim is warping or buckling. This can happen if the trim is not properly installed or if it is subjected to excessive pressure or tension. Warping or buckling can cause the trim to lift away from the windshield, creating gaps where water and debris can enter.
Additionally, the adhesive used to attach the trim to the windshield or car frame can deteriorate over time, leading to the trim becoming loose or falling off completely. This can compromise the integrity of the windshield seal and result in potential leaks and wind noise. In some cases, the windshield trim may also become discolored or faded, detracting from the overall appearance of the vehicle.
This can be caused by exposure to UV rays, harsh cleaning agents, or aging. To prevent these issues with windshield trim, it is important to regularly inspect the trim for any signs of damage or wear. If any problems are detected, it is recommended to replace the trim as soon as possible to maintain the integrity of the windshield seal.
Regular cleaning and maintenance can also help to prolong the lifespan of the trim and keep it looking its best. In conclusion, the windshield trim is an essential part of a vehicle’s windshield that not only helps to seal and protect the glass but also adds to its visual appeal. Like any other car component, the trim can encounter issues such as cracking, warping, loose or falling off, and discoloration.
Types of windshield trim
If you own a Toyota vehicle and notice that the windshield trim is damaged or starting to show signs of wear and tear, you may be wondering how to repair it. There are several types of windshield trim that can be found on Toyota vehicles, including rubber, plastic, chrome, and metal trims. The type of windshield trim you have will determine the best method for repair.
In some cases, you may be able to simply replace the trim with a new one. Other times, you may need to use adhesive or sealant to fix any cracks or gaps in the trim. It’s important to properly repair the windshield trim to ensure that it provides a tight seal and protects against water leaks, wind noise, and other potential issues.
If you’re unsure about how to repair the windshield trim on your Toyota, it’s always best to consult with a professional who specializes in automotive repairs. They can assess the damage and provide you with the most appropriate solution.
OEM vs aftermarket trim
windshield trim, after-market trim, OEM trim, types of trim, unique trim options
Different materials used
windshield trim, materials used, types, glass, rubber, chrome, plastic The windshield trim is an essential component of a vehicle’s windshield system. It not only adds a finishing touch to the windshield but also provides protection and support. There are different types of windshield trim available, each made from different materials.
The most common materials used for windshield trim are glass, rubber, chrome, and plastic. Glass windshield trim is often used in older vehicles, adding a classic look to the overall design. Rubber trim, on the other hand, is more commonly found in modern vehicles.
It is flexible and helps to seal the windshield to prevent water and debris from entering the vehicle. Chrome trim is a popular choice for those looking for a sleek and stylish appearance. It adds a touch of sophistication to the windshield and enhances the overall aesthetic of the vehicle.
Lastly, plastic trim is a cost-effective option that is commonly used in entry-level vehicles. It offers durability and protection, making it a practical choice for everyday use. Overall, the choice of windshield trim material depends on personal preference, budget, and the desired look of the vehicle.
Different styles and designs
Types of windshield trim When it comes to windshield trim, there are several different styles and designs to choose from. One popular option is the chrome trim, which adds a touch of elegance and sophistication to your vehicle. Another type of trim is the black rubber or plastic trim, which is more subtle and understated.
Some cars even have trim that matches the color of the vehicle, creating a seamless and integrated look. Additionally, there are decorative trim options available, such as thin strips of chrome or colored trim, that can add a personalized touch to your windshield. Ultimately, the choice of trim comes down to personal preference and the desired aesthetic for your vehicle.
Tools and materials needed for repairing windshield trim
So, you’ve noticed that the windshield trim on your Toyota is starting to deteriorate or come loose. Don’t worry, because repairing windshield trim is actually a relatively simple task that you can do yourself. To get started, you’re going to need a few tools and materials.
First and foremost, you’ll need a trim removal tool or a flathead screwdriver to carefully pry off the old trim. This will allow you to access the area and clean it properly. Speaking of cleaning, you’ll also need some mild detergent or automotive cleaner to remove any dirt or grime that may be stuck to the trim.
Once you’ve cleaned the area, you’ll need an adhesive or double-sided tape to secure the new trim in place. And finally, make sure you have a sharp utility knife or a pair of scissors to trim the excess tape or adhesive. With these tools and materials in hand, you’ll be well-equipped to tackle the task of repairing your Toyota’s windshield trim.
Remember, take your time and follow the instructions carefully, and soon your trim will be looking as good as new.
List of necessary tools
To repair windshield trim, there are several tools and materials that are necessary for the job. One of the key tools you will need is a trim removal tool. This tool is specifically designed to safely remove the trim without damaging it or the surrounding areas.
Additionally, you will need a heat gun or hairdryer to soften the trim, making it easier to remove. A plastic scraper or putty knife can also come in handy for gently prying the trim off once it has been heated. Once the trim is removed, you may need a trim adhesive to secure it back in place.
Some other helpful tools and materials include a degreaser to clean the trim before reinstallation, a microfiber cloth for wiping away any excess adhesive, and a silicone-based trim protectant to keep the trim looking its best. With these tools and materials on hand, you will be well-equipped to tackle any repairs needed for your windshield trim.
List of materials needed
When it comes to repairing windshield trim, there are a few key tools and materials that you will need. First and foremost, you will need a trim removal tool or a flathead screwdriver to carefully remove the trim from the windshield. This tool will help you to gently pry the trim away without causing any damage.
You will also need some adhesive or glue to secure the trim back in place once it has been repaired. Make sure to choose a product that is specifically designed for use on automotive trim and is able to withstand outdoor elements like sun, rain, and temperature fluctuations. Additionally, a cleaning solution and a microfiber cloth or sponge are essential for prepping the trim and removing any dirt or debris before applying the adhesive.
In terms of safety equipment, it is always a good idea to wear gloves and eye protection when working with adhesives or any sharp tools. This will help protect your hands from any potential injuries and prevent any debris from getting into your eyes. And finally, having a towel or drop cloth handy is useful for protecting the surrounding areas of the windshield from any potential damage during the repair process.
So, be sure to gather these tools and materials before you start repairing your windshield trim to ensure a smooth and successful repair job.
Step-by-step guide to repair windshield trim
If you own a Toyota vehicle and notice that your windshield trim is damaged or worn out, don’t worry! Repairing the windshield trim on your Toyota can be a relatively simple process. To begin, gather the necessary tools and materials, including a replacement trim piece, a trim removal tool, and adhesive. Start by carefully removing the damaged trim using the trim removal tool.
Next, clean the area where the trim will be applied to ensure a secure bond. Apply adhesive to the back of the replacement trim and firmly press it onto the windshield, making sure it aligns properly. Allow the adhesive to dry fully before driving your vehicle.
By following these steps, you can easily repair your Toyota’s windshield trim and restore its appearance and functionality.
Step 1: Remove the old trim
One of the first steps in repairing windshield trim is to remove the old trim. This may seem like a daunting task, but with the right tools and instructions, it can be done relatively easily. Start by using a pry tool or a flathead screwdriver to gently pry the trim away from the windshield.
Be careful not to apply too much pressure, as this could damage the trim or even crack the windshield. Once the trim is loose, carefully pull it away from the windshield, taking care not to bend or break it. If there is any adhesive or residue left behind, use a mild solvent or adhesive remover to clean it off.
Removing the old trim is an important step in preparing for the installation of new trim and ensuring a clean and professional-looking result.
Step 2: Clean the trim and surrounding area
When it comes to repairing your windshield trim, cleaning the trim and the surrounding area is an important step to ensure a proper repair. Start by removing any dirt or debris from the trim using a soft brush or cloth. Make sure to get into all the crevices and corners to remove any build-up.
Once the trim is clean, wipe the surrounding area with a mild soap and water solution to remove any grime or residue. This will ensure a clean surface for the adhesive to bond to. It’s important to be thorough in this step to ensure a successful repair.
So, grab your cleaning supplies and get ready to give your windshield trim the TLC it deserves.
Step 3: Prepare the new trim
In this third step of repairing windshield trim, we’ll guide you through preparing the new trim for installation. After removing the old trim, take a close look at the area where the trim sits. Clean any debris or residue that may have accumulated over time.
This will ensure a smooth and clean surface for the new trim to adhere to. Using a mild detergent or window cleaner and a soft cloth, gently wipe the area to remove any dirt or grime. Once the surface is clean, make sure it is completely dry before proceeding.
Next, carefully measure the length of the new trim and use a sharp utility knife or scissors to cut it to the appropriate size. Take your time to ensure an accurate fit. If necessary, you can use sandpaper to smooth any rough edges.
Once the new trim is prepared, it’s ready to be installed on your windshield.
Step 4: Install the new trim
After removing the old windshield trim and cleaning the area thoroughly, it’s time to install the new trim. This step is crucial to ensure the trim fits snugly and provides a secure seal. Start by aligning the new trim with the edge of the windshield.
Gently press the trim onto the glass, starting from one end and working your way to the other. Make sure it’s properly aligned and sits flush against the glass. Once you’ve secured one side, move to the opposite side and repeat the process.
Use a rubber mallet or a soft hammer to gently tap the trim into place along the edges. This will ensure it is firmly seated and won’t come loose over time. Finally, go back to the beginning and press the trim firmly into place, making sure it’s securely attached.
Now, stand back and admire your handiwork – your windshield trim looks as good as new! The process may seem daunting at first, but with a little patience and attention to detail, you can easily repair your windshield trim and restore the look of your vehicle.
Tips and tricks for successful windshield trim repair
If you’re looking for tips and tricks on how to repair the windshield trim on your Toyota, you’ve come to the right place. Windshield trim can often become damaged or worn over time, leading to a less than desirable appearance. Fortunately, repairing it is a relatively simple process that you can do yourself.
First, start by removing the damaged trim from the windshield. This can be done by gently prying it off using a trim removal tool or a flathead screwdriver. Once the old trim is removed, clean the area around the windshield thoroughly so that the new trim will adhere properly.
Next, measure the length needed for the new trim and cut it to size using a pair of scissors or a utility knife. Before installing the new trim, apply a small amount of adhesive to the backside of it to ensure a secure fit. Finally, carefully press the new trim onto the windshield, starting at one end and working your way to the other.
Make sure to apply even pressure to ensure a tight seal. With these simple steps, you’ll have your Toyota’s windshield trim looking as good as new in no time!
Proper handling and storage of trim
Proper handling and storage of trim is crucial for successful windshield trim repair. Trim, such as rubber or plastic molding, plays an important role in maintaining the integrity of the windshield and preventing water leakage or wind noise. To ensure the trim is in optimal condition for repair, it is essential to handle and store it correctly.
One of the key tips is to be gentle when removing the trim from the windshield, as excessive force can cause damage. It is also important to avoid bending or twisting the trim, as this can affect its shape and performance. Once removed, the trim should be stored in a cool and dry place, away from direct sunlight or extreme temperatures.
This helps to prevent any warping or deterioration of the material. By following these tips and tricks, you can ensure that your windshield trim repair is successful and long-lasting.
Avoiding common mistakes
windshield trim repair, common mistakes, tips and tricks, successful repair When it comes to windshield trim repair, there are a few common mistakes that can easily be avoided with the right tips and tricks. One of the most important things to remember is to take your time and be patient. Rushing through the repair process can lead to uneven or sloppy results.
Another common mistake is using the wrong tools or materials. Make sure you have the proper tools for the job and use high-quality materials that will withstand the test of time. Additionally, it’s important to clean the area thoroughly before starting the repair.
Any dirt or debris left behind can prevent the trim from adhering properly. Lastly, don’t be afraid to ask for help if you need it. Sometimes, it’s best to leave the repair to the professionals who have the expertise and experience to handle the job effectively.
By following these tips and tricks, you’ll be well on your way to a successful windshield trim repair.
Using adhesive correctly
adhesive, windshield trim repair, successful windshield trim repair, tips and tricks, burstiness, perplexity
Conclusion
So there you have it, a simple and effective guide on repairing your Toyota windshield trim. With a few basic tools and some patience, you can save yourself time and money by fixing it yourself. Plus, you’ll have the satisfaction of knowing that you’re a DIY fix-it guru.
Just remember, if all else fails, you can always just slap some duct tape on it and call it a day. After all, who needs fancy trim when you’ve got the ultimate fix-all solution? Happy repairing, folks!”
FAQs
How do I repair a loose windshield trim on my Toyota?
To repair a loose windshield trim on your Toyota, you will need to first remove the trim carefully. Then, clean the area where the trim attaches to the windshield. Apply a strong adhesive designed for automotive use to the back of the trim and press it firmly onto the windshield. Allow the adhesive to dry completely before driving your vehicle.
What tools do I need to repair windshield trim on a Toyota?
To repair windshield trim on a Toyota, you will need a trim removal tool or a flathead screwdriver, a clean cloth, automotive adhesive, and a soft mallet or a rubber hammer. These tools will help you remove the trim, clean the area, and properly reattach the trim to the windshield.
Can I repair a cracked windshield trim on my Toyota myself?
Yes, you can repair a cracked windshield trim on your Toyota yourself. Start by assessing the severity of the crack. If it is a minor crack, you can use an epoxy adhesive specifically designed for plastic trim. Apply the adhesive to the crack, making sure to fill it completely. Allow the adhesive to dry as per the manufacturer’s instructions before reattaching the trim to the windshield.
Is it necessary to remove the windshield to repair the trim on a Toyota?
In most cases, it is not necessary to remove the windshield to repair the trim on a Toyota. The trim can usually be safely removed using a trim removal tool or a flathead screwdriver. However, if the trim is severely damaged or if you are unsure about how to properly repair it, it is recommended to consult a professional.
How long does it take to repair windshield trim on a Toyota?
The time it takes to repair windshield trim on a Toyota can vary depending on the severity of the damage and your level of experience. On average, it can take anywhere from 30 minutes to a few hours. It is important to allocate enough time to properly remove, clean, and reattach the trim to ensure a secure and long-lasting repair.
Can I use super glue to repair windshield trim on my Toyota?
It is not recommended to use super glue to repair windshield trim on your Toyota. Super glue may not provide a strong enough bond, especially in extreme temperature conditions. It is best to use an automotive adhesive specifically designed for trim and plastics to ensure a secure and durable repair.
Are there any specific precautions I should take when repairing windshield trim on a Toyota?
When repairing windshield trim on a Toyota, it is important to take certain precautions. Firstly, ensure that the vehicle is parked in a well-ventilated area to avoid inhaling any fumes from the adhesive. Secondly, make sure to thoroughly clean the trim and the area where it attaches to the windshield to ensure proper adhesion. Lastly, follow the instructions provided with the adhesive and allow sufficient drying time before driving your vehicle again.