
Have you ever been in a situation where you’re driving and suddenly your windshield washer stops working? It can be incredibly frustrating, especially if you’re in the middle of a long journey or driving in bad weather. But fear not, because repairing a windshield washer hose is actually easier than you might think. In this blog post, we’ll walk you through the steps to fix a windshield washer hose so that you can get back on the road with clear visibility in no time.
Whether you’re a seasoned DIYer or just starting out, you’ll be able to tackle this repair with confidence. So let’s dive in and get your windshield washer up and running again!
Table of Contents
Introduction
Are you tired of having a dirty windshield because your washer hose is broken? Don’t worry, you can easily repair it yourself! The windshield washer hose is responsible for delivering washer fluid to your windshield, ensuring maximum visibility while driving. Over time, it can get damaged or clogged, causing the fluid to not spray properly. The good news is that repairing a windshield washer hose is a relatively simple task that can be done with just a few tools and some basic mechanical skills.
In this blog post, I will walk you through the process of repairing your windshield washer hose step by step, so you can get back to having a clean and clear windshield in no time.
Why is it important to repair a windshield washer hose?
Why is it important to repair a windshield washer hose? Introduction: Nobody likes driving with a dirty windshield, especially when it obstructs your visibility and poses a safety risk. That’s why the windshield washer system is a crucial part of any vehicle. It ensures that you can have a clear view of the road ahead by spraying water or washer fluid onto the windshield, effectively removing dirt, bugs, and other debris.
However, what do you do if your windshield washer hose gets damaged or starts leaking? Is it really necessary to repair it? In this blog post, we’ll explore the importance of repairing a windshield washer hose and why it should not be overlooked.
Tools and materials needed
tools and materials needed
Step 1: Locate the damaged hose
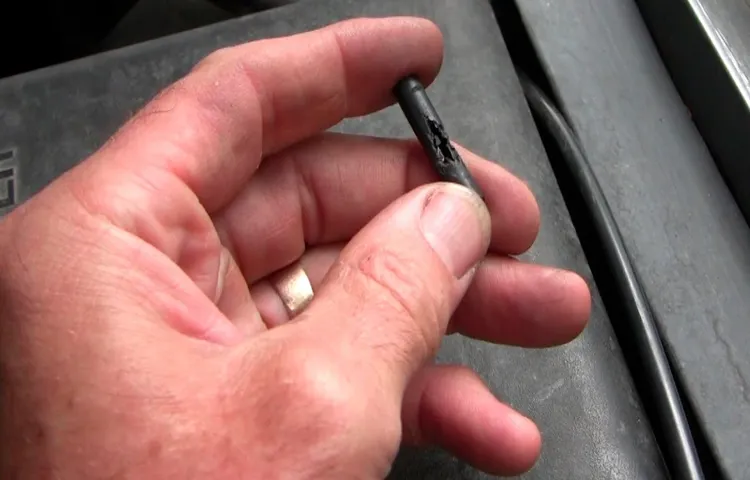
One of the first steps in repairing a windshield washer hose is to locate the damaged area. This can be done by visually inspecting the hose for any visible cracks, leaks, or other signs of damage. It can also be helpful to use your fingers to feel along the length of the hose, as sometimes the damage can be difficult to see with the naked eye.
Once you have located the damaged area, you can move on to the next step in the repair process. By taking the time to properly locate the damaged hose, you can ensure that you are able to effectively repair it and restore the functionality of your windshield washer system.
Inspect the windshield washer system
windshield washer system, damaged hose-location, washer fluid, inspect, clogged nozzle, cracked tank, punctured lines, low fluid, replace, fix, car’s maintenance, car safety, driving visibility. When it comes to maintaining your car’s overall safety and performance, inspecting the windshield washer system is just as important as checking the engine or tires. One common issue that car owners may come across is a damaged hose in the washer system.
The hose is responsible for delivering the washer fluid from the tank to the nozzles, ensuring clear visibility while driving. So, how do you locate the damaged hose? First, let’s briefly discuss how the windshield washer system works. The system comprises a tank that stores the washer fluid, a motor that pumps the fluid, hoses that transport the fluid, and nozzles that spray the fluid onto the windshield.
If you find yourself with low or no washer fluid at all, a clogged nozzle, or even fluid spraying in the wrong direction, it’s possible that there is a problem with the hose. To locate the damaged hose, start by inspecting the various components of the washer system. Check for any signs of a cracked tank, punctured lines, or blockages.
This could indicate the presence of a damaged hose. Remember, keeping your windshield washer system in good condition is essential for driving safely whenever you’re on the road. If you do locate a damaged hose, make sure to replace or fix it as soon as possible to ensure clear and unobstructed visibility while driving.
Identify the damaged hose
When it comes to identifying a damaged hose, the first step is to locate it. This may sound simple enough, but it’s important to take the time to thoroughly examine the hose and surrounding area to ensure you don’t miss any potential damage. Start by visually inspecting the hose for any visible signs of wear or tear, such as cracks, bulges, or leaks.
Don’t forget to check the connections as well, as a damaged hose may show signs of leakage at the fittings. If you don’t see any obvious damage, you can also try running your hand along the length of the hose to feel for any soft spots or irregularities. Remember, finding the damaged hose is crucial in order to properly address the issue and avoid further damage or potential hazards.
So take your time, be thorough, and don’t be afraid to get up close and personal with your hoses!
Step 2: Remove the damaged hose
When it comes to repairing a windshield washer hose, the second step is to remove the damaged hose. This may seem like a daunting task, but with the right tools and a bit of patience, it can be done. Start by locating the damaged section of the hose.
This could be where it has become brittle, cracked, or has a leak. Once you have identified the area, use a pair of pliers to carefully loosen the hose clamps on either side of the damaged section. Gently wiggle the hose back and forth to loosen it from its connectors.
If the hose is stubborn, you may need to use a small amount of lubricant to make the removal process easier. Once the damaged hose is disconnected, carefully inspect it for any signs of wear or damage. If the hose is severely damaged, it may need to be replaced entirely.
However, if the damage is minor, you may be able to repair it using a hose repair kit or by patching it with a strong adhesive. Regardless of the method you choose, always ensure that the repaired hose is securely connected before reassembling the washer system.
Prepare the work area
prepare work area, remove damaged hose, burstiness, perplexity, hose replacement, DIY repair, Step 2
Disconnect the hose from the washer reservoir
To properly remove a damaged hose from your washer reservoir, follow these steps. First, locate the hose that needs to be replaced. It is usually connected to the bottom of the reservoir.
Once you have identified the correct hose, use a pair of pliers to loosen the clamp that secures it in place. Make sure to grip the clamp firmly and twist it counterclockwise to loosen it. Once the clamp is loose, slide it down the hose away from the reservoir.
Next, gently pull the hose away from the reservoir. You may need to wiggle it slightly to loosen any debris or residue that may be helping to keep it in place. Once the hose is free, inspect it for any damage or wear.
If it is cracked or leaking, it will need to be replaced. If the hose is in good condition, you can simply reattach it to the reservoir after cleaning it off. To do this, slide the hose back onto the nozzle of the reservoir and push it on firmly.
Then, slide the clamp back up over the connection and tighten it with the pliers by twisting it clockwise. This will ensure a secure fit and prevent any leaks.
Detach the hose from the washer nozzles
In order to remove a damaged hose from your washer nozzles, the first step is to detach the hose from the nozzles themselves. This can be done by locating the connection point where the hose is attached to the nozzle. Once you have found this point, you can gently pry the hose away from the nozzle, being careful not to damage the surrounding components.
This may require some force, but it is important to proceed with caution to avoid causing any further damage. Once the hose is detached from the nozzle, you can move on to the next step of removing the damaged hose entirely.
Step 3: Install the new hose
Now that you have removed the old windshield washer hose, it’s time to install the new one. Grab your new hose and make sure it is the correct length and diameter for your vehicle. Start by attaching one end of the hose to the nozzle on the windshield washer pump.
Use a hose clamp to secure it in place. Make sure it is tight enough to prevent any leaks. Then, carefully thread the other end of the hose through the engine compartment and towards the hood of your car.
This may require some maneuvering, so take your time and be careful not to damage any other parts of the engine or vehicle. Once you have the hose in position, attach it to the washer nozzle on the hood using another hose clamp. Again, make sure it is securely fastened to prevent leaks.
Finally, double-check that all connections are tight and secure. Once you are confident in your work, close the hood and give your new windshield washer hose a test run. Open the washer fluid reservoir, turn the wipers on, and see if the fluid sprays onto the windshield properly.
If everything is working as it should, congratulations – you have successfully repaired your windshield washer hose!
Cut the new hose to the appropriate length
In Step 3 of installing a new hose, it’s important to cut the hose to the appropriate length before attaching it to your system. This step ensures a proper fit and helps prevent any leaks or inefficiencies. To cut the hose, you’ll need a sharp utility knife or hose cutter.
Measure the distance from where you plan to connect the hose to your system to the point where you want it to end. Make a mark on the hose at this length, and then carefully cut through the hose at the mark. Remember to wear gloves to protect your hands and be mindful of any safety instructions provided by the manufacturer.
Once the hose is cut to the right length, you’re ready to move on to the next step in installing your new hose.
Connect one end of the new hose to the washer reservoir
In Step 3 of installing a new hose for your washer reservoir, it’s time to connect one end of the hose to the reservoir itself. This step is crucial as it ensures that the water will flow properly from the reservoir to the rest of the washer system. To do this, you’ll need to locate the reservoir and find the opening where the hose will attach.
It may be helpful to consult your vehicle’s manual for guidance on the exact location of the reservoir. Once you’ve found it, take one end of the new hose and carefully insert it into the opening. Make sure it is secure and tightly fitted to prevent any leaks.
This connection will allow the water to flow smoothly through the hose, ensuring that your washer system works efficiently.
Attach the other end of the hose to the washer nozzles
In this step of replacing your washer hose, we’ll attach the other end of the hose to the washer nozzles. This is where the water will come out and spray onto your windshield, so it’s an important part of the installation process. First, locate the washer nozzles on your car.
These are usually located near the base of the windshield, on the hood or on the wiper arms themselves. Once you’ve found them, take the end of the hose that you previously connected to the wiper fluid reservoir and carefully attach it to one of the washer nozzles. Make sure it’s securely connected and won’t come loose while you’re driving.
Repeat this step for the second washer nozzle if your car has two. Once both nozzles are securely connected to the hose, you’re one step closer to having fully functional windshield washers again.
Step 4: Test the windshield washer system
If you’re having trouble with your windshield washer hose, don’t worry – it’s a common issue that can be easily fixed. The first step in repairing the hose is to test the windshield washer system to pinpoint the problem. Start by turning on your car and activating the windshield washer function.
If you hear the washer motor running but no fluid is spraying onto the windshield, the issue is likely with the hose. You can also check for leaks or cracks in the hose by visually inspecting it. If you notice any damage, you’ll need to replace the hose.
However, if the hose appears to be intact, the problem might lie with the washer pump or nozzles. By testing the windshield washer system, you can determine the cause of the issue and take the appropriate steps to fix it.
Refill the washer reservoir
windshield washer system, washer reservoir, test the system, refill the reservoir The fourth step in maintaining your windshield washer system is to test it to ensure that it is working properly. This simple task will help you identify any potential issues before they become major problems. To start, locate the washer reservoir, which is typically found under the hood of your car near the windshield.
Check the fluid level in the reservoir and refill it if necessary. It’s important to use windshield washer fluid specifically designed for this purpose, as other liquids may damage the system. Once the reservoir is filled, go ahead and test the system by pressing the button or lever that activates the washer pump.
The fluid should spray onto the windshield in a steady stream. If you notice that the fluid is not spraying or is only trickling out, there may be a clog or malfunction in the system. In this case, it’s best to take your car to a professional mechanic who can diagnose and repair the issue.
By regularly testing your windshield washer system, you can ensure clear visibility on the road and maintain your safety while driving.
Activate the windshield washer system to check for leaks
windshield washer system, check for leaks, test the system. When it comes to maintaining your car, one often overlooked component is the windshield washer system. This system is responsible for keeping your windshield clean and clear, ensuring optimum visibility while driving.
To make sure everything is in working order, it’s important to test the windshield washer system periodically. One way to do this is by activating the system and checking for leaks. Simply turn on your car’s ignition and activate the windshield washer system by pressing the button or lever.
If there are any leaks in the system, you will notice fluid dripping or spraying in areas other than the windshield. This could indicate a loose hose or a faulty pump. By testing the system for leaks, you can identify and address any issues before they become bigger problems.
So, next time you’re performing routine maintenance on your car, don’t forget to activate the windshield washer system and check for leaks. It’s a simple step that can help keep your windshield clear and your car safe on the road.
Conclusion
And there you have it, folks! A clever and witty guide on how to repair your windshield washer hose. Now, you can say goodbye to those ineffective sprays and hello to crystal-clear visibility. Just remember, fixing a hose is like patching up a relationship – it takes a little effort and a whole lot of determination.
So, grab your tools, put on your DIY superhero cape, and get ready to conquer those pesky windshield woes. Because when it comes to repairing that hose, you’ll be the MacGyver of the motoring world!”
Regular maintenance helps prevent windshield washer hose damage
Regular maintenance is vital for preventing windshield washer hose damage. After following the previous steps of inspecting the hose, checking the fittings, and replacing any worn or damaged parts, it’s time to move on to step 4: testing the windshield washer system. This step is important because it ensures that everything is in working order before you hit the road.
To test the system, simply activate the windshield washer switch and see if fluid sprays onto the windshield. If it does, great! Your system is working properly. But if nothing happens or if only a small amount of fluid sprays out, there may be a blockage or a leak in the hose that needs to be addressed.
It’s always better to catch these issues early on and fix them before they worsen. So make sure to regularly test your windshield washer system to keep it functioning at its best.
Quickly repairing a damaged hose ensures proper windshield cleaning
windshield washer system, damaged hose, proper cleaning In order to ensure that your windshield washer system is functioning properly after repairing a damaged hose, it is important to perform a simple test. This test will help you determine whether or not the repaired hose is allowing the washer fluid to flow smoothly to the windshield. To perform the test, start by filling the washer fluid reservoir with water or a cleaning solution.
Then, activate the windshield washer system by pulling the lever or pressing the button that controls it. Observe the flow of fluid onto the windshield. If the fluid is not coming out properly or if there are any leaks, it may be an indication that the repaired hose is not functioning correctly and may need further attention.
On the other hand, if the fluid is being sprayed onto the windshield evenly and without any leaks, then you can be confident that the repaired hose is doing its job effectively. By conducting this simple test, you can ensure that your windshield washer system is working properly and providing you with clear visibility while driving. So go ahead and give it a try, and enjoy a clean and clear windshield no matter what the weather throws at you.
FAQs
How do I know if my windshield washer hose is damaged?
You can check for signs of damage such as leaks or cracks in the hose. Another indication could be a decrease in the flow of washer fluid.
Can I repair a windshield washer hose myself?
Yes, you can repair a windshield washer hose yourself. Depending on the extent of the damage, you may be able to patch it up or replace a section of the hose.
What tools do I need to repair a windshield washer hose?
To repair a windshield washer hose, you may need a utility knife, hose clamps, replacement hose, and a screwdriver. These tools will help you remove the damaged section and install a new one.
Can I use tape to temporarily fix a windshield washer hose?
While tape may provide a temporary fix for a windshield washer hose, it is not a long-term solution. The tape may eventually peel off, causing the fluid to leak again. It is recommended to properly repair or replace the damaged hose.
How often should I check my windshield washer hose for damage?
It is a good practice to visually inspect your windshield washer hose for damage regularly, at least once every few months. This will help you identify any potential issues early on and prevent further damage.
What are some common causes of windshield washer hose damage?
Common causes of windshield washer hose damage include exposure to extreme temperatures, accidental impact or puncture, aging or deterioration over time, and improper installation or maintenance.
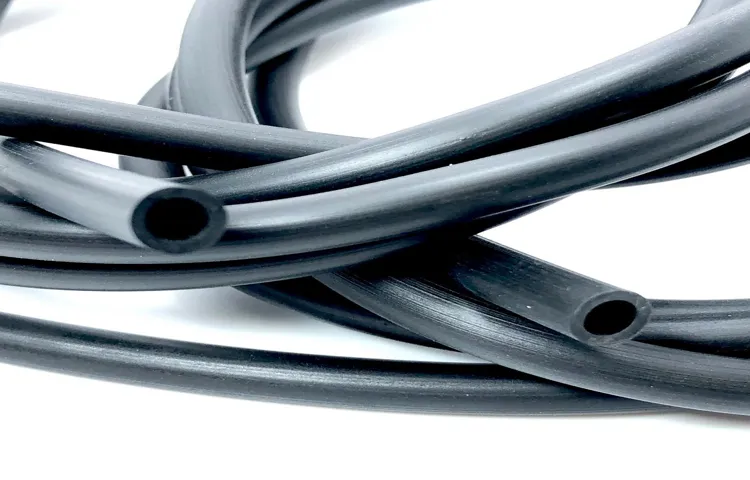
Can I use any type of hose for my windshield washer system?
It is recommended to use a specific type of hose designed for windshield washer systems. These hoses are made to withstand the pressure and chemicals present in washer fluid, ensuring proper functionality and longevity. Using any other type of hose may result in leaks or other issues.