
Do you find yourself struggling with a windshield wiper hose that’s not functioning properly? It can be frustrating when your windshield wipers aren’t working correctly, especially when it’s raining or snowing. Whether the hose is clogged, leaking, or detached, this can significantly affect your visibility on the road and compromise your safety. Just like any other component of your car, your windshield wiper hose can wear out over time due to exposure to extreme temperatures and harsh weather conditions.
Fortunately, repairing a windshield wiper hose is a relatively simple process that you can do yourself with just a few basic tools and a little know-how. In this blog post, we will guide you through the steps to repair your windshield wiper hose and get your wipers back in working order. We’ll cover common issues that may be causing the malfunction, along with detailed instructions on how to fix them.
By the end of this post, you’ll have the confidence and knowledge to tackle this repair yourself, saving you time and money on a trip to the mechanic. So, let’s dive in and learn how to repair your windshield wiper hose and ensure clear visibility for a safer driving experience. Don’t let a faulty hose keep you from conquering the road ahead!
Table of Contents
- 1 Introduction
- 2 Tools and Materials
- 3 Step-by-Step Guide to Repairing Windshield Wiper Hose
- 3.1 Step 1: Identify the damaged area of the wiper hose
- 3.2 Step 2: Prepare the necessary tools and materials
- 3.3 Step 3: Disconnect the wiper hose from the wiper arm
- 3.4 Step 4: Cut out the damaged section of the wiper hose
- 3.5 Step 5: Attach the new section of hose to the existing hose
- 3.6 Step 6: Reconnect the wiper hose to the wiper arm
- 4 Tips and Precautions
- 5 Conclusion
- 6 FAQs
Introduction
Are your windshield wipers not working as they should? One possible culprit could be a damaged or clogged windshield wiper hose. This hose supplies the necessary fluid to the wiper blades, ensuring a clean and clear windshield. Thankfully, repairing a windshield wiper hose is a relatively simple task that you can do yourself.
First, you’ll need to locate the hose, which is typically found under the hood of your car. Once located, you can inspect it for any visible damage or clogs. If you find any issues, you can either repair the hose using a patch or replace it entirely.
By following these steps, you can get your windshield wiper hose back in working order in no time.
Explanation of the importance of a functioning wiper hose
introduction to a functioning wiper hose.” Have you ever been caught in a sudden downpour while driving and realized that your wiper blades weren’t working properly? It can be frustrating and even dangerous to have limited visibility on the road. One often overlooked but crucial component of a properly functioning windshield wiper system is the wiper hose.
This small yet essential component is responsible for delivering washer fluid to the wiper blades, ensuring that they can effectively remove dirt, debris, and rainwater from your windshield. In this article, we will explore the importance of a functioning wiper hose and how it contributes to your overall driving safety. So let’s dive in and discover why this little hose is such a big deal!
Potential causes of windshield wiper hose damage
windshield wiper hose damage. Introduction: Your car’s windshield wiper system is crucial for maintaining visibility and safety on the road, especially during inclement weather. However, you may encounter issues with the system, such as damaged windshield wiper hoses.
These hoses are responsible for carrying washer fluid from the reservoir to the wiper blades, ensuring they are functioning properly. In this blog post, we will explore some potential causes of windshield wiper hose damage, as well as ways to prevent it. By understanding these causes, you can take the necessary precautions to keep your wiper system in optimal condition.
Tools and Materials
Have you ever turned on your windshield wipers only to find out that no water is coming out? It’s frustrating, especially when you need to clean your windshield while driving. The good news is that you can easily repair a windshield wiper hose yourself. All you need are a few tools and materials.
First, you’ll need a new wiper hose, which you can find at an auto parts store or online. You’ll also need a pair of pliers, a screwdriver, and some zip ties. To start, locate the wiper fluid reservoir in your car.
It’s usually a white, translucent container with a blue cap. Unhook the hose from the bottom of the reservoir and detach it from the wiper nozzle. Next, use your pliers to remove any clamps holding the hose in place.
Once the old hose is removed, attach the new hose in its place. Secure it with the zip ties and reattach the hose to the wiper nozzle and reservoir. Lastly, add wiper fluid to the reservoir, turn on your wipers, and check if the water is coming out properly.
Voila! Your windshield wiper hose is now repaired, and you won’t have to worry about driving with a dirty windshield.
List of required tools and materials for repairing the wiper hose
When it comes to repairing your wiper hose, there are a few key tools and materials that you’ll need to have on hand. First and foremost, you’ll need a replacement wiper hose. This can typically be purchased at an auto parts store or online.
Additionally, you’ll need a pair of pliers or a wrench to remove and replace the hose connectors. Depending on the specific make and model of your vehicle, you may also need a screwdriver to remove any panels or covers that are blocking access to the wiper hose. Finally, it’s always a good idea to have a clean cloth or paper towels on hand to wipe away any excess fluid or debris.
With these tools and materials in your toolkit, you’ll be well-prepared to tackle any wiper hose repairs that come your way.
Step-by-Step Guide to Repairing Windshield Wiper Hose
So, your windshield wiper hose is giving you trouble? No worries! With a little bit of patience and a few tools, you can easily repair it yourself. Here’s a step-by-step guide to help you get your wiper hose back in working order. First, you’ll need to locate the damaged section of the hose.
This is usually found underneath the hood, near the base of the windshield. Once you’ve identified the problem area, you’ll want to remove the hose from the wiper system. To do this, simply detach the hose from its connection point, which is usually a small clip or clamp.
Next, you’ll want to measure the length of the damaged section and cut out a piece of replacement hose to match. Make sure to add an extra inch or two to ensure a snug fit. Once you have your replacement hose ready, slide a small hose clamp onto one end of the new hose.
Now it’s time to connect the new hose to the wiper system. Simply slide the hose onto the nozzle, making sure it is securely in place. Then, tighten the hose clamp over the connection point.
Repeat this process on the other end of the new hose, connecting it to the wiper arm. Once you’ve made the necessary connections, it’s a good idea to test the system before putting everything back together. Turn on your wipers and spray some windshield washer fluid to make sure everything is working properly.
If you notice any leaks or issues, double-check your connections and make any necessary adjustments. Finally, secure the hose back into place using the clips or clamps you removed earlier. Give everything a final once-over, making sure all connections are tight and secure.
Step 1: Identify the damaged area of the wiper hose
windshield wiper hose. If you’ve noticed that your windshield wipers aren’t spraying water as they should, there’s a good chance that there is a problem with the wiper hose. This hose is responsible for delivering the washer fluid from the reservoir to the wiper nozzles.
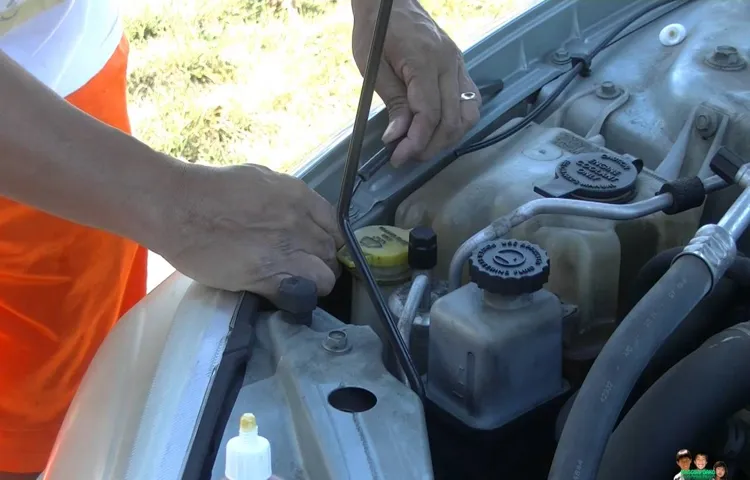
Over time, the hose may become damaged or worn out, causing it to leak or become disconnected. The first step in repairing the windshield wiper hose is to identify the damaged area. Start by locating the hose under the hood of your car.
It is usually made of a flexible rubber material and runs from the reservoir to the wiper arm. Look for any visible signs of damage, such as cracks or holes in the hose. You may also notice that the hose is disconnected or loose.
Once you have identified the damaged area, you can move on to the next step in the repair process.
Step 2: Prepare the necessary tools and materials
windshield wiper hose repair tools and materials When it comes to repairing a windshield wiper hose, having the right tools and materials on hand is essential. Here’s a step-by-step guide to help you prepare everything you’ll need for the job. First and foremost, you’ll need a replacement windshield wiper hose.
Make sure to measure the length of your current hose to ensure that you get the correct size. You can typically find replacement hoses at your local auto parts store or online. Next, you’ll need a set of pliers or a wrench to remove the old hose.
These tools will help you loosen and disconnect the hose from the wiper blades and the fluid reservoir. In addition to the pliers or wrench, you’ll also need a screwdriver. This will come in handy when removing any screws or fasteners that are securing the hose in place.
To properly secure the new hose in place, you’ll need a hose clamp. This clamp will help to create a tight seal and prevent any leaks. You can find hose clamps in various sizes, so make sure to choose one that matches the diameter of your hose.
Finally, you’ll need a cloth or rag to clean up any spilled fluid or debris. It’s important to keep the area clean to prevent any dirt or debris from interfering with the new hose. Once you have all of these tools and materials ready, you’ll be well-prepared to start repairing your windshield wiper hose.
With a little bit of patience and the right supplies, you’ll have it fixed up and working like new in no time.
Step 3: Disconnect the wiper hose from the wiper arm
In the third step of repairing your windshield wiper hose, it’s time to disconnect it from the wiper arm. This step is crucial as it allows you to gain access to the hose and replace it if necessary. To begin, locate the wiper arm and look for the hose where it connects to it.
You may need to lift the hood of your car to get a better view. Once you’ve found the hose, you’ll see a small plastic or metal clip holding it in place on the wiper arm. Gently pry the clip open using a pair of pliers or your fingers.
Be careful not to apply too much force as you don’t want to damage the hose or the wiper arm. Once the clip is open, carefully slide the hose away from the wiper arm. You may need to wiggle it a bit to loosen it from any tight connections.
Once the hose is disconnected, you can inspect it for any cracks, leaks, or blockages. If you notice any issues, it’s recommended to replace the hose entirely to ensure proper functionality. Disconnecting the wiper hose from the wiper arm is an essential step in repairing any issues with your windshield wiper system.
By doing so, you can easily access the hose and determine if it needs to be replaced. So don’t forget to carefully disconnect the hose before moving on to the next step in the repair process.
Step 4: Cut out the damaged section of the wiper hose
In this step-by-step guide, we will walk you through the process of repairing a damaged windshield wiper hose. The fourth step in this process is to cut out the section of the hose that is damaged. This can be done using a sharp utility knife or a pair of scissors.
Carefully determine the length of the damaged section and make a straight cut above and below the damaged area. It’s important to make clean, precise cuts to ensure a proper fit when connecting the new hose. Remember, the goal here is to remove only the damaged section, so be sure to measure and cut accurately.
Once you have successfully cut out the damaged section, you’re ready to move on to the next step in the repair process.
Step 5: Attach the new section of hose to the existing hose
Once you’ve located the damaged section of your windshield wiper hose, the next step in the repair process is to attach the new section of hose to the existing one. Before you begin, make sure you have the necessary tools, including a hose cutter, hose clamps, and a screwdriver. Start by cutting the damaged section of hose in two, ensuring that you have enough room to work with.
Then, take the new section of hose and slide it onto one end of the existing hose, making sure it fits snugly. Next, tighten a hose clamp around the connection to secure it in place. Repeat this process for the other end of the hose, ensuring a tight and secure fit.
Once both ends are securely attached, give the hose a gentle tug to ensure it is not loose. If it is, tighten the hose clamps further until it is firmly in place. With the new section of hose attached, your windshield wiper system should be back up and running smoothly.
Remember to test the wipers to ensure they are working properly before hitting the road.
Step 6: Reconnect the wiper hose to the wiper arm
“windshield wiper hose repair” Have you noticed that your windshield wipers aren’t spraying water properly? One of the most common causes of this issue is a disconnected or damaged wiper hose. Luckily, repairing it is a relatively straightforward task that you can do yourself. In this step-by-step guide, we’ll walk you through the process of reconnecting the wiper hose to the wiper arm, getting your wipers back to working condition in no time.
To begin, you’ll need to locate the wiper hose under the hood of your car. It is usually a small, black tube that runs from the wiper arm to the windshield washer fluid reservoir. Once you’ve found the hose, take note of any disconnects or leaks that may be present.
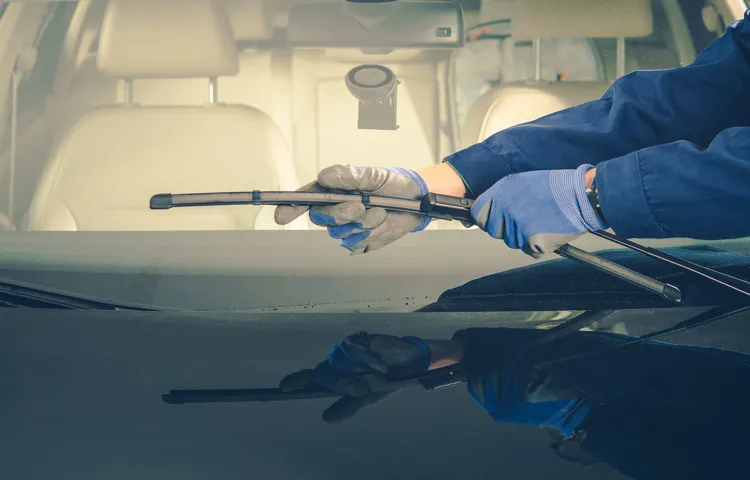
If there are any, you may need to repair or replace the hose before proceeding. Next, you’ll want to prepare the wiper arm for reconnection. Start by lifting the wiper arm away from the windshield, making sure it is in the upright position.
This will give you easier access to the hose and prevent any accidental damage to the windshield. Now comes the actual reconnection process. Take the end of the wiper hose and slide it onto the nozzle on the wiper arm.
Make sure it fits snugly and securely. You may need to push or twist it slightly to ensure a proper connection. Once the hose is connected, give it a little tug to make sure it is firmly in place.
After reconnecting the hose, lower the wiper arm back onto the windshield. It should now be ready to spray the windshield washer fluid properly. To test it out, simply activate your windshield wipers and see if the fluid is spraying as it should.
Tips and Precautions
If you find that your windshield wipers aren’t functioning properly and suspect that there may be a problem with the wiper hose, there are a few steps you can take to repair it yourself. First, locate the wiper fluid reservoir in your vehicle. It is usually labeled and can be found under the hood.
Next, inspect the wiper hose for any signs of damage, such as cracks or leaks. If you notice any issues, you will need to replace the hose. You can purchase a replacement hose from an auto parts store or online.
Once you have the new hose, carefully remove the old hose and replace it with the new one, ensuring that it is securely connected to both the wiper fluid reservoir and the wiper arms. Finally, test the wipers to ensure they are working properly. It is important to always follow the manufacturer’s instructions and exercise caution when working on your vehicle.
Tip 1: Always wear protective gloves when working with windshield wiper hose
windshield wiper hose, protective gloves, working with, tips and precautions When it comes to working on your car’s windshield wiper system, it’s important to take the necessary precautions to protect yourself. One important tip is to always wear protective gloves when working with the windshield wiper hose. This hose carries the fluid that helps clean your windshield, and it can be filled with all sorts of chemicals and debris.
By wearing gloves, you can protect your hands from coming into contact with any potentially harmful substances. Plus, gloves can also provide some extra grip when you’re trying to disconnect or reconnect the hose. It’s a simple precaution, but it can make a big difference in keeping you safe while working on your car.
Tip 2: Use hose clamps to secure the connections between the old and new sections of hose
hose clamps
Precaution: Avoid using excessive force when disconnecting or reconnecting the wiper hose
Tips and Precautions for Disconnecting or Reconnecting Wiper Hoses When it comes to maintaining your vehicle, it’s essential to know the proper procedures and precautions for every task. One common maintenance task is disconnecting or reconnecting the wiper hose. Whether you’re replacing a damaged hose or trying to clean out a clogged nozzle, it’s important to proceed with caution.
First and foremost, you should avoid using excessive force when disconnecting or reconnecting the wiper hose. These hoses are typically made of flexible plastic or rubber and can easily be damaged if too much pressure is applied. Instead, try gently wiggling or twisting the hose to loosen it before attempting to remove it.
Secondly, it’s crucial to be mindful of the specific connection type used for your wiper hose. Some hoses are connected using clamps or clips, while others may have a push-in or threaded connection. Understanding the type of connection can help you determine the correct method for disconnecting or reconnecting the hose.
Additionally, it’s a good idea to take note of the position and orientation of the wiper hose before disconnecting it. This will make it easier to reattach the hose correctly later on. You can use markers or tape to label any connections and ensure they are positioned correctly when reassembling.
Lastly, always remember to turn off the vehicle’s wiper system before attempting to disconnect or reconnect the wiper hose. This not only avoids any potential injuries but also prevents any damage to the wiper components. It’s a simple step that can save you from unnecessary hassle and expenses.
In conclusion, when it comes to disconnecting or reconnecting wiper hoses, it’s essential to proceed with caution. Avoid using excessive force, be mindful of the connection type, take note of the position and orientation, and remember to turn off the wiper system. By following these tips and precautions, you can successfully complete the task without any issues.
Conclusion
And there you have it, my friends! A step-by-step guide on how to repair your pesky windshield wiper hose. No longer will you be doomed to endure the frustration of water spraying in all the wrong directions. With a few simple tools and a little bit of elbow grease, you can easily become the hero of your own car’s windshield wiper system.
Now, I know what you’re thinking – “Do I really have the skills to tackle this kind of repair?” Well, fear not! Repairing your windshield wiper hose is a piece of cake. In fact, it’s as easy as pie (preferably apple, in my humble opinion). So, grab your toolbox and let’s dive into this repair like a fearless mechanic in a sleek jumpsuit.
Just remember, a wise person once said, “Necessity is the mother of invention” – and when it comes to repairing your car, necessity quickly becomes the aunt of innovation. Now, I won’t promise you’ll become a household name in the automotive repair world after successfully fixing your windshield wiper hose. But what I can guarantee is a feeling of accomplishment that rivals finding the last piece of a jigsaw puzzle or finally beating that unbeatable video game boss.
It’s a small victory, but sometimes those are the sweetest ones. And who knows, maybe this newfound skill will open doors for you. Perhaps your friends will start coming to you when their windshield wiper hoses decide to misbehave, or you may find yourself in a heated debate about the best way to tackle this seemingly insurmountable challenge at your next backyard barbecue.
Only time will tell. So, my fellow fixers and DIY enthusiasts, go forth and conquer that malfunctioning windshield wiper hose! Show it who’s boss and bring it back to life. And remember, repairing your car isn’t just about practicality or saving money – it’s about embracing your inner handyman and conquering challenges you never thought possible.
Savor the taste of victory, my friends, and let the world know that you are the master of all things automotive repair!
Summary of the steps to repair windshield wiper hose
windshield wiper hose repair, windshield wiper hose replacement, fixing windshield wiper hose, how to repair windshield wiper hose Are you experiencing issues with your windshield wiper hose? Don’t worry, because repairing it is easier than you may think. Here are the steps you need to follow to repair your windshield wiper hose. First, locate the damaged portion of the hose.
This can usually be found near the connection points to the wiper arms or the windshield washer reservoir. Once you have identified the damaged area, you will need to cut it out using a sharp knife or scissors. Be sure to cut at least an inch on either side of the damage to ensure you remove all of the weakened hose.
Next, measure the length of hose you removed and purchase a replacement section from your local auto parts store. It’s essential to use the right size and type of hose to ensure a proper fit and functionality. Once you have the replacement hose, lubricate the ends before installation.
This will make it easier to slide the hose onto the connections. Use a small amount of dish soap or a silicone-based lubricant to help with this process. After lubricating the ends, slide the replacement hose onto the connections and secure them with hose clamps.
Make sure the clamps are tight enough to prevent any leaks but not so tight that they damage the hose. Finally, test the windshield wiper system to ensure it is working correctly. Turn on your wipers and activate the windshield washer fluid to see if the hose is functioning properly.
If there are no leaks and the wipers are working as expected, then congratulations, you have successfully repaired your windshield wiper hose! While repairing your windshield wiper hose can be a straightforward process, there are a few precautions to keep in mind. Always work in a well-ventilated area to avoid inhaling any fumes from the windshield washer fluid. Additionally, take care when cutting and handling the hose as it may have sharp edges.
Importance of regular maintenance to prevent future hose damage
In order to prevent future hose damage and ensure optimal performance, regular maintenance is crucial. By taking a few simple precautions and following some helpful tips, you can extend the lifespan of your hoses and avoid costly repairs or replacements. First and foremost, it’s important to regularly check your hoses for any signs of wear and tear, such as cracks, leaks, or bulges.
These could be indications of underlying issues that need to be addressed. Additionally, make sure to inspect the fittings and connections for any signs of corrosion or looseness. Tighten or replace any loose fittings to prevent leaks or ruptures.
It’s also a good idea to clean your hoses regularly, as dirt and debris can cause friction and damage the inner lining. Using a soft brush and mild detergent, gently scrub the hoses and rinse thoroughly. Lastly, always store your hoses properly when not in use.
Avoid leaving them exposed to extreme temperatures, sunlight, or harsh chemicals, as this can degrade the material and weaken the integrity of the hoses. By implementing these simple maintenance practices, you can ensure the longevity and efficiency of your hoses, saving you time and money in the long run.
Key takeaways from the blog post
blog section, key takeaways, tips, precautions In conclusion, it’s important to remember a few key takeaways when it comes to staying safe online. First and foremost, always be cautious of the information you share on the internet. Whether it’s through social media, online forms, or even in casual conversations, be aware of what personal information you’re putting out there.
Additionally, make sure to regularly update and strengthen your passwords to prevent unauthorized access to your accounts. Another important tip is to be wary of phishing attempts and suspicious emails or messages. Always double-check the sender’s information and be cautious before clicking on any links or attachments.
It’s also a good idea to keep your devices and software updated to ensure you have the latest security patches. Finally, consider using a VPN or other privacy tools to protect your online activities and keep your data secure. By following these precautions and tips, you can navigate the online world safely and with peace of mind.
FAQs
What are the common signs of a damaged windshield wiper hose?
Common signs of a damaged windshield wiper hose include leaking fluid, reduced or inconsistent spray pattern, and difficulty in clearing the windshield.
How can I diagnose a windshield wiper hose problem?
To diagnose a windshield wiper hose problem, you can visually inspect the hose for any visible cracks or leaks. You can also test the spray function to check for any issues with the flow or consistency of the fluid.
Can a windshield wiper hose be repaired?
Yes, a windshield wiper hose can be repaired if there is a minor leak or crack. You can use a hose repair kit or sealant to fix the damaged portion.
How much does it cost to replace a windshield wiper hose?
The cost of replacing a windshield wiper hose can vary depending on the make and model of your vehicle. On average, it can cost between $50 to $100, including parts and labor.
Can I replace a windshield wiper hose myself?
Yes, if you have basic automotive knowledge and the necessary tools, you can replace a windshield wiper hose yourself. However, it’s recommended to consult a professional if you’re unsure or inexperienced.
How often should I check my windshield wiper hoses?
It’s recommended to check your windshield wiper hoses regularly as part of routine vehicle maintenance. Ideally, you should inspect them every six months or whenever you notice any issues with the wiper system.
Are there any preventive measures to avoid windshield wiper hose damage?
To prevent windshield wiper hose damage, avoid using harsh chemicals when cleaning the windshield, as they can degrade the rubber. Additionally, park your vehicle in shaded areas to minimize exposure to extreme temperatures, which can cause the hose material to deteriorate.