
If you’ve ever been stuck with a flat tire on the side of the road, you know the importance of having a spare tire ready to go. But what if you can’t even get the old tire off? Removing the tire valve core might be the solution. This simple tool, often overlooked, can make changing your tire a lot easier and quicker.
In this blog, we’ll guide you through the steps of removing the tire valve core and how to do it safely. So whether you’re a seasoned mechanic or a new driver, read on to learn all about this simple but valuable technique.
Table of Contents
What You’ll Need
If you need to change a tire, it may be necessary to remove the tire valve core. This small piece is what allows air into the tire, and removing it can help deflate the tire quickly. To do this, you’ll need a few special tools.
First, grab a valve core remover tool. This small, caveman club-shaped tool is relatively cheap and can be found at most auto stores or online. You’ll also need a pair of pliers and a rag or towel.
Once you have these items, you’re ready to start removing the valve core. Just insert the valve core remover tool into the valve stem and turn it counterclockwise. This will unscrew the valve core and allow air to escape from the tire.
Use the pliers to remove the valve core completely and be sure to wipe away any debris with your rag or towel. Overall, removing the tire valve core is a simple procedure that anyone can do with the right tools and a little bit of know-how.
– Valve Core Tool – Pliers – Gloves – Safety Glasses
When it comes to working on your bike, having the right tools is essential. One tool that you’ll need to have in your arsenal is a valve core tool. This handy little device allows you to remove and install valve cores with ease, which is necessary when changing out inner tubes or inflating tires.
You’ll also want to have a pair of pliers on hand, as they can come in handy when dealing with stubborn valve cores or other components that need a little extra force. Additionally, it’s important to wear gloves to protect your hands from dirt and grime, as well as safety glasses to protect your eyes from flying debris. By having these tools on hand, you’ll make your bike maintenance tasks much easier and more efficient.
So don’t wait, gear up and get ready to take on any bike repair that comes your way!
Step 1: Remove Valve Cap
If you need to change your tire or check its pressure, you may need to remove the tire valve core. The first step in removing the tire valve core is to remove the valve cap. This small plastic or metal cap covers the valve stem and helps to prevent dirt and debris from getting inside.
To remove the valve cap, simply twist it counterclockwise until it comes off. It’s important to keep track of the valve cap so you don’t lose it, as it’s necessary for keeping dirt and moisture out of the valve stem. Once the valve cap is off, you can move on to removing the valve core.
– Unscrew the valve cap from the tire valve stem
To begin the process of inflating your tire, the first step is to remove the valve cap from the tire valve stem. The valve cap is the small cap that sits on top of the valve stem and helps to prevent dirt and debris from entering the valve. To remove the valve cap, simply unscrew it in a counterclockwise direction.
It’s important to note that you should be careful not to lose the valve cap, as it helps to maintain the longevity of your valve. Once the valve cap is removed, you now have access to the valve stem and can begin the process of inflating your tire. Remember, taking care of your tires is essential to ensure that your vehicle functions properly and stays safe on the road.
So go ahead and remove that valve cap, you’re one step closer to getting those tires inflated!
Step 2: Loosen Valve Core
When removing a tire valve core, the first step is to ensure that the tire is completely deflated, and then use a valve core remover tool to loosen the valve. You will want to be careful not to damage the valve stem while loosening the core. Once the tool is in place, give it a few turns to gently loosen the core from the stem.
If the core is still tight, you can use pliers or another tool to help loosen it. Once it has been loosened, you can remove the core from the valve stem. Remember to keep the valve core in a safe place so that you can easily replace it once you have finished whatever work you needed to do on the tire.
Overall, removing a tire valve core can be a simple process if you have the right tools and take the necessary precautions.
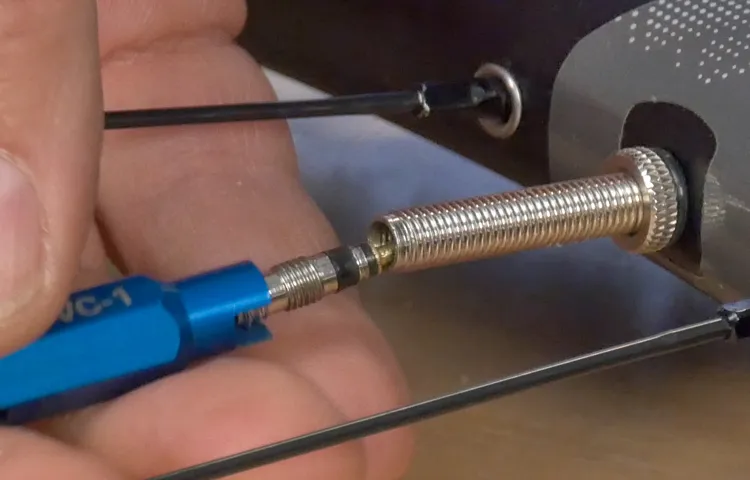
– Insert the valve core tool onto the valve stem and turn counterclockwise to loosen the core. – If the core does not loosen, use pliers to grip the tool and twist it more firmly.
Valve Core Tool When it comes to maintaining your car’s tires, it’s important to know how to properly remove and insert the valve core. In this second step, we’ll focus on loosening the valve core using a valve core tool. First, insert the tool onto the valve stem and turn it counterclockwise to loosen the core.
In some cases, the core may be difficult to loosen, so you may need to use pliers to grip the tool and twist it more firmly. Once the valve core is loosened, you can proceed with removing it completely. It’s important to loosen the core properly to ensure it doesn’t become damaged or stuck, which can cause air leaks or other issues down the road.
So, make sure to take your time and use the valve core tool as directed. Keep in mind that using pliers may damage the valve stem, so use them with caution and only if absolutely necessary. With this step complete, you’re on your way to properly maintaining your car’s tires and preventing potential issues in the future.
Step 3: Remove Valve Core
Removing the valve core from your tire is easier than you might think. All you need is a valve core remover tool, also known as a valve stem core remover. This tool allows you to unscrew the valve core from the valve stem safely and quickly.
Once you’ve located the valve stem on your tire, simply insert the valve core remover tool and rotate it counterclockwise until the valve core comes loose. Be gentle when you remove the valve core because it’s important not to damage the valve stem or the surrounding valve cap. Once you’ve removed the valve core, hold it over a container to catch any air or fluid that might escape.
From there, you’ll be able to move on to the next step in the tire repair process, which will depend on what issue you’re trying to fix. Just remember that removing the valve core is an essential part of the process, and with the right tool and a little bit of know-how, it’s easy to do yourself.
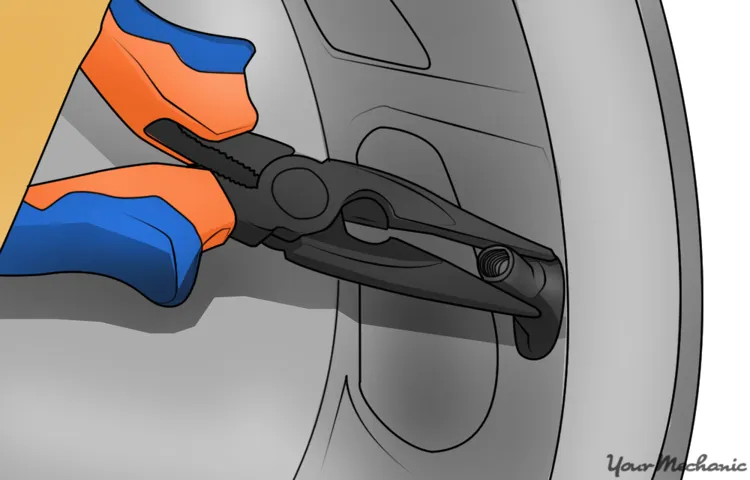
– Use pliers to grip the valve core and pull it out of the stem. – Wear gloves to protect your hands.
Removing the valve core is an essential part of maintaining your tire’s pressure. To do this, you will need a pair of pliers and gloves to protect your hands. Once you have these, grip the valve core with the pliers and carefully pull it out of the valve stem.
It’s important to ensure that you don’t damage the stem, as this can cause air leaks. So, take your time and use gentle but firm pressure as you remove the valve core. This step might seem small, but it’s crucial to getting accurate readings of your tire pressure and making sure your tires are properly inflated.
Overall, removing the valve core is an easy and straightforward process, as long as you’re careful and take the necessary precautions. Keep in mind that regular tire maintenance can help improve your car’s performance while extending its lifespan. So, take the time to check your tires and keep them in good condition, and you’ll enjoy a smooth and safe ride every time you hit the road.
Step 4: Replace Valve Core (Optional)
If you’re looking for an extra step to ensure your tire is properly sealed after inflating, you may want to consider replacing the valve core. This step is optional, but it can be helpful in preventing air from leaking out of the tire. To remove the tire valve core, simply use a valve core removal tool or pliers to unscrew it from the valve stem.
Be sure to hold onto the valve core as you remove it, as it can sometimes pop out with force. Once the old valve core is removed, you can insert a new one by screwing it into the valve stem using the same tool or pliers. Overall, this step may not be necessary for everyone, but it can provide an extra layer of security for your tire’s inflation.
– If necessary, insert a new valve core into the valve stem and use the valve core tool to tighten it in place.
If you’re replacing a tire, it’s advisable to check the valve core as well. The valve core is a small but crucial component of the valve stem, fueling the tire with air. A defective valve core could cause tire deflation or air loss, making it essential to check and replace the valve core if appropriate.
Fortunately, it’s an easy process that requires minimal effort on your part. With the help of a valve core tool, you can remove the old valve core, clean the surrounding area, and insert a new valve core into the valve stem. It’s optional, but if you prefer, you can replace the valve core while replacing the tire.
A new valve core will ensure a tight seal between the valve stem and the tire, permitting steady airflow into the tire. Remember to tighten the new valve core using the valve core tool to prevent air leaks. Overall, a healthy valve core enhances the performance and longevity of your tire.
Final Thoughts
Removing tire valve cores can seem intimidating at first, but it’s actually a pretty simple process. First, you’ll need a valve core removal tool (which can be found at any auto parts store). Next, use the tool to unscrew the valve core from the valve stem.
Be careful not to lose the small rubber seal that sits around the valve core as it can fall out during the removal process. Once you’ve successfully removed the valve core, you can then replace it with a new one if needed. Removing the valve core allows you to deflate a tire quickly, which can be helpful when needing to change a tire or check tire pressure.
Just be sure to re-install the valve core tightly to ensure proper function of your tire and avoid any potential leaks. With a little practice, removing tire valve cores will become a quick and easy task.
– Removing a valve core is a quick and easy task, but always wear gloves and safety glasses to protect yourself. – If you’re not comfortable working with tires, it’s best to have a professional handle the task.
Removing a valve core from a tire is a task that may seem daunting to some, but it’s actually quite simple. However, it’s important to take precautions to protect yourself. Always wear gloves and safety glasses in case the valve core pops out unexpectedly, since it can shoot out with force and could hurt your eyes or hands.
If you’re not comfortable working with tires, it’s best to have a professional handle the task for you. Removing the valve core allows you to easily add or remove air from the tire, which is helpful for maintaining proper tire pressure and performance. By removing the valve core, you can easily add sealant to your tubeless setup or use a valve extender to reach rims that are deeper or more inset.
Overall, learning how to remove a valve core is a must for any cyclist who wants to maintain their bike’s tires and maximize performance.
Conclusion
In conclusion, removing a tire valve core may seem like a daunting task, but with the right tools and a little know-how, it’s as easy as popping a bottle cap. Just remember to deflate the tire before removing the core (otherwise, you might be in for a surprise), and use a valve core remover tool to make the process quick and painless. With this DIY skill in your back pocket, you’ll be able to fix a flat tire in no time – and impress all your friends with your tire-changing prowess.
Happy wrenching!”
FAQs
What is a tire valve core and why should I remove it?
The tire valve core is the small, spring-loaded device inside the valve stem that allows air into the tire. It should be removed if you need to deflate the tire quickly or if you need to replace it.
What tools do I need to remove a tire valve core?
You will need a valve core removal tool, which is a small tool with a pointed end that fits into the valve stem. You can purchase this tool at most auto parts stores.
How do I locate the tire valve stem?
The valve stem is the point on the tire where you can add or remove air. It is usually located on the outer edge of the rim and has a small cap on it.
How do I remove the tire valve core?
Insert the valve core removal tool into the valve stem and turn it counterclockwise to remove the core. Be sure to hold onto the tool and the core to prevent them from falling into the tire.
What precautions should I take when removing a tire valve core?
Before removing the valve core, make sure the tire is fully deflated. Wear gloves to protect your hands from grease and dirt. And be sure to hold onto the valve core and removal tool to prevent them from falling into the tire.
Can I reuse the tire valve core?
It is generally not recommended to reuse the valve core, as it may become damaged during removal and could leak air. It is best to replace the valve core with a new one.
How do I install a new tire valve core?
Insert the new valve core into the valve stem and turn it clockwise until it is snug. Be sure not to overtighten it, as this could damage the valve stem. Finally, add air to the tire and check for leaks.