
Hey there! Are you tired of constantly paying for coolant replacements at the mechanic? Well, we’ve got you covered. In this step-by-step guide, we will show you how to flush coolant from your vehicle’s cooling system, saving you both time and money. Just like humans need water to stay cool, cars need coolant to prevent their engines from overheating.
Over time, that coolant can become contaminated with rust, dirt, and other debris, which can reduce its effectiveness. That’s why it’s important to periodically flush and replace the coolant in your vehicle. Flushing the coolant might sound like a complicated process, but don’t worry, it’s actually simpler than you might think.
All you need is a few basic tools, some fresh coolant, and a little bit of time. With this guide, you’ll be able to confidently tackle the task yourself, without relying on a mechanic. Think of flushing coolant as giving your car’s engine a refreshing drink.
By removing all the old, dirty coolant and replacing it with fresh coolant, you’re ensuring that your engine stays cool and performs at its best. It’s like giving your car a rejuvenating spa treatment! So, if you’re ready to take control of your car’s cooling system and save some money in the process, let’s get started! In the following steps, we will walk you through the process of flushing coolant, providing simple instructions and helpful tips along the way. Don’t worry, you don’t need to be a car expert to master this task.
With a little bit of patience and the right guidance, you’ll have a well-flushed cooling system in no time.
Table of Contents
Introduction
Flushing the coolant in your vehicle is an essential maintenance task that should not be overlooked. Over time, coolant can become contaminated with dirt, debris, and other harmful substances that can affect the performance of your engine. By flushing the coolant, you are effectively removing these contaminants and replacing it with fresh coolant, ensuring optimal performance and preventing potential damage to your engine.
But how exactly do you flush the coolant? Well, the first step is to locate the radiator drain valve, which is usually located at the bottom of the radiator. Once you have located it, place a container under the valve to catch the old coolant. Then, open the valve and allow the coolant to drain completely.
After the coolant has drained, close the valve and dispose of the old coolant properly. Next, you will need to refill the radiator with fresh coolant. This can be done by pouring the coolant directly into the radiator until it reaches the recommended level.
It is important to follow the manufacturer’s guidelines for the correct type and amount of coolant to use. After you have refilled the radiator, you will need to run the engine for a few minutes to circulate the coolant throughout the system. Finally, check the coolant level and top up if necessary.
Remember, flushing the coolant is an important maintenance task that should be done regularly to keep your engine running smoothly.
What is Coolant and Why is Flushing Important?
coolant, flushing
Potential Problems If Coolant Isn’t Flushed Regularly
coolant flush, potential problems, not flushed, regularly Introduction: Regularly flushing the coolant in your vehicle is an essential maintenance task that often gets overlooked. Coolant, also known as antifreeze, helps regulate the temperature of your engine and prevents it from overheating. Over time, however, coolant can become contaminated with rust, sediment, and other impurities.
If left unchecked, these contaminants can cause a host of potential problems for your car. In this blog post, we will explore some of the potential issues that can arise if coolant isn’t flushed regularly. By understanding the importance of coolant flushes, you can keep your engine running smoothly and avoid costly repairs in the long run.
So, let’s dive in and learn why regular coolant flushes are crucial for your vehicle’s health.
Step 1: Gather the Necessary Tools and Materials
When it comes to flushing your coolant system, the first step is to gather all the necessary tools and materials. You’ll need a few things to get the job done: a container to collect the old coolant, a wrench or socket set to remove the drain plug, a funnel to pour in fresh coolant, and of course, a new coolant to replace the old one. It’s important to have all these items on hand before you start the process, so you don’t have to stop in the middle and scramble to find what you need.
Once you have everything, you’ll be ready to move on to the next steps of the coolant flushing process. So let’s get started!
List of Tools and Materials Needed for Coolant Flush
coolant flush, tools and materials
Step 2: Prepare the Vehicle
When it comes to flushing your vehicle’s coolant system, it’s important to start by preparing the vehicle. This includes gathering the necessary tools and materials, as well as ensuring the vehicle is parked on level ground. Make sure the engine is cool before you begin, as working with hot coolant can be dangerous.
You should also have a drain pan or bucket ready to collect the old coolant. It’s a good idea to wear gloves and protective eyewear to keep yourself safe during the process. Additionally, you may need a wrench or socket set to remove the petcock or drain plug from the radiator.
Once you have everything in place, you’ll be ready to move on to the next step of flushing the coolant system.
Steps to Safely Prepare the Vehicle for Coolant Flush
coolant flush, prepare the vehicle, safely, steps, burstiness
Step 3: Drain the Old Coolant
Now that you’ve found the drain plug, it’s time to drain the old coolant and start fresh. Start by placing a drain pan underneath the drain plug to catch the old coolant. Then, using a wrench or socket, carefully loosen the drain plug and let the coolant flow out.
Make sure to do this slowly and evenly to avoid any spills or accidents. Once all the coolant has drained out, be sure to properly dispose of it according to your local regulations. Remember, coolant is toxic and harmful to the environment if not disposed of correctly.
Once the coolant has drained completely, tighten the drain plug back into place. Congrats, you’ve successfully drained the old coolant! Now let’s move on to the next step in the flushing process.
Proper Technique to Drain Old Coolant from the Radiator
Proper Technique to Drain Old Coolant from the Radiator Step 3: Drain the Old Coolant Now that you have gathered all the necessary tools and have taken the necessary precautions, it’s time to drain the old coolant from your radiator. This step is crucial to ensure that your cooling system is clean and ready for fresh coolant. To start, locate the drain valve or petcock at the bottom of the radiator.
It is usually positioned towards the rear and may be covered by a protective shield. Once you have found it, place a drain pan or container underneath to catch the coolant. Next, slowly turn the drain valve counterclockwise with a pair of pliers or a wrench.
It’s important to do this gradually to avoid splashing coolant everywhere. As you turn the valve, you will see the coolant start to flow out. Allow it to drain completely.
It’s essential to be patient during this process, as some radiators can take several minutes to drain completely. While you wait, you may want to inspect the coolant for any signs of contamination or debris. If you notice any, it might be a good idea to flush the radiator thoroughly before adding new coolant.
Once the old coolant has drained, tighten the drain valve securely to prevent any future leaks. Dispose of the old coolant responsibly, as it can be harmful to the environment. Many auto parts stores offer recycling services for used coolant.
Congratulations! You have successfully drained the old coolant from your radiator. In the next step, we will discuss how to flush the radiator to ensure a clean system for your new coolant. Stay tuned for Step 4: Flushing the Radiator.
Step 4: Flush the Cooling System
Alright, so now that we’ve drained out the old coolant, the next step is to flush the cooling system. Flushing the cooling system is an important part of regular maintenance for your car, as it helps to remove any built-up debris or contaminants that can hinder the performance of your engine. So, how exactly do you go about flushing the cooling system? First, it’s important to make sure that your engine is cool before you begin.
Safety first, right? Once you’ve confirmed that the engine is cool, locate the radiator drain plug and remove it. Be sure to have a container ready to catch the old coolant as it drains out. Next, it’s time to flush the system.
You can do this by using a hose to force water through the radiator and into the engine block. Start by connecting the hose to the water pump inlet, which is usually located on the bottom side of the water pump. Then, turn on the water and let it run for a few minutes.
This will help to flush out any residual coolant and debris. After you’ve finished flushing, it’s time to drain the water from the system. To do this, simply remove the radiator drain plug and let the water drain into a container.
Once all the water has been drained, replace the drain plug and move on to the next step. Now that your cooling system is flushed and drained, it’s time to refill it with fresh coolant. Refer to your vehicle’s owner’s manual for the specific type and amount of coolant you’ll need.
Pour the coolant into the radiator and make sure to fill it to the recommended level. Then, start your engine and let it run for a few minutes to ensure that the coolant is circulating properly throughout the system. And there you have it – a flushed and refreshed cooling system! By following these steps, you’ll help to ensure that your engine stays cool and protected, no matter how hot it gets outside.
Options for Flushing the Cooling System
flush the cooling system
Step-by-Step Instructions to Flush the Cooling System
In this step of the cooling system flushing process, it’s time to actually flush out the old coolant and any contaminants that may be lurking in your car’s system. Flushing the cooling system helps to ensure that the new coolant can do its job properly, keeping your engine cool and preventing any potential overheating issues. To begin the flushing process, you’ll need to locate the drain plug on your radiator.
The drain plug is typically located at the bottom of the radiator and can be loosened with a wrench. Once the drain plug is loose, carefully remove it and allow the old coolant to drain out into a container. Be cautious, as the old coolant may still be hot.
After the coolant has completely drained, it’s time to flush the system. You can do this by adding a flushing solution to the radiator and filling it up with water. Once the radiator is filled with the flushing solution and water, replace the radiator cap and start the engine.
Let the engine run for about 10 minutes, allowing the flushing solution to circulate throughout the cooling system. After the 10 minutes are up, turn off the engine and carefully drain the flushing solution and water mixture from the radiator. Repeat this process of filling the radiator with fresh water and draining it until the water runs clear, indicating that all of the flushing solution and contaminants have been flushed out.
Finally, tighten the drain plug on the radiator and fill it up with the new coolant according to your car’s specifications. And voila, your cooling system is now properly flushed and ready to keep your engine cool and running smoothly!
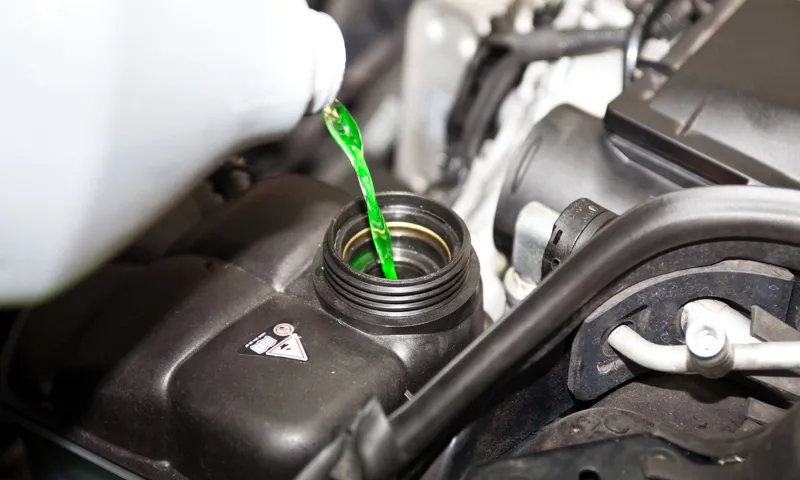
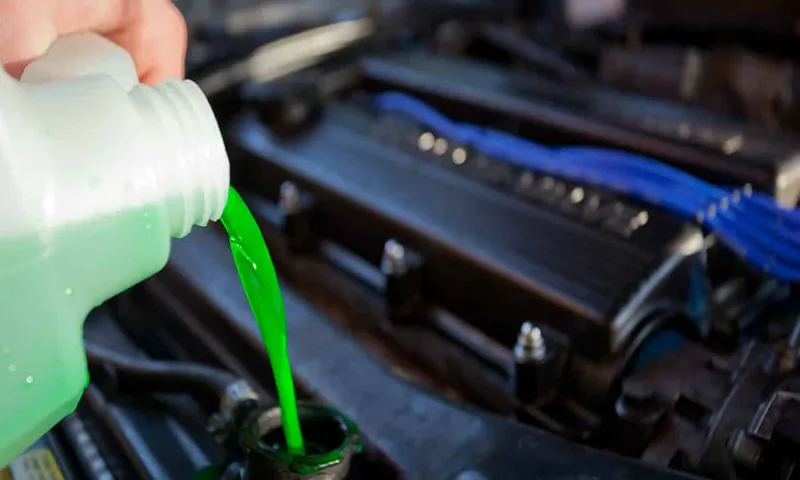
Step 5: Refill with New Coolant
Once you have successfully drained the old coolant from your vehicle’s radiator, it’s time to refill it with fresh new coolant. Before you begin, make sure you have the appropriate coolant mixture for your vehicle. This information can usually be found in your vehicle’s owner’s manual or through an online search.
To refill the coolant, locate the coolant reservoir tank, which is typically translucent and located near the radiator. Remove the cap and pour the coolant mixture into the tank until it reaches the “full” or “max” mark. Be sure not to overfill the tank, as this can cause leaks and other issues.
Once you have filled the tank, replace the cap tightly. It’s also a good idea to check for any leaks or drips around the radiator and coolant hoses. If you notice any leaks, you may need to tighten the connections or replace any damaged parts.
Now that you have successfully refilled your vehicle’s coolant, you can start the engine and let it run for a few minutes to ensure the coolant circulates properly. Remember to always take caution when working with hot coolant and allow the engine to cool down before you begin the flushing process.
Choosing the Right Coolant for Your Vehicle
When it comes to choosing the right coolant for your vehicle, step 5 is all about refilling with new coolant. This is an important step in the process, as it ensures that your engine will stay cool and prevent overheating. Before refilling, make sure to check your vehicle’s owner manual for the recommended type of coolant.
There are different types of coolant available, such as ethylene glycol-based and propylene glycol-based coolants. It’s important to use the right type for your vehicle to ensure optimal performance. Additionally, when refilling the coolant, make sure to mix it with the appropriate amount of water, as specified by the coolant manufacturer.
This will help ensure that the coolant is properly diluted and effective in keeping your engine cool. Taking the time to properly refill your coolant will help prolong the life of your engine and prevent any issues down the road. So be sure to follow this step carefully and use the right coolant for your vehicle.
Refilling the Cooling System with Fresh Coolant
coolant refill
Step 6: Bleed the Air from the System
Once you have flushed and refilled your coolant system, the next step is to bleed the air from the system. This is an important step to ensure that your coolant is flowing properly and your engine is properly cooled. To bleed the air from the system, start by opening the hood and locating the coolant reservoir.
It is usually a translucent plastic tank located near the front of the engine compartment. Once you have located the reservoir, remove the cap and start the engine. Allow the engine to run for a few minutes, until the coolant begins to circulate and any trapped air starts to escape.
While the engine is running, you may notice air bubbles escaping from the coolant reservoir. This is a good sign, as it means that the air is being purged from the system. Once the air bubbles have stopped and the coolant level in the reservoir has stabilized, replace the cap and turn off the engine.
It is important to check the coolant level in the reservoir regularly and top it off as needed to ensure that the system remains properly filled. By following these steps, you can effectively bleed the air from your coolant system and ensure that it is operating at its optimal level.
Importance of Removing Air Pockets from the Cooling System
cooling system, air pockets, bleed, importance, overheating, efficient, operation, mechanics, vehicle, air bubbles, radiator, engine components, airlock, proper functioning
Methods for Bleeding Air from the System
One of the final steps in the process of bleeding air from a system is to actually bleed the air itself. This is an essential step because any air trapped in the system can cause issues such as reduced heating efficiency, noisy pipes, and uneven heat distribution. To bleed the air, you will need a special key or tool designed for this purpose.
Start by locating all the bleed valves on your system. These are typically found on radiators or baseboard heaters. Once you have located the valves, use the key or tool to open them.
You will then hear a hissing sound as the air is released. It’s important to have a container or cloth handy to catch any water that may come out as well. Continue to bleed each valve until you no longer hear any air escaping.
It may take a few minutes for all the air to be released from the system. Once you have completed this step, you can close the bleed valves and your system should be free of air.
Step 7: Double-check for Leaks or Issues
Once you’ve completed the process of flushing out the old coolant from your vehicle, it’s important to double-check for any leaks or issues before you finish up. The last thing you want is to go through all that effort only to discover a leak later on. Start by inspecting the area around the radiator and coolant hoses for any signs of leakage.
Look for puddles or stains of coolant on the ground or on the engine itself. Additionally, check the coolant reservoir to ensure it is properly sealed and there are no cracks or leaks. If everything looks good, start up your car and let it run for a few minutes.
Keep an eye on the temperature gauge to make sure it stays within a normal range. If you notice any abnormal fluctuations or overheating, it could be a sign of a problem. Keep an eye out for any steam or smoke coming from under the hood as well.
By thoroughly inspecting for leaks or issues, you can catch any potential problems early on and avoid further damage to your vehicle.
Steps to Ensure the Cooling System is Working Properly
cooling system, leaks, issues
Conclusion
And that, my friends, is how you flush coolant like a pro. In just a few simple steps, you can ensure your engine stays cool and your car keeps running smoothly. So go ahead, grab your tools and get ready to embark on the great coolant flushing adventure.
But remember, it’s not just about getting rid of the old coolant – it’s about embracing the opportunity to rid your life of all the metaphorical coolant that’s been clogging up your engine too. So, flush out those toxic relationships, cleanse yourself of negativity, and start fresh, just like you’re doing with your car. Happy flushing, folks, may your engines be forever cool and your lives filled with endless adventure!”
The Importance of Regular Coolant Flushes for Vehicle Maintenance
coolant flush, vehicle maintenance, leaks, issues, regular maintenance, optimal performance Your vehicle’s cooling system plays a vital role in keeping your engine running smoothly. That’s why regular coolant flushes are so important for vehicle maintenance. When you bring your car in for a coolant flush, the technician will drain the old coolant and replace it with fresh coolant.
But the process doesn’t end there. Step 7 in the coolant flush process is to double-check for any leaks or issues that may be present. This step is crucial because even a small leak can lead to big problems down the line.
By catching and fixing any leaks or issues during the coolant flush, you are ensuring that your vehicle continues to perform at its optimal level. So the next time you bring your vehicle in for regular maintenance, make sure to ask about getting a coolant flush and have the technician double-check for any leaks or issues. It’s a small step that can make a big difference in the long run.
FAQs
What is coolant and why is it important in a vehicle?
Coolant is a liquid that helps regulate the temperature of the engine in a vehicle. It is important because it prevents the engine from overheating and also helps prevent corrosion and freezing.
How often should coolant be flushed and replaced?
It is generally recommended to flush and replace coolant every 2-3 years or every 30,000-50,000 miles, whichever comes first. However, it is always best to consult the vehicle’s owner manual for specific recommendations.
What are the signs that coolant needs to be flushed?
Some signs that coolant needs to be flushed include overheating of the engine, coolant leaks, a sweet smell inside the vehicle, or discolored coolant (e.g. it appears rusty or murky).
Can I flush the coolant myself or should I take it to a professional?
Flushing the coolant can be done as a DIY job, but it requires following proper safety precautions and having the necessary tools and knowledge. If you’re not confident in your abilities, it is recommended to take it to a professional to avoid any potential damage or accidents.
What happens if coolant is not flushed regularly?
If coolant is not flushed regularly, it can become contaminated with debris and particles, reducing its effectiveness in regulating engine temperature. This can lead to engine overheating, coolant leaks, and potential damage to the engine.
Can I use tap water to mix with coolant?
It is not recommended to use tap water to mix with coolant, as tap water may contain minerals and impurities that can cause corrosion or blockages in the cooling system. It is best to use distilled water or coolant/water premix.
How do I properly dispose of old coolant?
Old coolant should not be poured down the drain or into the environment. It contains toxic chemicals that can harm wildlife and the environment. It is best to take old coolant to a local recycling center or an automotive service facility that accepts used coolant for proper disposal.