
Maintaining a semi-truck can be an arduous task, but it’s necessary to keep it running on the roads safely. Every truck driver knows that, and the throw-out bearing is one of the crucial components that need to be well-maintained for a smoother ride. However, some may find it challenging to grease the throw-out bearing as it is situated deep in the clutch housing.
Fear not, as we have got you covered. In this blog, we’ll guide you on how to grease the throw-out bearing on your semi-truck without any obstacles. So, let’s dive deeper into it.
Table of Contents
Introduction
If you find yourself in need of greasing the throw out bearing on your semi truck, don’t worry – it’s not as complicated as it might seem. First, make sure to locate the throw out bearing on your truck’s transmission. Once you’ve found it, remove any excess dirt or debris from the area.
Next, use a grease gun to inject grease into the fitting on the top of the bearing. Be sure to pump the grease gun slowly and steadily in order to distribute the grease evenly throughout the bearing. Once you’ve greased the bearing, wipe away any excess grease and replace the rubber dust cover.
Regularly greasing your throw out bearing is crucial for ensuring a longer lifespan for your semi truck’s transmission. By taking a few minutes to properly grease your throw out bearing, you can save yourself from costly repairs down the line.
Explanation of throw out bearings
Throw out bearings are a crucial component of a car’s clutch system. If you’re familiar with manual transmissions, you know that the clutch pedal is used to disengage the engine from the transmission in order to shift gears. The throw out bearing is attached to the clutch fork (which is connected to the clutch pedal) and pushes against the pressure plate to release the clutch’s grip on the flywheel.
Essentially, it’s a small bearing that’s responsible for separating two spinning objects. Over time, the bearings can wear out or become damaged, which can result in a noisy clutch, difficulty shifting gears, or even a complete failure of the clutch system. It’s important to address any issues with throw out bearings as soon as possible to avoid bigger, more expensive problems down the road.
Importance of proper maintenance
Proper maintenance of any item is of utmost importance to ensure its longevity and efficient functioning. Regular servicing and upkeep help prevent breakdowns, and malfunctioning of machines, saving a lot of money on repairs and replacements. Neglecting maintenance can lead to serious consequences and can also pose a threat to life and property.
Take, for instance, a car that needs regular oil changes, tire rotations, and general checkups. Failure to do so can compromise its safety, efficiency, and reliability, leading to accidents and costly repairs. So, it’s essential to keep all your equipment, machines, and vehicles well-maintained for a smooth and reliable operation, and to keep them in good condition for as long as possible.
By doing so, you are ultimately protecting your investment and ensuring its long-term usefulness and safe operation.
Step-by-Step Guide
If you’re wondering how to grease the throw out bearing on your semi truck, you’ve come to the right place. Follow these simple steps to get started. First, locate the throw out bearing on your clutch and remove its cover.
Next, clean the bearing and surrounding area using a degreaser. This will help ensure that there is no dirt, debris, or other contaminants that could interfere with greasing the bearing effectively. Then, use a grease gun to apply grease to the bearing until it is full.
Be sure to use the appropriate type of grease recommended by the manufacturer of your truck. Finally, replace the cover and test the clutch to make sure it is working properly. Properly greasing your throw out bearing is an important maintenance step for keeping your semi truck running smoothly.
Preparation and safety measures
When considering a DIY home renovation project, preparation and safety are key factors to consider. To ensure a successful project, it’s essential to begin by planning out every step and defining what needs to be done before starting any work. Start by identifying the specific areas you want to renovate and the tools and materials needed to complete the task.
It’s also important to take safety precautions seriously by wearing personal protective gear such as gloves, eye protection, and a dust mask. Make sure that any electrical or plumbing work is delegated to a professional as these tasks require specialized skills and equipment. Additionally, always have a first aid kit on hand in case of accidents and ensure that your home renovation project is covered by insurance.
By taking these necessary preparations, you can ensure that your DIY home renovation project is completed effectively and safely.
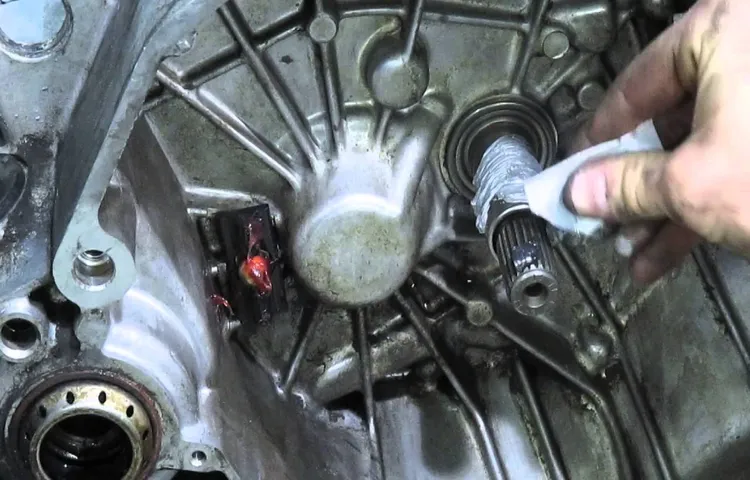
Locating the throw out bearing
If you’re expecting a guide on how to locate the throw out bearing, then you’ve come to the right place. The throw out bearing is an essential component of your vehicle’s clutch system, allowing you to shift gears easily and smoothly. Finding the throw out bearing can be a bit tricky, but it’s not impossible.
The first step is to locate the transmission, which is usually located at the back of your engine. Once you’ve found the transmission, look for the clutch housing that surrounds it. The throw out bearing is located inside the clutch housing, which can be accessed by removing the transmission.
It’s crucial to note that removing the transmission requires a lot of expertise and specialized tools, so it’s best to leave it to the professionals. Once the transmission has been removed, you can easily locate the throw out bearing. It’s a small, round component that’s attached to the clutch fork, and it’s crucial to ensure that it’s in good condition.
If you’re experiencing any clutch-related issues, it’s essential to check the throw out bearing’s condition as it’s often the culprit.
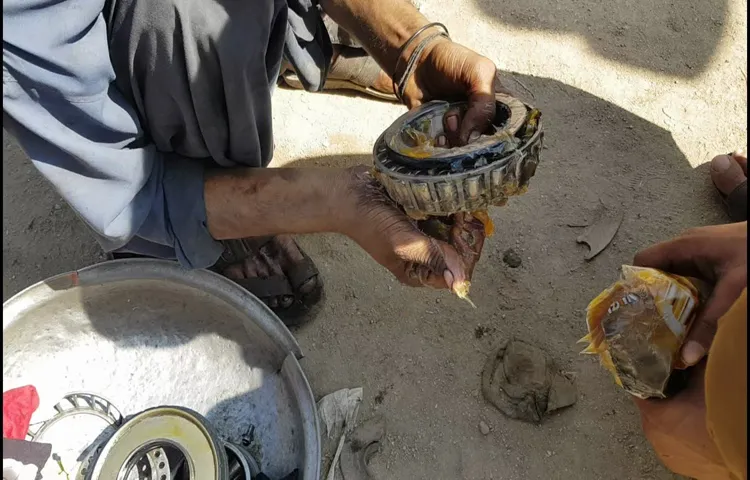
Removing the dust cover and accessing the bearing
Removing the dust cover and accessing the bearing is an essential task in maintaining your equipment’s longevity and efficiency. Here is a step-by-step guide on how to do it. First, locate the cover, which is usually on the side of the equipment and fix it into place.
There might be a snap-on mechanism that you need to unfasten or a bolt that requires unscrewing. Once you remove the cover, you will see the bearing, and the next step is to access it. You might need specific tools such as a pry bar or a screwdriver to detach the seal around the bearing.
Before you do this, ensure that the equipment is off and that the area around the bearing is dry and clean. Once the seal is off, carefully press down the bearing and inspect its condition for any damage or deterioration. Replace or repair the bearing if it is worn out or damaged.
Finally, reassemble the cover and start the equipment to test its functionality. In summary, removing the dust cover and accessing the bearing requires attention to detail and the right tools, but it’s an important maintenance exercise to keep your equipment in tip-top shape.
Applying the grease
When it comes to applying grease, there are a few important steps to follow to ensure you get the best results. First, choose the right type of grease for the job. Different types of grease will work better for different applications, so make sure you choose one that’s appropriate for your needs.
Next, clean the surface you’ll be applying the grease to. Use a clean rag and solvent if necessary to make sure the surface is completely free of dirt and debris. Once you’ve done that, apply the grease evenly to the surface.
You can use your fingers, a brush, or a specialized applicator depending on the situation. Make sure you apply enough grease to cover the entire area, but don’t apply too much. Finally, wipe away any excess grease and dispose of it properly.
With these simple steps, you’ll be able to apply grease like a pro and get the most out of your lubrication efforts.
Reassembling the dust cover and testing
Reassembling a dust cover may seem like a daunting task at first, but with a bit of know-how and patience, it can be done easily. First, ensure that all the parts are clean and free from any dirt or debris. Start by inserting the metal rod into the rectangular slot on one side of the dust cover.
Then, carefully slide the rectangular end of the spring over the metal rod and onto the dust cover. Next, insert the other end of the metal rod into the rectangular slot on the opposite side of the dust cover. Finally, slide the other end of the spring onto the metal rod and onto the dust cover.
Congratulations! You’ve now reassembled your dust cover. Before you place it back onto the device, it’s important to test it out first. Gently press down on the dust cover and make sure it opens and closes smoothly.
Now you can confidently reattach it to your device, knowing it’s properly assembled.
Conclusion
In conclusion, greasing the throw out bearing on a semi truck may seem like a daunting task, but with a little patience and know-how, it can be easily accomplished. Think of it like giving your truck a spa-day; a little love and attention goes a long way. Plus, a well-greased throw out bearing will ensure smoother shifting and a longer lifespan for your clutch system.
So, grab your favorite grease gun and get ready to pamper your truck like the queen it is!”
Summary of key points
In this step-by-step guide, we will outline the key points for optimizing your website’s content for search engines. The first step is to identify your target keywords and phrases. These are the words that potential customers might use when searching for your products or services.
Once you have identified your keywords, integrate them naturally throughout your content, including in your page titles, headings, and body copy. Next, ensure that your content is informative, engaging, and relevant to your target audience. This will help keep your website visitors on your site for longer, reducing bounce rates and increasing the chances of conversions.
Another key point is to ensure that your website is optimized for mobile devices, as more and more people are using their smartphones to browse the web. Additionally, make sure that your website loads quickly, as slow loading speeds can negatively impact your search rankings. Finally, regularly create new, high-quality content to keep your website fresh and up-to-date, which can help improve your search rankings over time.
By following these steps, you can help ensure that your website is search engine optimized and primed for success.
Importance of routine maintenance for longevity
The importance of routine maintenance for the longevity of any machine or device cannot be overstated. Regular inspections and upkeep can ensure that all parts are functioning optimally, minimizing the risk of breakdowns and costly repairs in the future. To help you get started, here is a step-by-step guide for maintaining your equipment:
Read the owner’s manual: The manual will have important information regarding the machine’s recommended maintenance schedule and specific instructions for inspection and upkeep. Perform routine checks: This includes checking the oil levels, filters, belts, and hoses.
Replace any worn-out parts immediately. Clean the equipment regularly: Regular cleaning can prevent dirt and debris from accumulating in the machine, which can slow it down or cause damage.
Lubricate moving parts: Proper lubrication increases the longevity of your machine’s moving parts, reduces friction, and helps to avoid overheating.
Store the equipment properly: Always store your machine in a dry, secure place to prevent rusting and other damage. By following these simple steps, you can ensure that your equipment is well-maintained and runs smoothly for years to come. Don’t wait until something goes wrong to take action.
Regular maintenance can help you avoid costly repairs and prolong the lifespan of your equipment. Remember, prevention is always better than cure!
Encouragement to take action
If you’re ready to take action in your life, but not sure where to start, you’re not alone. It can be overwhelming to make changes, but taking small steps towards your goals can make a big difference. The first step is to define what you want to achieve and why.
Write down your goals and make them specific, measurable, achievable, relevant, and time-bound. Next, create a plan of action by breaking down your goals into smaller tasks. This will help you to focus on one step at a time and avoid getting overwhelmed.
Set deadlines and hold yourself accountable for completing each task. Don’t forget to celebrate your progress along the way. Remember, taking action is a process, and persistence is key.
So, take that first step and keep moving forward towards achieving your goals.
FAQs
1. What is a throw out bearing in a semi truck? A: A throw out bearing is a mechanical component that facilitates disengagement of the clutch in a semi-truck. 2. How do you know if your throw out bearing is failing? A: Signs of a failing throw out bearing in a semi-truck include a grinding noise, clutch pedal resistance, and difficulty shifting gears. 3. Can a throw out bearing cause damage if not replaced in a semi-truck? A: Yes, a failing throw out bearing in a semi-truck can cause damage to the clutch, pressure plate, and flywheel if not replaced promptly. 4. What type of grease should be used to lubricate a throw out bearing in a semi-truck? A: It is recommended to use high-temperature synthetic grease to lubricate a throw out bearing in a semi-truck. 5. How often should the throw out bearing in a semi-truck be replaced? A: The lifespan of a throw out bearing in a semi-truck varies, but it is recommended to replace it every 100,000 miles or sooner if signs of failure are present. 6. Can a throw out bearing be repaired in a semi-truck? A: In most cases, a throw out bearing cannot be repaired and must be replaced in a semi-truck. 7. Is it necessary to replace the clutch when replacing the throw out bearing in a semi-truck? A: While it is not necessary to replace the clutch when replacing the throw out bearing in a semi-truck, it is recommended to do so to prevent future issues and save on labor costs.