
We live in a fast-paced world where everything is constantly changing and evolving. As we navigate through the complexities of life, one thing that remains constant is our desire to learn and acquire new knowledge. Whether it’s for personal growth, career advancement, or simply to satisfy our curiosity, the need to expand our understanding of the world is inherent to our human nature.
In this blog, we will explore the concept of “introduction” and its significance in various aspects of our lives. From introducing ourselves to new people to diving into the world of a new subject, the act of introducing plays a crucial role in our personal and professional relationships. It allows us to establish connections, build rapport, and create opportunities for growth.
But what exactly is an introduction? Is it simply a way to break the ice and initiate a conversation? Or does it go deeper than that? In this blog, we will delve into the different layers of introduction and uncover its true essence. We will explore the importance of a first impression and how it can shape our interactions with others. We will also discuss practical tips for making a memorable introduction that leaves a lasting impact.
Join us on this journey as we unravel the mysteries behind the art of introduction. Whether you’re a seasoned networker or someone who struggles with meeting new people, this blog aims to provide you with valuable insights and actionable strategies to enhance your introduction skills. So, let’s embark on this adventure together and master the art of introduction.
Are you ready to take the first step? Let’s dive in and discover the power of a well-crafted introduction.
Table of Contents
What is a coolant system and why is it important?
Have you ever wondered what a coolant system does and why it is important for your vehicle? Well, let me break it down for you. A coolant system is responsible for regulating the temperature of your engine and preventing it from overheating. It circulates coolant, a mixture of water and antifreeze, throughout the engine to absorb and dissipate heat.
This process is crucial because if the engine gets too hot, it can cause serious damage and lead to costly repairs. That’s why it’s important to regularly flush your coolant system to remove any contaminants and ensure that it is working efficiently. Flushing the system involves draining the old coolant, flushing it with water to remove any debris or buildup, and then refilling it with fresh coolant.
By doing this, you can extend the life of your engine and keep it running smoothly. So, the next time you’re due for maintenance, don’t forget to include a coolant system flush to keep your vehicle in top shape.
Signs that your coolant system needs to be flushed
If you’ve noticed any signs of trouble with your coolant system, it may be time to flush it out. Signs that your coolant system needs to be flushed include a high engine temperature, a coolant leak, or a strange smell coming from the engine. Flushing the coolant system involves draining the old coolant and replacing it with fresh coolant.
This process helps to remove any contaminants or build-up that may be inhibiting the system’s performance. It’s essential to follow the manufacturer’s instructions and use the correct type of coolant for your vehicle. Flushing the coolant system regularly can help to prevent engine overheating and extend the life of your vehicle’s cooling system.
So, if you notice any signs of trouble, it’s a good idea to flush your coolant system to keep your vehicle running smoothly.
Preparing for the coolant system flush
When it comes to maintaining your car’s cooling system, one important task is to regularly flush out the coolant. Flushing the coolant system helps remove any contaminants or impurities that may have built up over time. To prepare for a coolant system flush, there are a few steps you should take.
First, make sure you have all the necessary materials and tools, such as a coolant flush kit, a drain pan, and a funnel. You’ll also want to park your car on a flat surface and let the engine cool down completely before starting the process. It’s a good idea to consult your car’s manual for specific instructions on how to drain the coolant, as the process may vary depending on the make and model of your vehicle.
Once you have everything ready, you’ll be on your way to a clean and efficient cooling system.
Gather the necessary tools and materials
coolant system flush, tools and materials. Before performing a coolant system flush, it’s important to gather all the necessary tools and materials. This will ensure that you have everything you need and eliminate any last-minute trips to the store.
Some basic tools you’ll need include a socket set, pliers, a drain pan, and a funnel. You’ll also need the appropriate coolant for your vehicle, as well as distilled water. It’s important to use distilled water because tap water can contain minerals and impurities that can potentially harm your cooling system.
Additionally, you may want to have some rags or towels on hand to clean up any spills or messes that may occur during the flush. By having all these tools and materials ready beforehand, you’ll be well-prepared to tackle the coolant system flush and ensure a smooth and efficient process.
Park your vehicle in a safe and well-ventilated area
Preparing for a coolant system flush is an essential step in maintaining the health and functionality of your vehicle. Before you begin the process, it’s vital to park your vehicle in a safe and well-ventilated area. This ensures that you have enough space to work comfortably and that there is adequate airflow to prevent any fumes or gases from building up.
By parking your vehicle in a safe area, you minimize the risk of accidents or damage while working on the coolant system. It’s essential to choose a location that is level and free of any obstacles that may impede your access to the engine compartment. Additionally, make sure to park in an area away from flammable materials or open flames, as the coolant system involves handling potentially hazardous substances.
Moreover, a well-ventilated area is crucial during a coolant system flush. As you flush the system, coolant and other fluids may emit fumes or gases that can be harmful if inhaled in a confined space. Ensuring there is proper ventilation helps to minimize exposure to these potentially toxic substances.
Overall, taking the time to prepare for a coolant system flush by parking your vehicle in a safe and well-ventilated area is a crucial step in ensuring a smooth and safe process. By doing so, you create an environment that prioritizes your safety and allows you to work efficiently on your vehicle’s coolant system.
Allow your engine to cool down
Preparing for a coolant system flush can help prolong the lifespan of your engine and ensure it runs smoothly. One important step in this process is allowing your engine to cool down before beginning the flush. This is crucial because the coolant system operates at high temperatures, and attempting to flush it while the engine is still hot can be dangerous.
It’s like trying to touch a hot stove – you’re bound to get burned! By taking the time to let your engine cool down, you not only protect yourself from potential accidents but also allow the coolant system to reach a safe temperature for flushing. So, before diving into the coolant system flush, make sure your engine has had ample time to cool down and avoid any mishaps.
Step-by-step guide: How to flush your coolant system
Are you noticing that your engine is running hot or your heater isn’t working as well as it used to? It may be time to flush your coolant system. Flushing your coolant system is an important maintenance task that helps prevent overheating and keeps your engine running smoothly. So, how do you go about flushing your coolant system? Here’s a step-by-step guide to get your started.
First, you’ll need to gather the necessary tools and materials. This includes a coolant flush kit, a drain pan, and a funnel. You’ll also need a jack and jack stands if you need to lift your vehicle to access the radiator drain plug.
Next, make sure your engine has cooled down completely. It’s important to never open the radiator cap when the engine is hot, as it can cause serious burns. Once your engine is cool, locate the radiator drain plug.
This is typically located at the bottom of the radiator. Place the drain pan underneath the plug to catch the old coolant. Carefully open the drain plug and let the coolant drain into the pan.
Be sure to dispose of the old coolant properly, as it is toxic and harmful to the environment. Once all the coolant has drained, close the drain plug and fill the radiator with water. It’s important to use distilled water to prevent mineral buildup in your system.
Next, add the coolant flush solution from the kit to the radiator. Follow the instructions on the kit for the proper amount to use. Start your engine and let it run for the specified time on the coolant flush kit instructions.
Drain the old coolant
Now that you have gathered all the necessary tools and equipment for flushing your coolant system, it’s time to get started. The first step in this process is to drain the old coolant from your vehicle. To do this, locate the drain plug or petcock on the bottom of your radiator.
This is usually a small valve or screw that can be easily turned with a wrench or pliers. Before opening the drain plug, it’s important to place a catch basin or container underneath to collect the coolant and avoid making a mess. Once the catch basin is in place, slowly open the drain plug, allowing the coolant to flow out.
Be careful, as the coolant may be hot and can cause burns. If the flow becomes slow or stops, you can use a screwdriver or similar tool to gently loosen any debris or sediment that may be blocking the drain plug. After the coolant has completely drained, close the drain plug tightly to prevent any leaks.
Take this opportunity to inspect the drain plug for any signs of damage or wear. If the plug is worn or damaged, it may need to be replaced before you continue with the coolant flush. Now that the old coolant has been successfully drained, you can move on to the next step in the process: flushing the system with clean water.
Stay tuned for our next blog post, where we will guide you through this important step in the coolant flushing process.
Flush the system with water
coolant system flush, flush the system with water, step-by-step guide If you notice that your car’s engine is overheating or that there is a coolant leak, it may be time to flush your coolant system. Flushing the system involves removing all the old coolant and debris that may have built up over time and replacing it with fresh coolant. This not only helps to keep your engine running smoothly but also prevents any potential damage that could occur from a clogged system.
To flush your coolant system, the first step is to make sure the engine is cool. Then, locate the coolant reservoir and remove the cap. Next, you’ll need to locate the drain valve at the bottom of the radiator.
Place a bucket underneath to catch the draining coolant. Open the valve and let the coolant empty out completely. Once all the coolant has drained, close the valve and refill the system with water.
Start the engine and let it run for a few minutes, allowing the water to circulate throughout the system. After that, open the drain valve again and let the water drain out. Repeat this process a few times until the water draining out is clear and free of debris.
Finally, close the drain valve and refill the system with fresh coolant, following the manufacturer’s recommendations. And there you have it – a step-by-step guide on how to flush your coolant system.
Add the coolant flush treatment
coolant flush treatment Adding a coolant flush treatment to your vehicle’s coolant system can help improve its overall performance and extend its lifespan. This step-by-step guide will walk you through the process of flushing your coolant system and adding the treatment. First, make sure that your vehicle is parked on a level surface and has cooled down completely before you begin.
This will help prevent any accidents or injuries while working with the coolant. Next, locate the coolant reservoir under the hood of your car. It’s usually a translucent plastic container with a cap labeled “coolant” or “antifreeze.
” Carefully remove the cap and set it aside. Now, it’s time to drain the old coolant from the system. Look for the radiator drain plug at the bottom of the radiator and place a catch pan directly underneath it to collect the coolant.
Loosen the drain plug using a wrench and let the old coolant drain completely. Once the coolant has drained, it’s time to flush the system. Fill the radiator with water using a hose until it’s full.
Then, start the engine and let it run for a few minutes to circulate the water throughout the system. This will help flush out any remaining old coolant or debris. Now, it’s time to add the coolant flush treatment.
Refer to the manufacturer’s instructions for the correct amount of treatment to use based on the size of your coolant system. Pour the treatment directly into the radiator and fill the rest of the system with water. Replace the cap on the coolant reservoir.
Flush the system again with water
If you’ve followed the previous steps in our guide on how to flush your coolant system, you’ve already drained the old coolant from your vehicle. Now it’s time to flush the system again with water to remove any remaining debris or contaminants. Flushing with water is essential to ensure that your coolant system is clean and ready for new coolant.
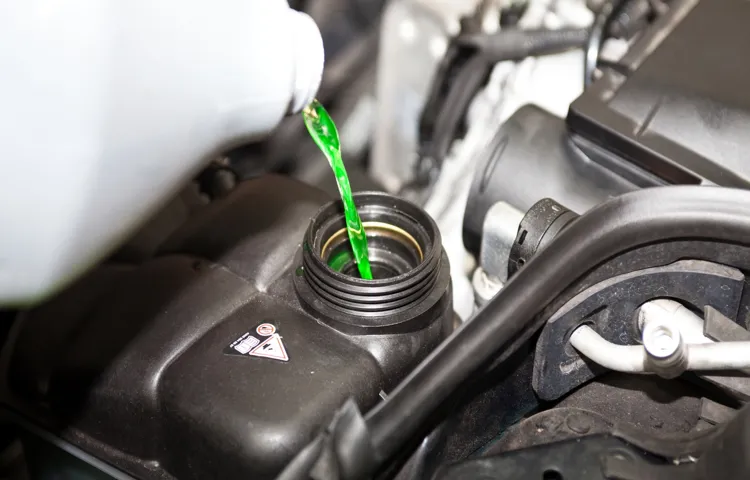
To begin, carefully pour water into the radiator until it is full. Then, start your vehicle and allow it to run for about 10 minutes to circulate the water throughout the system. This will help loosen any remaining deposits.
After the 10 minutes is up, turn off your vehicle and let it cool down completely. Once cool, open the radiator cap and drain the water from the system. Repeat this process of filling the radiator with water, running the vehicle for 10 minutes, and draining the water until it runs clear.
This may take several rounds of flushing to completely remove all debris. Once the water runs clear, you can proceed to the final step—refilling your coolant system with fresh coolant.
Refill the system with fresh coolant
coolant system, flush, refill, step-by-step guide
Check for any leaks and test the coolant system
When it comes to maintaining your vehicle’s cooling system, one important step you shouldn’t skip is flushing the coolant system. Over time, coolant can become contaminated with dirt, debris, and rust, which can lead to clogs and overheating. Flushing the coolant system helps to remove these contaminants and ensures that your engine stays cool and functioning properly.
Before you begin flushing the coolant system, it’s important to check for any leaks. A leaky coolant system can cause a loss of coolant, which can lead to engine damage and overheating. Inspect all the hoses, clamps, and connections for any signs of leakage.
If you find any leaks, it’s important to repair them before proceeding with the coolant system flush. Additionally, testing the coolant system is essential to ensure that it is functioning correctly. This can be done by using a coolant system tester.
The tester checks the pressure of the system and ensures that there are no leaks or other issues that may affect the cooling capacity of the coolant system. By completing these steps before flushing the coolant system, you are ensuring that your engine stays cool and protected from potential damage.
Conclusion
In conclusion, flushing your coolant system is like giving your car a refreshing spa day. Just like how you treat yourself to a facial or massage to feel rejuvenated, your car deserves the same TLC. By flushing out the old coolant, you’re ensuring that your engine stays cool, your radiator stays clean, and your car stays happy.
So don’t let your coolant system become a hot mess – grab your gloves, pop the hood, and give your car the coolant flush it deserves. Your car will thank you with smooth rides, cool breezes, and maybe even a little purr of appreciation. Happy flushing!”
Additional tips for maintaining your coolant system
One of the most important parts of maintaining your vehicle’s coolant system is to regularly flush it. Flushing your coolant system removes any debris or sediment that may have accumulated over time, ensuring optimal performance and preventing any potential damage to your engine. To flush your coolant system, start by locating the radiator drain plug or coolant reservoir drain plug, which is typically found at the bottom of the radiator or on the side of the coolant reservoir.
Place a drain pan underneath the plug to catch the old coolant, then open the drain plug and allow the coolant to fully drain out. Once the coolant has drained completely, close the drain plug and refill the coolant system with a mixture of coolant and water according to your vehicle’s specifications. Be sure to carefully follow the manufacturer’s instructions to ensure you mix the coolant correctly.
Keep in mind that flushing your coolant system is a task that should be done periodically and it is recommended to consult your vehicle’s owner’s manual or seek professional advice if you are unsure of the appropriate intervals. By regularly flushing your coolant system, you can ensure that your engine stays cool and in optimal condition.
FAQs
So, you noticed that your engine temperature is running hotter than usual, and you suspect that it could be due to a coolant system issue. Well, one of the most common causes of overheating is a clogged or dirty coolant system. Over time, coolant can become contaminated with rust, debris, and other impurities, which can hinder its ability to properly cool your engine.
To remedy this, it’s important to flush your coolant system regularly. Flushing your coolant system involves draining the old coolant, flushing it out with water or a specialized coolant flush solution, and then refilling it with fresh coolant. This process helps to remove any built-up debris and restore the efficiency of your coolant system.
By flushing your coolant system regularly, you can prevent overheating and potentially extend the life of your engine. So, if you notice any signs of coolant system issues, don’t hesitate to give your engine the TLC it needs and flush out that old coolant!
FAQs
How often should I flush my coolant system?
It is recommended to flush your coolant system once every two years or every 30,000 miles, whichever comes first.
What are the signs that I need to flush my coolant system?
Some signs that indicate the need to flush your coolant system include overheating, a sweet smell coming from the engine, coolant leaks, and a buildup of sludge or rust in the radiator.
How do I know if my coolant is contaminated and needs to be flushed?
You can check the color and consistency of your coolant. If it appears murky, discolored, or has floating particles, it is likely contaminated and should be flushed.
Can I flush my coolant system myself, or do I need to take it to a mechanic?
Flushing your coolant system can be done as a DIY project, but it requires some knowledge and tools. If you’re not confident in doing it yourself, it is best to take it to a professional mechanic.
What are the steps involved in flushing a coolant system?
The steps involved in flushing a coolant system include draining the old coolant, flushing the radiator, filling it with a coolant flush solution, running the engine to circulate the solution, draining and rinsing the system, and finally refilling with fresh coolant.
Can I use tap water to flush my coolant system?
No, it is not recommended to use tap water to flush your coolant system. Tap water contains minerals that can cause corrosion and other issues. It is best to use distilled water or a coolant flush solution recommended by the manufacturer.
How important is it to flush my coolant system?
Flushing your coolant system is essential for maintaining the health and performance of your vehicle. It helps remove contaminants, prevent overheating, and prolong the life of your engine and cooling system components.