

Changing a flat tire can be a frustrating task, especially when you’re in a hurry. But what’s even more frustrating is being stuck on the side of the road with a flat tire and not knowing how to fix it. That’s why it’s important to know how to rebead a tire, the process of putting the tire back on the rim.
Rebeading a tire is a simple process that can save you time and money. It’s a skill that every car owner should learn, as it can come in handy in emergencies. But how exactly do you rebead a tire? Don’t worry; it’s not as complicated as it sounds.
With the right tools and a little patience, you can rebead a tire in no time. In this blog post, we will guide you through the step-by-step process of rebeading a tire. We’ll provide you with tips and tricks to make the process easier, so you can get back on the road as quickly as possible.
From identifying the problem to remounting the tire, we will cover everything you need to know to rebead a tire like a pro. So, whether you’re a seasoned mechanic or a car newbie, read on to learn how to rebead a tire and be prepared in case of a flat tire emergency.
Table of Contents
Gather Materials
When it comes to re-beading a tire, the first step is to gather all the materials you will need to successfully complete the process. You will need new tire beads, a tire bead lubricant, tire mounting tools such as tire spoons or levers, and an air compressor. It’s important to make sure that all of your tools are in good condition and working properly before you begin.
The tire beads come in various sizes, so make sure you get the right size for your tire. Be sure to also get a high-quality tire bead lubricant to make the process easier and safer. Once you have everything you need, you can move on to the next step of re-beading your tire.
By gathering the right materials, you will set yourself up for a successful re-beading process that will help ensure your tire’s performance and longevity.
Tire Iron, Lubricant, Bead Sealer, Safety Glasses, Inflation Tool
When it comes to changing a tire, preparation is key. Before you even attempt to remove the old tire and install the new one, make sure you have all the necessary materials. The first item on your list should be a tire iron.
Without it, you won’t be able to remove the lug nuts that hold the tire in place. You’ll also need lubricant to help the tire move more easily onto the rim. Bead sealer is another important item, which helps create an airtight seal and prevents air from leaking out of the tire.
Safety glasses are a must-have to protect your eyes, especially when inflating the new tire. Lastly, you’ll need an inflation tool to pump up the new tire once it’s installed. By taking the time to gather all these materials beforehand, you’ll save yourself from any unexpected mishaps and make the tire-changing process a breeze.
Remove Tire from Rim
If you’re wondering how to re bead a tire, the first step is to remove the tire from its rim. This can seem like a daunting task, but with the right tools and some patience, it can be done quickly and efficiently. Start by deflating the tire completely and removing the valve stem.
Next, use a tire lever to pry the tire off of the rim, working around the circumference of the wheel. Once the tire is partially off, use your hands to wiggle it free from the rim completely. It can be helpful to use some lubricant to make the process a bit easier.
With the tire removed, you’re ready to re bead it and get it back on the road again.
Deflate the tire, remove valve core, break the bead seal using the tire iron
Removing a tire from a rim may seem like a daunting task, but with the right tools and techniques, it’s a fairly straightforward process. The first step is to deflate the tire completely by removing the valve core. Doing so will ensure that the tire is easier to work with and won’t cause any unnecessary frustration.
Next, grab your trusty tire iron and start breaking the bead seal by inserting the iron in between the tire and the rim and pushing down. Be sure to work your way around the entire tire, as you’ll need to break the seal on both sides. Once the bead seal is broken, use the tire iron to pry the tire away from the rim.
This can be a bit tricky, so be sure to take your time and work slowly and methodically. It may also be helpful to have a friend or second pair of hands to assist you. With a little bit of patience and effort, you’ll have the tire removed from the rim in no time! Just remember to take caution and make safety your top priority throughout the process.
Lubricate Bead Area
When it comes to re beading a tire, an important step is to lubricate the bead area. This is required to ensure that the tire slides onto the rim without causing any damage. You can use a tire lubricant that is specifically designed for this purpose to ensure a smooth and easy installation.
Lubricating the bead area also helps to prevent the bead from getting stuck or pinched during the installation process. It is important to use the right amount of lubricant for the job. Too little lubrication can cause the tire to not slide all the way onto the rim, while too much can cause the tire to slip or even come off the rim when in use.
By properly lubricating the bead area, you can save yourself time and trouble when re beading your tire.
Apply lubricant to bead area of tire and rim
Lubricating the bead area of your tire and rim might seem like a small detail, but it can make a big difference in the performance of your vehicle. When the bead area isn’t properly lubricated, it can lead to difficulty mounting and unmounting tires. That’s where a good quality lubricant comes in handy.
Applying a lubricant to the bead area of your tire and rim reduces friction and helps the tire slide onto the rim with ease. It also prevents the bead from getting damaged during the mounting process. This is particularly important when dealing with larger tires and rims, which can be more difficult to work with.
By lubricating the bead area, you’ll save time and effort when changing your tires, and you’ll ensure that your tires and rims last as long as possible. So, whether you’re changing a tire at home or working in a professional shop, don’t forget to apply some lubricant to the bead area. Your tires (and your hands) will thank you for it!
Reposition Tire on Rim
When it comes to changing a tire, there may be situations where you need to reposition the tire on the rim, also known as “re-beading” the tire. This can occur if the tire has been improperly mounted or if the tire has been punctured and the air pressure caused the tire to move on the rim. To re-bead a tire, you will need to remove the tire from the rim and lubricate the bead area of the tire with soapy water.
Then, use a tire iron to work the tire back onto the rim, ensuring that the bead is properly seated in the groove of the rim. It’s important to take care not to damage the tire or the rim during this process. Once you have successfully re-beaded the tire, inflate the tire to the recommended air pressure and check the tire for any signs of damage or leaks.
With these steps, you can reposition a tire on the rim and get back on the road safely.
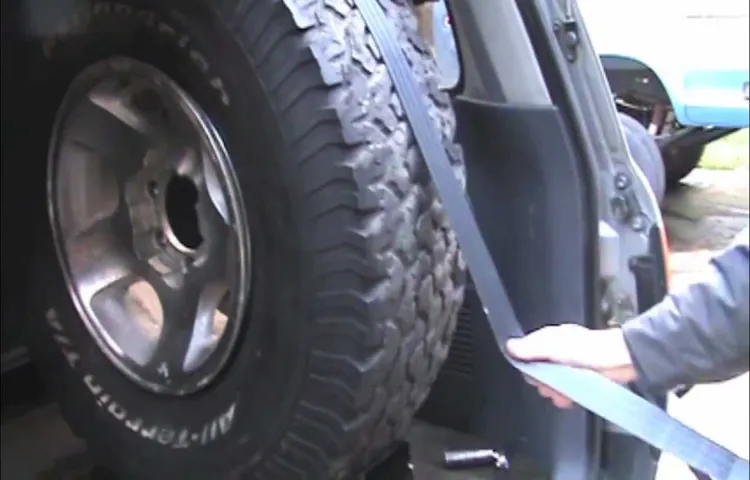
Align the tire on the rim, push down gently on the sidewalls as you roll the tire towards the bead you’ve already seated
When it comes to changing a tire, one important step many people overlook is properly aligning the tire on the rim. To do this, first make sure the tire is free of any debris or dirt that could cause an uneven fit. Then, position the tire so that the tread is facing up and the valve stem is centered in the rim’s hole.
From here, carefully roll the tire towards the bead you’ve already seated and gently push down on the sidewalls. This helps to push the tire into place and ensures that it’s properly situated on the rim. Taking the time to reposition the tire on the rim not only makes the installation process easier, but it also helps to prevent damage to both the tire and the wheel.
So, if you’re changing a tire, don’t forget to take this small but significant step – you’ll be glad you did.
Seat the Tire Bead in the Rim
If you’ve ever had to change a flat tire, you know that one of the most challenging parts is getting the tire bead seated properly in the rim. This step is crucial for ensuring that the tire is securely attached to the wheel and won’t come loose while you’re driving. To re-bead a tire, the first thing you need to do is make sure that the tire is fully deflated and that the rim is clean and free of debris.
Then, you’ll need to apply some tire lubricant to the inside of the tire bead and the rim flange. This will help the bead slide smoothly into place. Next, use a tire iron to start working the bead over the edge of the rim.
Once you’ve gotten part of the bead seated, you’ll need to work your way around the entire tire, using the tire iron to push the bead over the rim. It’s important to take your time and be patient, as forcing the tire bead can cause damage to both the tire and the rim. Once the bead is seated all the way around, give it a final check to make sure it’s securely in place and then inflate the tire to the proper pressure.
With a little practice, re-beading a tire can become second nature and you’ll be back on the road in no time!
Use an inflation tool and bead sealer to seat the tire on the rim, inflate the tire to the recommended pressure
Seating the tire bead in the rim can be a tricky task, but it’s essential for a safe and smooth ride. To get started, you’ll need an inflation tool and a bead sealer. Begin by positioning the tire on the rim correctly, ensuring that the valve stem is aligned with the valve hole in the rim.
Next, apply a bead sealer to the tire bead and the rim’s mating surface to ensure a secure fit. Then, attach the inflation tool to the valve and gradually inflate the tire to the recommended pressure. It’s essential to inflate the tire evenly to ensure that the bead seats properly in the rim.
As you inflate, listen for a “pop” sound indicating that the tire bead has seated correctly. If the tire doesn’t seat properly, you can try bouncing the tire or using a tire iron to help the tire bead “pop” into place. Once the tire is seated correctly, double-check the pressure and remove the inflation tool.
With the tire properly seated, you can hit the road with confidence, enjoying a safe and smooth ride. Remember to always follow the manufacturer’s guidelines for recommended tire pressure, as overinflated or underinflated tires can be dangerous.
Finish Up
We’ve come to the end of the how-to guide on re beading a tire. By following the steps we’ve outlined, you can ensure your tire is properly seated on the rim and ready to roll. Remember that safety always comes first, so be sure to inspect your tire carefully for any damages or issues before re beading.
Once you’ve confirmed everything is good to go, begin by lubricating the bead and rim with soap or another lubricant. Use a tire iron to pry the bead over the edge of the rim and work your way around the tire, being careful not to damage the tire or inner tube. Finally, inflate the tire to the recommended pressure, and you’re ready to hit the road.
With a bit of practice, re beading a tire will become second nature, and you’ll be back on the road in no time. Remember to keep your tires well-maintained and properly inflated for the best performance and longevity.
Check the seal all around the edge of the tire, tighten the valve core, inflate the tire to recommended pressure
As you finish up repairing your tire, make sure to check the seal all around the edge of the tire to ensure that it’s tight and secure. This will help keep the air in and prevent any leaks. Additionally, don’t forget to tighten the valve core to avoid any air from escaping through the valve stem.
Inflate the tire to the recommended pressure, which is usually indicated on the sidewall of the tire or in your vehicle manual. It’s important to stick to this pressure to prevent any further damage to your tire or decrease in performance. Once you’ve completed these final steps, give your tire a visual inspection to make sure everything looks good and you’ll be ready to hit the road again in no time.
Remember to always keep your tires in good condition, as they’re a crucial component of your vehicle’s safety and performance.
Conclusion
Well, folks, after all these instructions on how to re bead a tire, you might be feeling a little deflated. But fear not! Let’s recap. When you find yourself with a stubborn tire that just won’t seat, remember to first remove any debris and then apply lubricant.
Give it a strong blast of compressed air and voila, you’ve got yourself a perfectly beaded tire! And the best part? You can use these skills not only for fixing your car, but also impressing anyone who asks if you know how to bead. You’re officially a tire-beading pro!”
FAQs
What is the common reason for tire bead damage?
The tire bead can get damaged due to various reasons, such as improper mounting or demounting, corrosion, and excessive wear and tear.
Can a damaged tire bead be repaired or does it need to be replaced?
In most cases, a damaged tire bead needs to be replaced as repairing it may compromise the safety of the tire.
How can I identify a damaged tire bead?
A damaged tire bead may cause the tire to lose air pressure quickly, may make a popping sound when driving, or may cause the tire to wobble or vibrate.
What tools do I need to re bead a tire?
To re bead a tire, you will need a tire iron, a bead breaker, an air compressor, and a tire lubricant.
Is it safe to re bead a tire myself or should it be done by a professional?
While it is possible to re bead a tire yourself, it is recommended to have it done by a professional to ensure proper installation and safety.
How do I lubricate the tire bead before installation?
Apply a generous amount of tire lubricant to the rim bead seats and the tire bead surfaces to make the installation easier and prevent damage to the tire bead.
What precautions should I take when re beading a tire?
Before re beading a tire, make sure to inspect the tire for any visible damage, wear protective gear such as gloves and eye goggles, and avoid over-inflating the tire to prevent it from bursting.