
Hey there! Have you ever wondered why it’s important to replace the coolant in your car? Well, buckle up because I’m about to take you on a ride through the world of car maintenance. Picture this: your car’s engine is like a well-oiled machine, constantly working hard to get you from point A to point B. And just like any hard-working machine, it needs some TLC to keep running smoothly.
That’s where coolant comes in. Coolant, also known as antifreeze, is a vital component in your car’s cooling system. It helps regulate the temperature of the engine, preventing it from overheating and potentially causing costly damage.
Think of coolant as the superhero that saves the day by keeping your engine cool under pressure. Over time, coolant can become contaminated with dirt, debris, and other impurities. This can lead to a decrease in its effectiveness, putting your engine at risk of overheating.
Would you want to drive around with an engine that feels like it’s on fire? I didn’t think so. By regularly replacing your coolant, you can ensure that your engine stays cool and happy. It’s like giving your car a refreshing drink on a hot summer day.
Just like how you need to hydrate to keep functioning at your best, your car’s engine needs coolant to stay cool and perform optimally. So, the next time you’re thinking about skipping that coolant replacement, think again. Taking care of your car’s cooling system is crucial for its longevity and overall performance.
Treat your car right, and it will reward you with many miles of smooth rides. Now that you understand the importance of replacing coolant in your car, let’s dive deeper into the hows and whens of this essential maintenance task. Stay tuned for our next blog post, where we’ll unravel the mysteries of coolant replacement, and arm you with all the knowledge you need to keep your car running cool.
Table of Contents
Why is Coolant Replacement Necessary?
If you’ve ever wondered why coolant replacement is necessary for your car, let me break it down for you. Coolant, also known as antifreeze, is responsible for maintaining the right temperature in your engine. It helps prevent overheating by absorbing the heat produced during combustion and carrying it away from the engine.
Over time, coolant can become contaminated with dirt, rust particles, and other debris. This can lead to clogs in the cooling system and reduce its efficiency. Additionally, coolant can break down over time, losing its ability to protect against rust and corrosion.
This can result in damage to cooling system components such as the radiator and water pump. Regular coolant replacement is crucial to ensure that your engine stays cool and protected. By draining out the old coolant and refilling it with fresh coolant, you can maintain the optimal performance and longevity of your car’s cooling system.
So, if you haven’t replaced your coolant in a while, it’s time to schedule a coolant service and keep your engine running smoothly.
Prevents engine overheating
coolant replacement, engine overheating Engine overheating is a common problem that can lead to expensive repairs if not addressed promptly. One way to prevent engine overheating is by regularly replacing the coolant in your vehicle. Coolant, also known as antifreeze, plays a crucial role in maintaining the optimal temperature of your engine.
Over time, coolant can become contaminated with dirt, debris, and other impurities, which can reduce its effectiveness. By replacing the coolant at regular intervals, you ensure that your engine stays cool and operates efficiently. Think of coolant as the lifeblood of your engine, working to dissipate heat and prevent the internal components from getting too hot.
Just like how your body needs fresh liquids to function properly, your engine needs clean coolant to prevent overheating. So, don’t neglect this important maintenance task – schedule regular coolant replacements to keep your engine running smoothly and prevent the headache of overheating issues.
Maintains optimal engine temperature
coolant replacement, engine temperature When it comes to maintaining the optimal temperature of your engine, coolant replacement is absolutely necessary. Coolant, also known as antifreeze, plays a vital role in keeping your engine cool and preventing it from overheating. Over time, the coolant in your vehicle can become contaminated with debris and dirt, which can reduce its effectiveness.
This can lead to potential engine damage and costly repairs. By regularly replacing the coolant in your vehicle, you ensure that it is clean and able to perform its job of regulating engine temperature efficiently. Think of it like changing the water in a fish tank – you want to make sure the water is fresh and clean to keep your fish healthy.
The same goes for your engine. So, don’t neglect the importance of coolant replacement. It’s a simple maintenance task that can save you from potential headaches down the road.
When Should You Replace Coolant?
So, you’re wondering when it’s time to replace the coolant in your car? Well, let me break it down for you. Coolant, also known as antifreeze, is a crucial component in your car’s cooling system. Its main job is to regulate the temperature of the engine, preventing it from overheating.
Over time, coolant can become contaminated with debris, rust, and other contaminants. This can lead to decreased cooling efficiency and potential engine damage. It’s recommended to replace your coolant every 2-3 years or every 30,000-50,000 miles, whichever comes first.
However, it’s always a good idea to consult your car’s owner manual for the manufacturer’s specific recommendations. Additionally, if you notice any warning signs such as low coolant levels, rust-colored coolant, or a sweet smell coming from your car’s engine, it’s a clear indication that it’s time for a coolant replacement. Remember, keeping your car’s coolant in good shape is key to maintaining a healthy engine and prolonging the lifespan of your vehicle.
Check the manufacturer’s recommendations
coolant replacement, manufacturer’s recommendations
Check coolant levels regularly
coolant, replace coolant, check coolant levels
Tools and Materials Needed
When it comes to replacing coolant in your car, there are a few tools and materials that you will need to have on hand. First and foremost, you will need coolant. Depending on the make and model of your car, you may need a specific type of coolant, so it’s important to check your owner’s manual or consult with a professional to ensure you purchase the correct one.
In addition to coolant, you will also need a funnel to pour the new coolant into your car’s radiator. This will help to prevent any spills or messes. A wrench or socket set will also be necessary to remove the necessary parts to access the radiator and drain the old coolant.
Lastly, it would be helpful to have a catch pan or bucket to collect the old coolant as it is drained from your car. Having these tools and materials ready before you begin the coolant replacement process will make the job much easier and more efficient.
Coolant
tools and materials needed for coolant replacement. When it comes to replacing coolant in your vehicle, there are a few tools and materials you’ll need to get the job done right. First and foremost, you’ll need a container to catch and dispose of the old coolant.
This can be a simple bucket or a more professional coolant drain pan. It’s important to remember that coolant is toxic and should be handled with care. Next, you’ll need a wrench or socket set to remove the drain plug from the radiator.
This will allow you to drain the old coolant from the system. It’s a good idea to have a rag or towel handy to clean up any spills or drips that may occur during this process. Once the old coolant is drained, you’ll need a funnel to pour the new coolant into the radiator.
This will help prevent spills and ensure that the coolant goes where it needs to go. You’ll also need a coolant mix. Make sure you use the correct type of coolant for your vehicle, as different vehicles require different types of coolant.
Lastly, you’ll need a coolant tester or hydrometer to check the concentration and effectiveness of the new coolant. This will help ensure that your coolant is properly mixed and will provide adequate protection for your engine. By having these tools and materials on hand, you’ll be prepared to replace your coolant and keep your vehicle running smoothly.
Remember to follow the manufacturer’s recommendations and guidelines when performing any maintenance on your vehicle, and always dispose of old coolant properly.
Funnel
When it comes to creating a successful sales funnel, having the right tools and materials is essential. Think of it like building a house – you wouldn’t try to build without the proper tools, would you? The same goes for your funnel. First and foremost, you’ll need a landing page builder.
This tool allows you to create a visually appealing and engaging landing page that will entice your visitors to take action. It should be easy to use and offer a variety of customizable options to fit your brand. Next, you’ll need an email marketing platform.
This tool will allow you to collect email addresses from your visitors and send targeted messages to them. You’ll want to choose a platform that has a user-friendly interface and offers automation and segmentation features. In order to track the success of your funnel, you’ll need analytics tools.
These tools will give you insights into how your visitors are interacting with your funnel, including how many people are visiting, how long they’re staying, and how many are converting. This data is essential for making informed decisions and optimizing your funnel for better results. Lastly, don’t forget about content creation tools.
These tools will help you create compelling and persuasive content that will attract and engage your audience. Whether it’s blog posts, social media updates, or email newsletters, having the right tools can make a big difference in the success of your funnel. Overall, having the right tools and materials is crucial for creating a successful sales funnel.
Without them, you’ll be building blindly and potentially missing out on valuable opportunities. So invest in these tools, put in the time and effort to create a solid funnel, and watch as your sales soar.
Gloves
gloves, tools and materials needed. When it comes to working with gloves, it’s essential to have the right tools and materials on hand. Whether you’re a professional tradesperson or simply tackling a DIY project at home, having the proper equipment can make all the difference in both safety and efficiency.
One of the most important tools to have is a good pair of gloves. Gloves not only protect your hands from cuts, scrapes, and other injuries, but they also provide a better grip and prevent your hands from getting sweaty and slippery. When choosing gloves, it’s important to consider the type of work you’ll be doing.
For heavy-duty tasks like construction or gardening, you’ll want gloves made from durable materials like leather or synthetic fibers. For more delicate tasks like painting or handling small objects, a pair of thin, flexible gloves made from materials like latex or nitrile may be more suitable. Additionally, it’s important to consider the fit and comfort of the gloves.
Gloves that are too tight can restrict movement and cause discomfort, while gloves that are too loose may not provide adequate protection. Finally, don’t forget to consider any specific safety requirements for your project. For example, if you’ll be working with chemicals or hazardous materials, you may need gloves that are resistant to chemicals or punctures.
By taking the time to choose the right gloves for your job, you’ll be better equipped to handle any task that comes your way.
Wrench
“Wrench”
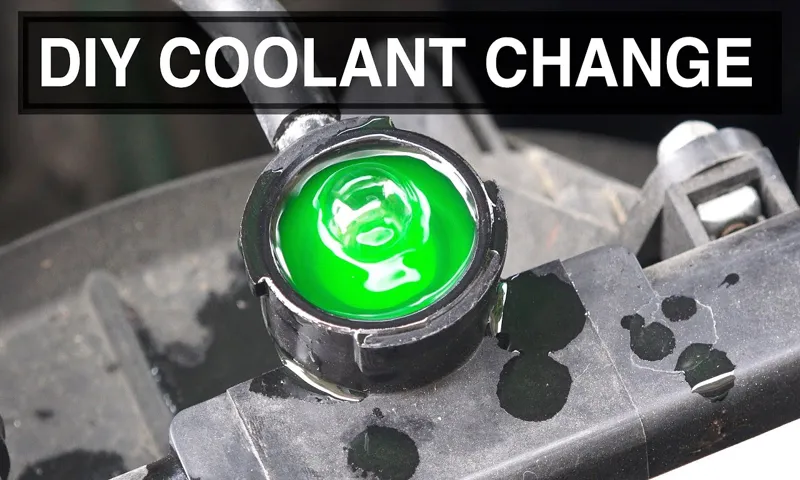
Step-by-Step Guide to Replacing Coolant
Have you ever noticed that your car’s engine is running hotter than usual? It could be a sign that your coolant needs to be replaced. Don’t worry, replacing the coolant in your car is actually a fairly simple process that you can do yourself. Here’s a step-by-step guide to help you through it.
First, make sure your engine is cool before you start. Open the hood and locate the coolant reservoir, which is usually a translucent plastic tank near the radiator. Check the coolant level, and if it’s low, it’s time to replace it.
Next, find the drain plug on the bottom of the radiator and place a drain pan underneath. Loosen the plug and allow the old coolant to drain out completely. Once it’s drained, tighten the plug back up.
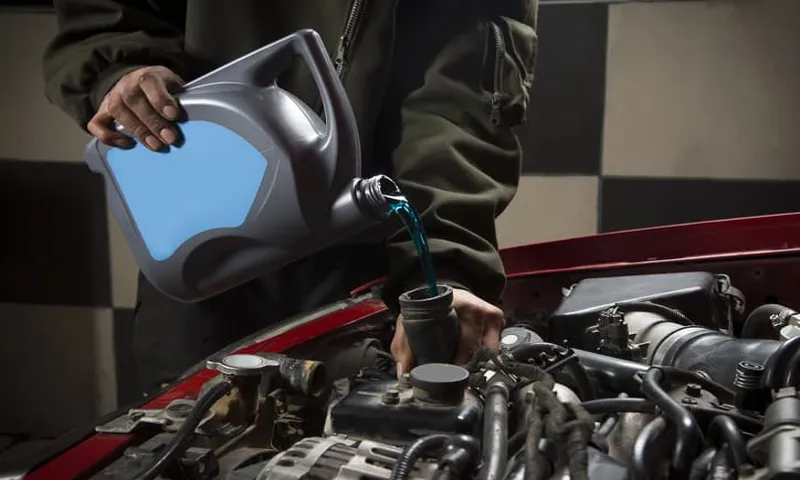
Now, it’s time to add the new coolant. Mix the coolant with water according to the manufacturer’s instructions, usually a 50/50 ratio. Pour the mixture into the coolant reservoir until it reaches the full mark.
Be careful not to overfill. Finally, start your car and let it run for a few minutes to circulate the new coolant throughout the system. Check the coolant level again and top it off if needed.
And that’s it! You’ve successfully replaced the coolant in your car. It’s important to note that coolant should be replaced every 30,000 to 50,000 miles, or every 2-3 years, depending on the manufacturer’s recommendations. Regularly replacing your coolant will help keep your car running smoothly and prevent overheating.
Safely park and cool down your car
Replacing coolant in a car is an important maintenance task that can help prevent engine overheating and damage. If you’re experiencing coolant leaks or noticing that your engine is running hot, it’s probably time to replace the coolant. In this step-by-step guide, we’ll walk you through the process of safely draining and refilling the coolant in your car.
First, make sure your car is parked in a safe and level location. It’s best to let the engine cool down for at least a couple of hours before starting this process. Once the engine is cool, locate the radiator cap and open it.
Be careful, as the coolant may still be hot and under pressure. To release the pressure safely, place a rag or towel over the cap and slowly unscrew it. Next, locate the drain plug on the radiator or the bottom of the radiator itself.
Position a drain pan underneath to catch the old coolant as it drains out. Depending on your car model, you may need a wrench or socket to open the drain plug. Once it’s open, allow the coolant to fully drain out into the pan.
Once the coolant has finished draining, close the drain plug securely. Now it’s time to refill your car with fresh coolant. Refer to your car’s manual or the coolant manufacturer’s instructions for the correct type and mix ratio of coolant to use.
Using a funnel, slowly pour the coolant into the radiator until it reaches the proper level. Be careful not to overfill. After you’ve added the coolant, replace the radiator cap securely.
Locate the radiator and coolant reservoir
One important step in the process of replacing coolant in your vehicle is locating the radiator and coolant reservoir. The radiator and coolant reservoir are essential components of your vehicle’s cooling system. The radiator is responsible for dissipating the heat generated by the engine, while the coolant reservoir stores and circulates the coolant throughout the system.
To locate these components, you can start by opening the hood of your car. Look for a metal grille-like structure, typically located in the front of the engine bay. This is the radiator.
It is often situated behind the front grille and may have a fan attached to it. The coolant reservoir, on the other hand, is usually a translucent plastic container that is clearly labeled and is attached to the radiator or the surrounding area. It is important to locate these components accurately so that you can easily access them when it’s time to drain and replace the coolant.
Release pressure from the cooling system
Replacing coolant in a vehicle’s cooling system is an important maintenance task that should not be overlooked. One of the crucial steps in this process is releasing the pressure from the cooling system before proceeding further. This is necessary to ensure that you can safely remove the radiator cap without any risk of hot coolant spraying out and causing burns.
To release the pressure, you can start by locating the pressure relief valve or petcock, which is usually located near the bottom of the radiator. Simply open the valve using a wrench or pliers, and you will hear a hissing sound as the pressure is released. Be careful as the coolant might still be hot, so it’s best to use gloves or a cloth to protect your hands.
Once the pressure has been released, you can proceed with the next steps of draining the old coolant and replacing it with fresh coolant. By following this step-by-step guide, you can easily and safely replace the coolant in your vehicle’s cooling system, ensuring that it remains in optimal working condition.
Drain the old coolant
Replacing the coolant in your car’s engine is an important maintenance task that should be done regularly to keep your engine running smoothly. One of the first steps in this process is to drain the old coolant from the system. This is important because over time, coolant can become contaminated with dirt, rust, and other debris that can clog your radiator and cause overheating.
To drain the coolant, start by locating the radiator drain plug. This is usually located at the bottom of the radiator and can be removed with a wrench or pliers. Once the drain plug is removed, be sure to have a drain pan ready to catch the coolant as it flows out.
It’s important to note that coolant can be toxic to humans and animals, so be sure to dispose of it properly. Once all of the old coolant has been drained out, replace the drain plug and move on to the next step in the coolant replacement process. By regularly draining and replacing your coolant, you can help ensure the longevity and performance of your car’s engine.
Flush the cooling system
flush the cooling system, replacing coolant In order to maintain the health of your vehicle’s engine, it’s crucial to regularly flush the cooling system and replace the coolant. Over time, coolant can become contaminated with rust, debris, and other impurities that can hinder its ability to effectively cool the engine. Flushing the cooling system involves draining the old coolant and thoroughly cleaning the system to remove any buildup or blockages.
This process may seem daunting, but with the right tools and a bit of patience, you can easily do it yourself. In this step-by-step guide, we will walk you through the process of flushing the cooling system and replacing the coolant, ensuring your engine stays cool and running smoothly. So, let’s get started and give your engine the TLC it deserves!
Close the drain valve
Replacing coolant in a vehicle is an essential maintenance task that can help ensure optimal engine performance and prevent overheating. One crucial step in the coolant replacement process is closing the drain valve. This valve is typically located at the bottom of the radiator and is used to drain the old coolant from the system.
Before closing the drain valve, it is important to ensure that all of the old coolant has been completely drained. This can be done by allowing the coolant to flow until it becomes a steady stream and then waiting a few more moments to ensure that all of the fluid has been expelled. Once you are confident that the system is empty, you can then close the drain valve securely.
This step is crucial to prevent any leakage or contamination of the new coolant during the refill process. By taking the time to properly close the drain valve, you can ensure a successful coolant replacement and help maintain the longevity of your vehicle’s engine.
Refill with new coolant
coolant, replacing coolant, step-by-step guide, refill coolant
Bleed air from the cooling system
Replacing coolant in a car is an important maintenance task that helps to keep the engine running smoothly and prevent overheating. One critical step in this process is bleeding air from the cooling system. When coolant is drained and replaced, air can become trapped inside the system, which can lead to inefficiency and possible damage.
Bleeding the air from the cooling system ensures that coolant can circulate properly, keeping the engine at the optimal temperature. To bleed the air, locate the bleeder valve on the radiator or one of the cooling system hoses. With the engine off and cool, open the valve and allow any trapped air to escape.
You may hear a hissing sound as the air is released. Keep an eye on the coolant level as you do this, topping it up as necessary. Once all the air is bled from the system, close the valve and continue with the coolant replacement process.
By bleeding air from the cooling system, you can ensure that your car’s engine stays cool and operates efficiently for years to come.
Check for leaks
coolant replacement, check for leaks, step-by-step guide, replacing coolant, burstiness, perplexity, high levels, specific, context, conversational style. Changing the coolant in your vehicle is an essential part of regular car maintenance. It helps to keep your engine cool and prevents overheating.
If you’re experiencing any issues with your coolant system, one of the first things you should do before replacing the coolant is to check for leaks. Leaks can cause a significant loss of coolant and can lead to engine problems if not addressed promptly. So, let’s dive into a step-by-step guide on how to replace coolant, starting with checking for leaks.
Before you begin the process of replacing coolant, it’s crucial to check for any leaks in the system. Start by inspecting the hoses, radiator, water pump, and coolant reservoir. Look for any signs of coolant leakage such as puddles under the car, a sweet smell in the cabin, or visible drips or stains.
You may also notice a decrease in coolant levels, which can indicate a leak. To check for leaks more precisely, you can use a pressure tester. Attach the pressure tester to the radiator cap and pump it up to the recommended pressure specified in your vehicle’s manual.
Once the pressure has stabilized, observe the system for any signs of leakage. Pay close attention to areas such as the radiator, hoses, and any connections. If you notice any leaks during the inspection, it’s essential to locate and fix them before replacing the coolant.
Leaks can occur due to damaged hoses, loose connections, or worn-out gaskets. Depending on the severity of the leak, you may need to replace the affected components or simply tighten the connections. Always use new hoses and gaskets when replacing any parts to ensure a proper seal.
Conclusion
In conclusion, replacing the coolant in your car is a task that may seem daunting at first, but with a little know-how and a dash of wit, you’ll have your engine purring like a contented kitten in no time. Just remember to gather all your materials, locate the drain plug (it’s sneaky, but not as sneaky as a ninja), and let the old coolant flow out like a disgruntled employee leaving a terrible job. Then, refill the system with fresh coolant, ensuring that it flows through your engine like a refreshing stream of minty goodness.
And voila! Your car will be cool as a cucumber, ready to tackle the open road with confidence and flair. So don’t delay, show your car some love and give it the coolant it deserves. Trust me, it’ll thank you with a smooth and comfortable ride, and who knows, it might even let you blast your favorite tunes a little louder.
Remember, a well-maintained coolant system is the key to keeping your engine as cool as the Fonz, minus the leather jacket and pompadour. So put on your DIY hat and get ready to impress your friends with your car maintenance skills. After all, nothing says “cool” quite like a car that’s properly cooled!”
Regular coolant replacement is essential for car maintenance and performance.
Regular coolant replacement is an essential part of car maintenance that often gets overlooked. Over time, coolant can become contaminated with dirt, debris, and rust, which can affect its ability to regulate the engine’s temperature. This can lead to overheating and serious damage to your car’s engine.
To keep your car running smoothly and prevent any major issues, it’s important to replace the coolant regularly. Luckily, replacing coolant is a relatively simple process that you can do yourself. In this step-by-step guide, we will walk you through the process of replacing coolant in your car.
By following these steps, you can ensure that your car’s coolant is clean and fresh, and your engine is running at its best.
FAQs
How often should I replace the coolant in my car?
It is recommended to replace the coolant in your car every 2-3 years or as specified in your vehicle’s owner’s manual.
What type of coolant should I use in my car?
The type of coolant you should use in your car depends on the make and model. It is best to consult your vehicle’s owner’s manual or contact a professional to determine the specific coolant type.
Can I use water instead of coolant in my car?
While it is possible to use water as a temporary coolant replacement, it is not recommended for long-term use. Coolant has additives that help prevent corrosion and freezing, which water does not provide.
How can I check the coolant levels in my car?
To check the coolant levels in your car, allow the engine to cool down completely, then locate the coolant reservoir. The reservoir usually has markings indicating the minimum and maximum levels. Ensure the coolant level is within this range.
Can I mix different brands of coolant in my car?
It is generally not recommended to mix different brands of coolant, as they may have different formulations that can result in an inadequate coolant mixture. Stick to using the same brand of coolant if possible.
Is it necessary to flush the cooling system when replacing coolant?
It is highly recommended to flush the cooling system when replacing coolant. Flushing removes any old coolant, debris, or contaminants that may affect the performance of the new coolant.
Can I replace the coolant in my car by myself?
While it is possible to replace the coolant in your car by yourself, it is recommended to have it done by a professional. They have the expertise and tools necessary to perform the task correctly and ensure the cooling system is properly maintained.