
Are you having trouble with air trapped in your coolant system? Don’t worry, you’re not alone. Air pockets in the coolant system can lead to overheating and other engine problems, so it’s important to address them as soon as possible. In this blog post, we’ll discuss how to remove air from the coolant system and keep your engine running smoothly.
Whether you’re a seasoned mechanic looking for a refresher or a novice DIYer tackling this for the first time, we’ve got you covered. So sit back, relax, and let’s dive into the world of coolant system air removal.
Table of Contents
- 1 Introduction
- 2 Signs of air in the coolant system
- 3 Step-by-step guide to removing air from the coolant system
- 3.1 Step 1: Turn off the engine and let it cool down
- 3.2 Step 2: Locate the coolant reservoir and check the coolant level
- 3.3 Step 3: Open the radiator cap or coolant bleeder valve
- 3.4 Step 4: Squeeze the upper radiator hose to remove air pockets
- 3.5 Step 5: Fill up the coolant reservoir and radiator
- 3.6 Step 6: Start the engine and let it idle
- 3.7 Step 7: Monitor the coolant level and temperature
- 3.8 Step 8: Repeat the process if necessary
- 4 Preventing air from entering the coolant system
- 5 Conclusion
- 6 FAQs
Introduction
Are you experiencing overheating problems with your car and suspect that air may be trapped in your coolant system? If so, you’re in the right place. Removing air from the coolant system is essential for maintaining proper engine temperature and preventing damage. The process may vary depending on the make and model of your vehicle, but the general steps remain the same.
First, make sure your vehicle is cool before starting. Locate the coolant reservoir and remove the cap. Then, start the engine and let it warm up.
As the engine warms up, air bubbles may rise to the surface of the coolant. Gently squeeze the radiator hoses to help release any trapped air. Finally, top off the coolant to the appropriate level and replace the reservoir cap.
By following these steps, you can ensure that your coolant system is free from air and your car runs smoothly.
What is the coolant system?
coolant system
Why is it important to remove air from the coolant system?
air in the coolant system. Introduction: When it comes to the coolant system in your vehicle, it is crucial to ensure that there is no air present. Air bubbles, or pockets of air, can cause several problems and can negatively impact the performance of your vehicle.
So, it is important to remove air from the coolant system to maintain the optimal functioning of your engine and prevent any potential damage. Let’s take a closer look at why this is such an important task.
Signs of air in the coolant system
If you’ve noticed signs of air in your coolant system, such as overheating, coolant leaks, or a bubbling sound coming from the radiator, it’s important to take action as soon as possible. Air in the coolant system can disrupt the flow of coolant, leading to engine damage and poor performance. So, how do you remove air from the coolant system? One common method is called “burping” the system, which involves removing air pockets trapped in the radiator, hoses, and engine.
To do this, start by allowing the engine to cool completely and locate the coolant reservoir. Most vehicles have a designated area for adding coolant, marked by a cap with a symbol that looks like a radiator or coolant. Carefully remove the cap (make sure the engine is cool to avoid burns) and inspect the coolant level.
If it’s low, add a mix of coolant and distilled water until it reaches the recommended level. Next, start the engine and let it run until it reaches normal operating temperature. Keep an eye on the coolant level during this time and add more if necessary.
As the engine warms up, any air pockets trapped in the system should be forced out and replaced with coolant. You may notice bubbles or a fluctuating coolant level as the system burps. Once the engine has reached its normal operating temperature, turn it off and let it cool completely.
Check the coolant level once more and top off as needed. If burping the system doesn’t completely remove the air, it may be necessary to bleed the system or check for leaks. Bleeding the system involves opening specific valves or bleed screws to release any trapped air.
This process varies depending on the make and model of your vehicle, so consult your owner’s manual or a trusted mechanic for instructions. Additionally, be sure to check for any coolant leaks that may be allowing air into the system. Leaks can be found by inspecting hoses, gaskets, and the radiator for signs of coolant or wetness.
Overheating engine
overheating engine, signs of air in the coolant system
Reduced performance
Reduced performance is a clear indicator that something is not quite right with your vehicle. One common issue that can lead to a decrease in performance is air in the coolant system. Air pockets in the coolant system can disrupt the flow of coolant, leading to overheating and a decrease in engine efficiency.
So, how can you tell if there is air in your coolant system? Look out for signs such as the engine running hotter than usual, erratic temperature gauge readings, or the coolant level dropping unexpectedly. These symptoms may indicate that there is air trapped in the system, preventing the coolant from effectively cooling the engine. If you notice any of these signs, it’s important to address the issue promptly to avoid further damage to your vehicle.
Leaks or coolant loss
air in the coolant system, coolant loss, signs of air, leaks, burstiness, perplexity, One common issue that may arise in your vehicle’s coolant system is the presence of air, also known as airlock or air pockets. When air gets trapped in the coolant system, it can cause a variety of problems, including overheating, loss of coolant, and engine damage. So how do you know if there is air in your coolant system? There are several signs to look out for.
First, you may notice that the temperature gauge on your dashboard is running higher than normal. This could indicate that there is not enough coolant circulating in the system, as air can block the flow of coolant. Another sign is a bubbling or gurgling sound coming from the radiator or coolant reservoir.
This sound is caused by air bubbles being pushed through the system. Additionally, you may also see coolant leaking or spraying from the radiator or hoses, which can be a sign of a coolant leak or air escaping from the system. If you notice any of these signs, it’s important to have your coolant system checked and serviced as soon as possible to prevent further damage to your engine.
Step-by-step guide to removing air from the coolant system
Have you noticed that your car’s temperature gauge is running hotter than normal? Or maybe you’ve noticed a decrease in coolant levels? These are common signs that air has entered your coolant system, which can lead to engine overheating and potential damage. Removing this air is crucial to maintaining the performance and longevity of your vehicle. Fortunately, the process of removing air from the coolant system is relatively simple and can be done with a few basic tools.
First, identify the highest point in your cooling system, usually the radiator or coolant reservoir. Next, locate the bleeder valve or screw on top of the radiator and loosen it slightly. This will allow the air to escape as you add coolant.
Now, start your engine and let it run until it reaches normal operating temperature. Keep an eye on the coolant level, topping it off as needed. As the engine warms up, the air bubbles should be pushed out of the system.
Finally, once the engine has reached its normal temperature, tighten the bleeder valve or screw and check the coolant level one last time. By following these steps, you can effectively remove air from your coolant system and keep your engine running smoothly.
Step 1: Turn off the engine and let it cool down
“The first step in removing air from the coolant system is to turn off the engine and let it cool down. This is an important step because working on a hot engine can be dangerous and can result in burns. It’s also important to let the engine cool down because the hot coolant can cause the pressure in the system to increase, making it difficult to remove the air.
So take a few minutes to let the engine cool down before moving on to the next step. This will ensure that you can safely and effectively remove the air from the coolant system.”
Step 2: Locate the coolant reservoir and check the coolant level
Removing air from the coolant system is an important task in maintaining the optimal performance of your vehicle. One of the key steps in this process is to locate the coolant reservoir and check the coolant level. The coolant reservoir is typically a translucent plastic container that is attached to the side of the engine bay.
It is important to locate this reservoir because it holds the coolant that helps regulate the temperature of your engine. To check the coolant level, you will need to remove the cap of the reservoir and visually inspect the fluid inside. The coolant level should be between the minimum and maximum marks on the reservoir.
If the level is below the minimum mark, you will need to add more coolant to bring it up to the appropriate level. This step is crucial because insufficient coolant can lead to overheating and potential damage to your engine. So, take the time to locate the coolant reservoir and check the coolant level regularly to ensure the proper functioning of your vehicle.
Step 3: Open the radiator cap or coolant bleeder valve
When it comes to removing air from your car’s coolant system, opening the radiator cap or coolant bleeder valve is an essential step. This allows any trapped air to escape from the system, ensuring that the coolant can flow freely and effectively cool the engine. But before you start, it’s important to let your engine cool down completely.
Opening a hot radiator cap can be dangerous and cause the coolant to spray out, potentially causing burns. Once your engine is cool, locate the radiator cap or coolant bleeder valve. The radiator cap is usually located on top of the radiator, while the bleeder valve can be found on the thermostat housing or near the radiator.
Carefully remove the radiator cap or loosen the bleeder valve to release any built-up pressure. This will also allow any trapped air to escape. It’s important to note that if your vehicle has a coolant bleeder valve, it’s best to use that instead of the radiator cap, as it prevents air from being drawn back into the system.
Once you’ve opened the radiator cap or coolant bleeder valve, you may hear a hissing sound as the air is released. Wait until this sound stops and any coolant or air bubbles have stopped coming out before moving on to the next step. Remember to always be cautious when working with the coolant system and follow your vehicle’s manufacturer instructions for safety precautions.
Step 4: Squeeze the upper radiator hose to remove air pockets
If you’re experiencing issues with your vehicle’s coolant system, such as overheating or a lack of heat in the cabin, it could be due to air pockets in the system. To resolve this problem, one important step is to squeeze the upper radiator hose to remove those air pockets. This process helps to ensure that coolant flows freely throughout the system, preventing any potential damage.
To begin, make sure your vehicle is cool and the engine is off. Locate the upper radiator hose, which is typically connected to the radiator cap. Gently squeeze and release the hose a few times.
This action helps to create pressure and force any trapped air out of the system. You may notice some air bubbles escaping from the radiator cap or coolant reservoir. Continue this process for a few minutes until you no longer see any air bubbles.
Once you’ve successfully removed the air pockets, you can then top off the coolant if needed and replace the radiator cap securely. Removing air from the coolant system is an essential step in maintaining the proper functioning of your vehicle. It helps to prevent overheating, which can lead to engine damage and costly repairs.
By regularly checking and addressing any air pockets in the system, you can ensure that your vehicle’s coolant is circulating efficiently and keeping your engine at an optimal temperature.
Step 5: Fill up the coolant reservoir and radiator
In this step-by-step guide, we will discuss how to remove air from the coolant system by filling up the coolant reservoir and radiator. It’s an essential part of maintaining your vehicle’s engine and ensuring it stays cool during operation. When air enters the coolant system, it can create pockets or bubbles that prevent the proper flow of coolant.
This can lead to overheating and potential damage to the engine. So, it’s important to remove any air from the system regularly. To begin, you will need to locate the coolant reservoir.
It is typically a translucent plastic tank located near the radiator. Check the owner’s manual if you are unsure about its location. Once you find it, remove the cap and check the coolant level.
If the level is low, you should start by adding a mixture of coolant and water to the reservoir. Follow the manufacturer’s recommendations for the appropriate coolant-to-water ratio. Next, you will need to locate the radiator cap.
It is usually located on top of the radiator. Before removing the cap, it’s crucial to ensure that the engine is cool. Opening the cap on a hot engine can cause the release of hot steam and coolant, which can lead to burns.
Once you are sure the engine is cool, remove the cap and set it aside. Now, it’s time to fill up the radiator. Slowly pour the coolant mixture into the radiator until it reaches the top.
Step 6: Start the engine and let it idle
coolant system, start the engine, let it idle
Step 7: Monitor the coolant level and temperature
Removing air from the coolant system can help prevent overheating and ensure that your engine runs smoothly. One important step in this process is to monitor the coolant level and temperature. As you remove air from the system, it’s essential to keep an eye on these two factors to ensure that everything is functioning properly.
First, check the coolant level in the radiator and overflow reservoir. If it’s low, add more coolant until it reaches the recommended level. Next, monitor the temperature gauge on your dashboard.
A rising temperature could indicate that there is still air trapped in the system or that there is another issue at hand. If the temperature starts to climb, it’s important to stop the vehicle and investigate the problem further. Remember, keeping a close eye on the coolant level and temperature will help you identify any potential issues and prevent them from causing further damage to your engine.
So, don’t overlook these crucial steps when removing air from your coolant system.
Step 8: Repeat the process if necessary
removing air from the coolant system, coolant system,maintaining optimal performance, reservoir, radiator, air bubbles, overheating, burp the system, top off the coolant, repeat the process In Step 8 of our step-by-step guide to removing air from the coolant system, we will address what to do if air bubbles persist after following the previous steps. Sometimes, even after burping the system and topping off the coolant, there may still be air trapped within the system. This can lead to continued overheating and decreased performance.
In these cases, it may be necessary to repeat the process to ensure all air is removed. Simply start from Step 1 and retrace your way through the steps outlined. This will help to ensure that any lingering air bubbles are released and the coolant system is completely free of air.
It’s important to remember that maintaining an air-free coolant system is crucial for the proper functioning of your vehicle, so don’t hesitate to repeat the process if needed. By taking the time to properly remove any trapped air, you can ensure that your vehicle runs smoothly and maintains optimal performance.
Preventing air from entering the coolant system
In order to prevent air from entering the coolant system of your vehicle, there are a few steps you can take. First, you will need to locate the bleeder valve on your radiator. This valve is usually found near the radiator cap.
Once you have located the valve, you will need to open it using a wrench or pliers. This will allow any trapped air in the system to escape. Next, you will need to fill the coolant system with a mixture of antifreeze and water.
It is important to use the correct ratio of antifreeze to water as specified by your vehicle’s manufacturer. You can find this information in your owner’s manual or by checking online. After you have filled the coolant system, you will need to start your engine and let it run for a few minutes.
This will help to circulate the coolant and remove any remaining air. Finally, you will need to check the coolant level and make sure it is at the correct level. You may need to add more coolant if necessary.
It is important to regularly check and maintain the coolant level in your vehicle to ensure it is working properly. By following these steps, you can help prevent air from entering your coolant system and keep your vehicle running smoothly.
Regular maintenance and inspections
One important aspect of regular maintenance for your vehicle is ensuring that no air enters the coolant system. Air in the coolant system can lead to serious issues and damage to your engine. To prevent this, it is crucial to regularly inspect and maintain your coolant system.
One common cause of air entering the coolant system is a leak in the radiator or hoses. Regularly check for signs of leaks, such as puddles of coolant under your vehicle or a low coolant level. If you notice any leaks, it is important to have them repaired as soon as possible to prevent air from entering the system.
Another potential cause of air in the coolant system is a faulty radiator cap. The radiator cap is designed to maintain pressure in the system and prevent air from entering. If the cap is not functioning properly, it may allow air to enter the system.
Inspect the cap regularly for signs of wear or damage, and replace it if necessary. By regularly inspecting and maintaining your coolant system, you can prevent air from entering and keep your engine running smoothly.
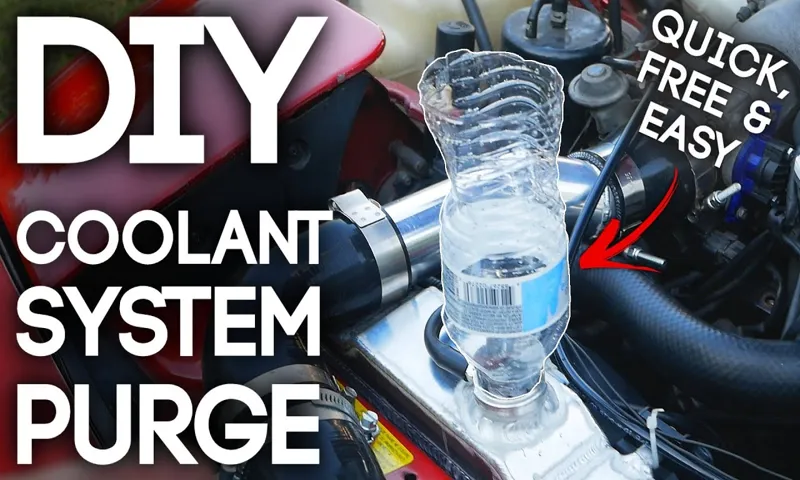
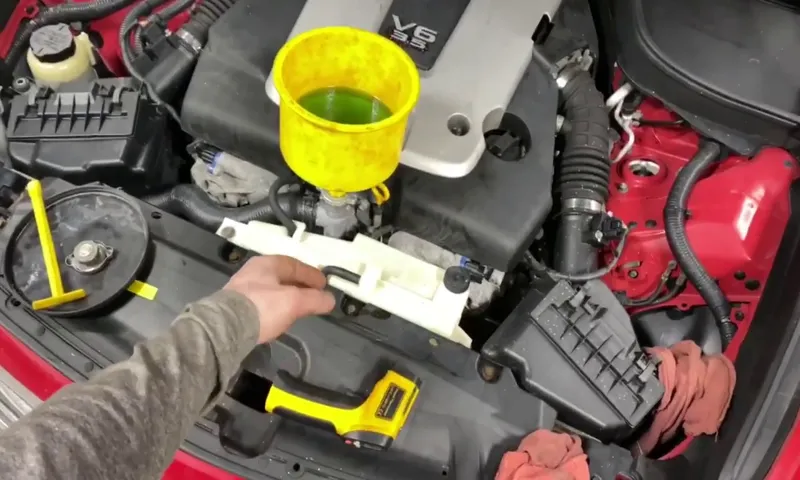
Using a coolant funnel
coolant funnel, preventing air, coolant system
Bleeding the system during coolant changes
When it comes to changing the coolant in your vehicle, it’s important to ensure that air doesn’t enter the system. This process, known as bleeding the system, helps maintain the efficiency and performance of your cooling system. Air bubbles in the coolant can obstruct the flow of coolant, leading to overheating and potential damage to your engine.
To prevent air from entering the system during coolant changes, it’s essential to follow a few simple steps. Firstly, make sure the vehicle is cool before starting the process. Then, locate the bleeder valve, which is usually situated near the radiator or engine block.
Open the valve slowly to release any air trapped in the system. As you open the valve, you may notice air and coolant mixture escaping. Once the air has been purged, close the valve tightly to prevent any further air from entering.
Remember to refill the coolant reservoir after bleeding the system to ensure the correct coolant level is maintained. By bleeding the system properly, you can keep your vehicle’s cooling system in optimal condition and avoid potential issues in the future.
Conclusion
So, there you have it – the art of removing air from your coolant system. It may seem like a simple task, but it is one that requires patience, precision, and a touch of cleverness. Just like a magician pulling a rabbit out of a hat, you too can make the air disappear from your coolant system with a few well-executed tricks.
Remember to start with a cool engine, have your tools and supplies ready, and most importantly, approach the task with a witty attitude. After all, it’s not just about removing air from your coolant system, it’s about embracing the opportunity to showcase your mechanical prowess and leaving your engine running smoothly and efficiently. So go ahead, master the art of air removal, and let your coolant system sing an ode to your cleverness.
And remember, just as every great performer needs an encore, make it a habit to check your coolant system periodically to ensure that air never gets a chance to steal the show again. Happy coolant system maintenance, fellow magicians of the mechanical arts!”
Removing air from the coolant system is essential for optimal engine performance and cooling. By following these steps and taking preventive measures, you can ensure your coolant system remains free from air and operates efficiently.
One of the most important factors in maintaining optimal engine performance and cooling is to prevent air from entering the coolant system. Air pockets in the coolant system can reduce the system’s efficiency, leading to overheating and potential damage to the engine. One way to prevent air from entering the coolant system is to regularly check the coolant level and top it up if necessary.
Additionally, it is important to check for any leaks in the coolant system, as air can enter through these leaks. Another preventive measure is to ensure that the coolant reservoir cap is tightly sealed to prevent air from seeping in. Regular maintenance, including flushing and replacing the coolant, can also help to prevent the formation of air pockets.
By taking these preventive measures, you can ensure that your coolant system remains free from air and operates efficiently, contributing to the optimal performance and cooling of your engine.
FAQs
What are the symptoms of air in the coolant system?
Symptoms of air in the coolant system include overheating, low coolant levels, coolant leaks, and a gurgling sound coming from the engine.
How does air enter the coolant system?
Air can enter the coolant system through a coolant leak, a faulty radiator cap, a damaged reservoir tank, or during maintenance procedures such as coolant flushes or engine repairs.
Can air in the coolant system damage the engine?
Yes, air in the coolant system can potentially damage the engine. It can lead to overheating, which can cause engine components to warp or crack, resulting in costly repairs.
How can I check if there is air in my coolant system?
You can check for air in the coolant system by inspecting the coolant level, looking for coolant leaks, and listening for any unusual sounds coming from the engine. Additionally, a professional mechanic can perform a coolant pressure test to determine if there is air in the system.
How do I remove air from my coolant system?
To remove air from the coolant system, you can use a coolant bleeder tool, which allows you to purge the air by releasing trapped air pockets. It is important to follow the manufacturer’s instructions or consult a professional mechanic for the best method to remove air from your specific vehicle’s coolant system.
Can I remove air from the coolant system without any special tools?
Yes, you can remove air from the coolant system without special tools. By allowing the engine to cool down, removing the radiator cap, and running the engine with the heater on full blast, you can sometimes release trapped air pockets. However, using a coolant bleeder tool is recommended for a more thorough air removal.
What should I do if I am unable to remove air from the coolant system?
If you are unable to remove air from the coolant system using traditional methods, it is recommended to seek assistance from a professional mechanic. They have specialized tools and knowledge to properly remove air and diagnose any underlying issues in the coolant system.