
Hey there! Have you ever wondered why bleeding air from the coolant system is so important? Well, let me break it down for you. Picture this: your car’s coolant system is like the lifeline of your engine, keeping it operating at optimum temperature and preventing it from overheating. But what happens when there’s air trapped in the system? It can cause all sorts of havoc, disrupting the flow of coolant and leading to potential damage.
You see, air pockets in the coolant system can hinder the circulation of coolant, preventing it from effectively absorbing and dissipating heat. This can result in an increase in engine temperature, potentially causing major issues like warped cylinder heads or blown gaskets. And trust me, you don’t want to deal with the headache and expense of repairing those.
That’s where bleeding air comes in. By bleeding the air from the coolant system, you ensure that there are no trapped air pockets that could compromise the proper functioning of your engine. It’s like releasing a pressure valve, allowing the coolant to flow freely and do its job of keeping your engine cool and happy.
Think of it this way: air trapped in the coolant system is like a rock in a river. It disrupts the natural flow, causing water to back up and potentially flood the surrounding area. Bleeding the air is like removing that rock, allowing the water to flow smoothly and avoiding any potential damage.
So, next time you notice your engine running a bit hotter than usual or your coolant levels dropping unexpectedly, don’t ignore it. Take the time to bleed the air from your coolant system and keep your engine running smoothly. Trust me, it’s a small but crucial step that can save you a lot of headaches down the road.
Table of Contents
- 1 Step 1: Identify if Bleeding is Necessary
- 2 Step 2: Gather the Required Tools and Materials
- 3 Step 3: Locate the Bleed Valve or Screw
- 4 Step 4: Prepare the Vehicle
- 5 Step 5: Open the Bleed Valve
- 6 Step 6: Start the Engine and Let it Idle
- 7 Step 7: Monitor the Coolant System
- 8 Step 8: Close the Bleed Valve
- 9 Step 9: Check for Leaks and Test the Cooling System
- 10 Conclusion
- 11 FAQs
Step 1: Identify if Bleeding is Necessary
Bleeding air from your coolant system may be necessary if you are experiencing problems like overheating or a loss of coolant. But before you dive into the process, it’s important to identify if bleeding is truly necessary. One way to determine if bleeding is needed is by checking for any signs of air bubbles or frothy coolant in your system.
This could indicate that air has entered the system and is preventing the proper flow of coolant. Additionally, if you notice that your engine is running hotter than usual or if your coolant levels are consistently low, it may be an indication that air needs to be bled from the system. It’s also important to consider if any recent work has been done on your coolant system, such as a radiator flush or the replacement of a coolant hose.
These procedures can introduce air into the system and may require bleeding to remove any trapped air. If you do decide that bleeding is necessary, it’s important to follow the specific instructions for your particular vehicle. In general, the process involves locating the bleed valve or screw, which is usually found on or near the radiator or coolant reservoir.
By opening this valve, you allow air to escape from the system while ensuring that coolant is flowing properly. Bleeding air from a coolant system can be a straightforward process, but it’s essential to take caution and follow the correct procedure for your vehicle. This will ensure that your engine stays cool, your coolant system functions properly, and you avoid any potential damage or overheating.
Checking for Warning Signs
checking for warning signs, bleeding In order to properly care for wounds and injuries, it’s important to know how to check for warning signs. One of the first steps in this process is to identify if bleeding is necessary. What does this mean exactly? Well, it’s all about assessing the severity of the bleeding.
Is it a minor scrape or is it a deep cut that requires medical attention? By evaluating the amount of blood and the rate at which it is flowing, you can determine if immediate action is needed. It’s important to note that some bleeding is normal and part of the body’s natural healing process. However, excessive bleeding that is difficult to stop or does not slow down after applying pressure may indicate a more serious injury.
In these cases, seeking medical help is recommended. So take a moment to assess the bleeding and determine if it’s necessary to take further steps to address the wound.
Checking the Coolant Level
coolant level, check coolant level, check coolant level car, coolant level low, low coolant level, engine coolant level, coolant level check, engine coolant level low, car coolant level, car engine coolant level. In the process of maintaining your car, it is essential to check the coolant level regularly. The coolant, also known as antifreeze, plays a crucial role in preventing your engine from overheating by absorbing and dissipating heat.
Insufficient coolant levels can result in engine damage and can affect the overall performance of your vehicle. So, how do you check the coolant level? The first step is to identify if bleeding is necessary. Bleeding the cooling system is crucial when there are air bubbles trapped in it.
These air bubbles can disrupt the circulation of coolant and hinder its effectiveness in maintaining the temperature of the engine. To check if bleeding is necessary, you can start by checking the level of coolant in the coolant reservoir. This reservoir is typically located near the radiator and has markings indicating the minimum and maximum levels of coolant.
If the coolant level is below the minimum mark, it is an indication that bleeding may be necessary. It is important to note that you should never attempt to open the radiator cap while the engine is hot, as the pressure can cause the hot coolant to spray out. Instead, wait until the engine has cooled down before opening the cap or checking the coolant level.
Remember, it’s better to be safe than sorry when it comes to maintaining your car’s coolant level.
Step 2: Gather the Required Tools and Materials
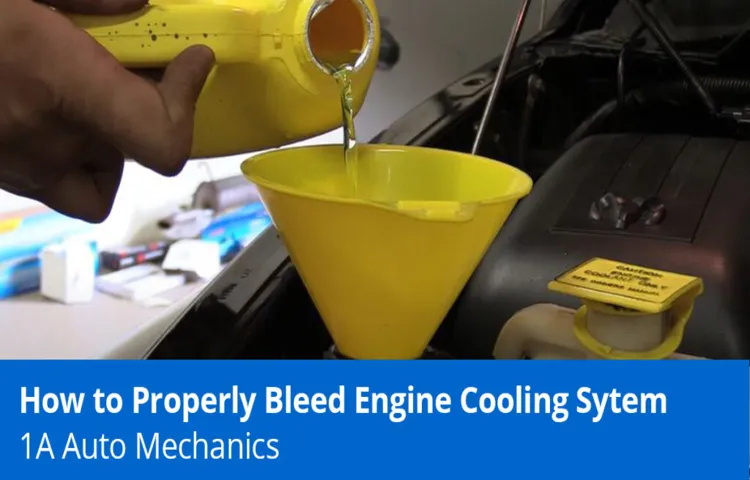
When it comes to bleeding air from your coolant system, you’ll need to gather a few tools and materials to get the job done. First and foremost, you’ll need a coolant system bleed kit. This kit typically includes a funnel and adapter that attaches to your radiator or coolant reservoir.
These tools are essential for creating a vacuum within the system, allowing the air to escape. Additionally, you’ll need a wrench or socket set to remove the radiator or reservoir cap. This will give you access to the coolant system and allow you to properly bleed the air.
It’s also a good idea to have a pair of gloves on hand to protect your hands from any spilled coolant. Lastly, make sure you have a container or bucket to catch any excess coolant that may spill during the bleeding process. With these tools and materials gathered, you’ll be ready to successfully bleed the air from your coolant system and keep your engine running smoothly.
What You Will Need
The second step in building your own wooden birdhouse is to gather all the necessary tools and materials. Before you begin this project, it’s important to make sure you have everything you need to complete the task. To get started, you will need a few basic tools, such as a hammer, a screwdriver, and a saw.
These will be used to measure, cut, and assemble the pieces of wood for your birdhouse. In addition to the tools, you will also need some specific materials, such as wooden boards, nails, and screws. The size and quantity of these materials will depend on the dimensions of the birdhouse you are building.
It’s always a good idea to have some extra wood and fasteners on hand in case you make any mistakes or need to make adjustments along the way. Once you have gathered all the tools and materials, you will be ready to move on to the next step in the process.
Safety Precautions
“Safety Precautions: Step 2: Gather the Required Tools and Materials” Now that you’ve decided to embark on a new DIY project, it’s important to prioritize your safety before diving right in. When it comes to DIY projects, having the right tools and materials is crucial. Not only will it make the project go smoother, but it will also ensure that you can complete it safely.
So, let’s discuss step 2: gathering the required tools and materials. Before you start shopping for tools and materials, take the time to research what you’ll need for your specific project. Consider the nature of the project, the materials you will be working with, and the tools that are necessary to complete the job.
Make a list to help you stay organized and ensure you don’t miss anything. Once you have your list, it’s time to gather your tools. If you already have some basic tools, such as a hammer, screwdriver, and tape measure, you’re off to a good start.
However, depending on the complexity of your project, you may need to invest in some additional tools. Consider borrowing or renting tools that you won’t use frequently to save some money. After gathering the necessary tools, it’s time to focus on the materials.
Whether you’re building a new piece of furniture or installing a new light fixture, make sure you have all the materials you need before you start. This includes things like wood, screws, nails, paint, and any other materials specific to your project. Remember, having the right tools and materials is not just about convenience; it’s about safety.
Using the wrong tools or materials can result in accidents and injuries. So, take the time to gather everything you need before you start your project. Your safety is worth it!
Step 3: Locate the Bleed Valve or Screw
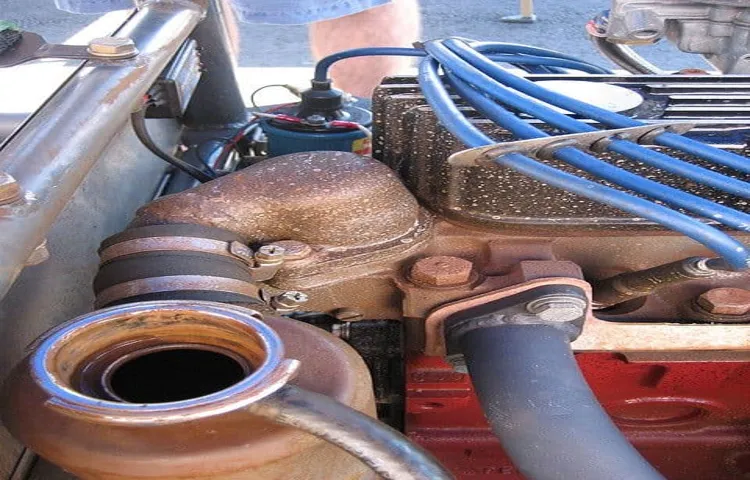
When it comes to bleeding air from the coolant system, it’s important to locate the bleed valve or screw. This valve or screw is typically found on the highest point of the system, such as the radiator or the cylinder head. It’s designed to release any trapped air from the coolant, ensuring that it circulates properly throughout the system.
Finding the bleed valve or screw may require referring to your vehicle’s manual or doing a quick online search for your specific make and model. Once you’ve located it, you can use a wrench or screwdriver to open it slightly, allowing the air to escape. Remember to have a container or towel ready to catch any coolant that may also be released during this process.
Bleeding the air from the coolant system is an important step in maintaining the proper functioning of your vehicle’s engine, so be sure to take the time to locate and properly bleed any air from the system.
Finding the Bleed Valve
bleed valve, locate, screw
Identifying the Bleed Screw
When it comes to bleeding your heating system, the first and most important step is to locate the bleed valve or screw. This is the key to releasing the trapped air from your radiators and ensuring your central heating system is working efficiently. The bleed valve is usually located at the top of your radiator, although it can also be found on the side.
Sometimes, it may be hidden behind a plastic cap or cover, so you may need to remove this to access the valve. Once you’ve located the valve, you’re ready to move on to the next step in the bleeding process.
Step 4: Prepare the Vehicle
Bleeding the air from your vehicle’s coolant system is an important step to maintaining the health and efficiency of your car’s engine. So, how do you go about doing this? Well, the first thing you need to do is prepare your vehicle. Make sure the engine is turned off and cool before you begin.
Next, locate the coolant reservoir, which is typically a plastic tank with a cap that says “coolant” or “antifreeze.” Open the cap and check the coolant level. If it’s low, you’ll need to add more coolant before bleeding the system.
Now, it’s time to move on to the next step.
Turn off the Engine
vehicle preparation, turning off the engine, vehicle safety. So you’ve arrived at your destination and it’s time to park your vehicle. Before you turn off the engine, there are a few things you should do to ensure the safety of your vehicle.
First, check your surroundings for any potential hazards such as pedestrians or other cars. This will help prevent any accidents or mishaps when you exit your vehicle. Next, make sure to put your vehicle in park and engage the parking brake.
This will prevent your car from rolling away while it’s parked. It’s also a good idea to turn off any accessories such as the radio or air conditioning before turning off the engine. This will help preserve your battery life and prevent any unnecessary drain on the electrical system.
Finally, double-check that all doors and windows are closed and locked before leaving your vehicle. This will help keep your vehicle secure and prevent any unauthorized access. Taking these steps to prepare your vehicle before turning off the engine will help ensure its safety and longevity.
Protect Yourself and the Work Area
Protect Yourself and the Work Area Step 4: Prepare the Vehicle Before starting any automotive work, it is crucial to make sure you are properly prepared and that the vehicle is in the optimal position for the job. Protecting yourself and the work area is essential to ensure a safe and efficient repair or maintenance task. To begin, it is wise to put on some safety gear.
Safety glasses, protective gloves, and sturdy footwear are all must-haves to shield yourself from any potential hazards. Additionally, wearing clothes that cover your arms and legs will provide an extra layer of protection. Next, it is essential to prepare the work area.
Clear out any unnecessary clutter and make sure the space is well-lit. This will make it easier to see what you’re doing and minimize the chances of tripping or damaging any tools or equipment. Once you’ve taken care of your own safety and the work area, it’s time to prepare the vehicle itself.
Start by parking the vehicle on a flat, level surface and engaging the parking brake. This will prevent the car from moving while you are working on it and ensure stability. Additionally, it is essential to read through the vehicle’s owner’s manual and familiarize yourself with the specific requirements for the repair or maintenance task you will be performing.
This will ensure that you have all the necessary tools and materials on hand and avoid any potential mistakes or delays. By taking the time to properly prepare both yourself and the work area, as well as the vehicle, you are setting yourself up for success. Not only will this help prevent accidents and injuries, but it will also make the job easier and more efficient.
Remember, safety should always be a top priority when working on vehicles.
Step 5: Open the Bleed Valve
So, you’ve successfully completed the previous steps of draining your coolant system, and now it’s time to move on to the final step: opening the bleed valve. This step is crucial in getting rid of any remaining air bubbles or pockets that may be trapped in the system. The bleed valve is usually located on top of the radiator or on one of the coolant hoses.
It’s a small valve that can be opened using a wrench or a pair of pliers. Before you start, make sure the engine is cool and the pressure has been released from the system. Once you’ve located the bleed valve, simply use the wrench or pliers to turn it counterclockwise.
As you do this, you’ll hear a hissing sound, which is the air being released from the system. It’s important to be careful not to release too much coolant while doing this. As you open the bleed valve, you may notice some bubbles or air escaping from the system.
This is completely normal and a sign that the bleeding process is working. Allow the air to escape until you see a steady stream of coolant coming out. Once you see a steady stream of coolant, it’s a good indication that all the air bubbles have been successfully bled from the system.
At this point, you can close the bleed valve by turning it clockwise with the wrench or pliers. And that’s it! You’ve successfully bled the air from your coolant system. This final step is important in ensuring that your coolant system is functioning properly and efficiently.
Remember to check your coolant levels and top up if necessary.
Loosening the Valve
“Loosening the Valve” is an essential step in the process of bleeding a radiator. Once the radiator key is inserted into the bleed valve, it’s time to open the valve and release the trapped air that is causing the radiator to not heat up properly. This step is crucial for allowing hot water to circulate freely through the radiator and ensure its efficient functioning.
By opening the valve, you are essentially opening the floodgates and creating a pathway for the air to escape, making room for the hot water to flow in smoothly. It’s like loosening a tightly closed jar lid to release the built-up pressure inside. So, go ahead and give that bleed valve a gentle twist, and let the air out!
Using a Bleeding Tool
bleeding tool, bleed valve When using a bleeding tool to remove air bubbles from a hydraulic system, the fifth step is to open the bleed valve. The bleed valve is located on the system and allows air or excess fluid to escape. It is important to open the bleed valve slowly to avoid any sudden pressure changes that could cause damage to the system or components.
By opening the bleed valve, you are creating a pathway for the air or fluid to be released, allowing the system to function properly. Just like opening a faucet to let water flow, the bleed valve is like the tap that releases the air from the hydraulic system. Once the valve is open, you can proceed with the bleeding process to ensure optimal performance of the system.
Step 6: Start the Engine and Let it Idle
Now that you’ve successfully refilled the coolant system and bled out any trapped air, it’s time to start the engine and let it idle. This is an important step in ensuring that your coolant system is functioning properly and that there are no more air bubbles in the system. To start the engine, turn the ignition key or press the start button.
Once the engine is running, let it idle for about 10-15 minutes. During this time, keep an eye on the temperature gauge to make sure it stays within the normal operating range. As the engine idles, the coolant will circulate through the system, helping to push out any remaining pockets of air.
You may hear gurgling or bubbling noises as the air is being pushed out through the radiator and coolant hoses – this is completely normal. If the temperature gauge starts to rise above the normal range or if you notice any leaks or abnormalities, turn off the engine immediately and check for any issues. It’s possible that there may still be air trapped in the system or that there is a problem with the cooling system that needs to be addressed.
Once the engine has been idled for the recommended time and you’re satisfied that everything is working as it should be, it’s time to take your vehicle for a test drive. Keep an eye on the temperature gauge and watch for any signs of overheating or coolant leaks. If everything looks good, congratulations – you’ve successfully bled the air from your coolant system! Remember, it’s always a good idea to consult your vehicle’s owner’s manual for specific instructions relating to your particular make and model.
And if you’re unsure or uncomfortable performing these tasks yourself, it’s best to consult a professional mechanic to ensure everything is done correctly.
Starting the Engine
Starting the engine of a car is the moment of truth. It’s like when you turn on a light switch and wait for the bulb to illuminate the room. But how exactly do you start a car engine? Well, the process is pretty straightforward.
Once you’re positioned in the driver’s seat with your foot on the brake pedal, you can insert the key into the ignition and turn it to the “start” position. Alternatively, if your car has a push-button start, you just have to press the button. This action will engage the starter motor, which is responsible for turning the engine over.
As you do this, you might hear a distinct sound, commonly known as the “crank.” It’s a good sign because it means the engine is getting ready to roar into action. After a few seconds of cranking, the engine should come to life, and you can release the key or button and let it idle.
Listening for Abnormal Sounds
abnormal sounds, start the engine, let it idle. When you start your car engine and let it idle, it’s important to listen for any abnormal sounds. These sounds can indicate potential problems that need to be addressed.
One common abnormal sound is a loud knocking noise, which could suggest issues with the engine’s bearings or connecting rods. Another sound to watch out for is a hissing noise, which could indicate a leak in the cooling system or a problem with the exhaust system. It’s also essential to listen for any grinding or whining noises, which could be a sign of transmission or power steering issues.
Additionally, pay attention to any squealing or screeching sounds, as these could be a result of worn-out belts or pulleys. Taking the time to listen for these abnormal sounds can help you catch problems early on and prevent further damage to your vehicle. So, the next time you start your car and let it idle, be sure to keep your ears open and address any abnormal noises promptly.
Step 7: Monitor the Coolant System
So, you’ve successfully completed the coolant system flush and refill. Great job! Now, it’s time to make sure there’s no air trapped in the system, which can lead to overheating and potential engine damage. Bleeding air from the coolant system is an essential step to ensure optimal performance and prevent any issues down the road.
To start, make sure your engine is cool before attempting to bleed the air. Locate the bleeder valve on the radiator or coolant reservoir. It’s usually a small valve with a screw cap.
If you’re not sure where it is, refer to your owner’s manual or consult a professional. Next, place a towel or rag beneath the valve to catch any escaping coolant. Slowly and carefully open the valve using a wrench or pliers.
As you open the valve, you’ll hear a hissing sound as the trapped air begins to escape. Allow the air to bleed out until you see a steady flow of coolant without any air bubbles. Once the air is bled, close the valve tightly.
Be careful not to overtighten, as this can damage the valve. Check the coolant level in the reservoir and add more if needed. Start the engine and let it run for at least 10 minutes, allowing the coolant to circulate and settle.
After running the engine, check the coolant level again and top up if necessary. Keep an eye on the temperature gauge and ensure it stays within the normal range. If you notice any issues or the gauge starts to rise, it may indicate a problem with the coolant system, and you should consult a professional for further inspection.
Keep an Eye on the Coolant Level
coolant level, coolant system, monitor coolant level
Observing the Coolant Flow
coolant flow, monitor coolant system
Step 8: Close the Bleed Valve
Now that you’ve successfully removed the air from your coolant system, it’s time to close the bleed valve. This is an important step to ensure that your system is functioning properly and no air is getting back in. To close the bleed valve, you’ll need a pair of pliers or a wrench, depending on the type of valve you have.
Start by placing the tool over the valve and turning it clockwise until it’s tightly closed. Make sure not to overtighten it, as this can damage the valve or cause leaks. Closing the bleed valve is crucial because it prevents any air from reentering the system and causing problems with your engine’s cooling efficiency.
If air is allowed to seep back in, it can lead to overheating and potentially serious damage to your engine. By following these step-by-step instructions and taking the time to properly bleed the air from your coolant system, you can ensure that your engine stays cool and runs smoothly. So, make sure to close that bleed valve tightly and get back on the road with confidence.
Shutting Off the Valve
“shutting off the valve” Once you have successfully bled the radiator and released any trapped air, it’s time to close the bleed valve and halt the flow of water. This last step is crucial for ensuring the proper functioning of your heating system. You don’t want any water leaking out or air sneaking back in, as this can lead to inefficient heating and potential damage.
Closing the bleed valve is a simple process that involves using a key or screwdriver to turn the valve clockwise until it is tightly closed. It’s important to make sure the valve is fully closed to prevent any leaks. Once the valve is closed, you can rest easy knowing that your radiator is operating at its best and keeping your home warm and comfortable.
Using a Wrench Correctly
“Using a Wrench Correctly” Step 8: Close the Bleed Valve Now that you have successfully loosened the bleed valve using the wrench, it’s time to move on to the next step – closing the bleed valve. This is an important step to ensure that the hydraulic system is properly sealed and no air or fluid leaks out. To close the bleed valve, you will need to use the wrench again.
Place the wrench over the bleed valve and apply gentle pressure in a clockwise direction. Make sure to turn the valve slowly and steadily to avoid any sudden movements that could cause damage to the valve or the surrounding components. As you turn the wrench, you may feel some resistance.
This is normal, as you are tightening the valve to seal it shut. Be sure to listen for any sounds or hissing noises that could indicate a leak. If you hear any unusual noises, stop immediately and check for any loose connections or damaged parts.
Once the bleed valve is closed, give it a final check to ensure that it is properly sealed. You can do this by gently tugging on the wrench in a counterclockwise direction. If the valve does not budge or show any signs of movement, it is securely closed.
Closing the bleed valve is a crucial step in the hydraulic system maintenance process. By ensuring that the valve is properly sealed, you can prevent any air or fluid leaks that could compromise the performance of the system. So take your time, use the wrench correctly, and close that bleed valve with confidence!
Step 9: Check for Leaks and Test the Cooling System
After completing the previous steps of flushing and refilling the coolant system, it is important to check for any leaks and properly bleed any air out of the system. Start by visually inspecting the hoses, connections, and radiator for any signs of coolant leakage. Even a small leak can lead to major problems down the road, so it’s crucial to locate and fix any issues before they worsen.
Next, it’s time to bleed the air from the coolant system. Air pockets can prevent the proper circulation of coolant, leading to engine overheating. To bleed the system, locate the coolant bleed valve, usually found near the highest point of the system, such as the thermostat housing or top of the radiator.
With the engine cool, slowly open the bleed valve using a wrench and allow the air to escape. As the air releases, you may see bubbles or hear a hissing sound. Keep the valve open until a steady stream of coolant is present, indicating that all the air has been removed.
Finally, close the bleed valve, top off the coolant if necessary, and make sure to recheck for any leaks. Properly bleeding the air from the coolant system will ensure optimal performance and prevent any potential overheating issues.
Inspecting for Leaks
One crucial step in maintaining a healthy car engine is checking for leaks and testing the cooling system. Leaks can cause significant damage to the engine if left unnoticed, so it’s important to inspect for any signs of leakage. Start by looking underneath the car for any puddles or stains on the ground.
This could indicate a leak in the radiator, water pump, or hoses. Next, open the hood and inspect the coolant level and color. The coolant should be at the appropriate level and have a vibrant color.
If it is low or discolored, there may be a leak. Additionally, check the radiator and hoses for any visible signs of leakage, such as wet spots or dripping coolant. If you notice any leaks, it’s crucial to address them immediately to prevent further damage to your engine.
Testing the Cooling System
cooling system test, check for leaks, cooling system testing, car maintenance, radiator leaks. In the ninth step of our comprehensive car maintenance guide, it’s time to take a closer look at your cooling system. This step is essential to ensure that your engine stays at the right temperature and doesn’t overheat.
One of the primary things you need to check for is leaks. Cooling system leaks can cause problems like decreased coolant levels and even engine damage. To check for leaks, carefully inspect all the hoses, connections, and the radiator itself.
Look for any signs of coolant dripping or pooling. Additionally, you can use a coolant pressure tester to pressurize the system and see if there are any leaks. This simple test can save you from potential headaches down the road.
So, put on your detective hat, grab your flashlight, and get to work examining your cooling system for any sneaky leaks!
Conclusion
And there you have it, a foolproof guide on how to bleed air from your coolant system! Remember, just like letting go of toxic relationships, getting rid of air bubbles in your coolant system is crucial for a healthier and smoother running engine. So, grab your tools, put on your mechanic hat, and prepare to conquer the air bubbles like a seasoned professional. Remember, a little patience and a lot of determination will go a long way in ensuring a cool and blissful ride.
Happy bleeding!”
FAQs
Why is it important to bleed air from the coolant system?
Bleeding air from the coolant system is important because trapped air can prevent the coolant from circulating properly and lead to overheating of the engine.
How do you know if there is air in the coolant system?
One way to tell if there is air in the coolant system is if the temperature gauge on your dashboard shows the engine is overheating. Other signs include coolant leaks, gurgling noises from the radiator, or fluctuating coolant levels.
Can I drive my car with air in the coolant system?
It is not recommended to drive your car with air in the coolant system, as it can lead to engine overheating and potentially cause serious damage to the engine.
How often should I bleed the air from the coolant system?
It is recommended to bleed the air from the coolant system whenever you replace coolant or perform any maintenance that involves draining the coolant.
What are the steps to bleed air from the coolant system?
The steps to bleed air from the coolant system may vary depending on the make and model of your vehicle, but generally involve locating the coolant bleeder valve, opening it, and allowing the air to escape while keeping the coolant reservoir topped up. Refer to your vehicle’s manual for specific instructions.
Can I bleed the air from the coolant system myself?
Yes, you can bleed the air from the coolant system yourself if you feel comfortable doing so. However, if you are unsure or not experienced in automotive maintenance, it is recommended to have a professional mechanic perform the task.
What should I do if bleeding the air from the coolant system doesn’t solve the overheating issue?
If bleeding the air from the coolant system doesn’t solve the overheating issue, it may indicate a bigger problem with the cooling system, such as a faulty water pump, radiator, or thermostat. It is recommended to have your vehicle inspected by a professional mechanic to determine the root cause of the issue.