
Hey there fellow car enthusiasts! Are you struggling with a sluggish engine or experiencing frequent overheating? It could be time to give your coolant system a little TLC. Maintaining your coolant system is essential to keeping your engine running smoothly and avoiding costly repairs down the line. In this blog post, we’ll walk you through the steps to properly purge your coolant system and help you maintain optimal engine performance.
So, grab your tools and get ready to rev up your car maintenance skills!
Table of Contents
Introduction
Are you experiencing issues with your coolant system and unsure of how to fix it? Don’t worry, we’re here to help you. In this blog post, we will guide you step-by-step on how to purge your coolant system. Purging the coolant system is essential for maintaining the optimal performance of your vehicle’s engine and preventing any potential damage.
Over time, air can become trapped in the coolant system, causing it to become less effective at dissipating heat. This can lead to engine overheating and potential damage. By learning how to properly purge the coolant system, you can ensure that your vehicle stays cool and runs smoothly.
So let’s get started on this important maintenance task for your vehicle.
Understanding the Importance of Purging the Coolant System
purging the coolant system, importance of purging the coolant system, coolant system maintenance, coolant system efficiency Introduction: Have you ever wondered why it’s important to purge the coolant system in your vehicle? Well, let me tell you, this seemingly small task plays a crucial role in maintaining the efficiency and longevity of your coolant system. Similar to how we need a clean and healthy circulatory system to function properly, your vehicle’s coolant system requires the same level of care. Purging the coolant system involves removing any trapped air pockets or contaminants that may hinder its performance.
In this blog post, we will explore the importance of purging the coolant system and how it can benefit your vehicle in the long run. So, let’s dive in!
Tools and Materials Needed
Tools and Materials Needed for a DIY Project When it comes to tackling a DIY project, having the right tools and materials is crucial for success. Whether you’re working on a small home improvement task or embarking on a larger project, having the right tools can make all the difference. So, what are the essential tools and materials you need for your DIY undertaking? Let’s break it down.
First and foremost, you’ll need a good set of basic hand tools. This includes items like a hammer, screwdrivers (both Phillips and flathead), a tape measure, a utility knife, and pliers. These tools are the building blocks of any toolbox and will come in handy for a wide variety of tasks.
In addition to hand tools, you’ll also need power tools for certain projects. A cordless drill is a must-have, as it can be used for drilling holes, driving screws, and even mixing paint or grout. Depending on the nature of your project, you may also need a jigsaw, circular saw, or angle grinder.
These power tools can make cutting and shaping materials much easier and more efficient. When it comes to materials, the specifics will depend on your project. However, there are a few basics that are always good to have on hand.
This includes a variety of screws, nails, and anchors, as well as different types of glue and adhesive. Sandpaper, paintbrushes, and rollers are also essential for any painting or finishing tasks. And don’t forget safety equipment like goggles, gloves, and a dust mask to protect yourself while working.
So, before you dive into your next DIY project, take some time to gather the necessary tools and materials. Having the right equipment will not only make your job easier, but it will also ensure that your finished project is of the highest quality. Happy DIYing!
Step 1: Preparing the Vehicle
Are you experiencing issues with your vehicle’s cooling system? It might be time to purge the coolant system. The first step in this process is to prepare the vehicle for the purge. Start by placing the vehicle on a flat surface and ensuring that the engine is completely cooled down.
Open the hood, locate the radiator cap, and carefully remove it. Be cautious as the coolant inside may still be hot. Next, locate the coolant drain plug, which is usually located at the bottom of the radiator.
Place a container underneath to catch the coolant as it drains out. Now it’s time to open the drain plug and allow the coolant to flow out completely. Once all the coolant has drained out, close the drain plug tightly and dispose of the old coolant properly.
This step is crucial in ensuring that the new coolant is effective in cooling your engine. With the vehicle prepared, you can move on to the next step in purging the coolant system.
Park the Vehicle in a Safe and Well-Ventilated Area
Preparing your vehicle for maintenance or repair work is an essential step to ensure safety and efficiency. The first step in this process is to park your vehicle in a safe and well-ventilated area. This is crucial because it provides a secure location where you can work without any distractions or hazards.
It’s important to choose a flat surface that is free from obstacles and traffic. This will allow you to maneuver around the vehicle easily and safely. Additionally, parking the vehicle in a well-ventilated area is vital to avoid inhaling any harmful fumes or gases that may be emitted during maintenance or repair work.
Good ventilation will help to disperse these substances and keep the air clean and breathable. So, before you begin any work on your vehicle, make sure to park it in a safe and well-ventilated area to ensure a smooth and safe maintenance or repair process.
Allow the Engine to Cool Down
“car engine overheating” When your car engine overheats, it’s important to take immediate action to prevent any further damage. One of the first steps you should take is to allow the engine to cool down. This can be done by turning off the engine and letting it sit for a while.
It’s important to remember not to open the hood right away, as the heat can cause steam and hot air to be released, which can be dangerous. Instead, give the engine some time to cool down naturally. This can take anywhere from 30 minutes to an hour, depending on the severity of the overheating.
During this time, you can take the opportunity to assess the situation and plan your next steps.
Step 2: Draining the Old Coolant
In order to properly purge your coolant system, you’ll need to start by draining the old coolant. This step is important because over time, coolant can become contaminated with dirt, debris, and other engine byproducts that can hinder its effectiveness. To drain the old coolant, you’ll first want to make sure your engine is cool to the touch.
Then locate the coolant drain valve, which is usually located at the bottom of the radiator. Open the drain valve and place a drain pan underneath to catch the coolant as it flows out. It’s important to remember to dispose of the old coolant responsibly, as it can be toxic to the environment.
Once all the old coolant has drained out, you can move on to the next step of purging your coolant system.
Locating the Drain Valve or Radiator Plug
When it comes to draining the old coolant from your radiator, the first step is locating the drain valve or radiator plug. This valve or plug is typically located at the bottom of the radiator. Some radiators have a drain valve that can be opened with a wrench, while others have a plug that can be removed by hand.
Once you have located the drain valve or plug, make sure you have a drain pan or bucket ready to catch the old coolant. Position the drain pan directly under the drain valve or plug to ensure that you catch all of the coolant as it drains out. Now it’s time to open the drain valve or remove the plug.
If you are using a wrench, turn it counterclockwise to loosen the valve. If you are removing a plug, simply unscrew it with your hand. Be prepared for some coolant to escape as soon as the valve or plug is loosened, so make sure the drain pan is in the right position.
Once the drain valve or plug is fully open, allow the old coolant to drain out completely. This may take a few minutes, so be patient. While the coolant is draining, it’s a good idea to inspect the coolant for any signs of contamination or debris.
If you notice any abnormalities, it may be a sign of a larger issue with your cooling system and it is recommended to have it checked by a professional. Once all of the old coolant has drained out, you can close the drain valve or replace the plug. Make sure it is tightened securely to prevent any leaks.
Now you are ready to move on to the next step in the coolant changing process. Remember, it’s important to follow the manufacturer’s instructions and safety precautions when draining old coolant from your radiator. Proper disposal of the old coolant is also important, as it can be toxic.
Positioning the Drain Pan
draining the old coolant
Opening the Drain Valve or Radiator Plug
The second step in the coolant draining process is opening the drain valve or radiator plug. This step is essential as it allows the old coolant to be released from the system. The drain valve or radiator plug is typically located at the bottom of the radiator.
However, it’s essential to consult your vehicle’s manual to locate it accurately. Once you find it, ensure you have a drain pan or bucket to collect the old coolant. Opening the valve or plug is relatively straightforward.
You can usually twist it counterclockwise by hand, but in some cases, you may need a wrench. Be prepared for the coolant to come flowing out, so make sure you’re wearing gloves and have a towel handy. It’s also important to note that the coolant can be hot, so exercise caution when handling it.
Once all the old coolant has drained out, you can proceed to the next step in the coolant changing process.
Allowing the Coolant to Fully Drain
In order to properly perform a coolant change, it’s crucial to allow the coolant to fully drain from the engine. This is the second step in the process and is essential for effectively removing all of the old coolant from the system. To start, you’ll need to locate the coolant drain plug, which is typically located at the bottom of the radiator.
Once you’ve identified the drain plug, place a drain pan underneath to catch any coolant that spills out. Next, carefully remove the drain plug and allow the coolant to drain completely. This might take a little time, so be patient and let gravity do its work.
While the coolant is draining, it’s a good idea to inspect the drain plug for any signs of damage or wear. If necessary, replace the drain plug before continuing with the coolant change. Once all of the coolant has drained out, you can move on to the next step of the process.
So, remember to allow the coolant to fully drain before proceeding to ensure a complete and successful coolant change.
Step 3: Flushing the System
One important step in maintaining your vehicle’s cooling system is to regularly purge the coolant system. Over time, coolant can become contaminated with debris, rust, and other contaminants that can hinder its effectiveness in keeping your engine cool. Flushing the system involves removing this old coolant and replacing it with fresh, clean coolant.
This process not only helps to remove these contaminants but also ensures that the coolant is working at its optimum level. So, how do you purge the coolant system? Well, it’s a relatively simple process that you can do yourself with a few basic tools. First, start by locating the coolant drain plug or petcock at the bottom of the radiator.
Place a container or bucket underneath to catch the old coolant as it drains out. Open the drain plug or petcock and let the coolant drain completely. Once all the coolant has been drained, close the drain plug or petcock and dispose of the old coolant properly.
Next, it’s time to refill the system with fresh coolant. Refer to your vehicle’s owner’s manual to determine the appropriate type and amount of coolant to use. Slowly pour the coolant into the radiator while keeping an eye on the coolant reservoir to ensure it stays at the proper level.
Once the radiator is filled, run the engine for a few minutes to allow the coolant to circulate throughout the system. Check the coolant level again and top it off if necessary. It’s important to note that purging the coolant system may vary depending on the make and model of your vehicle.
So, always consult your owner’s manual for specific instructions and guidelines. By taking the time to purge your coolant system regularly, you can ensure that your vehicle’s cooling system keeps your engine running cool and efficiently.
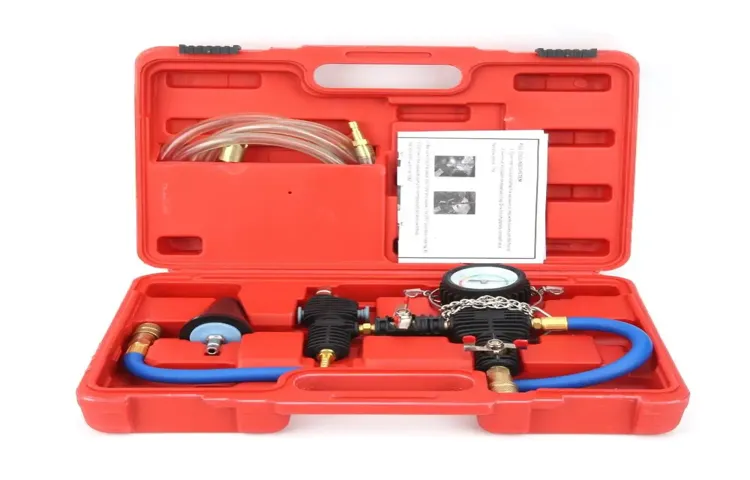
Connecting and Using a Flushing Kit
Flushing the system is a crucial step in maintaining the performance and longevity of your machine. Luckily, connecting and using a flushing kit is a relatively simple process. Once you have prepared your machine by removing any chemicals or cleaning solutions from the reservoir, it’s time to connect the flushing kit.
This kit typically consists of a set of hoses and fittings that attach to your machine. Follow the manufacturer’s instructions to ensure proper attachment and alignment. Once the kit is connected, it’s time to begin the flushing process.
This involves running a flushing solution through the system to remove any built-up residue or debris. The flushing solution should be added to the reservoir and then flushed through the entire system. This process may need to be repeated multiple times until the flushing solution runs clean.
Once you are satisfied with the results, carefully disconnect the kit and proceed with the final steps of cleaning and maintenance. Remember, proper flushing is essential for keeping your machine running smoothly, so don’t skip this step!
Flushing the System with Water
In the process of flushing out your cooling system, one key step is to make sure you effectively flush the system with water. This step helps to remove any built-up debris, sediment, or rust that may be contaminating your system and causing potential issues. Flushing the system with water is a crucial part of the maintenance process, as it ensures that your cooling system runs efficiently and effectively.
Think of it like giving your car a good cleaning – you wouldn’t want to drive around with a dirty, clogged engine now, would you? Flushing the system with water helps to clear out any gunk and build-up, allowing your cooling system to run smoothly and preventing any potential damage. So, when it comes to maintaining your cooling system, don’t forget to include the important step of flushing it out with water for optimal performance.
Running the Engine to Flush the System
engine flushing
Step 4: Replacing the Coolant
When it comes to maintaining your vehicle’s cooling system, one important step is to periodically replace the coolant. Over time, coolant can become contaminated with dirt, rust, and other debris, which can lead to inefficiencies and potential damage to your engine. To purge the coolant system and replace the old coolant with fresh fluid, start by locating the coolant drain valve under your vehicle.
Place a bucket or container under the valve to collect the old coolant as it drains out. Then, use a wrench to remove the valve cap and open the drain valve. Allow the coolant to drain completely before closing the valve and tightening the cap.
Next, locate the coolant reservoir and remove the cap. Using a funnel, slowly add the new coolant to the reservoir until it reaches the “Full” mark. It’s important to use the correct type of coolant recommended by your vehicle’s manufacturer.
Finally, start your engine and let it run for a few minutes to circulate the new coolant throughout the system. Check the coolant level again and top it off if necessary. By following these steps, you can effectively purge your coolant system and ensure your vehicle stays cool and running smoothly.
Choosing the Right Coolant for Your Vehicle
“Replacing the Coolant in Your Vehicle: A Step-by-Step Guide” So, you’ve chosen the right coolant for your vehicle, now it’s time to replace the old coolant with the new one. This step is crucial to maintain your vehicle’s performance and prevent overheating. Here’s a step-by-step guide to help you through the process.
First, make sure your engine is cool before you start. This is important to avoid any burns or injuries. Once the engine is cool, locate the radiator cap and remove it.
Be cautious as the coolant inside may still be hot. Next, find the drain plug at the bottom of the radiator. Place a container underneath to catch the old coolant.
Open the drain plug and let the coolant flow out. Make sure to dispose of the old coolant properly, as it is toxic to the environment. After draining the old coolant, close the drain plug securely.
Now it’s time to fill your radiator with the new coolant. Slowly pour the coolant into the radiator until it reaches the recommended level. Be careful not to overfill it.
Finally, replace the radiator cap and start your engine. Let it run for a few minutes to allow the coolant to circulate throughout the system. Check for any leaks or signs of overheating.
Refilling the Coolant Reservoir
“Replacing the coolant in your car is an essential maintenance task to keep your engine running smoothly. Step 4 of the process is refilling the coolant reservoir. Once you have drained the old coolant and closed the drain valve, it’s time to add fresh coolant to the system.
But before you do that, it’s important to make sure that the engine is cool to avoid any burns or accidents. You can wait for the engine to cool down naturally or use a rag to open the pressure cap slowly and release any remaining pressure. Once the engine is cool, locate the coolant reservoir and remove the cap.
This can usually be found near the radiator. Now, carefully pour the new coolant into the reservoir until it reaches the maximum fill line. Be sure to use the correct type of coolant recommended for your specific vehicle, as using the wrong one could cause damage.
After you have filled the reservoir, replace the cap and make sure it is securely tightened. And that’s it! You have successfully replaced the coolant in your car. Regularly replacing the coolant will help prevent your engine from overheating and keep it running efficiently.
“
Purging Air from the System
Purging air from the cooling system is a crucial step in maintaining the efficiency and performance of your car. Air pockets in the system can cause overheating and can lead to damage to the engine. To properly purge the air, you need to replace the coolant.
Coolant, also known as antifreeze, helps regulate the temperature in your engine and prevents it from freezing or boiling over. Over time, the coolant can become contaminated or lose its effectiveness, so it’s important to replace it regularly. When replacing the coolant, make sure to use the correct type and mix it with the right amount of water, as specified by your car’s manufacturer.
This will ensure that your engine stays cool and protected, prolonging its lifespan. So, don’t forget this important step in maintaining the health of your car’s cooling system!
Checking the Coolant Level
car coolant, replace coolant, checking coolant level, car maintenance, car coolant system, vehicle overheating, coolant reservoir, car engine cooling. The fourth step in replacing coolant is actually replacing the coolant itself. Once you have checked the coolant level and determined that it is low, it is important to replace it with fresh coolant to ensure that your car’s engine stays cool and running smoothly.
Replacing the coolant involves a few simple steps. First, make sure your car’s engine is cool before starting. Then, locate the coolant reservoir, which is usually a clear plastic tank with markings indicating the minimum and maximum levels.
Next, remove the cap from the coolant reservoir and carefully pour in the new coolant. Be sure to use the correct type of coolant recommended for your car. It’s a good idea to use a funnel to prevent spills and avoid getting coolant on any other engine components.
Once you have filled the coolant reservoir to the appropriate level, replace the cap and make sure it is secure. Lastly, start your car and let it run for a few minutes to allow the coolant to circulate through the system. This will help ensure that the coolant is properly distributed and that there are no leaks.
Regularly checking and replacing the coolant in your car is an important part of vehicle maintenance and can help prevent issues such as overheating and damage to the engine cooling system. By following these simple steps, you can easily replace the coolant in your car and keep your engine running cool.
Step 5: Testing for Proper Functioning
Once you have completed the steps of draining and refilling your coolant system, it is essential to test for proper functioning. This step ensures that your vehicle’s cooling system is operating at optimal levels and will help prevent any potential issues down the road. To test the effectiveness of your coolant system, you can start by visually inspecting the hoses, radiator, and water pump for any leaks or signs of damage.
Next, you can run your vehicle’s engine and monitor the temperature gauge to ensure it stays within the proper operating range. If the temperature rises too high, it could indicate a problem with the coolant system, such as a blockage or air pocket. In this case, you may need to repeat the purging process to remove any trapped air or debris.
Additionally, you can also check the coolant level in the reservoir to ensure it is at the recommended level. By carefully testing for proper functioning, you can have peace of mind knowing that your coolant system is in good working order, helping to protect your engine from overheating and potential damage.
Starting the Engine and Checking for Leaks
Starting the engine and checking for leaks is a crucial step in ensuring that your vehicle is functioning properly. Once you have completed the previous steps of preparing the engine and fuel line, it’s time to start the engine and see if any leaks are present. Before starting the engine, make sure all the connections are secure and the fuel line is properly attached.
Once you are ready, turn the ignition key and listen for the sound of the engine starting up. Pay close attention to any unusual noises or vibrations. Once the engine is running, check for any signs of fuel leaks.
Look for any wet spots or puddles under the vehicle and inspect the fuel lines and connections for any signs of leakage. If you notice any leaks, it’s important to address them immediately before continuing with the engine startup process. Leaking fuel can be a serious safety hazard and can lead to engine damage if not addressed promptly.
By carefully inspecting for leaks before starting the engine, you can catch and fix any issues before they become a major problem.
Observing the Coolant Temperature
coolant temperature, proper functioning, testing
Ensuring Proper Heat Distribution
heat distribution, proper functioning, testing, HVAC system Every homeowner wants their HVAC system to work properly, especially when it comes to heat distribution. After all, what good is a heating system if it can’t effectively warm up your home? That’s why testing for proper functioning is such an important step in ensuring the heat is evenly distributed throughout your living space. But how do you know if your HVAC system is working as it should? One way to test it is by using a thermometer.
Simply place the thermometer in different rooms of your home and compare the temperatures. If there are significant differences, it could be an indication that your HVAC system is not distributing heat evenly. Another way to test for proper functioning is by checking the airflow.
Are all the vents in your home blowing out warm air? If not, there could be a blockage or a malfunction that needs to be addressed. By testing for proper functioning, you can ensure that your HVAC system is working efficiently and effectively in distributing heat throughout your home.
Conclusion
In conclusion, purging the coolant system is like wringing out your car’s soaking wet socks after a long rainy drive. Just like hanging up soggy socks to dry, a properly purged coolant system ensures that your engine stays cool, dry, and ready for whatever adventures lie ahead. So go ahead, show your car some love by giving its coolant system a good ol’ purge.
Your engine will thank you, and you can finally enjoy the ride without any unwanted puddles along the way.
Maintaining Your Coolant System for Longevity and Performance
coolant system maintenance, testing coolant system, proper functioning cooling system Now that you’ve gone through the previous steps of maintaining your coolant system, it’s time to move on to testing for proper functioning. This step is crucial to ensuring that your coolant system is working efficiently and effectively in order to maximize the longevity and performance of your vehicle. One way to test for proper functioning is to check for any leaks in the system.
Leaks can lead to coolant loss, which can cause your engine to overheat and potentially cause serious damage. Inspect all the hoses, connections, and seals for any signs of leakage. If you notice any wet spots or puddles of coolant under your vehicle, it’s a clear indication that there is a leak that needs to be addressed.
Another important test to perform is checking the coolant levels. Low coolant levels can lead to overheating and engine damage. To check the coolant levels, make sure your engine is cool and locate the coolant reservoir.
The coolant level should be between the minimum and maximum markers on the reservoir. If it is below the minimum, you’ll need to add more coolant until it reaches the appropriate level. In addition to checking for leaks and coolant levels, you should also test the functionality of the thermostat.
The thermostat regulates the flow of coolant through your engine and controls the temperature. A malfunctioning thermostat can lead to overheating or inefficient cooling. To test the thermostat, start your engine and let it run until it reaches operating temperature.
Keep an eye on the temperature gauge to make sure it stays within the normal range. If the temperature continues to rise or fluctuate, it may indicate a problem with the thermostat that needs to be addressed. Lastly, it’s important to test the pressure of your coolant system.
FAQs
One common question that car owners often ask is how to purge the coolant system. Well, the process is actually quite simple. First, make sure that your car’s engine is cool and the radiator cap can be safely removed.
Then, locate the coolant drain valve, which is usually at the bottom of the radiator. Place a drain pan underneath the valve to catch the coolant as it drains. Next, open the valve and allow the coolant to fully drain out.
Once all of the coolant has been drained, close the valve and dispose of the old coolant properly. Finally, refill the system with fresh coolant, making sure to follow the manufacturer’s recommendations for the correct type and amount. And that’s it! You have successfully purged your car’s coolant system and ensured that it is running at its best.
What happens if I don’t purge my coolant system?
coolant system, flush coolant system, purge coolant system, consequences of not flushing coolant system, engine damage, overheating, corrosion, rust, clogs, reduced cooling efficiency
How often should the coolant system be purged?
“How often should the coolant system be purged?” When it comes to purging the coolant system, there is no set timeframe that applies to every situation. It really depends on the specific needs of your vehicle and the condition of the coolant. As a general guideline, it is recommended to have your coolant system flushed and purged every two years or every 30,000 miles, whichever comes first.
However, there are some signs that indicate the need for more frequent purging. For example, if you notice that your engine is overheating, if there are visible deposits or contaminants in the coolant, or if the coolant has a milky appearance, it is advisable to have the system purged as soon as possible. By purging the coolant system regularly, you can help to prevent overheating and maintain the efficiency of your vehicle’s cooling system.
FAQs
How does the coolant system get clogged?
The coolant system can get clogged due to a buildup of dirt, debris, or sediment in the radiator, hoses, or engine block. This can obstruct the flow of coolant and lead to overheating.
What are the signs of a coolant system problem?
Signs of a coolant system problem include engine overheating, a decrease in cooling performance, coolant leaks, low coolant levels, and a strong smell of coolant.
Can a clogged coolant system cause engine damage?
Yes, a clogged coolant system can cause engine damage. When the engine overheats due to poor cooling, it can result in warped cylinder heads, blown head gaskets, or even a cracked engine block.
How often should the coolant system be flushed?
It is recommended to flush the coolant system every 2 to 5 years or as specified in your vehicle’s maintenance schedule. This helps remove any contaminants and maintain optimal cooling performance.
How can I prevent coolant system clogs?
To prevent coolant system clogs, regular maintenance is essential. This includes checking coolant levels, inspecting hoses for leaks or cracks, flushing the system as recommended, and using the correct coolant for your vehicle.
Can I flush the coolant system myself?
Yes, you can flush the coolant system yourself, but it requires some basic knowledge and tools. It involves draining the old coolant, flushing the system with a flushing agent or distilled water, and refilling it with fresh coolant. It is advisable to consult your vehicle’s manual or seek professional help if you are unsure.
What are the steps to purge a coolant system properly?
The steps to properly purge a coolant system include ensuring the engine is cool, opening the radiator cap or coolant reservoir cap slowly, draining the old coolant, flushing the system if necessary, refilling it with a 50/50 mixture of coolant and distilled water, and burping the system to remove any trapped air bubbles. It is important to refer to your vehicle’s manual for specific instructions.
What can cause air pockets in the coolant system? A8. Air pockets in the coolant system can be caused by improper coolant replacement, a coolant leak, a faulty radiator cap, a malfunctioning thermostat, or a broken water pump.
Can I use tap water to fill the coolant system?
It is not recommended to use tap water to fill the coolant system as it may contain minerals and impurities that can cause corrosion or clogs. It is best to use distilled water to maintain the longevity and efficiency of the coolant system.
What type of coolant should I use for my coolant system?
The type of coolant you should use for your coolant system depends on your vehicle’s specifications. It is important to use the coolant recommended by the manufacturer, which could be either an ethylene glycol-based coolant or a propylene glycol-based coolant.
Can I use an additive to clean my coolant system?
Yes, you can use a coolant system additive to help clean and remove any deposits or contaminants. However, it is important to follow the instructions provided by the additive manufacturer and not exceed the recommended dosage. It is also advisable to consult a professional if you have any doubts.
How long does it take to purge a coolant system?
The time it takes to purge a coolant system can vary depending on the vehicle and its specific requirements. On average, it can take anywhere from 30 minutes to 1 hour. However, it is recommended to allocate enough time to ensure all steps are performed properly for optimal results.