

Do you know how to replace a coolant hose in your car? If not, don’t worry! In this blog post, we’ll walk you through the step-by-step process of replacing a coolant hose, so you can tackle this DIY project with confidence. Your car’s coolant system is crucial for keeping the engine cool and preventing overheating. The coolant hose plays a vital role in this system, carrying the coolant from the radiator to the engine and back again.
Over time, these hoses can wear out and develop leaks, which can lead to engine damage if not addressed. Replacing a coolant hose may seem like a daunting task, but with a little know-how and the right tools, you can do it yourself. We’ll guide you through each step, from identifying the faulty hose to installing the new one.
Think of it as giving your car’s cooling system a much-needed spa day. Just like a rejuvenating massage, replacing a coolant hose can keep your car running smoothly and prevent any mishaps on the road. So let’s dive in and get your car in top-notch shape!
Table of Contents
- 1 Introduction
- 2 Preparation
- 3 Step-by-Step Process
- 3.1 – Drain the coolant from the system
- 3.2 – Remove the clamps or connectors securing the hose
- 3.3 – Carefully detach the hose from the fittings
- 3.4 – Inspect and clean the fittings
- 3.5 – Install the new coolant hose
- 3.6 – Reattach the clamps or connectors to secure the hose
- 3.7 – Refill the coolant system
- 4 Tips and Precautions
- 5 Conclusion
- 6 FAQs
Introduction
If you’re experiencing a coolant hose leak or it’s time to replace your old hose, don’t worry! Replacing a coolant hose is actually a fairly simple task that you can do at home with just a few basic tools. The coolant hose is responsible for carrying the coolant from the radiator to the engine and back, so it’s an important component of your vehicle’s cooling system. Over time, the hose may become worn out, cracked, or even develop a leak, which can lead to overheating and engine damage.
To replace the coolant hose, start by allowing the engine to cool down completely. Then, locate the hose that needs to be replaced. Use pliers to loosen the hose clamps and slide them back.
Carefully remove the old hose, taking note of how it is positioned. Install the new hose by sliding it onto the fittings and tightening the clamps. Finally, check for any leaks and make sure the hose is secure.
Regularly inspecting and replacing coolant hoses as needed can help prevent costly engine damage and keep your vehicle running smoothly. So, don’t hesitate to tackle this simple maintenance task yourself and save some money in the process!
– Importance of replacing coolant hose
coolant hose, replacing coolant hose, importance of replacing coolant hose. Introduction: The coolant hose is an essential component of your vehicle’s cooling system. It helps circulate coolant or antifreeze throughout the engine to regulate its temperature and prevent overheating.
Over time, coolant hoses can become worn, cracked, or even start leaking. This can lead to coolant loss and potential engine damage if not addressed promptly. Therefore, it is crucial to understand the importance of replacing coolant hoses and the potential consequences of neglecting this maintenance task.
– Signs of a damaged coolant hose
damaged coolant hose, signs of a damaged coolant hose
Preparation
If you own a vehicle and want to take care of it properly, then replacing the coolant hose is a task you should be familiar with. The coolant hose is a crucial component of the cooling system, and if it becomes damaged or worn out, it can lead to overheating and engine damage. So, how do you replace a coolant hose? First of all, you’ll need to gather the necessary tools such as pliers, a socket set, and a hose clamp tool.
Then, you’ll want to drain the coolant from the system by loosening the drain plug on the radiator. Once the coolant is drained, you can start removing the old hose by loosening the hose clamps on either end. Be careful not to damage the hose or the connections as you remove it.
After the old hose is removed, you can install the new hose by sliding it onto the connections and tightening the hose clamps. Finally, refill the cooling system with fresh coolant and check for any leaks. By following these steps, you can easily replace a coolant hose and keep your vehicle running smoothly.
So don’t wait until it’s too late, take the time to replace your coolant hose and prevent any potential engine problems.
– Gather required tools and materials
preparation, gather required tools and materials, DIY project First and foremost, preparing for a DIY project requires gathering all the necessary tools and materials. It’s essential to have everything you need before starting to avoid any unnecessary delays or frustrations. Take the time to make a list of all the tools and materials required for your project and double-check it to ensure you haven’t missed anything.
Consider the nature of your project and determine what specific tools and materials will be needed. Are you building a bookshelf? Make sure you have a saw, hammer, drill, screws, and wood. Are you painting a room? You’ll need brushes, rollers, paint trays, and drop cloths.
Once you have a clear idea of what you need, gather all the tools and materials and have them organized in one place, ready to be used. By doing this, you’ll save time and ensure a smoother DIY experience.
– Park the car on a flat surface and let it cool down
car cooling down Once you’ve finished driving, it’s important to give your car some time to cool down before you do anything else. This is especially crucial if you’ve been driving for a long period or if you’ve been traveling at high speeds. Heat can cause serious damage to your engine, so it’s essential to let it cool down properly.
Find a flat surface to park your car on, preferably away from any heat sources like direct sunlight or hot pavement. This will help to prevent additional heat from building up in the engine compartment. Letting your car cool down also gives the oil and other fluids a chance to settle back to their normal levels, which is crucial for their proper functioning.
So take a few minutes, find a cool spot, and give your car the break it needs to cool down.
– Locate the coolant hose to be replaced
locate the coolant hose to be replaced
Step-by-Step Process
Replacing a coolant hose may seem like a daunting task, but with the right tools and a step-by-step process, it can be done easily. Firstly, locate the coolant hose that needs to be replaced. This can typically be found near the radiator and engine.
Next, drain the coolant by using a drain pan to catch any spillage. Once the coolant has been drained, use a pair of pliers to loosen the clamps that are holding the hose in place. Carefully remove the old hose and inspect it for any signs of damage or wear.
If necessary, clean the area where the hose will be attached to ensure a proper seal. Then, attach the new hose by sliding it onto the fitting and tightening the clamps securely. Once the hose is in place, refill the coolant reservoir with the appropriate mixture of coolant and water.
It’s important to follow the manufacturer’s instructions when filling the reservoir. Finally, start the engine and check for any leaks. If everything looks good, you’re all set! Remember to properly dispose of any old coolant and follow all safety precautions when working with coolant.
With a little patience and careful attention to detail, replacing a coolant hose can be a simple DIY job.
– Drain the coolant from the system
Draining the coolant from your vehicle’s cooling system is an essential step in performing maintenance or repairs. This task helps to ensure that the system remains efficient and prevents any potential damage from occurring. While it may seem daunting, the process is relatively straightforward and can be completed in a few simple steps.
First, locate the coolant drain plug, usually situated at the bottom of the radiator or on the engine block. Once you have identified the drain plug, place a container beneath it to catch the coolant as it flows out. Then, carefully loosen the drain plug, allowing the coolant to drain completely.
It is important to exercise caution as the coolant may still be hot and could cause burns. Once all the coolant has been drained, replace the drain plug and dispose of the old coolant properly. By following this step-by-step process, you can effectively drain the coolant from your vehicle’s cooling system and ensure it continues to function optimally.
– Remove the clamps or connectors securing the hose
When it comes time to replace a hose, you need to remove the clamps or connectors that are securing it in place. This step is essential to ensure a proper installation of the new hose. To do this, you will need to locate the clamps or connectors on either end of the hose and use the appropriate tool to loosen them.
In some cases, you may need pliers or a screwdriver to loosen the clamps, while other connectors may require a specific tool. Once the clamps or connectors are loose, you can carefully slide them away from the hose and set them aside. Be careful not to damage the hose or other components while removing the clamps or connectors.
With the clamps or connectors out of the way, you can proceed with replacing the hose with a new one. So, remember to remove the clamps or connectors securing the hose before proceeding with the replacement process.
– Carefully detach the hose from the fittings
“Now that you’ve disconnected the water supply and turned off the water main, it’s time to carefully detach the hose from the fittings. This step is crucial to ensure that you can safely remove the hose without causing any damage or leaks. Start by examining the fittings where the hose is connected.
Look for any screws or clamps that may be securing the hose in place. If you find any, use a screwdriver or pliers to loosen and remove them. Once the fittings are free, gently pull the hose away from them, being careful not to yank or twist it.
If the hose is stuck, you can use a lubricant or warm water to help loosen it. Remember, patience is key here. It may take a bit of time and effort to detach the hose, but it’s worth it to ensure a smooth and leak-free removal.
“
– Inspect and clean the fittings
fittings, inspect, clean, step-by-step process
– Install the new coolant hose
coolant hose installation, replacing coolant hose, DIY coolant hose replacement, step-by-step coolant hose installation process, tips for installing a new coolant hose
– Reattach the clamps or connectors to secure the hose
After inspecting and cleaning the hoses of your car, the next step in the process is to reattach the clamps or connectors to secure the hose. This is a crucial step as it ensures that the hose remains firmly in place and prevents any leaks or damage. Start by placing the hose back onto the fitting or connector, making sure it is properly aligned.
Then, use your hands or pliers to tighten the clamps around the hose, ensuring a snug fit. It’s important to not overtighten the clamps, as this can damage the hose or fitting. Once the clamps are securely in place, give the hose a gentle tug to ensure it is firmly attached.
If it doesn’t move, you can be confident that the hose is properly secured. Taking the time to reattach the clamps or connectors correctly will give you peace of mind knowing that your car’s hoses are secure and in good working condition.
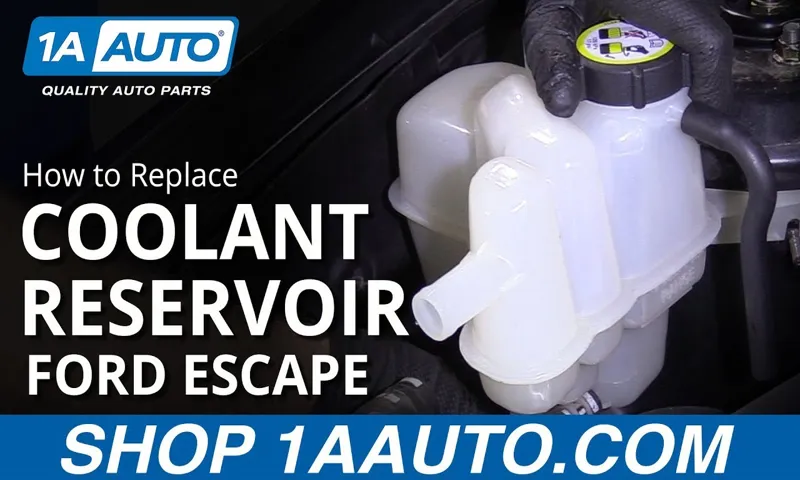
– Refill the coolant system
In the process of maintaining your vehicle’s coolant system, one important step is to refill the coolant. This task may seem daunting to some, but it doesn’t have to be. By following a step-by-step process, you can easily replenish the coolant and ensure your engine stays cool and protected.
First, make sure the engine is completely cool before you begin. This will prevent any potential burns caused by hot coolant. Next, locate the coolant reservoir, which is usually a clear plastic tank near the radiator.
Open the cap slowly to release any built-up pressure. Now, you can begin filling the coolant. Mix the coolant with water according to the manufacturer’s instructions, and pour it into the reservoir until it reaches the “full” line.
Be careful not to overfill. Finally, replace the cap securely, start the engine, and observe the coolant level. If necessary, add more coolant until it reaches the appropriate level.
By following these simple steps, you can successfully refill your coolant system and keep your engine running smoothly.
Tips and Precautions
If you’re experiencing a coolant leak or noticing your engine is running hot, it may be time to replace a coolant hose. Replacing a coolant hose is a relatively straightforward task, but there are a few tips and precautions to keep in mind. First and foremost, make sure the engine is cool before attempting any work on the coolant system.
Coolant can reach high temperatures and cause burns if handled improperly. Secondly, always check the condition of the hose clamps before removing the old hose. If the clamps are corroded or damaged, it’s a good idea to replace them as well.
When installing the new hose, ensure it is properly aligned and securely fastened. Finally, don’t forget to refill the coolant reservoir once the new hose is installed. Overall, replacing a coolant hose is a manageable DIY task, but it’s important to take the necessary precautions to ensure your safety and the longevity of your vehicle.
– Use proper safety equipment like gloves and goggles
“Tips and Precautions for Using Proper Safety Equipment” When it comes to any task that involves potential hazards, it is always important to prioritize safety. One of the key ways to ensure your safety is by using the proper safety equipment, such as gloves and goggles. Gloves can protect your hands from sharp objects, chemicals, or extreme temperatures, while goggles shield your eyes from harmful substances or flying debris.
Wearing these protective gears can prevent accidents and minimize the risk of injuries. To make the most out of your safety equipment, here are a few tips and precautions to keep in mind: Choose the right equipment: Make sure to select safety equipment that is suitable for the specific task at hand.
Different gloves offer different levels of protection, so be sure to choose the appropriate type for your needs. Similarly, goggles come in various styles, depending on the level of eye protection required.
Check for proper fit: Safety equipment should fit properly to provide optimal protection. Gloves that are either too tight or too loose can impede your dexterity and increase the risk of accidents. Likewise, ill-fitting goggles may not fully cover your eyes, leaving them vulnerable to potential hazards.
Inspect for damage: Before using your safety equipment, inspect them for any signs of damage or wear. Gloves with holes or tears should be replaced, as they may not effectively protect your hands.
Cracked or scratched goggles may compromise visibility and fail to shield your eyes adequately. Follow manufacturer’s instructions: Ensure you understand and follow the manufacturer’s instructions for using and maintaining your safety equipment.
– Follow manufacturer’s instructions for the new hose
When replacing a hose, it is important to follow the manufacturer’s instructions to ensure proper installation and optimal performance. The instructions provided by the manufacturer will give you specific details about how to properly connect the hose to your appliance or equipment. This may include details about sealing connections, tightening fittings, or using specific tools or materials.
By following these instructions, you can avoid potential leaks or damage to your equipment. Additionally, it is important to choose the right size and type of hose for your needs. Using a hose that is too small or not designed for your specific application can lead to poor performance or even damage to your equipment.
So, before purchasing a hose, make sure it is the correct size and type for your needs. Taking these precautions and following the manufacturer’s instructions will ensure that your new hose functions properly and lasts for a long time.
– Double-check all connections before starting the engine
Before starting the engine of your vehicle, it is crucial to double-check all the connections. This simple tip can prevent potential problems and ensure that your vehicle runs smoothly. By taking the time to examine the connections, you can identify any loose or faulty connections and make the necessary adjustments.
This is especially important when it comes to the battery connections. Loose or corroded battery connections can lead to starting issues and even electrical malfunctions in your vehicle. By ensuring that all connections are secure and in good condition, you can avoid unexpected breakdowns and maintain the overall health of your vehicle.
So, before you turn the key, don’t forget to give those connections a quick once-over to keep your engine running smoothly.
Conclusion
In conclusion, replacing a coolant hose can be a daunting task but with the right tools and a bit of know-how, you’ll be channeling your inner mechanic in no time. Remember, a failing hose can leave your engine feeling a little deflated, so don’t let it disrupt your smooth ride. Take charge, swap it out, and keep your coolant flowing like a cool breeze.
With this step-by-step guide, you’ll be the envy of all your car-savvy friends, who will be green with hose envy. So, tighten those clamps, secure those connections, and let your inner gearhead shine. Just remember, when it comes to replacing coolant hoses, it’s cool to be hot under the hood!”
– Importance of regular maintenance and inspection of coolant hoses
coolant hoses, regular maintenance, inspection, tips, precautions Paragraph: Regular maintenance and inspection of coolant hoses are critical for the overall health and performance of your vehicle. Neglecting these essential components can lead to major issues down the road, including overheating, engine damage, and costly repairs. To ensure the longevity of your coolant hoses, here are some tips and precautions to keep in mind.
Firstly, regularly check for any signs of wear or damage, such as cracks, bulges, or leaks. If you notice any issues, it’s crucial to replace the hoses immediately to prevent any potential failures. Secondly, make it a habit to inspect the hose clamps for tightness and security.
Loose or damaged clamps can cause coolant leaks and compromise the system’s effectiveness. Thirdly, take note of the age of your hoses and consider replacing them every 4-6 years or as recommended by the vehicle manufacturer. Lastly, always follow the manufacturer’s guidelines for coolant maintenance, as using the wrong type or mixing different coolant brands can lead to corrosion and premature failure.
By taking these simple yet important precautions, you can ensure that your coolant hoses are in good condition, minimizing the risk of unexpected breakdowns and costly repairs.
– Enjoy a well-functioning cooling system with a properly replaced coolant hose
cooling system, coolant hose, properly replaced, well-functioning
FAQs
What is a coolant hose?
A coolant hose is a rubber or plastic tube that carries coolant (or antifreeze) from the radiator to the engine and back.
Why would I need to replace a coolant hose?
Coolant hoses can deteriorate over time due to heat and chemical exposure, leading to leaks or cracks. Replacing a coolant hose is necessary when it becomes damaged or starts leaking coolant.
How do I know if my coolant hose needs replacing?
Signs that your coolant hose might need replacing include visible cracks, leaks, bulges, or a soft and spongy texture. It’s important to monitor your coolant levels regularly and check for any abnormalities.
Can I replace a coolant hose myself?
Yes, replacing a coolant hose is a relatively simple task that can be done by most car owners. However, it’s important to consult your car’s manual or seek professional advice if you’re unsure about the process.
How often should coolant hoses be replaced?
Coolant hoses typically have a lifespan of 4-5 years, depending on factors such as the type of coolant used and driving conditions. It’s recommended to inspect hoses regularly and replace them preventively before any signs of wear or damage occur.
What tools do I need to replace a coolant hose?
The tools needed to replace a coolant hose may include a pair of pliers, screwdriver, hose clamp, coolant, and a catch basin to collect any spilled coolant.
Are there different types of coolant hoses?
Yes, there are different types of coolant hoses available, including molded hoses, flexible hoses, and straight hoses. The specific type of coolant hose needed for your vehicle depends on the make, model, and engine specifications.