
Hey there! So, you’ve noticed a puddle of liquid under your car, and you suspect it might be a coolant leak. Don’t worry, you’ve come to the right place! Coolant leaks can be a common issue in vehicles, but it’s important to address them quickly to prevent further damage to your engine. Checking for a coolant leak doesn’t have to be a daunting task.
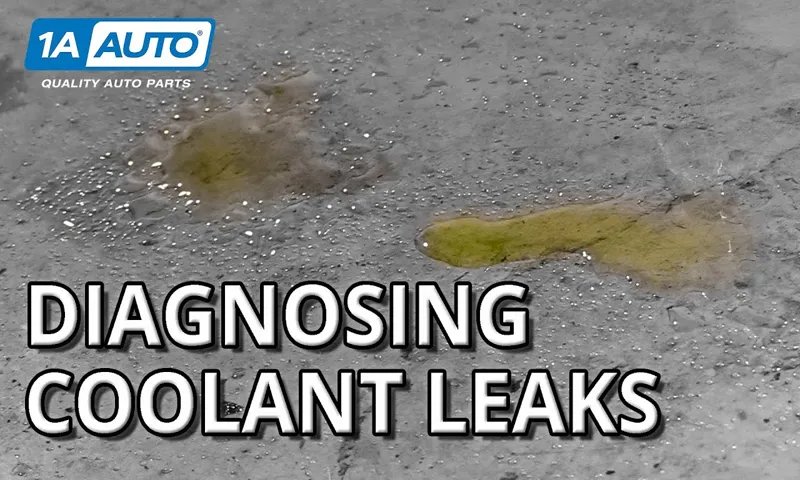
With a few simple steps, you can easily identify if your car is experiencing this problem. Think of it like playing detective – you’ll be searching for clues to solve the mystery of the leak! One of the easiest ways to check for a coolant leak is to inspect the ground underneath your car. Coolant is usually bright green or orange in color, so if you spot a puddle of liquid that matches this description, there’s a good chance it’s coolant.
Keep in mind that coolant can also be slimy or oily in texture, so take note of any unusual substances you come across. Another clue to look out for is an overheating engine. If your car’s temperature gauge is consistently higher than normal, it could be a sign of a coolant leak.
Coolant helps regulate the engine’s temperature, so a leak can cause the engine to overheat and potentially lead to serious damage if not addressed promptly. Additionally, pay attention to any sweet or pungent smell coming from your car. Coolant has a distinct odor, so if you catch a whiff of something unusual, it’s worth investigating further.
The smell may be particularly noticeable when the engine is hot or when you turn on the heater in your car. Now that you know what signs to look out for, it’s time to get down to business and inspect your car for a coolant leak. By finding and fixing the source of the leak, you’ll not only save yourself from costly repairs but also ensure the longevity of your vehicle.
Stay tuned for our next blog post where we’ll dive deeper into the process of checking for a coolant leak. We’ll provide you with step-by-step instructions and tips on what to do if you discover a leak. Remember, maintaining your car’s coolant system is essential for keeping your engine cool and running smoothly.
Table of Contents
Introduction
If you suspect that your car might have a coolant leak, it’s essential to address the issue promptly to prevent further damage to your engine. Checking for a coolant leak is a relatively straightforward process that you can do yourself. Start by looking under your car for any signs of a puddle or spot near the front or middle of the engine bay.
Coolant is usually green, pink, or orange, so keep an eye out for any fluid that matches these colors. Another way to check for a coolant leak is to inspect the radiator and hoses for any signs of leakage or damage. You may also want to check the coolant level in the reservoir and make sure it’s at the recommended level.
If you notice any of these signs, it’s best to get your car checked by a mechanic to determine the exact cause of the coolant leak. Remember, addressing the issue early can save you from costly repairs down the road.
Importance of Checking for Coolant Leak
coolant leak
Signs of Coolant Leak
coolant leak
Common Causes of Coolant Leak
coolant leak, common causes of coolant leak, engine overheating, radiator, water pump, heater core, radiator hoses, cracked cylinder head, engine block, radiator cap, malfunctioning thermostat. Introduction: Hey there, fellow car enthusiasts! Let’s talk about a common headache that many of us have faced at some point – a coolant leak. Nothing spoils your road trip plans faster than seeing that temperature gauge start creeping towards the red zone.
But fear not! In this article, we’ll explore some of the common causes of coolant leaks and how you can diagnose and fix them. So, grab a cup of coffee and let’s dive right in!
Tools Needed
If you suspect that you may have a coolant leak in your vehicle, it’s important to check for it as soon as possible. One of the easiest ways to do this is by using a few simple tools. First, you will need a flashlight to help you see into the nooks and crannies of your engine.
Next, you will need a clean white cloth or paper towel to wipe away any residue or moisture that you find. Keep in mind that coolant is usually bright and colorful, such as green, orange, or pink, so it should be relatively easy to spot. It’s also a good idea to have a pressure tester on hand, which will allow you to pressurize the cooling system and pinpoint the exact location of the leak.
By having these tools ready to go, you will be well-equipped to identify and fix any coolant leaks in your vehicle.
Flashlight
Flashlight, Tools Needed When it comes to basic tools that everyone should have, a flashlight is definitely at the top of the list. Whether you’re a homeowner, a DIY enthusiast, or just someone who wants to be prepared for emergencies, having a reliable flashlight is essential. But what tools do you need to make your flashlight even more effective and useful? Well, the good news is that you don’t need a lot of fancy gadgets or accessories to enhance your flashlight’s capabilities.
In fact, there are just a few key tools that can make a big difference. First and foremost, you’ll want to make sure you have a good set of extra batteries. After all, what good is a flashlight without power? Make sure to keep a supply of fresh batteries on hand, and be sure to check them regularly to ensure they’re still good.
Another tool that can come in handy is a battery tester. This simple device allows you to check the charge level of your batteries so you know when it’s time to replace them. It’s a small investment that can save you a lot of frustration in the long run.
Next, consider investing in a quality flashlight holster or sheath. This will allow you to easily carry your flashlight on your belt or in your pocket, keeping it accessible at all times. A holster also helps protect your flashlight from scratches or damage, ensuring it stays in good working condition.
Additionally, having a holster means you won’t have to fumble around in the dark when you need to use your flashlight quickly. Finally, consider adding a diffuser cone or wand to your flashlight. This simple accessory can transform your flashlight into a versatile tool, allowing you to use it for tasks like reading or camping.
The diffuser cone spreads out the beam of light, making it softer and more diffused. This can be particularly useful in situations where you don’t want a bright, focused beam of light. So there you have it – the tools you need to make your flashlight even more functional and versatile.
Coolant pressure tester
coolant pressure tester, tools needed. When it comes to maintaining and troubleshooting your vehicle’s cooling system, a coolant pressure tester is a must-have tool. This handy device allows you to check if your coolant system is holding pressure, which is important for preventing leaks and overheating issues.
But what tools do you need to use a coolant pressure tester? First and foremost, you’ll need the coolant pressure tester itself. This is a device that usually consists of a hand pump, a pressure gauge, and various adapters to fit different types of radiator caps. Make sure to choose a high-quality coolant pressure tester that is compatible with your vehicle’s cooling system.
Next, you’ll need a set of wrenches or pliers to remove the radiator cap. Most coolant pressure testers come with adapters that fit onto the radiator cap, so you’ll need to remove it before connecting the tester. A set of wrenches or pliers will help you easily remove the cap without causing any damage.
Additionally, you’ll need a coolant drain pan or container to catch any coolant that may be released during the pressure testing. This will help prevent any spills or messes. It’s important to dispose of coolant properly, as it is toxic to humans and animals.
Finally, you’ll need a basic understanding of your vehicle’s cooling system and the specific instructions for using the coolant pressure tester. This will ensure that you use the tool correctly and obtain accurate results. In conclusion, a coolant pressure tester is a valuable tool for maintaining and troubleshooting your vehicle’s cooling system.
By having the right tools, such as the coolant pressure tester itself, wrenches or pliers, a coolant drain pan, and a basic understanding of your vehicle’s cooling system, you’ll be well-equipped to diagnose and address any potential issues with your coolant system. So, make sure to have these tools on hand and keep your vehicle running smoothly.
Safety goggles
safety goggles, tools needed When it comes to working with tools and machinery, safety should always be a top priority. One essential tool that should be included in any DIYer or handyman’s arsenal is a pair of safety goggles. These goggles, often made of durable and impact-resistant materials, are designed to protect your eyes from dust, debris, and other hazards that can cause serious damage.
Whether you’re using power tools, working with chemicals, or even just doing some light gardening, safety goggles are a must-have. They provide a barrier between your eyes and any potential dangers, ensuring that you can work with peace of mind. So, the next time you pick up a tool, don’t forget to grab your trusty pair of safety goggles.
Your eyes will thank you for it!”
Gloves
gloves, tools needed
Step-by-Step Guide
Have you noticed that your car’s engine temperature is rising or your coolant level is getting lower? These could be signs of a coolant leak. Checking for a coolant leak is an important step in maintaining the health of your vehicle’s engine. Luckily, it’s a simple process that you can do yourself.
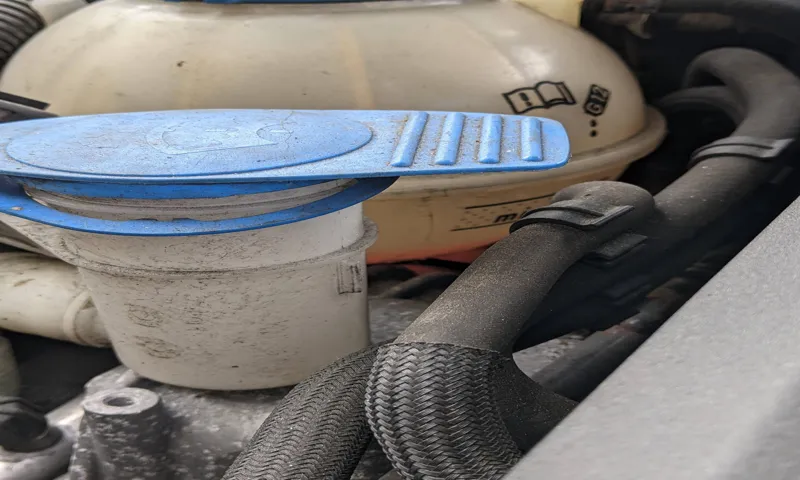
To begin, make sure your engine is cool and the car is parked on level ground. Pop the hood and locate the radiator and coolant reservoir. The coolant reservoir can usually be found near the front of the engine compartment and is a translucent plastic container.
Take a close look at the reservoir to see if there are any visible signs of leakage, such as wet spots or dried coolant. Next, check around the radiator and the hoses connected to it. Look for any drips, puddles, or wet spots that could indicate a leak.
If you don’t see any obvious signs of leakage, you can also check the condition of your coolant by removing the radiator cap (only when the engine is cool) and inspecting the color and consistency. If the coolant appears muddy or has oil or debris floating in it, this could be a sign of a coolant leak. In this case, it’s best to bring your car to a professional mechanic for further inspection and repair.
Checking for a coolant leak on a regular basis can help prevent costly engine damage and keep your car running smoothly. So, take a few minutes to inspect your coolant system and ensure your vehicle’s performance and longevity.
Park the car on a flat surface
“Park the car on a flat surface” is one of the important steps that we often overlook when it comes to parking our vehicles. Whether you’re a seasoned driver or just starting out, it’s crucial to park your car on a level ground to avoid any mishaps or damage. So, how do you go about parking on a flat surface? Let’s break it down in a step-by-step guide.
Firstly, look for a level area to park your car. This could be a driveway, parking lot, or even the side of the road. It’s important to choose a spot that is not on an incline or decline as it can affect the stability of your vehicle.
Once you have found a suitable spot, come to a complete stop and engage the parking brake. This will ensure that your car stays in place even if the surface is not completely flat. Next, shift your car into park if it has an automatic transmission or neutral if it has a manual transmission.
This will prevent your car from accidentally rolling forward or backward. After that, turn off the engine and remove the key from the ignition. This step is important as it will prevent any accidental acceleration or movement of the car.
Finally, double-check that your car is securely parked on the flat surface. Take a look at the wheels to ensure that they are not tilted or leaning in any direction. If needed, you can also use wheel chocks or blocks to further secure your car in place.
By following these simple steps, you can easily park your car on a flat surface without any worries. Remember, parking properly not only prevents accidents but also keeps your car in good condition. So, take the time to find a level spot and ensure that your car is securely parked.
Allow the engine to cool down
Allowing the engine to cool down is an important step that should not be overlooked. After a long drive or intense usage, the engine can become extremely hot. It is crucial to give it some time to cool down before you start working on any repairs or maintenance.
Just like our bodies need time to rest and recover after a workout, engines need time to cool down and get back to their optimal operating temperature. This is because excessive heat can cause damage to the engine components, leading to costly repairs. So, the next time you notice your engine running hot, remember to give it some time to cool down before attempting any repairs or maintenance.
Trust me, your engine will thank you for it!
Inspect the radiator
“radiator inspection” When it comes to keeping your car running smoothly, one important aspect to check regularly is the radiator. The radiator is responsible for regulating the temperature of your engine, making sure it doesn’t overheat. To ensure your radiator is in good working order, it’s crucial to conduct regular inspections.
To start, let’s take a look at the radiator itself. Is it clean and free of debris? Over time, leaves, dust, and other particles can collect on the surface, obstructing airflow. If you notice any buildup, it’s important to clean it off gently to restore proper cooling efficiency.
Next, examine the radiator fins. These thin metal pieces are responsible for dissipating heat from the coolant. Inspect them carefully for any signs of damage or bending.
Even a small bend can impact the radiator’s ability to cool effectively. If you notice any issues, you may need to straighten the fins using a fin comb or seek professional assistance. Moving on, check the radiator hoses for any leaks or cracks.
These hoses are crucial for transporting coolant between the radiator and the engine. Look for signs of wear and tear, such as bulging or soft spots. If you notice any leaks or damage, it’s essential to replace the hoses promptly to prevent coolant loss and potential overheating.
Lastly, inspect the radiator cap. This might seem like a small detail, but it plays a significant role in maintaining pressure within the cooling system. A damaged or loose radiator cap can cause coolant leaks and result in engine overheating.
Check for coolant stains or puddles
In order to ensure that your vehicle is functioning properly, it’s important to regularly check for any coolant stains or puddles. Coolant is a vital component for your car’s engine, as it helps to regulate its temperature and prevent overheating. If you notice any stains or puddles underneath your car, it could be a sign that there is a coolant leak.
Coolant leaks can lead to serious engine damage if left unchecked, so it’s important to address the issue as soon as possible. To check for coolant stains or puddles, you can simply look underneath your car in the area where the coolant tank is located. If you see any wet spots or signs of dripping, it’s a clear indication that there is a leak.
It’s important to note that coolant stains can sometimes be difficult to spot, especially if they are small or if they have already dried up. In these cases, it’s a good idea to use a flashlight or a mirror to get a better look. By regularly checking for coolant stains or puddles, you can catch any leaks early on and prevent further damage to your engine.
Inspect the radiator hoses
In this step-by-step guide, we’ll explore the importance of inspecting your radiator hoses. Your radiator plays a crucial role in keeping your engine cool and preventing it from overheating. The radiator hoses are responsible for carrying coolant to and from the engine, ensuring that it stays at an optimal temperature.
Over time, these hoses can deteriorate and develop cracks or leaks, which can lead to coolant loss and engine damage. By inspecting your radiator hoses regularly, you can identify any potential issues and address them before they become major problems. So, let’s dive in and learn how to inspect your radiator hoses effectively.
Examine the water pump
water pump, inspect, troubleshoot, maintenance, signs of damage, potential problems, fix, replacement, professional assistance. Examine the water pump Step-by-Step Guide: Hey there, DIY enthusiasts! Today, we’re going to dive into one of the most crucial components of your plumbing system: the water pump. As a homeowner, it’s essential to know how to inspect and troubleshoot your water pump regularly to ensure it’s in good working condition.
After all, this piece of equipment is responsible for pumping water throughout your home, supplying water for your daily needs. The first step is to locate your water pump. In most cases, you’ll find it in the basement or a utility room.
Once you’ve found it, the next thing to do is give it a visual inspection. Look for any signs of damage, such as leaks, rust, or unusual noises. These could be potential problems that need immediate attention.
Next, it’s time to test your water pump. Turn on a faucet and observe the water pressure. If it’s fluctuating or weak, it may indicate a problem with the pump.
Also, check the water pressure gauge if you have one. It should read within the recommended range. If it’s too low or too high, it could be a sign that your water pump isn’t functioning correctly.
If you’ve noticed any issues during the inspection and testing process, it’s crucial not to ignore them. Water pump problems can worsen over time and lead to more significant issues with your plumbing system. Instead, it’s recommended to fix the problem promptly or consult a professional for assistance.
Check the heater core
heater core Are you experiencing problems with your car’s heating system? One of the potential culprits could be a faulty heater core. The heater core plays a crucial role in keeping your car warm during those chilly winter months. It acts like a small radiator, allowing hot coolant from the engine to flow through it.
As air passes through the heater core, it gets heated up and then directed into the cabin, warming up the interior. If your heater is blowing cold air or has reduced airflow, it’s time to check the heater core. In this step-by-step guide, we’ll walk you through the process of checking the heater core to help you diagnose the issue.
Inspect the head gasket
head gasket, inspect, car maintenance, engine, signs of damage, oil leaks, coolant leaks, overheating Are you experiencing engine troubles or notice strange noises coming from under the hood? It may be time to inspect your head gasket. A head gasket is a crucial component of your engine that seals the cylinder head to the engine block, preventing oil and coolant from mixing and maintaining proper compression. Over time, the head gasket can become worn or damaged, leading to leaks that can result in overheating and costly repairs.
To inspect your head gasket, start by checking for signs of damage. Look for any oil leaks, coolant leaks, or white smoke coming from the exhaust pipe. These could all be indicators of a faulty head gasket.
Additionally, keep an eye on the temperature gauge as overheating can also be a sign of head gasket problems. If you notice any of these signs, it’s important to address the issue promptly to avoid further damage to your engine. Whether you’re a DIY enthusiast or prefer to leave car maintenance to the professionals, inspecting your head gasket is an essential step in ensuring the longevity and performance of your vehicle.
Conclusion
So there you have it, a clever and witty explanation on how to check for a coolant leak. Remember, a coolant leak can be a sneaky little devil, but armed with the right tools and knowledge, you can outsmart it and keep your engine running cool. Just remember, if it’s a hot mess under your hood, it’s time to get your Sherlock Holmes hat on and start investigating.
Happy leaking, or should I say, happy fixing!”
Importance of Regular Coolant Leak Checks
coolant leak checks, regular coolant leak, importance of coolant leak checks, step-by-step guide, coolant system, checking coolant level, checking for coolant leaks, signs of coolant leaks, checking for coolant residue, checking for rust or corrosion, inspecting hoses and connections, using a pressure tester
Taking Action to Fix Coolant Leak
Taking Action to Fix Coolant Leak If you’ve noticed a puddle of coolant under your car or seen the temperature gauge rising, it’s likely that you have a coolant leak. This can be a serious issue, as coolant is responsible for keeping your engine at the right temperature and preventing overheating. Luckily, fixing a coolant leak is something you can tackle on your own with a little know-how and some basic tools.
Let’s break down the step-by-step process to help you fix this problem and get back on the road safely. Step 1: Locate the Leak The first thing you need to do is find the source of the coolant leak. Start by inspecting the radiator, hoses, water pump, and radiator cap.
Look for any signs of moisture, corrosion, or damage. If you can’t find the leak visually, you may need to use a pressure tester to help locate it. Step 2: Prepare for Repairs Once you’ve located the leak, it’s time to gather the tools and materials you’ll need.
These typically include a wrench or socket set, replacement hoses or gaskets, a bucket or drain pan, and of course, coolant. Make sure you have everything ready before you start the repair process. Step 3: Drain the Coolant Before you can fix the leak, you’ll need to drain the coolant from your car.
Start by placing the bucket or drain pan underneath the radiator drain valve. Open the valve and allow the coolant to drain completely. It’s important to properly dispose of the old coolant according to local regulations.
Step 4: Repair the Leak After draining the coolant, it’s time to fix the leak. The specific repair method will depend on the source of the leak. If it’s a hose that is leaking, you’ll need to remove the clamps, disconnect the hose, and replace it with a new one.
FAQs
How can I check for a coolant leak in my car?
To check for a coolant leak in your car, start by inspecting the ground underneath your vehicle for any puddles or stains. You can also check the coolant reservoir to see if the level is lower than usual. Additionally, look for any signs of coolant leakage around the radiator, hoses, water pump, and heater core. If you notice a sweet smell or white smoke coming from the exhaust, these could also be indicators of a coolant leak.
What are the common causes of a coolant leak?
There are several common causes of a coolant leak in a car. Some of these include a cracked radiator, a damaged or worn-out hose, a faulty water pump, a leaking head gasket, a heater core leak, or a loose or damaged coolant reservoir cap. It’s important to address the cause of the coolant leak promptly to prevent engine overheating and potential damage.
Can I drive my car with a coolant leak?
It is generally not recommended to drive your car with a coolant leak. Coolant helps regulate the temperature of the engine, and driving with a coolant leak can cause the engine to overheat. This can lead to further damage to the engine and potentially leave you stranded on the side of the road. It’s best to have the coolant leak repaired before driving the vehicle.
How much does it cost to fix a coolant leak?
The cost of fixing a coolant leak can vary depending on the cause of the leak and the make and model of your car. Repairing a coolant leak can involve replacing a cracked radiator, repairing or replacing hoses, or fixing a faulty water pump or head gasket. The cost can range from a relatively inexpensive hose replacement to a more expensive radiator replacement. It’s best to consult with a qualified mechanic for an accurate estimate.
How do I prevent coolant leaks in my car?
To prevent coolant leaks in your car, it’s important to maintain your cooling system regularly. This includes checking the coolant level and condition, inspecting hoses and connections for signs of wear or damage, and ensuring that the cooling system is flushed and filled with the recommended coolant at the specified intervals. It’s also important to address any coolant leaks promptly to prevent further damage to the engine.
Can I use a coolant leak sealant to fix a coolant leak?
While there are coolant leak sealants available on the market, it is not recommended to rely solely on these products to fix a coolant leak. Coolant leak sealants are temporary solutions and may not address the underlying cause of the leak. It’s best to have a qualified mechanic inspect and repair the coolant leak to ensure a proper and long-lasting fix.
How long does it take to repair a coolant leak in a car?
The time it takes to repair a coolant leak in a car can vary depending on the cause of the leak and the extent of the damage. Simple repairs, such as replacing a hose or tightening a connection, can be completed relatively quickly. However, more complex repairs, such as replacing a radiator or fixing a head gasket, can take longer. It’s best to consult with a mechanic to get an estimate of the repair time for your specific situation.