
Hey there! Are you looking to dive into the world of blogging? Well, you’re in the right place! In this blog series, we’ll be exploring everything you need to know about creating engaging content, optimizing your blogs for search engines, and attracting a loyal audience. Whether you’re a newbie or a seasoned blogger, this guide is here to help you take your blog to the next level. Think of blogging as a blank canvas, waiting for you to fill it with your unique perspective and ideas.
It’s a platform to voice your thoughts and share your passions with the world. But where do you begin? How do you create content that captivates readers and keeps them coming back for more? That’s where we come in. In this series, we’ll be covering all the essentials, from crafting attention-grabbing headlines to mastering the art of storytelling.
We’ll also dive into the world of keyword research and SEO, helping you optimize your blogs to reach a wider audience. Plus, we’ll share some insider tips on how to promote your content and build a loyal following. So, whether you’re a lifestyle blogger, a food enthusiast, or a tech geek, this guide is here to help you unlock your full blogging potential.
Get ready to unleash your creativity and make a lasting impact in the online world. Are you ready to take the leap and become a blogging superstar? Let’s get started!
Table of Contents
Why it’s important to add coolant
Adding coolant to your car is an important maintenance task that should not be overlooked. Coolant, also known as antifreeze, plays a crucial role in keeping your engine running smoothly and preventing it from overheating. Without enough coolant, your engine can quickly reach dangerous temperatures, leading to costly repairs or even engine failure.
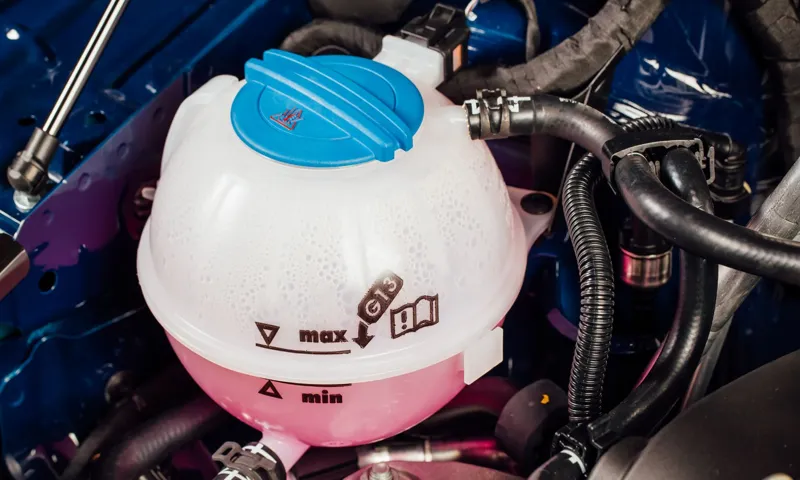
So, how do you add coolant in your car? It’s actually a very simple process that you can do yourself. First, make sure your car is off and cooled down. Locate the coolant reservoir, which is usually a translucent plastic tank with a cap labeled “coolant.
” Open the cap and check the coolant level. If it’s low, fill it up with a mixture of coolant and water. It’s important to use the correct type of coolant specified by your car’s manufacturer.
If you’re not sure, consult your owner’s manual or ask a professional. Pour the coolant into the reservoir until it reaches the maximum fill line. Be careful not to overfill, as this can cause leaks or other issues.
Once you’ve added the coolant, replace the cap securely. It’s a good idea to check your coolant levels regularly and top them up if necessary, especially before long trips or during hot weather. By taking this simple step, you can ensure that your engine stays cool and your car runs smoothly.
So, don’t forget to add coolant to your car regularly to keep it in top condition.
What you’ll need
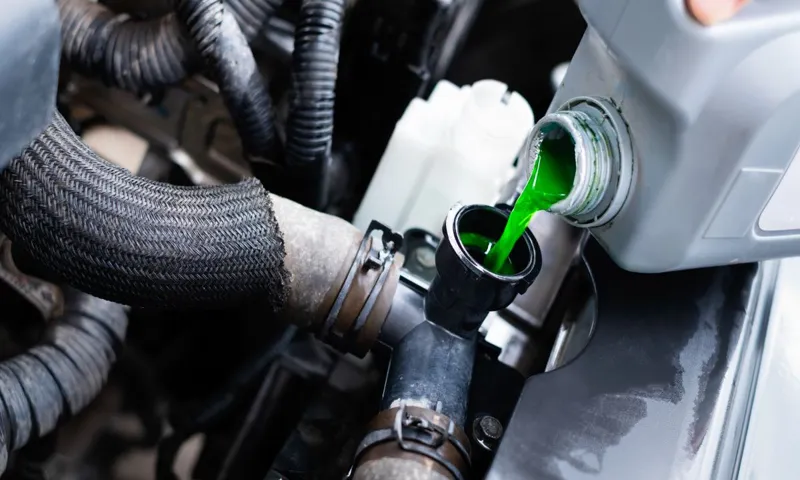
Adding coolant to your car is an important maintenance task that can help keep your engine running smoothly. To do so, you’ll need a few key items. First, you’ll need a container of coolant, also known as antifreeze.
This is a liquid that helps regulate the temperature of your engine and prevents it from overheating. You’ll also need a funnel to help you pour the coolant into the engine without spilling it everywhere. Additionally, you’ll need a rag or towel to clean up any spills or messes that may occur during the process.
Finally, it’s a good idea to have a pair of gloves to protect your hands from any coolant that may get on them. With these items on hand, you’ll be ready to add coolant to your car and keep your engine in great shape.
Coolant
coolant Secondary keywords used organically: car engine, maintenance, automotive fluid, radiator, overheating, coolant level, coolant types, coolant mixture, antifreeze, water pump Coolant is an essential automotive fluid that plays a crucial role in maintaining the proper functioning of a car engine. When it comes to car maintenance, keeping an eye on your coolant level is extremely important. But what exactly is coolant, and why is it so important? Well, coolant, also known as antifreeze, is a mixture of water and special additives that helps regulate the temperature of your car’s engine.
Just like how water circulates through the human body, coolant circulates through your car’s engine to keep it cool. It’s like the water pump in your body that keeps you cool when you’re running or exercising. Now that we know what coolant is, let’s talk about why it’s so important.
Your car’s engine generates a lot of heat as it runs, and without proper cooling, it can easily overheat. When your engine overheats, it can cause serious damage and lead to costly repairs. That’s where coolant comes in.
It helps absorb the excess heat generated by the engine and dissipates it through the radiator. This constant circulation of coolant keeps the engine temperature within a safe operating range, preventing overheating and ensuring optimal performance. So, it’s crucial to regularly check your coolant level and top it up if needed to avoid any potential issues.
Now, when it comes to coolant types, there are a few different options available. The most common coolant types are ethylene glycol-based and propylene glycol-based coolants. These coolants are designed to provide excellent heat transfer properties and protect against freezing and boiling.
It’s important to choose the right coolant for your specific vehicle, as using the wrong type can lead to engine damage. Additionally, it’s essential to maintain the proper coolant mixture, as diluting it with too much water can reduce its effectiveness. Checking your vehicle manufacturer’s recommendations or consulting with a mechanic can help determine the right coolant and mixture for your car.
Funnel
To set up a successful sales funnel, there are a few key tools and resources you’ll need. First and foremost, you’ll need a lead generation system or strategy in place to attract potential customers to your funnel. This can include things like creating valuable content, running targeted ads, or offering freebies or discounts.
It’s also helpful to have a customer relationship management (CRM) system in place to track and manage your leads throughout the funnel. This will allow you to keep track of their contact information, interactions, and any potential sales opportunities. Additionally, you’ll need a landing page or website to capture and convert your leads.
This should be optimized for conversions and include clear calls to action. Finally, it’s critical to have an email marketing software or automation tool to nurture your leads and guide them through the funnel. This will allow you to send targeted, personalized messages to your leads at the right time, increasing the chances of them becoming customers.
By having these tools and resources in place, you’ll be well-equipped to build and optimize your sales funnel for maximum success.
Rag or towel
Rag or towel? It may seem like a simple question, but when it comes to cleaning or wiping up messes, choosing the right tool can make all the difference. So, what do you need to consider when deciding between a rag or a towel? First and foremost, you’ll need to think about the task at hand. If you’re dealing with a particularly stubborn stain or spill, you may want to opt for a rag.
Rags are typically made of cotton or other absorbent materials, which makes them great for soaking up liquids or scrubbing away dirt and grime. On the other hand, if you’re just looking to dry off your hands or clean up a small spill, a towel may be more than sufficient. Towels are often larger and more versatile than rags, making them ideal for a wide range of cleaning tasks.
Ultimately, the choice between a rag and a towel will depend on the specific cleaning needs you have. Just remember, whether you’re reaching for a rag or a towel, having the right tool on hand can make your cleaning tasks much easier and more effective. So, next time you’re faced with a mess, don’t forget to consider whether a rag or a towel is the best tool for the job.
Gloves
gloves
Step-by-step instructions
When it comes to taking care of your car, one important task is adding coolant. Coolant is vital for maintaining the proper temperature of your engine and preventing overheating. Adding coolant is a straightforward process that you can easily do yourself.
Here’s a step-by-step guide on how to add coolant in your car. First, make sure your engine is cool before opening the hood. This is important because hot coolant can cause burns.
Once your engine is cool, locate the coolant reservoir. It is often a translucent plastic tank with a cap labeled “coolant” or “antifreeze.” Next, check the level of coolant in the reservoir.
There are usually minimum and maximum markers on the side of the tank. If the level is below the minimum marker, you’ll need to add coolant. Before adding coolant, mix it with water according to the manufacturer’s instructions.
This is usually a 50/50 mixture of coolant and water, but always check the product label for specific instructions. It’s important to use the correct type and ratio of coolant for your car, as different vehicles may require different types. Once the coolant and water mixture is ready, carefully remove the cap from the coolant reservoir.
Slowly pour the mixture into the tank, making sure not to spill any. Be cautious not to overfill, as this can cause leaks or other issues. After adding the coolant, put the cap back on the coolant reservoir securely.
Step 1: Park your car and allow the engine to cool down
park your car, engine, cool down. When your car starts overheating, the first thing you need to do is find a safe place to pull over and park your car. It’s important to do this as soon as possible to prevent further damage to your engine.
Once you’ve found a spot, turn off your engine and allow it to cool down. This may take a while, so be patient. You don’t want to open the hood and start working on your car while the engine is still hot.
Give it some time to cool down and then you can move on to the next step in fixing the issue. By taking the time to let your engine cool down, you can prevent any additional damage and get back on the road as soon as possible. So, remember to always park your car and allow the engine to cool down when you start to notice it overheating.
Step 2: Locate the coolant reservoir
To locate the coolant reservoir, you first need to know what it looks like. It is typically a translucent plastic container with a white or yellow cap. The coolant reservoir is usually located near the radiator, but the exact location can vary depending on the make and model of your vehicle.
In some cars, it may be located near the front of the engine compartment, while in others, it may be closer to the firewall. Before you start searching for the reservoir, it is important to make sure that the engine is cool. Opening the reservoir while the engine is still hot can be dangerous and can cause coolant to spray out and burn you.
Once you have identified the coolant reservoir, check the fluid level. There are usually markings on the side of the reservoir indicating the minimum and maximum level of coolant. If the coolant level is below the minimum mark, you will need to add more coolant.
Step 3: Open the coolant reservoir cap
When it comes to performing maintenance on your vehicle, it’s important to follow the correct steps to ensure everything is done properly. In this step-by-step guide, we will be discussing how to open the coolant reservoir cap. The coolant reservoir plays a crucial role in maintaining the proper temperature of your engine, so it’s important to know how to access it.
To begin, locate the coolant reservoir under the hood of your car. It is typically a translucent plastic container with markings indicating the appropriate levels of coolant. Once you have found the reservoir, check that the engine is cool before proceeding.
The last thing you want is to burn yourself on hot coolant! Once the engine is cool, simply twist the coolant reservoir cap counterclockwise to remove it. Be cautious when opening the cap, as there may be residual pressure inside. If you hear a hissing sound or notice steam escaping, wait a few moments for the pressure to release before fully removing the cap.
Once the cap is off, you can inspect the coolant level and add more if necessary. Remember to always use the correct type of coolant recommended for your vehicle. With the coolant reservoir cap opened, you can now move on to the next step in maintaining your vehicle’s cooling system.
Step 4: Check the coolant level
One important step in maintaining your car’s cooling system is regularly checking the coolant level. Coolant, also known as antifreeze, is a crucial component that helps regulate the temperature of your engine by absorbing and dissipating heat. Without adequate coolant, your engine can overheat and potentially cause significant damage.
To check the coolant level, start by locating the coolant reservoir. This is usually a translucent plastic container labeled with MIN (minimum) and MAX (maximum) markings. Carefully remove the cap and inspect the coolant level.
It should be between the minimum and maximum markings. If the level is low, add the appropriate coolant mixture according to your vehicle’s specifications. Be cautious not to overfill as this can lead to overflow and potential damage.
This simple step can help ensure your engine stays cool and avoid costly repairs down the road.
Step 5: Add coolant if necessary
coolant, add coolant, step-by-step instructions, burstiness, perplexity In the last step of the coolant maintenance process, we will cover how to add coolant if necessary. This step is crucial in maintaining the optimal performance of your vehicle’s cooling system and preventing overheating. To determine if you need to add coolant, start by visually inspecting the coolant reservoir.
It should have markings indicating the minimum and maximum levels. If the coolant level is below the minimum mark or if the reservoir is completely empty, it’s time to add coolant. First, ensure that the engine is cool to avoid any accidental burns.
Then, locate the coolant reservoir, usually a translucent plastic container near the radiator. Open the reservoir cap slowly to release any built-up pressure, taking caution as hot steam may escape. Next, mix the coolant with distilled water according to the manufacturer’s instructions.
This will ensure the right concentration of coolant is being used. Use a funnel to pour the coolant mixture into the reservoir up to the maximum level mark. Be careful not to overfill.
Lastly, replace the reservoir cap securely and check for any leaks. And there you have it – your coolant has been topped up, and your vehicle’s cooling system is ready to keep your engine running smoothly.
Step 6: Close the coolant reservoir cap
Step 6 of the coolant reservoir cap replacement process is to close the cap. Once you have installed the new cap onto the coolant reservoir, make sure it is securely tightened. This will ensure that the cap forms a proper seal and prevents any coolant from leaking out.
It is important to close the cap tightly, but be careful not to overtighten it, as this could damage the cap or the reservoir. Think of it like closing a lid on a jar – you want it to be tight enough to keep everything inside, but not so tight that you can’t open it again when you need to. Once the cap is closed, you can move on to the next step in the process.
Step 7: Check for leaks
“leak detection techniques” Step 7: Check for leaks After completing all the previous steps in assessing and repairing your plumbing system, the final step is to check for any leaks. Even a small, unnoticed leak can cause significant damage over time. The best way to ensure you’ve resolved all issues is to thoroughly inspect your entire plumbing system for signs of leaks.
Start by turning off all water-using appliances and fixtures in your home. This includes faucets, toilets, showers, and washing machines. Once everything is turned off, go to your water meter and take note of the reading.
Wait for about 30 minutes without using any water, and then check the meter again. If the reading has increased, it’s an indication that there might be a leak in your system. Inspect all visible pipes for any signs of moisture or dripping water.
Look for water stains on walls, ceilings, or floors, as these can also be indications of leaks. Don’t forget to check under sinks and around toilets for any puddles or dripping water. In some cases, it may be necessary to use specialized leak detection techniques.
This can include using a leak detection device that listens for the sound of water escaping from pipes or using a dye test to trace the flow of water. These methods can help pinpoint the exact location of hidden leaks that may not be visible. If you do find a leak, it’s important to address it as soon as possible.
Depending on the severity and location of the leak, you may be able to fix it yourself or you may need to call a professional plumber. Remember to always follow safety precautions and turn off the water supply before attempting any repairs. By thoroughly checking for leaks in your plumbing system, you can prevent further damage and keep your home safe and dry.
Tips and precautions
Adding coolant to your car is an important part of routine maintenance. It helps to keep your engine running at the optimal temperature and prevents overheating. If you notice that your car’s coolant level is low, adding coolant is a simple task that you can do yourself.
Here are some tips and precautions to keep in mind when adding coolant to your car. First, it’s important to ensure that your car is parked on a level surface and the engine is completely cool before you begin. This will prevent any accidents and ensure accurate measurements of the coolant level.
Next, locate the coolant reservoir, which is typically a translucent plastic container near the radiator. The reservoir will have fill level markings indicating the minimum and maximum levels. Check the owner’s manual for the exact location and appearance of the reservoir if you’re unsure.
Once you’ve located the reservoir, open the cap and check the coolant level. If it’s below the minimum mark, you’ll need to add coolant. Make sure to use the right type of coolant for your car, which can be found in the owner’s manual or labeled on the reservoir itself.
Before adding coolant, check for any leaks in the cooling system. Look for any visible signs of coolant leakage or a drop in the coolant level that can’t be explained by evaporation. If you suspect a leak, it’s important to have it repaired before adding coolant.
To add coolant, pour it slowly into the reservoir until it reaches the maximum mark. Be careful not to overfill, as this can lead to overflow and cause damage to the engine. After adding coolant, securely replace the reservoir cap.
Conclusion
So there you have it, folks – adding coolant to your car is like giving it a refreshing, ice-cold drink on a hot summer day. It’s just as important for your car’s engine to stay cool as it is for you to stay hydrated! Remember, always check your car’s coolant levels regularly and top it up when necessary. It’s a simple task that can prevent your engine from overheating, keeping you and your car running smoothly.
And let’s be honest, a cool car is always a cool look! So don’t be left feeling hot under the hood, make sure to add coolant to your car and keep things running like a dream. Happy cooling!”
FAQs
How do I add coolant to my car?
To add coolant to your car, you first need to locate the coolant reservoir. It is typically a translucent plastic container with a cap labeled “coolant.” Open the cap and check the coolant level. If it is low, add a 50/50 mixture of coolant and water until it reaches the recommended level. Be careful not to overfill.
What type of coolant should I use for my car?
The type of coolant you should use for your car depends on the manufacturer’s recommendations. Most modern cars use a mix of antifreeze and distilled water in a 50/50 ratio. However, some vehicles require a specific type of coolant, such as Dex-Cool or HOAT. Consult your car’s owner’s manual or contact the manufacturer to determine the correct coolant for your vehicle.
How often should I check the coolant level in my car?
It is recommended to check the coolant level in your car at least once a month. However, if you notice any signs of overheating, such as steam coming from the engine or the temperature gauge rising, you should check the coolant level immediately.
Can I add water instead of coolant to my car?
It is not recommended to add plain water to your car’s coolant system. Coolant is a mixture of antifreeze and water, and it helps prevent freezing, boiling, and corrosion. Using only water can lead to engine damage, especially in extreme temperatures.
How do I properly dispose of old coolant?
Old coolant should never be poured down the drain or onto the ground, as it is toxic and harmful to the environment. Instead, take the old coolant to a designated recycling or disposal facility. Many automotive service centers or waste management facilities accept used coolant for proper disposal.
What are the signs of low coolant in a car?
Some signs of low coolant in a car include overheating, a sweet smell coming from the engine, a low coolant warning light on the dashboard, or coolant leaking under the car. If you notice any of these signs, it is essential to check the coolant level and add more if necessary.
Can I mix different types of coolant in my car?
It is generally not recommended to mix different types of coolant in your car. Different coolant types have various additive packages and may not be compatible. Mixing them can result in reduced coolant performance or even damage to the cooling system. Stick to using the same type of coolant that is recommended for your vehicle.