
We all know that coolant stains on the driveway can be a real eyesore. It can ruin the curb appeal of our home and make our driveway look neglected. But the good news is that removing coolant stains doesn’t have to be a nightmare.
In fact, you can do it yourself with just a few simple steps and some common household items. So, if you’re dealing with stubborn coolant stains on your driveway, don’t worry, we’ve got you covered! In this blog post, we’ll walk you through everything you need to know about removing coolant stains from your driveway and restore your home’s beauty in no time.
Table of Contents
Materials Needed
If you have a car or any vehicle that uses coolant, there’s a good chance you’ve spilled some of it on your driveway. It’s best to take care of the spill as soon as possible to prevent any permanent damage to the surface. Here’s how to get coolant off your driveway.
First, you’ll need some absorbent materials like cat litter, sawdust, or sand. Sprinkle it on the spill and let it sit for a few hours or overnight to absorb the coolant. Once the absorbent material has done its work, sweep it up and dispose of it properly.
Next, you’ll need to clean the remaining stain with a degreaser or an all-purpose cleaner. These can be found in any hardware or automotive store. Apply it to the stain and scrub with a brush until it’s removed.
Finally, rinse the area with a hose to remove any remaining residue. With a little patience and the right materials, you can get coolant off your driveway and keep it looking like new.
Absorbent Material
When it comes to absorbent materials, there are a few key components you’ll need. First and foremost, you’ll need a material that is designed to absorb liquids effectively. There are many options available, including cotton, wool, and synthetic materials like rayon or polyester.
It’s important to choose a material that is suitable for the type of liquid you’ll be dealing with – for example, some materials may be better suited to absorbing oil than water. Another important factor to consider when choosing an absorbent material is the size and shape of the material itself. This can impact how quickly and efficiently the material is able to soak up liquids.
Flat, thin materials like paper towels may be better for spills on flat surfaces, while thicker, more absorbent materials like sponges may be better for larger spills or harder-to-reach areas. Finally, you’ll want to consider any additional features that might be useful for your specific needs. For example, some materials may be treated with chemicals or coatings to make them more effective at absorbing certain types of liquids, or they may be designed with durable, long-lasting construction to withstand heavy use.
With the right combination of materials and features, you can find an absorbent material that is perfect for your needs, whether you’re dealing with spills in the home, workplace, or beyond.
Water Hose
When it comes to watering your lawn, garden, or cleaning your car or outdoor furniture, a good quality water hose is an essential tool to have. To get started, you’ll need some materials. First, you’ll need to choose your hose size, length, and material.
Consider the size of your yard or the distance you need to cover to determine the right hose length for your needs. A standard size is 5/8 inches, which is suitable for most household needs. Next, decide whether you prefer a rubber or vinyl hose.
Rubber hoses are more durable and long-lasting, while vinyl hoses are more affordable and lightweight. You’ll also need to choose a nozzle for your hose, which will enable you to adjust the water pressure and flow. A good quality spray nozzle will allow you to tackle a range of tasks, from gentle watering to more robust cleaning.
Lastly, make sure you have the right connectors and adapters to attach your hose to your outdoor spigot. Always invest in quality materials to ensure your hose functions effectively and lasts a long time.
Bucket
If you’re going to make a DIY bucket, then you’ll need a few essential tools and materials. First and foremost, you’ll need an actual bucket – preferably one made of durable plastic or metal. You can find buckets at most hardware stores or online.
Additionally, you’ll need a drill with various-sized drill bits, a saw blade, sandpaper, a marker or pen, and a measuring tape. If you’re going to attach any additional features to your bucket, such as a handle or spout, you’ll need screws, bolts, or nuts. And finally, if you want to jazz up your bucket with some color, you can always invest in some waterproof paint or stickers.
With these materials in hand, you’re ready to create a customized bucket that fits your unique needs!
Baking Soda or Cat Litter
In the world of cat ownership, dealing with unpleasant odors is sometimes a necessary evil. Two common solutions to this problem are baking soda and cat litter. Baking soda, when sprinkled in the litter box, can absorb odors and help keep them at bay.
Cat litter, on the other hand, is specifically designed to absorb urine and feces, while also providing a spot for cats to do their business. Before deciding which to use, it’s important to understand the pros and cons of each. For baking soda, all you need is a box of the powder.
For cat litter, you’ll need to purchase a type that works for you and your cat. Additionally, some litters can be messy or have a strong scent that cats may not appreciate. It’s important to choose one that is gentle on your cat’s paws, doesn’t cause dust or tracking, and addresses your specific odor issues.
With a little research and experimentation, you can find the solution that works best for you and your feline friend.
Step-by-Step Guide
If you’re wondering how to get coolant off your driveway, don’t worry – it’s a common problem that can be easily solved. The first step is to scrape up any excess coolant with a plastic scraper or putty knife. Be sure to wear gloves and eye protection to avoid any skin or eye irritation.
Next, sprinkle baking soda or cat litter over the affected area to absorb any remaining liquid. Let it sit for a few hours or overnight before sweeping it up and disposing of it properly. Finally, use a pressure washer or hose to wash away any remaining residue.
If the stain persists, you may need to use a specialized cleaner or consult a professional for help. Remember to always follow proper safety procedures and dispose of any hazardous materials appropriately. With these simple steps, you can quickly and easily remove coolant stains from your driveway.
Step 1: Absorb Excess Coolant
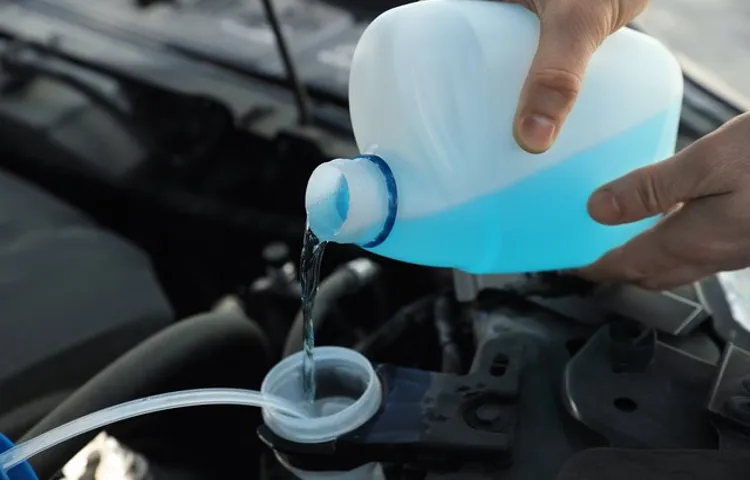
If you’ve ever dealt with an overheating engine, you know how important it is to take care of this issue quickly. One of the first steps you need to take is to absorb the excess coolant. This is typically done by placing a container underneath the radiator and opening the petcock valve.
Once the coolant starts to flow, you can collect it in the container and dispose of it properly. It’s important to wear gloves and protective clothing during this process, as the coolant can be hot and hazardous to your health. By absorbing the excess coolant, you can prevent your engine from further damage and start the necessary repairs.
Remember, taking care of your engine and keeping it in good condition is crucial in extending its lifespan and avoiding costly repairs down the line.
Step 2: Hose Down the Area
When it comes to cleaning up spills or stains outside, it’s essential to start by hosing down the area thoroughly. This step is especially important if the spill is something like oil or grease that can cling to surfaces and cause long-term damage. Before you start, make sure that you have the proper hose and nozzle for the job.
A high-pressure nozzle or sprayer will work best to remove stubborn stains and debris. Begin by spraying the area with water to loosen up any loose dirt and debris. Next, turn up the water pressure and begin spraying the area, moving slowly and methodically to ensure that you cover every inch.
Take care to direct the water away from any plants or grassy areas to avoid damaging them. Once you’ve finished hosing down the area, take a moment to inspect it and see if any stains or spots are still visible. If so, you may need to repeat the process or move on to the next step in your cleaning routine.
Step 3: Apply Absorbent Material
When it comes to cleaning up spills, it’s important to use an absorbent material in order to properly contain and remove the mess. Once you’ve stopped the source of the spill and cleared away any solid debris, it’s time to apply the absorbent material. There are many different options available, such as paper towels, rags, or even specialized spill mats.
However, it’s important to make sure that the material you choose is capable of soaking up the type of spill you’re dealing with. For example, oil spills may require a different type of material than a spill of water or soda. Simply spread the material over the spill and press down firmly to ensure maximum absorption.
Depending on the size and severity of the spill, you may need to repeat this process several times. Once the spill is completely absorbed, carefully dispose of the used material in accordance with local regulations. By following these steps, you can quickly and effectively clean up any spills that come your way.
Step 4: Let it Sit
Once you’ve mixed all your ingredients together and kneaded your dough, it’s time to let it rest. Allowing your dough time to rest is a crucial step in the bread-making process, as it allows the gluten to relax and the flavors to develop. Cover your dough with a damp towel or plastic wrap and leave it in a warm, draft-free place to rise.
Depending on the recipe, the resting time can range from 30 minutes to several hours. But don’t rush this step! The longer you let your dough rest, the better the bread will turn out. During this time, the yeast will continue to work, causing the dough to rise and ferment, creating those delicious aromas that we all associate with freshly baked bread.
So, sit back, relax, and let your dough do its thing. Your patience will be rewarded with bread that’s soft, chewy, and full of flavor.
Step 5: Sweep It Up
After completing the painting task, it’s time to give your space a final touch. In step 5, sweep it up! This means keeping the area clean and tidy by sweeping or vacuuming the floors and removing any remaining painting equipment or debris. A clean space not only makes your project look more professional, but it also helps to prevent accidents.
Tripping over debris or paint cans can result in serious injuries and can damage the surface you just worked so hard on. Sweeping up also helps to ensure that your space is ready to be used immediately after the project is complete. It’s essential to always be cautious and mindful throughout the painting process, especially during this last step, as it sets the tone for the project’s successful conclusion.
Don’t underestimate this critical step either. A lack of clean-up can leave a sour taste and a less than satisfactory end result.
Preventing Future Coolant Stains
If you’re dealing with a recent coolant spill on your driveway, you may be wondering how to get it off without damaging the surface or leaving behind a stain. The key to preventing future coolant stains is to act quickly and effectively. Start by using a detergent or degreaser that’s safe for use on concrete, and scrub the affected area with a stiff-bristled brush.
Make sure to rinse the area thoroughly with water and dry it completely before parking your car. You may also consider using a large mat or tray under your vehicle to catch any future spills. By taking these steps, you can keep your driveway looking clean and pristine while also protecting the environment from harmful chemicals.
Regular Vehicle Maintenance
Regular vehicle maintenance is crucial for preventing future coolant stains on your vehicle. It’s important to regularly check your coolant levels and make sure that there are no leaks. Neglecting your vehicle’s coolant system could lead to costly repairs and potential damage to your engine.
It’s recommended to have your coolant system inspected by a professional mechanic at least once a year, especially before the summer months when your vehicle will be working harder to keep cool. The good news is that preventing coolant stains is relatively easy and inexpensive through regular maintenance. Think of it like going to the dentist for a cleaning to prevent future cavities – preventative measures can save you time and money in the long run.
By taking care of your vehicle’s coolant system, you can ensure that it runs smoothly and avoid any unsightly coolant stains on your driveway or garage floor.
Covered Parking
Covered parking is a great way to protect your car from a variety of outdoor hazards such as bugs, leaves, and weather elements like rain or snow. However, one of the biggest risks to your vehicle can come from your own car’s coolant system. Coolant stains can easily form when your car’s cooling system is leaking, and they can be incredibly difficult to remove.
Preventing these stains is as simple as being proactive with maintaining your car’s cooling system. Regularly check your coolant levels, watch for warning signs of a leak (such as a persistent puddle under your vehicle), and bring your car in for routine maintenance to ensure everything is in working order. By taking these simple steps, you can prevent future coolant stains and keep your car looking its best in covered parking.
Quick Clean Up
If you’ve ever had to deal with a coolant stain, you know the hassle it can bring. Fortunately, there are ways to prevent future coolant stains from happening. One of the most effective ways is to regularly check your coolant levels and ensure that your car’s cooling system is functioning properly.
When your cooling system isn’t working efficiently, it can cause the engine to overheat, leading to spills or leaks. Additionally, be mindful of where you park your car. Avoid parking on uneven or sloped surfaces that can cause coolant to leak out.
If you do happen to spill coolant, quickly clean it up to avoid any permanent damage to your car’s paint. By taking these simple precautions, you can prevent coolant stains and ensure your car stays in top condition.
Conclusion
In conclusion, getting coolant off your driveway can be a daunting task, but with the right tools and technique, it’s definitely achievable. Whether you’re using a degreaser or a simple mixture of baking soda and water, persistence is key. And remember, it’s always better to take preventative measures to avoid spills in the first place – unless you’re looking to channel your inner-quicksilver and create a slip-n-slide in your driveway!”
FAQs
What is coolant and why is it dangerous for driveways?
Coolant is a liquid used to regulate engine temperature in vehicles. It can be dangerous for driveways because it can leave permanent stains and is toxic to animals.
How long does it take for coolant stains to set in on a driveway?
Coolant stains can set in as quickly as one day if not properly cleaned up.
What is the best way to clean up coolant spills on a driveway?
The best way to clean up coolant spills on a driveway is to use an absorbent material such as kitty litter and then wash the area with a degreaser or vinegar and water solution.
Can I use a pressure washer to clean up coolant stains on a driveway?
Yes, a pressure washer can be used to clean up coolant stains on a driveway, but it should be done carefully to avoid pushing the stain deeper into the concrete.
How can I prevent coolant spills on my driveway?
You can prevent coolant spills on your driveway by regularly checking your vehicle for leaks, properly disposing of used coolant, and avoiding overfilling your engine with coolant.
Is coolant harmful to the environment if it spills on the driveway?
Yes, coolant is harmful to the environment if it spills on the driveway as it can seep into the soil and groundwater and contaminate them.
What should I do if my pet ingests coolant from a driveway spill?
If your pet ingests coolant from a driveway spill, seek veterinary attention immediately as it can cause serious harm or even death.