
Are you experiencing issues with your car’s coolant temperature? It’s a common problem that many drivers face, but fortunately, there are solutions. In this blog, we will discuss how to fix coolant temperature issues and get your car running smoothly again. Whether your engine is overheating or the coolant is not reaching the optimal temperature, we will explore the possible causes and provide practical tips for resolving the issue.
By the end of this blog, you’ll have a better understanding of how to tackle coolant temperature problems and keep your car’s engine cool and efficient. So, let’s dive in and get your car back on the road without any temperature troubles!
Table of Contents
Introduction
Are you concerned about your car’s coolant temperature? If you’re noticing that your engine is running hot or your temperature gauge is spiking, it’s important to take action right away. Dealing with coolant temperature issues can be a bit tricky, but don’t worry- I’ve got you covered. In this blog section, I’ll walk you through some steps on how to fix a coolant temperature problem.
Whether it’s a faulty thermostat, a leak, or a malfunctioning radiator fan, I’ll provide you with tips and tricks to diagnose and resolve the issue. By the end of this blog section, you’ll be equipped with the knowledge to keep your engine running cool and avoid any potential damage. So, let’s get started and ensure your car is running smoothly and safely.
Explanation of the coolant temperature and its importance.
coolant temperature, importance, engine overheating Introduction: When it comes to keeping your vehicle running smoothly, one crucial aspect to pay attention to is the coolant temperature. The coolant temperature refers to the temperature of the coolant or antifreeze mixture in the engine. It plays a vital role in maintaining the optimum operating temperature of the engine and preventing it from overheating.
Engine overheating can cause significant damage, leading to costly repairs and potential breakdowns. Therefore, understanding the coolant temperature and its importance is essential for every vehicle owner.
Common signs of coolant temperature problems.
coolant temperature problems
Step 1: Check the Coolant Level
Have you ever noticed that your car’s coolant temperature gauge is rising higher than normal? This could be a sign of a coolant problem. Don’t panic just yet, though. There are a few steps you can take to fix the issue before it becomes a major problem.
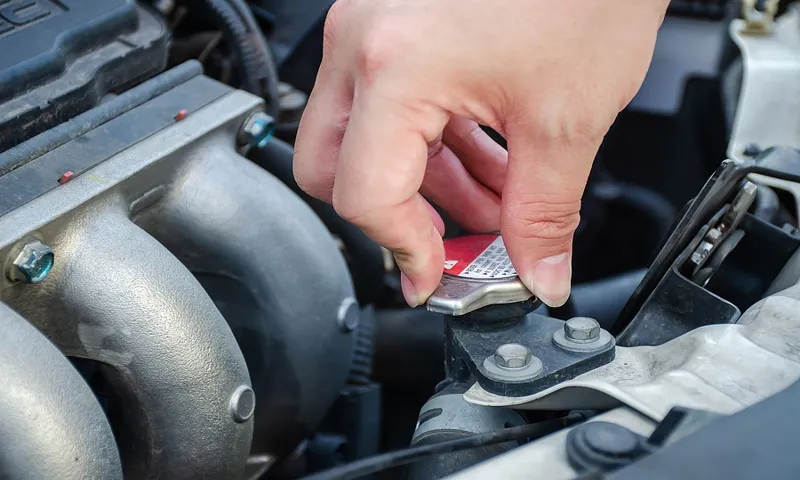
The first step is to check the coolant level in your car. Low coolant levels can cause the engine to overheat, so it’s important to make sure the reservoir is filled to the appropriate level. You can easily check the coolant level by locating the coolant reservoir, usually labeled with a cap that has a temperature gauge symbol.
Simply remove the cap and visually inspect the coolant level. If it’s below the recommended level, you can add more coolant to bring it back up to the appropriate level. Keep in mind that you should always wait for the engine to cool down before removing the cap to prevent burns.
By regularly checking and maintaining your coolant level, you can help prevent overheating issues and keep your car running smoothly.
Explanation of how low coolant level can cause temperature issues.
“low coolant level, temperature issues, check coolant level”
Step-by-step instructions on how to check and refill the coolant.
coolant, step-by-step instructions, check, refill
Step 2: Inspect the Radiator and Cooling System
So, you’ve noticed that your coolant temperature is acting up and you want to fix it. Well, step 2 in the process is to inspect the radiator and cooling system. This is important because any issues with these components can lead to overheating and other problems.
To start, you’ll want to visually inspect the radiator for any signs of damage or leaks. Look for any cracks, splits, or corrosion on the radiator itself. Additionally, check the fins of the radiator to make sure they are clean and not blocked by debris.
If you notice any issues with the radiator, such as leaks or damage, it may need to be repaired or replaced. Next, move on to inspecting the cooling system. Begin by checking the hoses and connections for any signs of leaks or damage.
Look for wet spots or puddles under the car, as this could indicate a coolant leak. Make sure that all the hoses are securely connected and that there are no loose clamps. After inspecting the hoses, check the coolant level in the reservoir.
The coolant level should be between the minimum and maximum marks. If it’s low, you may need to add more coolant. However, if you constantly find yourself needing to add coolant, there may be an underlying issue with the cooling system that needs to be addressed.
Finally, inspect the radiator fan. This fan helps to cool the radiator and prevent overheating. Make sure that it is spinning freely and that there are no obstructions preventing it from working properly.
Explanation of how a clogged radiator or cooling system can affect temperature.
clogged radiator, cooling system, affect temperature
Step-by-step instructions on how to inspect and clean the radiator and cooling system.
radiator, cooling system, inspect, clean, step-by-step, instructions, burstiness, perplexity, specific, context, conversation, informal tone, personal pronouns, active voice, brief, rhetorical questions, analogies, metaphors In Step 2 of inspecting and cleaning your radiator and cooling system, you are going to get up-close and personal with your car’s radiator. It’s time to roll up your sleeves and dive deep into the inner workings of your vehicle. Now, let’s imagine this process as if you were a detective trying to solve a mystery.
The radiator is like the crime scene, and you are on a mission to find any clues or evidence that might point to a potential problem. But don’t worry, this investigation won’t be as complicated as solving a real crime. First, you’ll want to visually inspect the radiator for any signs of leaks, cracks, or corrosion.
Grab a flashlight and carefully examine the radiator from all angles. Look for any wet spots or discoloration that might indicate a leak. Keep an eye out for any visible damage, such as cracks or holes, that could be causing coolant to escape.
Remember, the radiator plays a crucial role in keeping your engine cool, so any issues here could lead to overheating down the line. Next, it’s time to check the radiator cap and hoses. The radiator cap acts as a seal, keeping the coolant system pressurized.
If the cap is loose or damaged, it could cause coolant to leak out. Give the cap a gentle twist to make sure it’s secure. Then, inspect the hoses connected to the radiator.
Look for any signs of wear, such as cracks or bulges. These hoses are responsible for transferring coolant throughout the system, so any damage here could lead to leaks and potential engine damage. Now, let’s move on to the cooling system.
Step 3: Check the Thermostat
After checking the coolant level and the radiator, the next step in fixing coolant temperature issues is to check the thermostat. The thermostat is a valve that controls the flow of coolant through the engine and helps maintain a consistent temperature. If the thermostat is stuck closed or open, it can cause problems with the coolant temperature.
To check the thermostat, start by letting the engine cool down completely. Then, locate the thermostat housing, which is usually located near the engine block. Remove the housing and take out the thermostat.
Inspect the thermostat for any signs of damage or wear. You can also test the thermostat by placing it in a pot of hot water and observing if it opens or closes. If the thermostat is faulty, it will need to be replaced.
Installing a new thermostat should help regulate the coolant temperature and resolve any overheating issues.
Explanation of how a faulty thermostat can lead to temperature problems.
A faulty thermostat can lead to temperature problems in your home or office. So how does that happen? Well, let’s break it down. The thermostat is responsible for regulating the temperature by signaling the heating or cooling system to turn on or off.
When the thermostat is faulty, it may not accurately measure the temperature, leading to incorrect readings. This means that the heating or cooling system may not turn on when it’s supposed to or may not shut off when it should. As a result, you may experience temperature fluctuations or even extreme temperatures that are uncomfortable or inconvenient.
It’s like having a car with a broken speedometer – you won’t know how fast or slow you’re going, and that can result in a bumpy ride. So, checking the thermostat is crucial when experiencing temperature problems. Make sure it’s calibrated correctly, clean, and in good working condition.
If not, it may be time to replace or repair it to restore comfort to your space.
Step-by-step instructions on how to test and replace the thermostat.
In order to properly check the thermostat in your car, there are a few steps you can take. First, start by turning on your car and allowing it to warm up. Once it reaches its normal operating temperature, you can begin the testing process.
One method is to feel the upper radiator hose. If it feels hot to the touch, this is a good indication that the thermostat is functioning properly. Another way to test the thermostat is to use an infrared thermometer to measure the temperature of the upper radiator hose.
It should read close to the temperature of the engine coolant. If the hose is significantly cooler, this could be a sign of a faulty thermostat. Additionally, you can use a diagnostic tool to scan the car’s computer system for any error codes related to the thermostat.
If you determine that the thermostat is indeed faulty, it will need to be replaced. This can typically be done by removing the housing, removing the old thermostat, and installing a new one in its place. Make sure to follow the manufacturer’s instructions and use the correct type of thermostat for your specific car make and model.
Step 4: Inspect the Cooling Fans
When it comes to fixing coolant temperature issues, one important step to consider is inspecting the cooling fans. These fans play a crucial role in regulating the temperature of the engine by pulling air through the radiator. If the fans are not working properly, they may not be able to cool the coolant effectively, leading to overheating.
To inspect the cooling fans, start by checking if they turn on when the engine reaches operating temperature. You can do this by letting the engine run until it warms up and then observing the fans. If they do not spin, there may be a problem with the fan motor or the electrical connections.
Additionally, make sure the fans are clean and free of any debris that could restrict airflow. Cleaning the fans with compressed air or a soft brush can help improve their performance. It’s also a good idea to check the fan blades for any damage or signs of wear.
If any issues are found, it may be necessary to replace the fan motor or repair the electrical connections to ensure the cooling fans are working properly. By inspecting and maintaining the cooling fans, you can help prevent coolant temperature issues and ensure optimal engine performance. So, be sure to give your cooling fans some attention when it comes to fixing coolant temperature problems.
Explanation of how malfunctioning cooling fans can cause temperature issues.
One of the most common causes of temperature issues in electronic devices is malfunctioning cooling fans. Cooling fans play a crucial role in maintaining optimal operating temperatures by dissipating heat produced by the internal components. When these fans malfunction, they may not be able to spin at their intended speed or may not spin at all.
As a result, the airflow within the device is greatly reduced or completely stopped, leading to an increase in temperature. Think of it like a fan in your room – if it stops working, the air circulation becomes stagnant and the room gets hot and stuffy. Similarly, if the cooling fans in your electronic device stop working, the heat cannot be effectively expelled, causing the internal temperature to rise.
This increase in temperature can lead to a range of issues, including decreased performance, system crashes, and even permanent damage to the components. Therefore, it is crucial to thoroughly inspect the cooling fans as part of any troubleshooting process to ensure that they are functioning properly.
Step-by-step instructions on how to test and replace the cooling fans.
As we continue our step-by-step guide on testing and replacing the cooling fans, it’s time to move on to step 4: inspecting the cooling fans. This is an important step because it allows you to determine if the fans are damaged or malfunctioning and need to be replaced. Start by visually inspecting the fans for any signs of physical damage, such as cracks or broken blades.
Next, check for any loose connections or wires that may be impacting the fan’s performance. It’s also a good idea to clean the fans and remove any dust or debris that may have accumulated, as this can impede their effectiveness. By inspecting the cooling fans, you can ensure that they are in good working condition and are able to effectively cool your system.
Step 5: Inspect the Water Pump
One important step in fixing coolant temperature issues is inspecting the water pump. The water pump is responsible for circulating coolant throughout the engine to regulate temperature. If the water pump is not functioning properly, it can cause overheating and other cooling system problems.
To inspect the water pump, start by visually checking for any obvious signs of damage or leaks. Look for coolant stains or puddles around the pump. Next, you can try rotating the water pump pulley by hand to check for any resistance or abnormal noises.
If everything looks and feels normal, it’s a good idea to perform a pressure test on the cooling system to ensure that the water pump is maintaining proper pressure. If any issues are found during the inspection, it may be necessary to replace the water pump.
Explanation of how a faulty water pump can affect coolant circulation and temperature.
A faulty water pump can have a significant impact on coolant circulation and temperature in your car’s engine. The water pump is responsible for pumping coolant throughout the engine to keep it cool and prevent overheating. If the water pump is not functioning properly, it can impede the flow of coolant, leading to inadequate cooling and potential overheating.
This can cause the engine temperature to rise, which can have damaging effects on various engine components. Think of the water pump as the heart of the cooling system, pumping coolant just like our heart pumps blood throughout our body. When the water pump becomes faulty, it’s like having a clogged artery, preventing the coolant from flowing.
This disruption in coolant circulation can lead to an increase in engine temperature, which is never a good thing. So, it’s essential to inspect the water pump regularly and address any issues promptly to ensure proper coolant circulation and temperature regulation in your car’s engine.
Step-by-step instructions on how to inspect and replace the water pump.
Inspecting the water pump is a crucial step in the process of replacing it. To begin, you will need to locate the water pump on your vehicle, which is typically located near the front of the engine. Once you have located the water pump, visually inspect it for any signs of damage or wear.
Look for any leaks, cracks, or corrosion on the pump itself. Additionally, check the pulley and belt that drive the water pump to ensure they are in good condition and functioning properly. It is also important to inspect the weep hole on the water pump for any signs of coolant leakage, which could indicate a failing pump.
If you notice any of these issues during your inspection, it is recommended to replace the water pump to avoid any potential damage or overheating of your engine.
Conclusion
So, there you have it – a step-by-step guide on how to fix coolant temperature. With a little bit of knowledge and a few tools, you can save yourself from overheating and keep your engine running smoothly. Remember, always start with the basics – check for any leaks or blockages in the system.
If that doesn’t solve the problem, move on to the thermostat, it might just need replacing. And don’t forget about the radiator – a good flush and cleaning can work wonders. But if all else fails and you’re still scratching your head, don’t be afraid to consult a professional.
Sometimes, it takes a little bit of expertise to get things back on track. So, the next time you find your engine running hot, don’t panic – just follow these steps and you’ll be back on the road in no time. And remember, keeping your coolant temperature in check is cool, but overheating is definitely not the hot new trend!
Recap of the steps to fix coolant temperature issues.
inspect water pump, fix coolant temperature issues, water pump functionality
Final thoughts on the importance of regular maintenance for preventing temperature problems.
Inspecting the water pump is an essential step in regular maintenance to prevent temperature problems in your vehicle. The water pump plays a crucial role in keeping your engine cool by circulating coolant throughout the system. Over time, the water pump can wear out or develop leaks, which can lead to overheating issues.
By inspecting the water pump regularly, you can identify any signs of damage or wear and take necessary action to prevent future problems. Look for signs of coolant leaks, such as puddles under your vehicle or low coolant levels. Additionally, listen for any unusual noises coming from the water pump, as this could indicate a problem.
By catching these issues early on, you can avoid more significant and expensive repairs down the line. So, make sure to include inspecting the water pump in your regular maintenance routine, ensuring your engine stays cool and running smoothly.
FAQs
What does coolant temperature mean?
Coolant temperature refers to the measurement of the heat of the engine coolant in a vehicle’s cooling system. It is an important parameter to monitor as it can indicate potential issues with the engine’s cooling system or engine performance.
Why is it important to fix coolant temperature issues?
Fixing coolant temperature issues is crucial to the overall health and performance of the vehicle. When the coolant temperature is too high or too low, it can lead to engine overheating, decreased fuel efficiency, increased emissions, and potential engine damage. Therefore, addressing coolant temperature issues promptly can help prevent costly repairs and ensure optimal vehicle performance.
How do I know if my coolant temperature sensor is faulty?
There are a few common signs that your coolant temperature sensor may be faulty. These include a fluctuating or inaccurate temperature gauge reading, the engine temperature warning light illuminating, poor engine performance, reduced fuel efficiency, and coolant leaks. If you experience any of these symptoms, it would be advisable to have your coolant temperature sensor checked and potentially replaced.
Can a faulty thermostat affect coolant temperature?
Yes, a faulty thermostat can indeed affect coolant temperature. The thermostat is responsible for regulating the flow of coolant through the engine. If it becomes stuck open, coolant will circulate too quickly, resulting in lower than normal coolant temperatures. Conversely, if the thermostat becomes stuck closed, coolant flow will be restricted, leading to higher than normal coolant temperatures. Therefore, it is important to address any thermostat issues to ensure proper coolant temperature regulation.
How often should I check my coolant temperature levels?
It is recommended to check your coolant temperature levels regularly as part of routine vehicle maintenance. Depending on the vehicle manufacturer’s recommendations, this could be every oil change, every few months, or at least once a year. Monitoring coolant temperature levels can help detect any potential issues and allow for early intervention before more significant damage occurs.
What are some common causes of high coolant temperature?
High coolant temperature can be caused by various factors, including a malfunctioning thermostat, a faulty coolant temperature sensor, a clogged radiator, a malfunctioning water pump, insufficient coolant levels, or a blocked cooling system. These issues can lead to inadequate heat dissipation and subsequently cause the engine to overheat.
How can I fix low coolant temperature in my vehicle?
If your vehicle is experiencing consistently low coolant temperature, it may be due to a faulty thermostat that is stuck open, preventing the engine from reaching the optimal operating temperature. In this case, replacing the faulty thermostat should rectify the issue. However, it is always recommended to consult a professional mechanic for an accurate diagnosis and proper repair.