

Have you noticed that your air conditioning unit is not blowing cold air as it used to? This may be a sign that your AC unit needs a refill of coolant. Adding coolant to your AC unit is an easy task that anyone can do, and it’s crucial to ensure that your unit runs efficiently and effectively. Not sure how to add coolant to your AC unit? Don’t worry, we’ve got you covered! In this blog, we’ll guide you through the easy steps of adding coolant to your AC unit to bring back the refreshing cold air in your home.
We’ll cover everything from the tools and equipment you’ll need to the safety precautions you should take before starting the process. By the end of this blog, you’ll have the knowledge and confidence to add coolant to your AC unit like a pro! Without further ado, let’s dive into the world of coolant and get you on your way to cold air in your home once again!
Table of Contents
Gather the Necessary Tools
When it comes to putting coolant in your AC unit, it’s important to gather all of the necessary tools beforehand. You’ll need a can or bottle of refrigerant, a charging hose, and a gauge to measure the pressure in your unit. Additionally, make sure to wear gloves and safety glasses to protect your skin and eyes during the process.
It’s important to note that each AC unit may have slightly different requirements, so it’s best to consult your owner’s manual for specific instructions before getting started. With the right equipment and a bit of caution, you’ll be able to put coolant in your AC unit and keep it running smoothly all summer long.
Examples: Coolant, Screwdriver, Hose, Gloves
When preparing to complete a project, it’s essential to gather all the necessary tools to ensure you have everything you need to get the job done efficiently. Let’s take an example of changing your car’s coolant. You’ll need to gather the appropriate coolant for your car, and any tools required to access and remove the coolant from the system.
You might also need gloves to avoid skin irritation or injury. A screwdriver may come in handy to facilitate the process. And finally, a hose to help dispose of the used coolant safely.
If you’re missing any of these tools, it can prolong the project and potentially cause more significant issues if you’re forced to improvise with sub-optimal substitutes. Gathering all the tools required beforehand saves time and ensures a smooth, stress-free process.
Turn off Your AC Unit
If you’re wondering how to put coolant in an AC unit, it’s important to first understand the possible reasons why it may need more coolant. Low refrigerant levels can often indicate a leak in the AC system, which should be addressed by a professional technician. However, if you have determined that simply topping off the refrigerant is necessary, make sure to follow the manufacturer’s guidelines for the specific type of unit you have.
It’s also important to turn off your AC unit completely before attempting to add refrigerant. While adding refrigerant may help temporarily, it’s best to address any underlying issues that may have caused the low levels in the first place to ensure optimal performance and efficiency of your AC unit in the long run.
Examples: Switch the Circuit Breaker or Physically Unplug the Unit
If you need to turn off your AC unit for maintenance or repair, there are a couple of ways you can do it. One of the easiest ways is to simply switch off the circuit breaker that powers the unit. This is usually located in the electrical panel box and may be labeled as “Air Conditioner” or “AC.
” Simply switch the breaker to the “off” position and your unit will no longer receive power. If you can’t find the circuit breaker or it’s not labeled, you can also physically unplug the unit from the wall socket. This is a bit more cumbersome but just as effective.
Once the unit is unplugged or the circuit breaker is switched off, you can safely perform any maintenance or repairs you need to do. Remember to always exercise caution when working with electrical systems. Turning off your AC unit can be as simple as flipping a switch or unplugging it.
By following these steps, you can safely perform any maintenance or repairs you need to do. If you’re not comfortable working with electrical systems, always hire a professional to do the job for you. Whether you’re switching off the circuit breaker or physically unplugging the unit, always remember to exercise caution and prioritize safety above all else.
With these simple steps, you can take care of your AC unit and keep it running smoothly for years to come.
Locate the Coolant Caps
Putting coolant in your AC unit is a simple task that you can easily do on your own, as long as you know where the coolant caps are located. The coolant caps are small, circular caps that are usually located near the outdoor unit of your AC system. If you are unsure where to find them, consult your AC unit’s user manual or search online for your particular model.
Once you have found the coolant caps, make sure that the AC unit is turned off and that the power supply is disconnected to avoid any potential accidents. Then, carefully remove the caps, being sure not to spill any coolant. Using a funnel, pour the coolant into the AC unit until it reaches the recommended level marked on the unit.
Once you have finished, replace the coolant caps and turn the power supply back on. It’s important to note that adding too much coolant can damage your AC unit, so be sure to stick to the recommended level. And that’s it! By following these simple steps, you can ensure that your AC system is running smoothly and efficiently, keeping your home cool and comfortable all summer long.
Examples: Look for Two Caps labeled ‘R-22’ or ‘R-410A’
To ensure that your air conditioning system is running smoothly, it’s important to locate the coolant caps. These caps are usually labeled with the type of coolant used, such as ‘R-22’ or ‘R-410A’. Look for two caps, one blue and one red, on the outdoor unit or the refrigerant lines.
The blue cap usually covers the suction side, while the red cap covers the high-pressure side. It’s crucial not to mix up the two as this can cause damage to your system. Think of these coolant caps as the keys to your air conditioning unit’s heart.
Without them, the system won’t be able to properly regulate the temperature in your home. So, take the time to locate them and make sure they are properly secured. If you notice that the caps are loose or missing, it’s best to call a professional to come and fix the issue.
In addition to checking the coolant caps, it’s also important to schedule regular maintenance for your air conditioning unit. This will help prevent any potential issues from arising and ensure that your system is running efficiently. Don’t wait until something goes wrong to call a professional.
An ounce of prevention is worth a pound of cure, as they say. Overall, keeping an eye on your air conditioning unit’s coolant caps is a small but important step in maintaining your home’s comfort. By taking the time to locate and inspect them regularly, you can avoid costly repairs down the line.
So, grab a flashlight and head outside to give your air conditioning system some love today!
Attach the Hose to the Coolant Canister
When it comes to maintaining your AC unit, adding coolant is an important step. To put coolant in your AC unit, you first need to attach the hose to the coolant canister. Make sure the canister is clean and free of debris before attaching the hose.
Once the canister is ready, insert one end of the hose into the canister and secure it tightly. Then, insert the other end of the hose into the AC unit’s coolant port. Make sure it is also secured tightly before proceeding.
Once you have attached the hose to both the canister and the AC unit, you are ready to begin the coolant refill process. It’s important to follow the manufacturer’s instructions and safety guidelines to ensure a successful refill. Adding coolant helps keep your AC unit functioning effectively and efficiently, so it’s important to take the time to do it right.
Examples: Use a Screwdriver to Secure the Hose onto the Coolant Hose
When it comes to attaching a hose to the coolant canister in your vehicle, a screwdriver can come in handy. Using a screwdriver, you can secure the hose onto the canister and ensure a tight and leak-free connection. Start by sliding the hose onto the canister and using the screwdriver to tighten the clamp around the hose.
This will prevent the hose from slipping off or leaking coolant. Make sure to tighten the clamp enough so that it’s snug but not too tight as it could damage the hose. Double-check to ensure there are no leaks before driving your car.
Utilizing a screwdriver can make the process easy and straightforward, ensuring your vehicle’s engine stays cool without any leaks.
Attach the Hose to the AC Unit’s Coolant Port
If you’re looking to recharge your air conditioning unit, you’ll first need to find the coolant port. Once you’ve located it, the next step is to attach the hose properly. Usually, the port is located on the outside of the AC unit and is marked clearly.
Depending on the type of unit you have, you may need to remove a cap or valve before attaching the hose. Be sure to read the manufacturer’s instructions for your specific unit before proceeding. Once the hose is securely attached, you can begin the recharge process.
Remember to follow all safety precautions, such as wearing gloves and goggles, and never overfill the coolant. By following these steps carefully, you can ensure that your AC unit will be working efficiently again in no time.
Examples: Typically Found on the Larger Pipe
When it comes to connecting a hose to your AC unit’s coolant port, it’s important to know where to look. Typically, the larger pipe on your unit will have the coolant port that needs to be attached to the hose. The port may be labeled or have a cap that needs to be removed before connecting the hose.
Before starting, make sure the AC unit is turned off and the hose connection is securely attached to both the unit and the other end of the hose. This will ensure that the connection is properly sealed and won’t leak any coolant. Remember, proper maintenance of your AC unit is key to keeping it running smoothly and efficiently.
By attaching the hose to the coolant port, you’re helping to ensure that your unit is getting the coolant it needs to run effectively and keep your home cool.
Add the Coolant to the AC Unit
Adding coolant to your AC unit can be a bit challenging, but with a few simple steps, you can get it done quickly and easily. The first step is to locate the coolant port on your unit; usually, it’s a small valve located near the compressor. Once you find it, attach the hose of the coolant canister to the valve and turn the valve to the “open” position.
Now, slowly release the coolant into the system while monitoring the pressure gauge to ensure that you don’t overfill the system. Once the pressure gauge is within the recommended range, turn off the valve, and remove the canister. Finally, check the system for any leaks or other issues before restarting the unit.
Remember, adding coolant is not a permanent solution, and if your AC unit is low on coolant, it’s a sign that there’s a leak somewhere in the system that needs to be addressed by a professional.
Examples: Slowly Pour the Coolant into the Hose Connected to the Port
Adding coolant to your AC unit may seem like a daunting task, but it is a straightforward procedure. First, ensure that the AC unit is turned off and disconnected from the power source before starting the process. Next, locate the port where the coolant will be added.
Slowly pour the coolant into the hose connected to the port, making sure not to overfill. It is essential to add the correct amount of coolant to prevent damage to the AC unit. Once you have added the coolant, reconnect the power source and turn on the unit to check for any leaks.
Remember to wear gloves and eye protection during this process as the coolant can be harmful if it comes into contact with your skin or eyes. Adding coolant to your AC unit is an important part of maintaining its functionality. By regularly adding the correct amount of coolant, you can ensure that the unit runs efficiently and doesn’t break down unexpectedly.
Moreover, keeping a well-maintained AC unit can save you from costly repairs or replacements in the future. Giving your AC unit some attention can also give you peace of mind when summertime temperatures rise. So grab some coolant, follow the instructions, and stay cool all summer long!
Remove the Hose and Recap the Coolant
If you’re looking to put coolant in your AC unit, the first step is to remove the hose and recap the coolant. This will allow you to access the coolant compartment and add the new coolant. Before doing this, be sure to turn off the power to the unit and allow it to cool down completely.
Once you have access to the compartment, use a funnel to pour the coolant in slowly, being careful not to overfill. It’s recommended that you use the same type of coolant that’s already in the unit, but if you’re unsure, consult the owner’s manual or contact a professional. Once you’ve added the coolant, replace the cap, reattach the hose, and turn the power back on.
It’s also a good idea to monitor the unit for a few days to ensure that the coolant levels are stable and there are no leaks. With these steps, you should be able to effectively and safely add coolant to your AC unit.
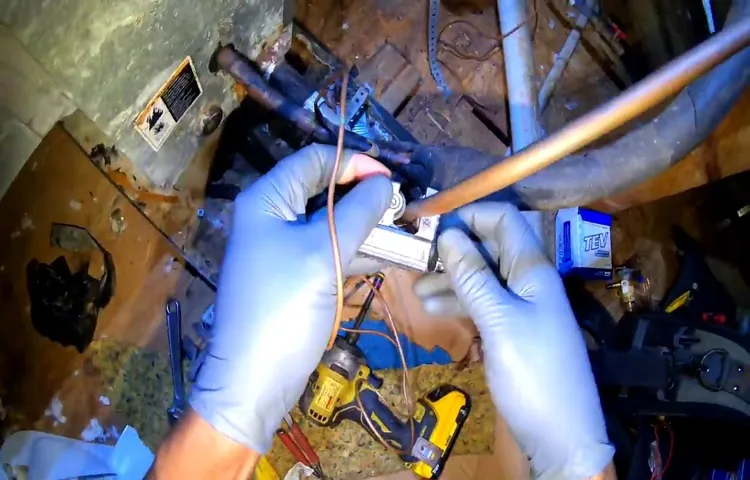
Examples: Grip the Steel Pin and Pull the Hose Off the Port, Recap the Coolant Canister
If you want to remove the hose from a port, the process is fairly simple. Grip the steel pin and pull the hose off the port. That’s all there is to it! However, it’s important to make sure that there isn’t any pressure in the hose before you attempt to detach it.
Otherwise, you’ll end up with coolant spraying everywhere. Once you’ve removed the hose, you’ll need to recap the coolant canister to prevent any coolant from spilling out. Make sure to place the cap securely on the canister to prevent any leaks.
Overall, it’s important to handle coolant with care as it can be dangerous if it comes into contact with your skin or eyes. With a little bit of caution and precision, you can safely remove hoses and recap coolant canisters without any issues.
Turn on the AC Unit
If you’re wondering how to put coolant in your AC unit, there are a few steps you need to follow. Firstly, make sure to turn off your AC unit and disconnect it from the power source. Then, locate the coolant lines on the unit, which are usually made of copper tubing.
Next, remove the caps from the coolant ports and attach the coolant charging hose. Once you’ve done this, slowly open the valve on the charging hose to allow the coolant to flow into the unit. You can monitor the pressure gauge on the hose to ensure that you’re adding the right amount of coolant.
Finally, close the valve on the charging hose, detach it from the unit, and replace the coolant port caps. After you’ve reconnected the power source and turned on your AC unit, you should feel cool air flowing through your home in no time. Just remember, if you’re not comfortable performing this task yourself, it’s best to leave it to a trained professional who can ensure your safety and protect the health of your AC unit.
Examples: Re-Engage the Circuit Breaker or Plug the Unit Back In
If your AC unit isn’t turning on, don’t panic! There are a couple of things you can try before calling in a professional. First, check your circuit breaker to see if it’s been tripped. If it has, simply flip the switch back to its original position.
This may be all you need to do to get your AC unit up and running again. If that doesn’t work, try unplugging the unit and plugging it back in again. This can sometimes reset the system and fix any glitches.
Make sure the unit is properly plugged in and the outlet is functioning properly. If neither of these solutions work, it’s time to call in an expert. A professional technician can diagnose and fix any issues with your AC unit to keep you feeling comfortable during the hot summer months.
Remember, regular maintenance can help prevent AC issues from occurring in the first place, so don’t neglect your system!
Check for Cool Air
One of the key elements of maintaining your air conditioning unit is making sure that there is enough coolant to keep your space cool and comfortable. If you notice that your AC is not blowing cool air, it may be an indication that it’s time to add some refrigerant to the system. First, you will need to locate the access valve on the refrigerant line—which usually looks like a small brass or copper cap.
Carefully remove the cap and attach the refrigerant canister to the valve. Be sure to follow the manufacturer’s instructions before turning on the AC system. Once you have added the coolant, turn on the AC and wait for the air to start blowing cool again.
It is important to note that if your AC is consistently low on refrigerant, it could be a sign of a more significant issue, and it’s best to call in a professional to examine the unit.
Examples: Wait a Few Minutes for the AC to Kick In, Confirm Cool Air is Flowing Through the Vents
When the weather gets hot and humid, cool air from your AC becomes crucial to creating a comfortable environment. However, sometimes it takes a little time for the air conditioning to kick in, leaving you wondering if the system is even working at all. Before you go out and call a repairman, there are a few simple steps that you can take to check for cool air.
First, wait a few minutes for the AC to start up. It may take a minute or two for the system to start blowing cool air, especially if it hasn’t been used in a while. Next, check the vents to ensure that cool air is flowing through them.
If you don’t feel any cool air coming out, there may be a problem with the system that requires a professional to fix. However, if you do feel cool air, it’s likely that everything is functioning normally and you can enjoy a comfortable and refreshing indoor environment. So, next time you’re feeling hot and sweaty, don’t panic and call for a repairman right away.
Instead, take a few simple steps to check for cool air, and you may just save yourself time and money in the long run!
Conclusion
In conclusion, putting coolant in your AC unit is like giving the engine of your car a refreshing drink to keep it running smoothly. Just remember to use the right type of coolant and follow the manufacturer’s guidelines to ensure optimal performance. And with a little DIY know-how and a touch of patience, you’ll be “cool as a cucumber” all summer long!”
FAQs
What is coolant and why is it important for AC units?
Coolant, also known as refrigerant, is a substance that absorbs heat from the air inside an AC unit and releases it outside. It is important for AC units to have sufficient levels of coolant to ensure optimal cooling performance.
Can I put any type of coolant in my AC unit?
No, you cannot put any type of coolant in your AC unit. Different units require different types of coolant, and using the wrong type can damage your unit and even pose a safety risk. Always refer to your unit’s manual or consult with a professional before adding coolant.
How do I know if my AC unit needs more coolant?
If your AC unit is not blowing cold air or isn’t cooling your space as well as it used to, it may be a sign that your coolant levels are too low. You can check this by having a professional inspect your unit and check the coolant levels using specialized equipment.
Can I add coolant to my AC unit myself?
It is not recommended to add coolant to your AC unit yourself, as this can be dangerous and lead to damage or malfunction. Always contact a professional HVAC technician to perform this task safely and effectively.
What are some common signs of a coolant leak in an AC unit?
Common signs of a coolant leak in an AC unit include reduced cooling performance, hissing or bubbling noises, ice buildup on the unit, and a noticeable drop in indoor air quality.
How often should I have my AC unit’s coolant levels checked?
It is recommended to have your AC unit’s coolant levels checked at least once a year, usually during annual maintenance or tune-ups. This ensures that your unit is running smoothly and efficiently.
Are there any safety precautions I should take when working with coolant in an AC unit?
Yes, there are several safety precautions to take when working with coolant in an AC unit. Always wear protective gear such as gloves and goggles, avoid touching or inhaling the coolant, and dispose of any excess coolant properly according to local regulations.