
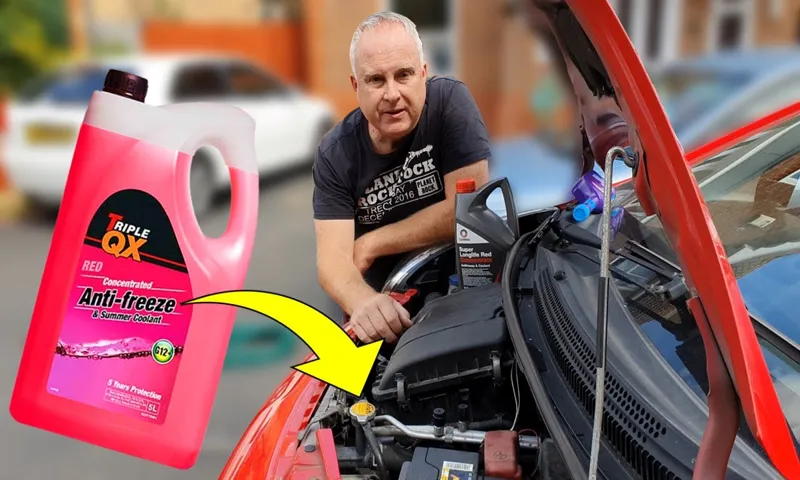
Hey there, car enthusiasts! Are you ready to tackle another DIY project to keep your beloved vehicle in tip-top shape? Well, today we’re going to talk about something essential for maintaining your car’s engine: changing the coolant. Think of coolant as the lifeblood of your engine – it keeps things running smoothly and prevents overheating. Over time, coolant can become contaminated or lose its effectiveness, so it’s crucial to change it regularly.
But don’t worry, this blog post will walk you through the process step by step, so you’ll be a coolant-changing pro in no time! Changing your coolant may seem like a daunting task, but it’s actually quite simple. Plus, doing it yourself can save you a trip to the mechanic and some extra cash. All you’ll need are basic tools, a new coolant, and a little bit of patience.
In this blog post, we’ll cover everything from draining the old coolant to refilling the system with fresh, clean coolant. We’ll provide detailed instructions and even some handy tips and tricks along the way. You’ll learn about the importance of flushing your coolant system, how to properly dispose of the old coolant, and what type of coolant is best for your specific vehicle.
Not only will changing your coolant help prevent engine damage and maintain optimal performance, but it will also give you peace of mind knowing that you’ve taken one more step towards keeping your car in great shape. So, grab your toolbox and let’s get started on changing your coolant! Stay tuned for our next blog post, where we’ll dive into the step-by-step process of draining the old coolant from your car’s system. Trust us, you’ll be amazed at how easy it is to become a coolant-changing expert in just a few simple steps.
Get ready to revitalize your vehicle and ensure it stays cool and reliable on those hot summer days!
Table of Contents
Introduction
Are you experiencing issues with your car’s cooling system? Maybe it’s time to change the coolant. By changing your coolant regularly, you can ensure that your car’s engine stays cool and runs smoothly. Changing your coolant may sound intimidating, but with the right tools and instructions, it can be a simple process.
Here’s a step-by-step guide on how to change your coolant in your car. First, gather all the necessary tools, including a drain pan, a new coolant, a funnel, a screwdriver, and gloves. Then, locate the coolant reservoir in your car, which is usually a translucent white plastic container with a cap labeled “Coolant.
” Open the cap and place the drain pan underneath the car to catch any overflow. Use the screwdriver to open the radiator drain valve and allow the old coolant to drain completely. Once drained, close the drain valve and remove any residue left behind.
Next, use the funnel to pour the new coolant into the reservoir. Be careful not to overfill it. Finally, close the cap tightly and start your car.
Let it run for a few minutes to circulate the new coolant throughout the system. And that’s it – you’ve successfully changed your coolant! Remember to dispose of the old coolant properly, as it is toxic. Regularly changing your coolant will help keep your car’s engine cool and running efficiently, saving you from potential overheating issues down the road.
So don’t neglect this essential maintenance task – follow these steps and take care of your car’s cooling system today!
Why is it important to change your coolant?
coolant, change coolant, importance of changing coolant. Introduction: Changing your coolant is an essential part of regular vehicle maintenance that is often overlooked. While it may not seem like a pressing issue, neglecting to change your coolant can have serious consequences for your engine’s performance and overall longevity.
In this blog post, we will explore why it is important to change your coolant regularly and the benefits it can have for your vehicle. So, let’s dive in and understand why this seemingly small task is actually a big deal.

When should you change your coolant?
coolant changes, coolant maintenance, when to change coolant
Preparation
Changing the coolant in your car is an important part of regular maintenance that can help prevent your engine from overheating and causing expensive damage. Luckily, with a few simple tools and some basic knowledge, you can easily change the coolant yourself. First, make sure your car is parked on a level surface and the engine is cool.
Then, locate the radiator cap and remove it. Next, position a container beneath the radiator drain plug and open it to drain the coolant. Once all the coolant has been drained, close the drain plug and refill the radiator with the new coolant, making sure to follow the manufacturer’s recommendations for the correct coolant type and mixture ratio.
Finally, replace the radiator cap and start the engine to check for any leaks. Changing your coolant regularly will help keep your car running smoothly and prevent any potential overheating issues.
Gather the necessary tools and materials
The first step in any project, whether it’s building a birdhouse or fixing a leaky faucet, is to gather all the necessary tools and materials. This is especially important because it can be frustrating to start a project only to realize you don’t have what you need halfway through. So, before you begin, take some time to go through the project instructions and make a list of all the tools and materials you’ll need.
This could include anything from a hammer and nails to specific types of screws or glue. Once you have your list, gather all the items together and make sure everything is in working order. This will not only save you time and frustration, but it will also ensure that you have everything you need to complete the project to the best of your ability.
So, take a few extra minutes to gather your tools and materials before you begin, and you’ll set yourself up for a successful project.
Prepare your car for the coolant change
coolant change, prepare your car, preparation
Draining the Old Coolant
Changing the coolant in your car is an essential part of regular maintenance. Over time, coolant can become contaminated with dirt, rust, and other debris, which can lead to engine overheating and other problems. Draining the old coolant is the first step in this process.
To do this, make sure the engine is cool and turn off the car. Locate the coolant drain valve, which is usually at the bottom of the radiator. Place a draining pan or bucket under the valve to catch the old coolant.
Open the valve to allow the coolant to drain out completely. Once it has fully drained, close the valve and dispose of the old coolant properly. It’s important to note that some cars may have a coolant drain plug instead of a valve, so consult your vehicle’s manual for specific instructions.
Changing the coolant regularly will help prolong the life of your car’s engine and prevent any overheating issues. So don’t forget to include this maintenance task in your regular car care routine.
Locate the drain plug
drain plug, old coolant, coolant change When it comes to changing the coolant in your car, one of the first steps you need to take is locating the drain plug. This plug is typically located on the bottom of the radiator and allows you to remove the old coolant from the system. Finding the drain plug can sometimes be a bit tricky, as it can vary depending on the make and model of your car.
One way to locate it is by referring to your car’s manual, which should provide a diagram or explanation of where the drain plug is located. Another option is to visually inspect the bottom of the radiator, looking for a small, hexagonal plug. Once you’ve located the drain plug, you can use a wrench or socket set to loosen it and allow the old coolant to drain out.
It’s important to be cautious when removing the drain plug, as the coolant can be hot and cause burns. Additionally, make sure you have a container ready to catch the coolant as it drains from the system. Once the old coolant has been drained, you can move on to the next step of the coolant change process.
Place a container to collect the old coolant
When it comes to draining the old coolant from your vehicle, one essential step is to place a container to collect the coolant. This is important because coolant can be toxic and harmful to the environment if it is not properly disposed of. By having a container in place, you can ensure that the coolant is safely collected and can be disposed of in accordance with local regulations.
It’s crucial to choose a container that is large enough to hold all the coolant and is made from a material that can safely contain it. Additionally, make sure that the container is labeled as “coolant” to avoid any confusion or accidental misuse. By taking these simple steps, you can ensure that you are properly draining and disposing of the old coolant from your vehicle.
Open the drain plug and let the coolant flow out
draining coolant, old coolant, coolant system, engine overheating, anti-freeze solution, car maintenance. Excess heat can cause major damage to your vehicle’s engine, leading to costly repairs. That’s why it’s important to regularly maintain your car’s cooling system, including draining the old coolant and replacing it with fresh, clean coolant.
So, how do you go about draining the old coolant? It’s not as difficult as it may seem. Firstly, make sure your engine is completely cool before starting this process. Then, locate the drain plug, typically located on the bottom of the radiator.
Place a container underneath to catch the old coolant, as it will flow out once the plug is opened. Remember to wear gloves as the coolant may be hot and harmful to your skin. Once you’re ready, open the drain plug and let the coolant flow out.
It’s important to let the coolant completely drain, so don’t rush the process. Once the coolant has stopped flowing, you can close the drain plug again.
Flush the System
Ever wondered how to change your coolant in your car? Well, fear not! I’m here to guide you through the process step by step. Changing the coolant in your car is an important maintenance task that ensures your engine stays cool and running smoothly. Over time, the coolant in your car can become contaminated with dirt and debris, which can lead to overheating and engine damage.
By flushing the system and replacing the coolant, you can prevent these issues and keep your car running at its best. So, let’s get started! First, make sure your car is parked on a flat surface and the engine has cooled down. It’s important to never open the radiator cap while the engine is hot, as the pressure inside could cause the coolant to spray out and burn you.
Once the engine is cool, locate the radiator and the coolant reservoir. The radiator is usually at the front of the engine compartment and the coolant reservoir is a small plastic tank connected to it. Next, place a container or bucket underneath the radiator drain plug to catch the old coolant.
Then, using a wrench, slowly turn the drain plug counterclockwise to open it. Be careful, as the coolant may be hot and could spill out quickly. Allow the coolant to drain completely into the container.
Once the coolant has drained, close the drain plug by turning it clockwise with the wrench. Now it’s time to flush the system. Fill the radiator with a mixture of coolant and water according to the manufacturer’s instructions.
Usually, a 50/50 mix is recommended, but check your car’s manual to be sure. It’s important to use the correct coolant for your car, as different types are not compatible and can cause damage. After filling the radiator, start the engine and let it run for a few minutes.
Use a coolant flush solution
coolant flush solution
Follow the instructions on the flush solution
system flush solution
Adding New Coolant
If you want to keep your car running smoothly and prevent any overheating issues, it’s important to know how to change the coolant. Changing the coolant in your car is a relatively simple process that can be done in just a few easy steps. First, locate your car’s radiator and open the radiator cap.
Be sure to do this when the engine is cool to avoid any burns. Next, find the coolant drain plug, which is usually located at the bottom of the radiator. Place a bucket or pan underneath the radiator to catch the old coolant as it drains out.
Once the coolant has fully drained, replace the drain plug and begin pouring in the new coolant. It’s important to use the correct type of coolant for your car, so check your owner’s manual for guidance. Slowly pour in the coolant until it reaches the recommended level, then replace the radiator cap.
Finally, start your car and let it run for a few minutes to circulate the new coolant throughout the system. And that’s it! By following these simple steps, you can easily change your car’s coolant and keep your engine running smoothly.
Prepare the new coolant mixture
Adding new coolant to your car is an essential part of maintaining its cooling system. When it’s time to replace the coolant, follow these steps to ensure a smooth and effective process. First, make sure your car is parked on a flat surface and the engine is cool.
Open the hood and locate the radiator cap. Carefully remove the cap and set it aside. Next, find the radiator drain plug, which is usually located at the bottom of the radiator.
Place a container underneath the plug to catch the old coolant. Carefully loosen the plug and let the old coolant drain out completely. Once the old coolant has been drained, it’s time to prepare the new coolant mixture.
Refer to your car’s owner’s manual for the correct coolant specifications. Typically, coolant is a mix of antifreeze and distilled water, with a ratio of 50:50. Measure out the appropriate amount of antifreeze and pour it into a clean container.
Then, add an equal amount of distilled water. Mix the two liquids together thoroughly. Now, you’re ready to add the new coolant mixture to your car’s cooling system.
Slowly pour the coolant into the radiator until it reaches the full mark. It’s important not to overfill the radiator, as this can lead to overheating. Replace the radiator cap, making sure it is securely tightened.
Locate the coolant reservoir
coolant, coolant reservoir, adding new coolant
Pour the new coolant into the reservoir
Adding New Coolant: Pouring in the Perfect Mix So, you’ve checked your car’s coolant levels and discovered that it’s in need of a top-up. No worries! Adding new coolant is a relatively simple task that you can DIY. Just make sure you have the correct type of coolant for your particular vehicle.
First things first, find the coolant reservoir under the hood. It’s usually a translucent plastic container with a cap that’s labeled “coolant” or “antifreeze.” Once you’ve located it, remove the cap and set it aside.
Now, grab your fresh coolant and carefully pour it into the reservoir. Remember to use a funnel to avoid any spills. Slowly fill the reservoir until the coolant level reaches the “full” line.
Take your time with this step – it’s important to avoid overfilling, as this could lead to leakage and engine damage. While pouring in the new coolant, it’s also a good idea to inspect the old coolant’s color. Coolant can become contaminated over time, altering its effectiveness.
If you notice that the coolant looks dirty or has changed color significantly, it may be time for a complete coolant flush. Once you’ve added the new coolant, replace the cap on the reservoir tightly. It’s crucial to ensure a secure seal to prevent any coolant from leaking out.
Afterward, start your engine and let it run for a few minutes. This will help circulate the new coolant throughout the cooling system. Remember to always consult your vehicle’s manual for specific instructions on adding coolant, as some vehicles may have slightly different procedures.
Bleeding the System
Changing the coolant in your car is an essential maintenance task that can help prevent engine overheating and extend the life of your vehicle. Over time, coolant can become contaminated with dirt, debris, and rust, which can compromise its effectiveness. It’s important to change the coolant regularly to ensure it continues to protect your engine.
So, how exactly do you change the coolant in your car? Well, it’s not as complicated as you might think. First, you’ll want to make sure the engine is cool, as working with hot coolant can be dangerous. Next, locate the radiator drain plug, which is typically located at the bottom of the radiator.
Place a container underneath the plug to catch the old coolant as it drains out. Once you’ve removed the drain plug, allow the coolant to completely drain out before replacing the plug. Next, locate the radiator cap and remove it to allow air to flow through the system.
This will help the coolant to flow more easily. Then, add a mixture of coolant and water to the radiator, following the specific ratios recommended by your car’s manufacturer. Once you’ve added the coolant, replace the radiator cap and start the engine to allow it to circulate.
Finally, check the coolant level again after a few minutes to ensure it is at the proper level. And there you have it – a simple step-by-step guide to changing the coolant in your car. Regularly changing your coolant will help keep your engine running smoothly and ensure that your car continues to perform at its best.
Start the engine and let it run
“bleeding the system” One important task when maintaining a car is bleeding the system, which refers to removing any air bubbles or trapped air from the fuel or coolant system. Air bubbles can cause engine overheating or poor performance, so it’s crucial to get rid of them. To start, locate the bleeder screws, which are usually found near the highest point in the system.
Then, attach a clear plastic hose to the bleeder screw and place the other end in a container to collect the fluid. With the engine off, open the bleeder screw and let the fluid flow until all the air bubbles are gone. It’s crucial to keep an eye on the fluid level and top it up as needed.
Once done, close the bleeder screw tightly and start the engine. Let it run for a few minutes to ensure the system is working properly and to check for any leaks. Bleeding the system may seem like a small task, but it can greatly improve the performance and lifespan of your car’s engine.
Make sure the coolant level is correct
Bleeding the cooling system is an essential step in ensuring that your car’s engine stays running smoothly and avoids any overheating issues. After performing any maintenance or repairs that involve draining the coolant, it is crucial to remove any air bubbles or pockets that may have formed in the system. This ensures that the coolant can flow freely and effectively cool the engine.
To bleed the system, start by locating the bleed valve, which is usually found near the top of the radiator. Then, using a wrench or pliers, open the valve slowly to release any trapped air. Be careful not to fully remove the valve, as this may cause coolant to spray out.
Keep a close eye on the coolant level as you do this, topping it up with the appropriate mixture of coolant and water as needed. Once you no longer see any air bubbles coming out of the valve, close it tightly and double-check that the coolant level is correct. Remember, properly bleeding the cooling system is a crucial step to keeping your engine in top shape and preventing any overheating issues down the line.
Check for leaks
bleeding the system
Conclusion
In conclusion, if you want to cool your car like a boss and avoid any possible meltdowns (pun intended), it’s time to roll up your sleeves and take control of the coolant situation. By following these steps, you can bid farewell to the hot mess that is an overheating engine and instead cruise in chill style. So, don’t be a drip, be a cool cat and give your car the refreshment it deserves.
Keep calm and coolant on, my friends!”
Regularly changing your coolant is crucial for your car’s longevity
Changing your car’s coolant regularly is an essential part of overall maintenance. One crucial step in this process is bleeding the system. So what exactly does this entail? Well, when you bleed the coolant system, you are essentially removing any trapped air or gases that may have built up.
Why is this important? Well, when air gets trapped in the system, it can prevent the coolant from flowing properly, leading to overheating and potential damage to your engine. Think of it like a clogged pipe – if there’s an obstruction, the water can’t flow freely. Bleeding the system ensures that your coolant can circulate effectively, keeping your car running smoothly and preventing costly repairs down the line.
So, make sure to include bleeding the system as part of your regular maintenance routine to keep your car in top shape.
Follow these steps to safely change your car’s coolant.
If you’re planning on changing your car’s coolant, it’s important to bleed the system properly to ensure that there are no air pockets or bubbles trapped in the cooling system. Bleeding the system involves removing any trapped air so that the coolant can flow freely and effectively. To start, make sure that your engine is cool and that the radiator cap is secure.
Locate the bleeder valve, which is usually located near the top of the radiator, and place a drain pan beneath it to catch any coolant that may escape. Open the valve slowly and allow the coolant to flow out until there are no air bubbles visible. Once all the air has been expelled, close the valve and refill the radiator with fresh coolant.
Repeat the process a few times to make sure that all the air is removed from the system. Bleeding the cooling system is an essential step in changing your car’s coolant, as it ensures that the coolant can effectively regulate the temperature of your engine.
FAQs
What are the signs that my car’s coolant needs to be changed?
Some signs that your car’s coolant needs to be changed include overheating, a sweet smell in the cabin, and visible coolant leaks.
How often should I change my car’s coolant?
It is generally recommended to change your car’s coolant every 2-3 years or every 30,000-50,000 miles, but refer to your vehicle’s manual for specific recommendations.
Can I change the coolant myself, or should I take it to a professional?
Changing the coolant in your car can be done yourself if you are comfortable with basic car maintenance tasks. However, if you are unsure or not confident in your abilities, it is best to seek the help of a professional mechanic.
What type of coolant should I use for my car?
It is important to use the coolant specified by your vehicle’s manufacturer. This information can usually be found in your car’s manual or by contacting the manufacturer directly.
How do I drain the old coolant from my car?
To drain the old coolant from your car, locate the drain plug on the radiator, place a container underneath to catch the coolant, and then open the plug. Allow the coolant to fully drain before closing the plug.
How do I refill my car’s coolant?
After draining the old coolant, close the drain plug and locate the coolant reservoir. Remove the cap, and slowly pour in the new coolant until the reservoir reaches the recommended level. Be sure to use a funnel to avoid spills.
Are there any precautions I should take when changing my car’s coolant?
When changing your car’s coolant, be sure to let the engine cool down completely before starting, wear protective gloves and eyewear, and properly dispose of the old coolant, as it is toxic and harmful to the environment.