
Hey there! Are you experiencing an engine coolant leak? Don’t worry, you’re not alone. Engine coolant leaks can be a common issue for car owners, but they can also be a frustrating one. If left untreated, coolant leaks can lead to overheating and potential damage to your engine.
But before you rush to the nearest mechanic, why not try fixing the problem yourself? That’s right – with a little bit of know-how and patience, you can get your engine back in tip-top shape in no time. In this step-by-step guide, we’ll walk you through the process of fixing an engine coolant leak. We’ll cover everything from identifying the source of the leak to sealing it up for good.
So grab your tools and let’s get started! First things first, you’ll need to locate the source of the leak. This can be a bit tricky, as coolant leaks can come from a variety of places – the radiator, hoses, water pump, or even the engine itself. But don’t fret, we’ll show you some simple techniques to help pinpoint the problem area.
Once you’ve identified the source of the leak, it’s time to gather your materials. Depending on the severity of the leak, you may need to replace a hose or seal up a cracked component. Don’t worry, we’ll guide you through the process and help you choose the right products for the job.
Now it’s time to get your hands dirty and start fixing the leak. We’ll go step-by-step through the repair process, explaining each action along the way. From removing the damaged part to installing the new one, we’ll make sure you have all the information you need to successfully complete the repair.
And voila! Your engine coolant leak should now be a thing of the past. With our step-by-step guide, you’ll be able to tackle this common car problem with confidence. But remember, if you’re ever unsure or uncomfortable with any part of the process, it’s always best to consult a professional.
Table of Contents
Understanding the Problem
If you’ve noticed that your car is overheating or there is a puddle of coolant underneath it, it’s likely that you have an engine coolant leak. This is a common issue for many car owners, but luckily, there are several ways you can fix it. One of the first things you should do is locate the source of the leak.
This may involve inspecting the radiator, hoses, water pump, and other components of the cooling system. Once you’ve identified the problem, you can determine the best course of action. In some cases, a simple repair or replacement of a damaged hose or gasket may be all that’s needed.
However, more severe leaks may require professional intervention or the replacement of larger components. It’s important to address an engine coolant leak as soon as possible, as neglecting it can lead to further damage to your engine and potentially costly repairs.
What is an engine coolant leak?
engine coolant leak
Common signs of an engine coolant leak
engine coolant leak, common signs of an engine coolant leak, understanding the problem
Identifying the Source of the Leak
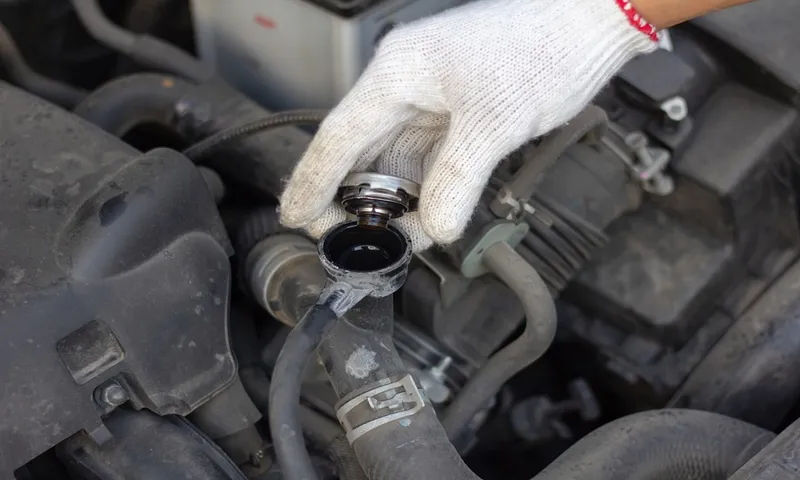
If you’ve noticed a puddle of coolant under your car or a decrease in the coolant level in your engine, you may have an engine coolant leak. To fix the problem, you first need to identify the source of the leak. One way to do this is to visually inspect the engine and cooling system components for any signs of leakage.
Look for wet spots or stains on hoses, radiator, water pump, and thermostat housing. Additionally, you can pressurize the cooling system by using a cooling system pressure tester. This will help you locate any leaks by forcing coolant to escape from the source of the leak.
Once you have identified the source of the leak, you can determine the appropriate fix, whether it’s replacing a damaged hose or sealing a leaking gasket. Remember, it’s important to fix an engine coolant leak promptly to prevent further damage to the engine and to ensure your car runs smoothly.
Checking for visible coolant leaks
coolant leaks Checking for visible coolant leaks is an important part of maintaining your vehicle’s cooling system. If you notice a puddle of coolant under your car or see drips or stains on the ground where you park, it’s likely that you have a coolant leak. Identifying the source of the leak is the first step in fixing the problem.
Start by inspecting the radiator, hoses, and water pump for any signs of leakage. Look for wet spots, stains, or crusty residue that could indicate a leak. You can also use a flashlight to check for any signs of coolant dripping or pooling in these areas.
Keep in mind that coolant leaks can sometimes be challenging to pinpoint, as the coolant may travel and accumulate in different areas before dripping onto the ground. So, be thorough in your inspection, paying attention to any additional areas where coolant might collect, such as the engine block or heater core. By carefully investigating and identifying the source of the leak, you’ll be better equipped to address the issue and prevent further damage to your vehicle’s cooling system.
Using a pressure tester to find the leak
pressure tester, find the leak
Inspecting common areas for coolant leaks
Coolant leaks can be a frustrating issue for car owners. Not only can they lead to engine problems, but they can also leave a messy puddle under your vehicle. If you suspect that your car may have a coolant leak, it’s important to identify the source of the leak so that it can be properly repaired.
One common area to inspect for coolant leaks is the radiator. The radiator is responsible for cooling down the coolant before it circulates back into the engine. Over time, the radiator can develop cracks or weak spots, which can result in coolant leaking out.
Another common area to check is the radiator hoses. These hoses transport the coolant between the radiator and the engine. If the hoses become brittle or damaged, coolant can start to leak out.
Additionally, the water pump is another area to inspect. The water pump is responsible for circulating the coolant through the engine. If the water pump becomes faulty or develops a leak, coolant can escape.
One way to check for a coolant leak is to inspect the ground underneath your vehicle for a puddle or stain. The color of the coolant can help indicate the source of the leak. Coolant is typically green, pink, or orange, so if you see a puddle of these colors, it’s likely a coolant leak.
It’s also important to inspect the engine compartment for any visible signs of coolant leaks, such as wet spots or stains. By locating the source of the leak, you can take the necessary steps to repair it and prevent any further damage to your vehicle’s engine.
Repairing the Coolant Leak
Are you noticing a puddle of coolant under your car or the temperature gauge on your dashboard creeping up? If so, you may have an engine coolant leak. Don’t panic though; this is a common issue that can usually be easily fixed. Before you begin, make sure your engine is cool and your car is parked on a flat surface.
Start by locating the source of the leak. This could be a cracked hose, a leaking radiator, or a faulty water pump. Once you’ve identified the problem area, you can proceed with the necessary repairs.
If it’s a cracked hose, you’ll need to remove it and replace it with a new one. If it’s a leaking radiator, you may be able to patch it up with a sealant or, if the damage is severe, you’ll need to replace the entire radiator. If it’s a faulty water pump, you’ll need to replace it as well.
Remember to always use the correct type of coolant for your car and be sure to properly dispose of any old coolant. With a little bit of time and effort, you’ll have your coolant leak fixed and your car back on the road in no time.
Replacing a damaged radiator hose
Replacing a damaged radiator hose is a common repair task that many car owners may face at some point. When you notice a coolant leak under your vehicle or your engine is overheating, it’s important to diagnose the problem and take immediate action. One of the most common causes of a coolant leak is a damaged radiator hose, which can occur due to wear and tear or from a faulty connection.
Luckily, replacing a damaged radiator hose is a relatively straightforward process that can be done at home with a few basic tools and some patience. By following a few simple steps, you can have your car back on the road and running smoothly in no time. First, you’ll need to locate the damaged hose and identify the type of hose clamp you have.
Once you have these details, you can purchase a replacement hose and clamp from your local auto parts store. Next, you’ll need to drain the coolant from your radiator to prevent any spills or leaks. This can typically be done by removing a drain plug at the bottom of the radiator or by disconnecting a hose at the bottom.
Once the coolant has been drained, you can remove the old hose by loosening the clamps at each end and pulling the hose off the connections. It’s important to inspect the connections for any signs of damage or corrosion and to clean them thoroughly before installing the new hose. When installing the new hose, make sure to tighten the clamps securely to prevent any future leaks.
Finally, refill the radiator with fresh coolant and check for any additional leaks. Replacing a damaged radiator hose is a relatively simple repair that can save you time and money by preventing further engine damage. With a little bit of know-how and some basic tools, you can keep your car running smoothly for years to come.
Fixing a leaking radiator
coolant leak, leaking radiator, repairing a radiator, fixing a radiator, radiator repair The last thing anyone wants to deal with is a leaking radiator. Not only can it be messy and inconvenient, but it can also lead to serious engine damage if left unchecked. Luckily, repairing a coolant leak is a relatively simple process that can be done at home with a few basic tools.
The first step is to locate the source of the leak. This can usually be found by inspecting the radiator for any signs of coolant dripping or pooling. Once the source is identified, the next step is to clean and prepare the area for repair.
This may involve draining the coolant, removing any debris or rust, and applying a sealant or patch to the leak. After the repair is complete, it’s important to refill the radiator with the proper coolant mixture and check for any additional leaks. By taking the time to repair a coolant leak, you can save yourself time and money in the long run and ensure that your radiator is functioning at its best.
Repairing a cracked engine block
repairing a cracked engine block, coolant leak. Repairing a cracked engine block can be a daunting task, but with the right knowledge and tools, it is definitely possible to fix the problem. One of the most common issues that arise with a cracked engine block is a coolant leak.
This can be a serious issue, as it can lead to overheating and engine damage if not addressed promptly. To repair a coolant leak, the first step is to identify the source of the leak. This can be done by inspecting the engine for any visible cracks or damage.
Once the crack is identified, the next step is to clean the area thoroughly to remove any dirt or debris that could interfere with the repair process. Depending on the severity of the crack, there are different methods that can be used to repair it. For small cracks, using an epoxy adhesive can be effective.
This involves applying the adhesive to the crack and allowing it to dry, creating a seal that prevents coolant from leaking out. For larger cracks, a more extensive repair may be required. This could involve using a welding or brazing technique to seal the crack.
It is important to note that repairing a cracked engine block can be a complex process and may require the assistance of a professional mechanic. Additionally, it is crucial to address the underlying cause of the crack, as it may be a sign of a more serious issue with the engine. Regular maintenance and inspection can help prevent engine block cracks and keep your car running smoothly.
Preventing Future Coolant Leaks
Are you worried about engine coolant leaks and want to know how to fix them? Well, you’ve come to the right place! Engine coolant leaks can be a real headache, but with some basic knowledge and a little DIY spirit, you can prevent these pesky leaks from happening in the first place. One of the most common causes of coolant leaks is a worn-out or damaged radiator hose. Over time, these hoses can become brittle or develop cracks, leading to coolant leaks.
One way to prevent this is by regularly inspecting your radiator hoses and replacing them if necessary. Additionally, make sure to check your coolant levels regularly and top them up if needed. Low coolant levels can cause your engine to overheat and put extra strain on your hoses, increasing the risk of leaks.
Another common cause of coolant leaks is a faulty radiator cap. The radiator cap is designed to maintain the pressure in your cooling system and prevent coolant from escaping. If the cap is not functioning properly, it can lead to coolant leaks.
To prevent this, it’s a good idea to replace your radiator cap every few years. Finally, be mindful of any overheating issues with your engine. Excessive heat can cause gaskets and seals to deteriorate, leading to coolant leaks.
If your engine is running hotter than usual, have it checked by a professional to ensure there are no underlying problems. By following these tips, you can take proactive steps to prevent coolant leaks and keep your engine running smoothly.
Performing regular coolant system maintenance
Performing regular coolant system maintenance is essential for preventing future coolant leaks in your vehicle. By taking the time to inspect and maintain your coolant system, you can identify and address any potential issues before they become major problems. One important step is checking the coolant level regularly and topping it off as needed.
Coolant plays a crucial role in regulating your engine’s temperature and preventing overheating. If the coolant level is consistently low, it could be a sign of a leak somewhere in the system. In addition to checking the coolant level, it is also important to inspect the radiator and hoses for any signs of damage or wear.
Cracks or leaks in the radiator or hoses can lead to coolant leaks, and addressing these issues early on can prevent further damage. Regularly flushing and replacing the coolant in your system is another important maintenance task. Over time, coolant can become contaminated or lose its effectiveness, which can lead to overheating and other problems.
By flushing and replacing the coolant according to your vehicle’s manufacturer guidelines, you can ensure that the coolant is doing its job properly. Overall, by performing regular coolant system maintenance, you can keep your vehicle running smoothly and prevent future coolant leaks.
Using the correct coolant for your vehicle
coolant leaks, prevent coolant leaks
Keeping an eye on temperature gauges and warning lights
coolant leaks, preventing future coolant leaks Temperature gauges and warning lights are a crucial part of our vehicles, helping us to monitor the overall health of our engines. But what happens when those gauges start to climb or those warning lights start to flash? One common culprit is a coolant leak. Coolant, also known as antifreeze, plays a vital role in regulating engine temperature and preventing overheating.
So, when a coolant leak occurs, it can lead to serious engine damage if not addressed promptly. To prevent future coolant leaks, it’s essential to stay on top of routine maintenance. This includes regularly checking the coolant level and inspecting hoses and connections for any signs of wear or corrosion.
Additionally, using high-quality coolant and following the manufacturer’s recommended maintenance schedule can help keep your engine running smoothly and prevent costly repairs down the road. So, next time you see a temperature gauge creeping up or a warning light flickering, take it as a cue to keep an eye out for any potential coolant leaks and act quickly to prevent further damage. Your engine will thank you!
Checking for signs of overheating
Checking for signs of overheating, such as a rising temperature gauge or steam coming from the engine, is crucial to preventing future coolant leaks in your car. Coolant leaks can lead to engine damage and expensive repairs, so it’s important to catch any issues early on. In addition to checking for signs of overheating, it’s also important to regularly inspect the hoses and connections in your car’s cooling system.
Look for any leaks or signs of wear and tear, such as cracks or bulges in the hoses. It’s also a good idea to flush and replace the coolant periodically to keep the system clean and prevent buildup. By being proactive and checking for signs of overheating and coolant leaks, you can potentially prevent costly repairs down the line.
So, make it a habit to regularly inspect and maintain your car’s cooling system to keep it running smoothly and prevent any overheating issues.
Conclusion
So, there you have it – the definitive guide on how to fix an engine coolant leak. Remember, tackling this issue head-on is essential to ensuring the long-lasting health and performance of your engine. Plus, you don’t want your car to be leaking coolant like a sieve, turning your driveway into a water park for all the wrong reasons.
By following these steps, you can save yourself a trip to the mechanic and impress your friends with your newfound DIY skills. Just picture it – you confidently popping the hood, armed with your wrench and a smile, ready to conquer that pesky coolant leak like a superhero saving the day. So, don’t let a leaky engine coolant dampen your spirits.
Instead, get out there, grab your tools, and fix that leak like the determined and resourceful car enthusiast you are. And remember, with each successful repair, you’ll become one step closer to earning your honorary degree in Coolant Leak Elimination. So go forth, my friend, and conquer those leaks – your engine will thank you for it!”
FAQs
What are the signs of an engine coolant leak?
Some signs of an engine coolant leak include a sweet smell from the engine, an engine temperature that is hotter than normal, coolant pooling under the car, and coolant level dropping without any apparent reason.
How can I find the source of an engine coolant leak?
To find the source of an engine coolant leak, you can inspect the radiator, hoses, water pump, thermostat housing, and any other components of the cooling system. Look for visible leaks, signs of coolant residue, or damp areas.
Can I drive with an engine coolant leak?
It is not recommended to drive with an engine coolant leak as it can lead to overheating and potential engine damage. It’s best to have the issue repaired before driving the vehicle.
How much does it cost to fix an engine coolant leak?
The cost to fix an engine coolant leak can vary depending on the source of the leak and the extent of the damage. It can range from a simple fix like replacing a hose or a gasket, which may cost around $100 to $300, to more extensive repairs like replacing a radiator or water pump, which may cost $500 to $1000 or more.
How do I temporarily fix an engine coolant leak?
Temporarily fixing an engine coolant leak can be done using products like radiator stop leak additives or sealants. These products can help seal small leaks, but they should only be used as a temporary solution until the leak can be properly repaired.
Can I use water as a coolant in my engine if I have a coolant leak?
In case of an emergency, you can use water as a temporary coolant if your engine has a coolant leak. However, it is important to get the leak fixed and replace the water with the appropriate coolant mixture as soon as possible to prevent engine damage.
How can I prevent engine coolant leaks?
To prevent engine coolant leaks, it is essential to maintain your vehicle’s cooling system regularly. This includes checking coolant levels, inspecting hoses and other components for any signs of wear or damage, and having the cooling system flushed and refilled according to the manufacturer’s recommendation. Additionally, using the appropriate coolant mixture for your vehicle and avoiding excessive heat or pressure can help prevent coolant leaks.