
Are you experiencing issues with your car overheating or running hotter than usual? One of the possible causes could be a problem with your car coolant. Over time, coolant can become old and ineffective, leading to inadequate cooling of the engine. In this blog post, we will guide you on how to replace your car coolant, ensuring that your engine stays cool and runs smoothly.
We’ll provide you with an easy step-by-step process, so even if you’re not a car expert, you’ll be able to do it yourself. By the end of this post, you’ll be equipped with the knowledge to tackle this task and keep your car in tip-top condition. So, let’s dive in and take a look at how you can replace your car coolant effectively.
Table of Contents
Introduction
If you’re finding yourself constantly overheating on the road, it might be time to replace your car’s coolant. The coolant in your vehicle is responsible for keeping the engine at the right temperature, preventing it from overheating. Over time, coolant can become old and contaminated, losing its ability to effectively cool the engine.
Replacing the coolant is a relatively simple task that can be done by most car owners. In this guide, we’ll walk you through the step-by-step process of how to replace car coolant, saving you time and money from taking your vehicle to the mechanic. So let’s dive in!
Why is it important to replace car coolant?
car coolant, replace, importance. Introduction: Car coolant plays a vital role in keeping the engine of your vehicle running smoothly. It helps regulate the temperature of the engine, ensuring that it doesn’t overheat.
Over time, however, coolant can become worn out and less effective at its job. That’s why it’s important to regularly replace your car coolant to maintain optimal engine performance and prevent potential damage. In this blog post, we will explore the reasons why replacing car coolant is essential and how it can benefit your vehicle in the long run.
So let’s dive in and uncover the importance of this often overlooked maintenance task.
Step 1: Prepare your car
Replacing your car’s coolant is an essential part of vehicle maintenance. To start, you’ll need to gather the necessary materials – a new coolant, a coolant funnel, a drain pan, and a pair of gloves. Make sure your car is parked on a flat surface and that the engine is cool before you begin.
Open the hood and locate the radiator cap. Next, remove the cap and position the coolant funnel securely on top of it. Place the drain pan underneath the car, directly under the radiator.
With gloves on, locate the drain plug on the radiator and carefully loosen it. Allow the old coolant to drain completely into the drain pan. Once the coolant has completely drained, tighten the drain plug securely.
Now, it’s time to refill the radiator with the new coolant. Remove the funnel and replace the radiator cap. Start the engine and let it run for a few minutes to circulate the new coolant.
Check the level of coolant in the radiator and top it up if necessary. Finally, check for any leaks and close the hood. By following these steps, you’ll be able to replace your car coolant and ensure the optimal performance of your vehicle.
Gather the required tools and materials
Before you start installing a car stereo system, it’s important to gather all the tools and materials you will need. Having everything ready beforehand will make the installation process much smoother and more efficient. To prepare your car for the stereo installation, you will need a few basic tools such as a set of screwdrivers (both flathead and Phillips), wire cutters/strippers, a wire crimping tool, electrical tape, and a panel removal tool.
These tools will help you remove any existing components, such as the old stereo or dashboard panels, and properly connect and secure the new stereo system. In addition to the tools, you will also need a few materials. Depending on your specific car and stereo system, you may need a wiring harness adapter and an antenna adapter.
These adapters will ensure that the new stereo is compatible with your car’s wiring and antenna connections. You may also need a mounting kit to securely install the new stereo into your car’s dashboard. It’s always a good idea to read the instruction manual that comes with your new stereo system to see if there are any additional tools or materials required.
Following the manufacturer’s instructions will ensure a successful installation and prevent any damage to your car or the new stereo system. By gathering all the necessary tools and materials before starting the installation, you can save time and avoid potential headaches. Being prepared will allow you to focus on the task at hand and complete the installation with ease.
So, gather your tools and let’s get started on transforming your car’s audio system!
Park the car in a safe and flat area
When you’re ready to park your car, the first step is to find a safe and flat area. This will ensure that your car is secure and won’t roll or slide while you’re parking. Look for a space that is free of any obstacles or hazards, such as rocks or potholes, as these could damage your car or cause an accident.
It’s also important to find a space that is well-lit, especially if you’re parking at night, so that you can see clearly and avoid any potential dangers. Once you’ve found the perfect spot, take your time to carefully maneuver your car into position. Remember, parking safely is crucial for the protection of your vehicle and the safety of others.
Step 2: Drain the old coolant
When it comes to replacing your car’s coolant, it’s essential to start with draining the old coolant from your vehicle. This step is crucial because you want to remove any old or contaminated coolant before adding fresh coolant. To begin, locate the drain plug on the bottom of your car’s radiator.
Once you’ve located it, place a container or bucket underneath to catch the coolant as it drains. Then, slowly unscrew the drain plug, being careful not to burn yourself on any hot coolant. Allow the old coolant to completely drain out before moving on to the next step.
Remember to dispose of the old coolant properly, as it is toxic and harmful to the environment. Removing the old coolant is an integral part of the coolant replacement process, as it ensures that your car’s cooling system is clean and ready for the new coolant.
Locate the coolant drain plug
“How to Drain the Old Coolant: Step 2 in Flushing Your Car’s Cooling System” Now that you’ve gathered all the necessary tools and supplies for flushing your car’s cooling system, it’s time to get started. The second step in the process is to drain the old coolant from the system, making way for a fresh batch. But before you do that, you need to locate the coolant drain plug.
The coolant drain plug is typically located at the bottom of the radiator, towards the front of the car. It may vary in design depending on the make and model of your vehicle, but it is usually a small plastic or metal plug with a hexagonal head. You can easily identify it by its distinct shape and position.
Once you’ve found the coolant drain plug, it’s time to actually drain the old coolant. But before you start, make sure you have a container ready to catch the coolant. This will prevent any spills or messes.
It’s also a good idea to wear gloves and safety goggles, as coolant can be harmful to your skin and eyes. To drain the coolant, simply unscrew the drain plug using a wrench or socket. Be careful not to drop or lose the drain plug, as you will need it later.
As you unscrew the drain plug, the coolant will start to flow out of the radiator and into the container. Depending on the size of your radiator, this process may take a few minutes. Once all the coolant has drained out, it’s time to move on to the next step in the process, which is flushing the cooling system.
But before you do that, make sure to close the drain plug tightly to prevent any leakage. You don’t want to lose your newly drained coolant! Draining the old coolant is an essential step in flushing your car’s cooling system. It allows you to remove any old or contaminated coolant and replace it with fresh, clean coolant.
Place a container under the drain plug
Draining the old coolant from your car’s radiator is an important step in maintaining its cooling system. To begin, you’ll want to place a container under the drain plug to catch the old coolant as it drains out. This will prevent any mess and make it easier to dispose of the old coolant properly.
Once you have the container in place, locate the drain plug on the bottom of the radiator. It is usually a small valve or plug that can be opened to allow the coolant to flow out. Use a wrench or pliers to loosen the drain plug and let the old coolant drain into the container.
While the coolant is draining, it’s a good idea to inspect the drain plug for any signs of damage or wear. If you notice any issues, it may be necessary to replace the plug before adding new coolant. Once all of the old coolant has drained out, you can move on to the next step of the coolant flushing process.
Open the drain plug and let the coolant drain
In order to properly maintain your vehicle’s cooling system, it is important to periodically drain and replace the coolant. This ensures that the engine is able to stay at a safe operating temperature and prevents any damage from overheating. The second step in this process is to open the drain plug and let the old coolant drain out.
This plug is typically located at the bottom of the radiator or on the side of the engine block. Before you begin, make sure the engine is completely cool to avoid any potential burns from hot coolant. To access the drain plug, you may need to remove a plastic cover or shield that is protecting it.
Once you locate the plug, place a drain pan or bucket underneath to catch the coolant as it drains out. Then, using a wrench or socket, loosen and remove the plug. As you open the drain plug, you may notice that the coolant starts to flow out in a steady stream.
This is perfectly normal and is a sign that the drain is working properly. Allow the coolant to drain fully until it stops flowing or slows down to a drip. Depending on the size of your vehicle’s cooling system, this can take anywhere from a few minutes to half an hour.
While the coolant is draining, take a moment to inspect the drain plug itself. Look for any signs of damage or wear, such as cracks or stripped threads. If you notice any issues, it may be necessary to replace the plug before continuing.
Once the coolant has finished draining, carefully replace the drain plug and tighten it securely. Be careful not to overtighten, as this can cause damage to the plug or the threads. Finally, dispose of the old coolant properly by taking it to a recycling center or an automotive service facility.
Step 3: Flush the cooling system
When it comes to keeping your car running smoothly, one important maintenance task is replacing the coolant. Over time, coolant can become dirty or contaminated, which can affect the overall performance of your vehicle’s cooling system. Step 3 in the process of replacing car coolant is to flush the cooling system.
Flushing the cooling system involves removing all of the old coolant and any built-up debris or sediment that may have accumulated. This ensures that the new coolant can do its job effectively. To begin the flushing process, you will need to locate the radiator drain plug, usually located at the bottom of the radiator.
Once you have located the plug, place a drain pan underneath it to catch the old coolant when it is released. Then, carefully remove the plug and allow the coolant to drain out. It is important to note that the coolant may still be hot, so use caution to avoid any burns.
Once the old coolant has been drained, replace the drain plug and fill the radiator with a radiator flush solution. This solution will help to remove any remaining debris or sediment within the cooling system. Allow the flush solution to circulate through the system for the recommended amount of time, which is usually around 10 to 15 minutes.
After the flush solution has had time to work, it is time to drain it from the system. Remove the drain plug once again, and allow the flush solution to drain into the pan. It is important to dispose of the old coolant and flush solution properly, as they can be harmful to the environment.
Check with your local recycling center or auto parts store for information on how to properly dispose of these fluids. Once the flush solution has been drained, it is time to fill the system with fresh coolant. Refer to your vehicle’s owner’s manual for the proper type and amount of coolant to use.
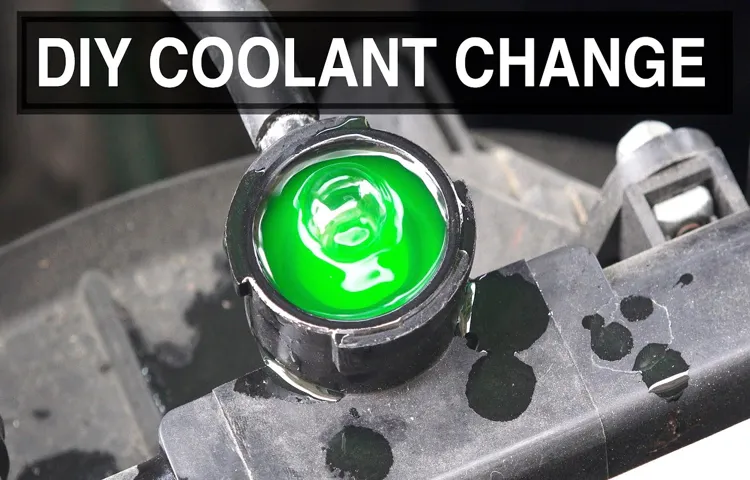
Pour distilled water into the radiator
distilled water, radiator, flush the cooling system Once you’ve drained the old coolant from the radiator, it’s time to flush the cooling system. This step is crucial for keeping your engine running smoothly and preventing any potential damage. To start, pour distilled water into the radiator until it’s full.
Why distilled water? Well, tap water often contains minerals and impurities that can cause buildup and corrosion. Distilled water, on the other hand, is pure and won’t leave any residue behind. Make sure to use a funnel to avoid spillage and fill the radiator to its maximum capacity.
Once the radiator is filled with water, it’s time to start the engine and let it run for about 10 minutes. This will allow the water to circulate through the cooling system and flush out any remaining coolant and debris. After 10 minutes, turn the engine off and let it cool down completely.
Then, drain the water from the radiator once again, making sure to catch it in a drain pan. Repeat this process of filling the radiator with distilled water and running the engine for 10 minutes, followed by draining, until the water runs clear. This ensures that the cooling system is thoroughly flushed and ready for the next step of adding fresh coolant.
Flush the cooling system regularly to keep your engine in top shape and prevent any overheating issues down the line.
Start the car and let it run for a few minutes
cooling system, flush the cooling system
Drain the water from the radiator
In order to properly maintain your vehicle’s cooling system, it is essential to flush the system periodically. Flushing the system involves removing any sediment or debris that may have accumulated and replacing the old coolant with fresh coolant. One important step in the flushing process is draining the water from the radiator.
This step is crucial because it allows you to remove any water that may be contaminated or diluted. To drain the water, you will need to locate the radiator drain plug, usually located at the bottom of the radiator. Once you have located the drain plug, place a drain pan underneath and carefully remove the plug.
Be prepared for a steady flow of water to come out. It is important to wait until all the water drains out before moving on to the next step. Once the water has drained completely, you can proceed with the next steps of flushing the cooling system.
By following this step-by-step process, you can ensure that your vehicle’s cooling system is clean and functioning properly, preventing any overheating issues in the future.
Step 4: Fill the radiator with new coolant
Alright, now that you’ve drained the old coolant from your car’s radiator, it’s time to fill it up with fresh coolant. This step is crucial in maintaining the optimal performance of your vehicle and preventing it from overheating. To start, make sure you have the correct type of coolant for your car.
Check your car’s manual or consult with a mechanic to determine the right coolant for your specific make and model. Once you have the right coolant, locate the radiator fill cap, which is usually located on the top of the radiator. Before opening the cap, double-check that the engine is cool.
Opening the cap on a hot engine can cause the hot coolant to spray out and potentially burn you. Once you’re sure the engine is cool, turn the cap counterclockwise and remove it. Now, it’s time to fill the radiator.
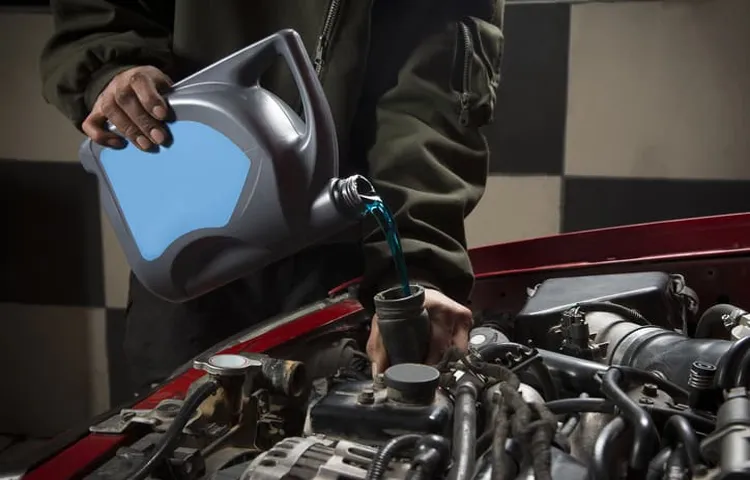
Position a funnel over the radiator fill hole to prevent spills. Slowly pour the coolant into the funnel, being careful not to spill any on the engine or surrounding components. Fill the radiator to the manufacturer’s recommended level, which is usually near the top of the fill hole.
Once the radiator is full, replace the cap securely by turning it clockwise. Be sure to check that the cap is tightly closed to prevent any leaks. After filling the radiator, it’s a good idea to check the coolant level in the reservoir tank as well.
The reservoir tank is typically a plastic container located near the radiator. Remove the cap on the reservoir tank and use the coolant mix to top it off to the appropriate level. Finally, start your car and let it idle for a few minutes.
Determine the recommended coolant type
coolant type, fill the radiator, new coolant Hey there, car enthusiasts! We’re back with another step in our radiator maintenance guide. So, you’ve determined that your radiator needs a coolant change, and now it’s time to figure out what type of coolant to use. This is an important step because using the wrong coolant can damage your radiator and engine, and that’s definitely not something we want.
To determine the recommended coolant type for your car, you’ll need to consult your vehicle’s owner’s manual. This little book of knowledge holds all the secrets to keeping your car running smoothly, and it should have the information you need. Look for a section that talks about radiator maintenance or coolant specifications.
Here, you should find the specific type of coolant that suits your vehicle. If, for some reason, you don’t have access to your owner’s manual, don’t worry! You can also check the radiator cap or the coolant reservoir. Sometimes, the recommended coolant type is printed right there.
Just make sure to double-check with a professional or a trusted source to be absolutely sure. Once you know the recommended coolant type, it’s time to fill up the radiator with fresh, new coolant. Make sure your engine is cool before you start this process, as working with hot fluids can be dangerous.
Locate the radiator cap, usually found on top of the radiator, and remove it slowly. Set it aside in a safe place. Now, it’s time to pour the coolant into the radiator.
Use a funnel to avoid spills and make sure you don’t overfill. Slowly pour the coolant into the radiator until it reaches the recommended level. Remember, using the right coolant is important, but so is the right amount.
Pour the new coolant into the radiator
coolant, radiator, fill, new coolant, overheating, engine maintenance, car maintenance, coolant flush, coolant replacement, engine temperature, car engine, radiator cap, coolant reservoir, radiator hoses, car overheating, coolant system.
Check the coolant level and top up if necessary
Checking the coolant level and topping up if necessary is an important step in maintaining your vehicle’s cooling system. Coolant, also known as antifreeze, helps to regulate the temperature of the engine and prevent it from overheating. Over time, coolant can become depleted or diluted, so it’s essential to regularly check the coolant level and top it up if needed.
To begin, make sure the engine is completely cool before opening the radiator cap. This is crucial to avoid any burns or injuries. Once the engine is cool, locate the radiator cap, typically found at the front of the engine compartment.
Slowly twist the cap counterclockwise to remove it, being cautious of any hot steam or pressure that may escape. Now it’s time to check the coolant level. Look inside the radiator and examine the fluid level.
There should be a marked fill line indicating the proper level of coolant. If the level is below the fill line or appears significantly lower than it should be, it’s time to top up the coolant. Before adding new coolant, it’s important to use the correct type for your vehicle.
Consult your vehicle’s manual or ask a professional to ensure you choose the appropriate coolant. Using the wrong type of coolant can cause damage or lead to inefficient engine performance. Once you have the correct coolant, carefully pour it into the radiator until the fluid reaches the fill line.
Take caution not to overfill, as this can also lead to issues with the cooling system. After topping up the coolant, securely replace the radiator cap by twisting it clockwise until it is tightly sealed. Checking the coolant level and topping up when necessary is a simple yet essential maintenance task that can prevent overheating and potential engine damage.
Step 5: Bleed the cooling system
Once you have replaced the coolant in your car, it’s important to bleed the cooling system to ensure that there are no air pockets remaining. Air pockets can prevent the coolant from circulating properly and may cause the engine to overheat. Bleeding the cooling system is a relatively simple process that can be done at home with basic tools.
To start, make sure that your car is cool and the engine is off. Locate the bleeder valve, which is usually found on the radiator or on one of the cooling system hoses. You may need to consult your car’s manual or do a quick search online to find the specific location for your vehicle.
Once you have located the bleeder valve, place a container underneath to catch any coolant that may be released. Then, use a wrench or pliers to open the valve. As you open the valve, you should start to hear a hissing sound as any air trapped in the system is released.
Allow the coolant to flow freely and continue to open the valve until only coolant is coming out. Once you have finished bleeding the system, close the bleeder valve and clean up any spilled coolant. Check the coolant level in your car’s reservoir and add more if necessary.
It’s also a good idea to run the engine for a few minutes and check for any leaks or abnormal noises. Bleeding the cooling system is an important step in the coolant replacement process and ensures that your car’s engine stays cool and protected. By following these simple steps, you can keep your car running smoothly and avoid any potential issues down the road.
Locate the coolant bleed valve
coolant bleed valve
Open the bleed valve to release trapped air
In the process of bleeding the cooling system of your vehicle, one important step is to open the bleed valve to release any trapped air. This is crucial because trapped air can prevent the cooling system from functioning efficiently, leading to potential issues with overheating. By opening the bleed valve, you allow any air bubbles that may be trapped in the system to escape, ensuring a proper flow of coolant throughout the engine.
Think of it like unclogging a pipe or releasing air from a balloon – by opening the valve, you allow for a smooth and continuous flow. This step is essential in maintaining the health and performance of your vehicle’s cooling system.
Close the bleed valve once coolant flows smoothly
cooling system, bleed valve, coolant, flows smoothly Step 5 in the process of maintaining and repairing your cooling system is to bleed the system. Bleeding the cooling system is an important step that helps remove any air pockets or trapped air in the system. Air pockets can prevent the coolant from flowing smoothly and efficiently, which can lead to overheating and potential damage to your engine.
To bleed the cooling system, you will need to locate the bleed valve, which is typically found near the top of the radiator. The bleed valve is a small valve that allows air to escape from the system. Before you begin, make sure the engine is completely cool to avoid any potential burns or injuries.
To start the bleeding process, place a rag or towel under the bleed valve to catch any coolant that may come out. Then, use a wrench or a pair of pliers to slowly open the bleed valve. As the valve is opened, you will start to hear a hissing sound, indicating that air is being released from the system.
Keep an eye on the coolant level in the radiator or overflow tank as you bleed the system. As the air is released, you may notice that the coolant level drops. This is normal, and you can add more coolant as needed to maintain the proper level.
Continue to bleed the system until you see a steady stream of coolant flowing out of the bleed valve. This is an indication that all the air pockets have been removed, and the coolant is flowing smoothly through the system. Once this happens, close the bleed valve tightly using your wrench or pliers.
After bleeding the cooling system, it’s a good idea to double-check the coolant level and top it off if needed. This is also a good opportunity to inspect the coolant for any signs of contamination or discoloration, which may indicate other issues with your cooling system. Bleeding the cooling system is a necessary step to ensure that your engine stays cool and runs efficiently.
Step 6: Check for leaks
Once you have successfully drained the old coolant from your car’s system and replaced it with fresh coolant, the next step is to check for any potential leaks. Leaks can be a major problem as they can lead to overheating and engine damage. To check for leaks, start by inspecting all the hoses and connections for any signs of moisture or drips.
Make sure all the clamps are tight and secure. Next, inspect the radiator for any cracks or damage. You can do this by visually checking for any signs of leakage or by using a pressure tester to identify any potential leaks.
Additionally, check the water pump and thermostat housing for any signs of leakage. If you spot any leaks, it’s important to address them immediately. Depending on the severity of the leak, it may require simple repairs such as tightening a hose clamp or replacing a damaged hose, or it may require professional assistance.
Regularly checking for leaks and addressing them promptly can help ensure the longevity and reliability of your car’s cooling system.
Inspect the radiator and hoses for any leaks
In the sixth step of inspecting your radiator, it’s important to check for any leaks. Leaks can cause a decrease in the coolant level, which can lead to overheating and potential engine damage. To check for leaks, start by visually inspecting the radiator and hoses for any signs of fluid dripping or wet spots.
If you notice any leaks, it’s important to address them as soon as possible to prevent further issues. This could mean tightening a loose hose clamp or replacing a worn-out hose. It’s always a good idea to keep an eye out for leaks, as catching them early can save you from costly repairs down the road.
Fix any leaks before proceeding
In the process of fixing a leaky faucet, it’s crucial to check for any leaks before moving forward. Even if you think you’ve tightened everything securely, it’s always better to double-check and ensure there are no lingering leaks. The last thing you want is to fix one problem only to discover another one later on.
To check for leaks, turn on the water supply and observe the faucet closely. Look for any signs of dripping or water escaping from unexpected places. If you spot any leaks, take the necessary steps to fix them before continuing with the repair.
This could involve tightening connections, replacing damaged parts, or applying a sealant. By addressing leaks proactively, you can ensure a successful faucet repair and prevent any further water damage or wastage.
Step 7: Reinstall the radiator cap
After draining and refilling the coolant in your car, it’s important to reinstall the radiator cap properly. This step ensures that the cooling system remains pressurized, allowing the coolant to effectively regulate the engine’s temperature. Start by locating the radiator cap, which is usually located on top of the radiator.
Look for any debris or dirt on the cap or around the opening of the radiator. Clean it if necessary to prevent any contaminants from entering the cooling system. Before reinstalling the cap, make sure it is clean and free of any damage or cracks.
A damaged cap can cause leaks and allow air to enter the system, affecting its efficiency. Align the cap with the opening on the radiator and push it down firmly. Turn the cap clockwise to secure it tightly.
It’s important to note that the radiator cap is designed to release pressure when the engine becomes too hot. This prevents the coolant from boiling and causing damage to the cooling system or engine. However, if the cap is not installed correctly or is damaged, it may not release pressure properly.
This can lead to overheating and potential engine damage. Therefore, it’s essential to ensure the cap is securely installed and in good condition. Once the cap is in place, you can close the hood of your car and start the engine.
Allow the engine to run for a few minutes to circulate the coolant. Check for any signs of leaks or abnormalities in the temperature gauge. If everything appears normal, you have successfully replaced the car coolant and reinstalled the radiator cap.
Clean the radiator cap and reinstall it securely
radiator cap, clean, reinstall, secure
Conclusion
Now that you have successfully replaced your car coolant, you can breathe a sigh of relief knowing that your vehicle’s engine will be running cool and smooth. Just think of it as giving your car a refreshing spa treatment, because let’s face it, even cars deserve a little pampering every now and then. So wave goodbye to those overheating troubles and say hello to a car that’s ready to take on the road with a cool and confident attitude.
Just remember, the key to a happy car is a healthy cooling system, and with your newfound knowledge and skills, you’ll be the coolest car owner on the block. Keep it cool, my friends!”
Regularly maintaining and replacing your car coolant is essential for engine performance and longevity.
Now that you have drained and refilled your car’s coolant system, it’s time to wrap up the process by reinstalling the radiator cap. This simple step may seem insignificant, but it’s actually crucial for maintaining the overall performance and longevity of your engine. The radiator cap serves as a seal to keep the coolant system pressurized, which helps prevent overheating and ensures that coolant circulates properly throughout the engine.
Without a properly sealed cap, the coolant could escape, leading to potential engine damage and reduced efficiency. So, make sure to securely tighten the cap back onto the radiator, ensuring a snug fit. With that done, you can consider your coolant maintenance complete and rest assured that your engine will be in good shape for miles to come.
FAQs
How often should car coolant be replaced?
Car coolant should be replaced every 2-3 years or as specified in the car’s manual.
What are the signs that car coolant needs to be replaced?
Signs that car coolant needs to be replaced include overheating, coolant leaks, a sweet smell inside the car, or low coolant levels.
Can I mix different types of car coolant?
It is generally not recommended to mix different types of car coolant as it can negatively affect the cooling system’s performance. It’s best to stick to the coolant recommended by the car manufacturer.
How do I safely dispose of old car coolant?
Old car coolant should be disposed of at a local recycling facility or through a hazardous waste program. It should never be poured down the drain or in the trash.
Can I replace car coolant myself?
Yes, car coolant can be replaced by following the instructions provided in the car’s manual. However, if you’re unsure, it’s best to consult a professional mechanic.
What is the purpose of car coolant?
Car coolant, also known as antifreeze, helps regulate the temperature of the engine by absorbing and dissipating heat. It also helps prevent the engine from freezing in cold temperatures.
How do I check the car coolant level?
To check the car coolant level, locate the coolant reservoir and ensure the fluid level is between the minimum and maximum markings. If it’s below the minimum level, the coolant should be topped up.