

Have you ever tried changing a flat tire on your dirt bike, but found it to be a daunting task? Removing a dirt bike tire may seem like a challenging task, but with the right tools and a little bit of patience, it can be done. Whether you need to change a damaged tire or simply want to swap out your current tire for a different one, learning how to remove a dirt bike tire is an essential skill for any off-road enthusiast. In this blog post, we will guide you through the process step-by-step, providing tips and tricks to make the process as easy as possible.
So, put on your work gloves and get ready to tackle this project with confidence!
Table of Contents
Gather the Necessary Tools
If you’re wondering how to remove a dirt bike tire, the first step is to gather all the necessary tools. This includes a tire iron, a bead breaker, a valve stem tool, and a rubber mallet. The tire iron is used to pry the tire away from the rim, while the bead breaker is used to break the bead away from the rim so that the tire can be removed.
The valve stem tool is used to remove the valve stem from the tube, and the rubber mallet can be used to help loosen the tire from the rim if necessary. It’s important to have all of these tools on hand before attempting to remove a dirt bike tire, as trying to improvise with whatever tools you have on hand can lead to damage to the tire or the bike itself. Once you have all the necessary tools, you’ll be ready to proceed with removing the tire.
Examples: Tire irons, valve stem tool, pliers
When embarking on a tire change, it’s crucial to gather all the necessary tools beforehand to avoid any roadblocks or frustrating setbacks. This means items like tire irons, a valve stem tool, and pliers should be within reach. Tire irons are essential for prying off the tire from the rim, while the valve stem tool makes it easy to deflate the tire.
Pliers can come in handy when trying to remove stubborn valve cores. Assemble these tools in one place so that you can access them quickly and efficiently. Having all the necessary tools on hand will prevent any unnecessary trips back and forth to the garage or store, ensuring a smooth and stress-free tire change.
Don’t forget that having the right tools will make the job much easier and enable you to get back on the road faster.
Deflate the Tire
Removing a dirt bike tire can seem like a daunting task, but with some patience and the right tools, it can be done easily. The first step is to deflate the tire. This not only makes it easier to remove, but also reduces the risk of any damage during the process.
Be sure to remove the valve stem cap and use a valve stem tool or a small screwdriver to depress the valve core and release the air. It’s important to remove all air pressure from the tire before attempting to remove it from the rim. Once the tire is fully deflated, it’s time to remove the wheel from the bike itself.
Use a socket wrench and the appropriate socket to loosen the nuts or bolts holding the wheel in place. Carefully remove the wheel from the bike and place it on a flat surface. From here, it’s a matter of loosening the bead and carefully working the tire off the rim.
With the right technique and tools, removing a dirt bike tire can be a breeze.
Use valve stem tool to let air out of the tire completely
To get started with changing your tire, the first thing you need to do is deflate the tire. This may seem like a simple step, but it’s important to do it correctly to avoid damaging your tire or rim. To deflate the tire, you’ll need a valve stem tool.
This tool allows you to remove the valve stem core and release all of the air from the tire. Make sure you place the tool squarely onto the valve stem to avoid the tool slipping and causing damage. Once the core is removed, you’ll hear a hissing sound as the air escapes from the tire.
Be thorough to ensure that all of the air is released from the tire. If there’s still some air left in the tire, it could make it difficult to remove the tire from the rim. This step is crucial in removing your tire, so take your time and be patient.
Remember, a little bit of prep work will ensure that the rest of the tire changing process goes smoothly.
Break the Bead
Removing a dirt bike tire can be a bit of a challenge, but breaking the bead is a crucial step in the process. The bead is the edge of the tire that grips the rim and holds it in place. To break the bead, you’ll need a bead breaker tool, which can be purchased at most motorcycle or dirt bike shops.
Start by placing the tire and wheel on a flat surface, then position the bead breaker tool at the edge of the rim. Tighten the tool until it applies enough pressure to break the bead. You may need to rock the tool back and forth a few times to fully break the bead.
Once the bead is broken, you can use tire irons to remove the tire from the rim. It’s important to note that breaking the bead can be a dangerous task if not done properly, so make sure to wear appropriate safety gear and follow all instructions carefully. With practice, you’ll become more comfortable with the process and be able to quickly remove and replace dirt bike tires as needed.
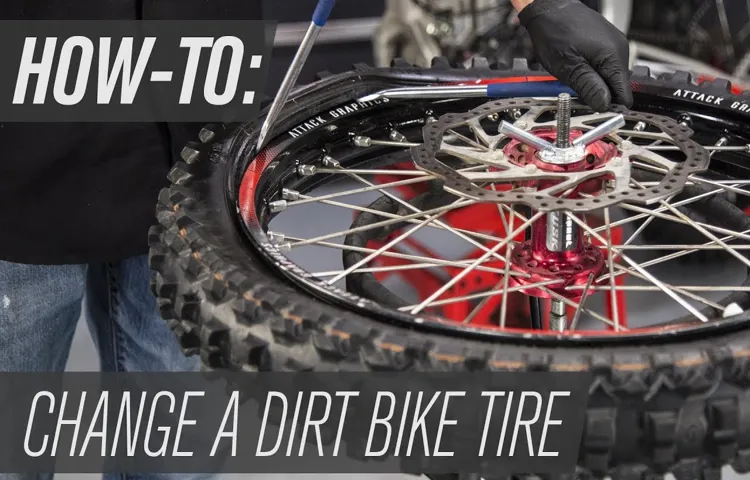
Insert tire iron between tire and rim, work around tire until bead is loose
Breaking the bead of a tire can be quite challenging, but with the right tools and techniques, it can be a fairly straightforward process. One essential tool is a tire iron, which can be inserted between the tire and rim to work around the tire until the bead is loose. It’s important to take care when working with the tire iron to avoid damaging the tire or rim.
Be sure to position the tire iron properly and not apply too much force as this can cause the tire to rupture. Gently push the tire iron around the rim until the bead breaks free. It’s also important to note that not all tires are the same, so be sure to consult your owner’s manual or a professional mechanic for advice on how to properly break the bead of your specific type of tire.
Overall, breaking the bead of a tire requires patience, care, and attention to detail, but with the right approach, it can be done effectively and efficiently.
Repeat on opposite side of the tire
So, you’ve successfully broken the bead on one side of the tire – good job! Now it’s time to repeat the process on the opposite side. Start by flipping the tire over and positioning it so that the side you’re working on is facing up. Using the same tools and techniques as before, work your way around the circumference of the tire, ensuring that the bead is completely detached from the rim.
This can be a bit tricky at first, especially if you’re working with a larger tire or a particularly stubborn bead. Remember to take your time and apply steady pressure as you go – rushing or using too much force can cause damage to the tire or the rim. Once you’ve completed the process on both sides of the tire, you’ll be ready to move on to the next step in the process.
Keep up the good work!
Remove the Tire
Removing a dirt bike tire might appear daunting, but it’s a doable process with the correct tools and confidence. First, elevate the bike off the ground utilizing a stand or blocks to lessen the weight on the tire. Then unleash the air pressure from the tire utilizing a valve stem tool or screwdriver.
Following that, release the brake caliper bolts and slide the caliper off the rotor cautiously. The next step is breaking the bead utilizing a bead breaker tool – clamp the tool onto the tire and force the tire down till the bead pops out of the rim. Once you’ve broken the bead, it’s time to remove the tire from the rim.
Begin at the valve stem and work your way around the tire with tire irons or spoons, gradually prying the tire off. Voila! You’ve successfully removed your dirt bike tire and can now continue with repairs or replacements.
Using tire irons, pry tire off of rim
When it comes to changing a tire, removing the old one is the first step. This may seem like an intimidating task, but with the right tools and techniques, it can be done easily. Using tire irons, you can pry the tire off of the rim.
It’s important to make sure the tire is completely deflated before trying to remove it. Start by inserting one tire iron between the rim and the tire, and then use another to insert farther down the tire. Slowly work the tire irons around the rim, gently prying the tire off inch by inch.
Be careful not to damage the rim in the process. Once the tire is completely off, you can move on to replacing it with a new one. By taking the time to carefully remove the tire, you can ensure a successful tire change without causing any unnecessary damage.
Repeat on opposite side of the tire
Removing a tire can be a daunting task for many people, especially if you are not familiar with the process. However, with the right steps, removing a tire can be an easy and straightforward task. After loosening the lug nuts and jacking up the car, it’s time to remove the tire.
First, ensure that the car is safely supported by using a jack stand. Before removing the tire, take note of which side is facing outwards. Locate the valve stem and use it as a reference point to know which side is facing outwards so that you can put the tire back on the same way.
Next, grab the tire on both sides and gently wiggle it back and forth until it comes off the hub. If the tire doesn’t come off, try kicking it gently from the backside to loosen it. Once the tire is off, repeat the process on the opposite side of the tire, and you’re done.
This process is simple, but it’s essential to take your time and be cautious to avoid any accidents. Remember, safety always comes first.
Clean the Rim
Removing a dirt bike tire can be a daunting task, but with a little know-how, it can be relatively easy to do. One important step to keep in mind is to start by cleaning the rim. This step is crucial because dirt and debris can accumulate on the rim over time, making it harder to remove the tire.
Begin by wiping the area around the rim with a clean cloth to get rid of any dirt and grime. Then, using a brush with stiff bristles, scrub the rim to remove any remaining debris. Don’t be afraid to use a little elbow grease, as this will make it easier to take off the tire.
Additionally, using a cleaning solution specifically designed for removing dirt and grime can also be helpful. By following these steps, you’ll ensure that your tire comes off smoothly, making any repair or replacement much easier in the end. So, the next time you need to remove a dirt bike tire, remember to clean the rim first!
Remove any remaining dirt or debris from the rim before installing new tire
When installing a new tire on your bike, it’s essential to ensure that the rim is clean and free of any dirt or debris. This step is crucial to prevent any damage to the new tire and ensure a long-lasting, smooth ride. Start by removing the old tire and tubing from the rim.
Next, use a soft-bristled brush or a piece of cloth to wipe away any dirt or debris from the surface of the rim. Make sure you get into all the crevices and edges of the rim to remove any stubborn dirt. You can also use a mild detergent or soapy water to help clean the rim if necessary.
Rinse the rim thoroughly with clean water and wait for it to dry completely before installing the new tire and tubing. Taking this simple and straightforward step will not only ensure the longevity of your new tire but also improve your overall riding experience. So, make it a habit to clean your bike’s rim every time you replace your tire for a smoother, more enjoyable ride.
Install New Tire
If you’re wondering how to remove a dirt bike tire, it’s actually not as complicated as you might think! To get started, you’ll first need to ensure that your bike is in a stable position. From there, you can use a tire iron or a similar tool to loosen the bolts that are holding the tire in place. Once they’re loose, you can use another tool to pry the tire off of the wheel rim.
This part might take a bit of effort, so don’t be afraid to put some muscle into it! Once you’ve removed the tire, you can either replace it with a new one yourself or take it to a professional if you’re not comfortable doing it on your own. Overall, removing a dirt bike tire is a doable task as long as you have the right tools and a bit of patience.
Use tire irons to carefully install new tire onto rim
Installing a new tire onto a rim can be a bit tricky if you don’t know what you’re doing. But with the right tools and a little bit of patience, you can get the job done easily. One of the most important tools you’ll need is a tire iron, which is designed to help you pry the tire onto the rim.
Before you begin, make sure you have the correct tire size for your rim and that it’s properly inflated. Then, use the tire iron to remove the old tire from the rim. Next, lubricate the inside of the new tire and the lip of the rim to make it easier to slide on.
Be careful not to pinch the tire or the tube while using the tire iron. Use the tire iron to work your way around the rim, gently prying the tire onto the rim until it’s completely seated. Finally, inflate the tire to the recommended pressure and check for any leaks.
With these simple steps and a little bit of practice, you’ll have your new tire installed and ready to hit the road in no time.
Inflate tire to manufacturer’s recommended pressure level
If you’re installing new tires on your vehicle, it’s important to make sure they are inflated to the manufacturer’s recommended pressure level. This not only ensures proper handling and performance, but it can also help extend the life of your tires. Overinflated tires can cause the center of the tread to wear down faster, while underinflated tires can cause the sides of the tread to wear down faster.
So, how do you know what the recommended pressure level is for your new tires? You can find it in your vehicle’s owner’s manual or on a sticker located inside the driver’s side door jamb. Simply use a tire pressure gauge to check the pressure level and add or release air as needed until it matches the manufacturer’s recommendation. By taking this simple step, you can help ensure a smoother and safer ride for yourself and your passengers.
Check tire pressure with a gauge to ensure it is correct
If you’ve just invested in a new set of tires, congrats! Before you hit the road, make sure you install them correctly. It’s important to check the tire pressure with a gauge to ensure it’s at the correct level. Proper tire pressure not only helps with performance but also extends the life of your tires.
Make sure to double-check the recommended tire pressure in your vehicle’s owner manual or on the tire itself. Once you know the proper pressure, use a gauge to measure it accurately. If the pressure is too low or too high, adjust it accordingly.
A few extra minutes spent checking and adjusting tire pressure can prevent accidents on the road and save you money in the long run. So, take the time to install your new tires correctly and hit the road with confidence knowing you’re driving safely on well-maintained tires.
Conclusion
And there you have it, folks! Removing a dirt bike tire is no easy feat, but with some patience, elbow grease, and a few handy tools, you too can be a master at swapping out tires like a pro. So go forth, fellow dirt bike enthusiasts, and ride with the confidence of knowing you can tackle any tire issue that comes your way! And remember, if all else fails, just ask a friend to lend a hand (or two). Happy riding!”
Removing a dirt bike tire takes patience and the right tools, but can save money compared to taking the bike to a mechanic
Installing a new tire on a dirt bike can seem like a daunting task, but it’s actually not as complicated as you might think. With some patience and the right tools, you can save money by doing it yourself instead of taking it to a mechanic. First, you need to make sure you have the correct tire size and type for your bike.
Once you have that, you’ll need to remove the old tire using tire levers and a bead breaker. After the old tire is off, you’ll want to inspect the rim to make sure there are no cracks or damages. Then it’s time to install the new tire.
Start by lining the tire up on the rim and using your fingers to make sure the bead is nestled inside the rim’s groove. Next, use a tire iron to put the tire onto the rim, being careful not to pinch the tube inside. Finally, use the air compressor to inflate the tire and make sure it’s seated properly before tightening the valve stem and adding the cap back on.
By doing this work yourself, not only will you save money, but you’ll also learn about your dirt bike and be prepared for any future repairs.
FAQs
What tools do I need to remove a dirt bike tire?
To remove a dirt bike tire, you’ll need a tire iron, a wrench, and possibly a bead breaker tool.
Do I need to deflate the tire before removing it?
Yes, you should always deflate the tire before removing it. This will make it easier to break the bead and remove the tire.
How do I break the bead on a dirt bike tire?
You can use a bead breaker tool, or you can use a tire iron to pry the tire away from the rim and loosen the bead.
Should I use lubricant when removing the tire?
Yes, using a lubricant like WD-40 or soapy water can make it easier to remove the tire without damaging it.
Is it necessary to balance the tire after re-installing it?
Yes, balancing the tire is important for a smooth ride and to prevent uneven tire wear.
What should I do if I notice damage to the tire while removing it?
If you notice any damage to the tire while removing it, it’s best to replace the tire rather than trying to repair it.
Can I remove and install a dirt bike tire myself, or should I take it to a professional?
It is possible to remove and install a dirt bike tire yourself, but if you’re not experienced or confident in your abilities, it may be best to take it to a professional.