
Do you know how to use a coolant tester? It’s an essential tool for maintaining the proper functioning of your vehicle’s cooling system. Just like you check your oil regularly, it’s equally important to test your coolant to ensure it’s at the correct levels and is free from any contaminants that can cause damage to your engine. But, if you’re unsure how to use a coolant tester, don’t worry! In this blog post, we’ll walk you through the simple steps of using a coolant tester, so you can keep your car running smoothly and avoid any potential problems down the road.
So, let’s dive in and learn how to use a coolant tester like a pro!
Introduction
Are you experiencing overheating issues with your car? One possible reason for this could be a low coolant level. To determine if this is the case, you can use a coolant tester. A coolant tester is a simple tool that measures the concentration of coolant in your car’s radiator.
It helps you determine if your coolant needs to be topped up or if it needs to be completely replaced. Using a coolant tester is fairly simple. All you need to do is remove the radiator cap, dip the tester into the coolant, and squeeze the rubber bulb on the tester to draw in a small amount of coolant.
Then, you can read the results on the tester’s scale to determine the coolant concentration level. This will help you identify if the coolant is at the proper level or if it needs to be adjusted. Regularly checking and maintaining your coolant level is essential for preventing engine overheating and other related issues.
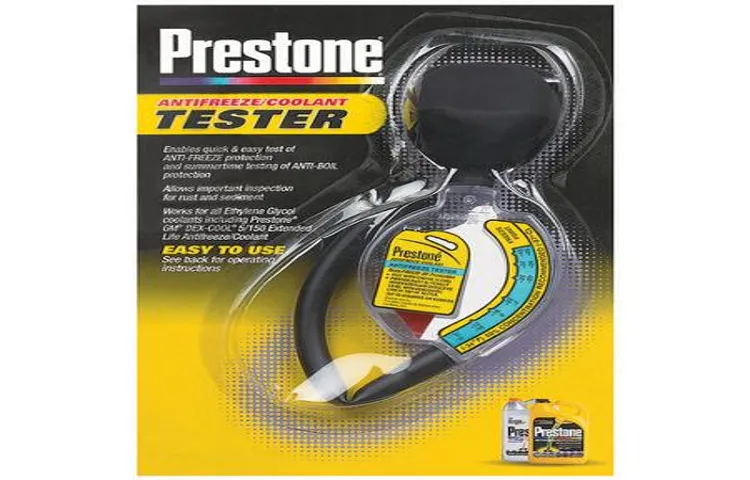
What is a Coolant Tester?
coolant tester
Why Use a Coolant Tester?
Coolant tester Introduction: Maintaining the proper levels of coolant in your vehicle is essential for keeping the engine running smoothly and avoiding costly repairs. But how do you know if your coolant is still good or if it needs to be replaced? That’s where a coolant tester comes in. This handy tool allows you to check the condition of your coolant and determine whether it needs to be changed.
In this blog post, we will discuss why using a coolant tester is important and how it can save you time, money, and potential headaches down the road. So, read on to find out more about this invaluable tool and why you should have one in your automotive toolkit.
Step-by-Step Guide
Have you ever wondered how to use a coolant tester? Well, you’re in luck because I’m here to guide you through the process step by step. Using a coolant tester is a simple and efficient way to check the condition of your engine coolant. This tool helps you determine if your coolant needs to be replaced or if it is still in good condition.
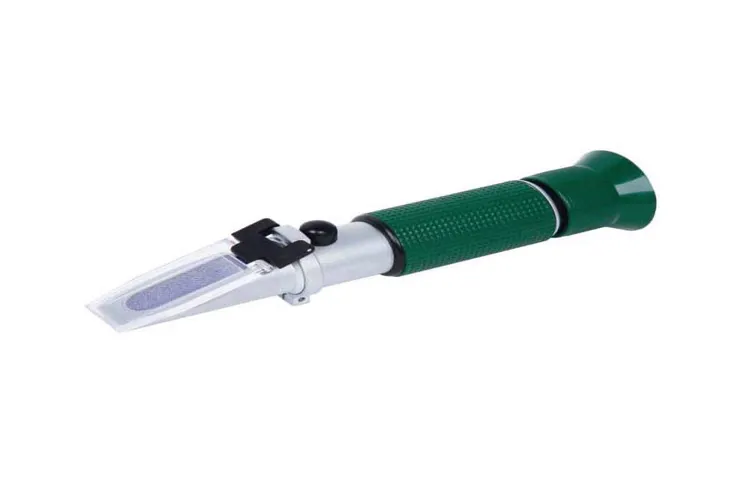
To use a coolant tester, start by removing the radiator or coolant reservoir cap and dipping the tester’s sensor into the coolant. Make sure the tester is submerged at least halfway to get an accurate reading. Then squeeze the tester’s rubber bulb a few times to create a vacuum and draw the coolant into the tester.
Release the bulb and look at the gauge on the tester. It will show you the temperature at which the coolant will start to freeze and the level of corrosion protection it provides. If the readings are outside the acceptable range, it’s time to replace your coolant.
Remember, using a coolant tester is a quick and easy way to ensure that your engine coolant is in good shape and that you are keeping your engine protected. So, the next time you’re wondering if it’s time to replace your coolant, grab a coolant tester and check it out for yourself!
Step 1: Prepare Your Coolant Tester
coolant tester, automotive maintenance, testing coolant, coolant system, vehicle engine, maintenance routine, check coolant, engine performance. The first step in testing your coolant is to prepare your coolant tester. This is an essential tool for maintaining your vehicle’s coolant system and ensuring optimal engine performance.
To start, you’ll want to gather your coolant tester and make sure it is clean and dry. This will ensure accurate readings when you test your coolant. Next, locate the coolant reservoir in your vehicle.
This is typically a translucent plastic container located near the front of the engine bay. Carefully remove the cap from the reservoir, being cautious of any hot coolant that may be present. Finally, insert the nozzle of your coolant tester into the coolant reservoir.
Be sure to follow the manufacturer’s instructions for your specific tester, as the process may vary. Once your tester is properly inserted, you are ready to move on to the next step in testing your coolant.
Step 2: Check the Coolant Level
coolant level, car maintenance, checking coolant level, car engine, overheating, engine temperature, radiator cap, coolant reservoir, fluid levels, engine coolant. When it comes to car maintenance, keeping an eye on your engine coolant level is essential to prevent overheating and potential damage to your engine. Fortunately, checking the coolant level is a simple task that you can easily do yourself.
Here’s a step-by-step guide to help you through the process. The first step is to locate your car’s radiator cap. This cap is typically found on top of the radiator, but in some cars, it may be located on the coolant reservoir.
Once you’ve located the cap, make sure that the engine is cool before proceeding. It’s important to never open the radiator cap while the engine is still hot, as the pressure can cause hot coolant to spray out and potentially cause burns. After ensuring that the engine is cool, remove the radiator cap or, if applicable, the cap on the coolant reservoir.
Take a moment to examine the cap and make sure that it’s in good condition. If you notice any cracks or signs of wear, it’s best to replace the cap to ensure a proper seal. Next, you’ll want to inspect the coolant level.
Most coolant reservoirs have markings on the side indicating the optimal level for the coolant. If the level is below the minimum mark, it’s important to add coolant. You can do this by pouring the coolant directly into the reservoir until it reaches the correct level.
Be sure to use the appropriate type of coolant recommended by your vehicle’s manufacturer. Once you’ve added coolant, replace the cap securely. It’s important to ensure that the cap is tightened properly to maintain a seal and prevent any coolant leaks.
Step 3: Insert the Coolant Tester
coolant tester, step-by-step guide, insert coolant tester
Step 4: Read the Results
reading the results After you have finished running your analysis and processing your data, the next step is to carefully read and interpret the results. This is a crucial step in any research or data analysis process, as it allows you to draw meaningful conclusions and insights from your data. When reading the results, it is important to keep in mind the specific objectives of your analysis and the research question you are trying to answer.
Look for patterns, trends, and relationships in the data that may provide insights into your research question. Pay attention to any significant findings or unexpected results that may require further exploration or explanation. It is also important to critically evaluate the quality and reliability of the results.
Consider the limitations of your data and the analysis techniques used, and assess the validity and generalizability of your findings. Remember that correlation does not imply causation, and be cautious about making sweeping conclusions based on your results. In addition, it is helpful to visualize the results using charts, graphs, or tables.
Visual representations can make it easier to identify patterns and trends in the data and communicate your findings to others. Consider using descriptive statistics such as means, medians, and standard deviations to summarize and quantify the results. Lastly, don’t forget to document your findings and conclusions in a clear and organized manner.
This will make it easier for others to understand and replicate your analysis, and it will also serve as a reference for future research and analysis. In summary, reading the results of your analysis is a critical step in the research and data analysis process. By carefully interpreting the data, considering the research question, and critically evaluating the findings, you can draw meaningful conclusions and insights from your analysis.
Visualizing the results and documenting your findings will help communicate your results to others and ensure that your work can be reproduced and built upon in the future. So take your time, analyze your results thoroughly, and let the data guide you to the answers you seek.
Tips and Precautions
Using a coolant tester is a simple and effective way to ensure that your vehicle’s coolant is functioning properly and protecting your engine from overheating. To use a coolant tester, start by opening the hood of your car and locating the coolant reservoir. Remove the cap from the reservoir and insert the tester into the coolant.
Squeeze the bulb on the tester to draw some coolant into the tester. Then, hold the tester up to the light and look for the floating balls inside. These balls will indicate the freezing and boiling points of your coolant.
Make sure to match the balls with the corresponding temperature markings on the tester. If the balls are floating at the correct levels, then your coolant is in good condition. However, if the balls are not floating at the correct levels, you may need to add more coolant or have your coolant system checked by a professional.
Remember to always use caution when working with hot coolant, and wear protective gloves and eyewear to prevent burns or injuries. By regularly testing your coolant, you can ensure that your engine stays cool and avoid costly repairs down the road.
Tip 1: Follow the Manufacturer’s Instructions
One of the most important things to keep in mind when using any product is to follow the manufacturer’s instructions. Whether it’s a new electronic gadget, a home appliance, or even a beauty product, the instructions provided by the manufacturer are there for a reason. They contain important information about how to properly use and maintain the product, as well as any potential risks or precautions you need to be aware of.
So before you start using a new product, take the time to read through the instructions carefully. This will help ensure that you get the best performance out of the product and avoid any unnecessary accidents or damage. Don’t just assume you know how to use something based on your previous experience with similar products.
Each product is different and may have its own unique features or requirements.
Tip 2: Keep Safety in Mind
“tips and precautions for safety and well-being” Now that you’ve decided to embark on your next adventure, it’s important to keep safety in mind. Whether you’re traveling to a familiar destination or exploring new territories, taking precautions can make a world of difference in ensuring a smooth and enjoyable trip. One of the first things you can do is to research the safety situation of your chosen destination.
Check for any travel advisories or warnings issued by government agencies, and stay informed about the local laws and customs. It’s also a good idea to share your travel itinerary with someone you trust, so they know where you’ll be and can check in on you if needed. When it comes to personal safety, be aware of your surroundings at all times and trust your instincts.
If something doesn’t feel right, it’s better to err on the side of caution. Avoid flashy displays of wealth, and keep your personal belongings secure. Be mindful of where you keep your passport, wallet, and other important documents.
Consider purchasing travel insurance to protect yourself against unforeseen circumstances. And lastly, don’t forget the basics – stay hydrated, get enough rest, and take care of your physical and mental well-being. By taking these simple precautions, you can ensure a safe and enjoyable travel experience.
Precaution 1: Use Protective Gloves and Eyewear
“Protective gloves and eyewear should always be used when it comes to your safety. Whether you’re working in a chemical laboratory or simply handling household cleaning products, wearing gloves and eyewear provides a crucial barrier between potential harm and yourself. Think of it as a superhero suit, protecting you from the harmful effects of chemicals, sharp objects, and other potential hazards.
Just like Superman would never go into battle without his cape, you should never engage in activities that pose a risk to your eyes or hands without the proper gear. So, next time you’re about to tackle a task that may involve dangerous substances or objects, make sure you’ve got your safety gear on, ready to take on anything that comes your way.”
Precaution 2: Dispose of Coolant Properly
Coolant disposal is an often overlooked aspect of vehicle maintenance, but it is crucial for both the environment and your own safety. When disposing of coolant, it is important to do so properly to prevent harm to the environment. Coolant is a mixture of water, antifreeze, and other additives that help regulate your engine’s temperature.
However, coolant can contain hazardous chemicals that can be harmful if not handled correctly. This is why it is important to never dump coolant down the drain or into the ground. Instead, you should take it to a designated recycling center or an auto repair shop that accepts used coolant.
These facilities have the proper equipment and knowledge to safely handle and dispose of coolant in an environmentally friendly manner. By disposing of coolant properly, you are not only protecting the environment but also preventing potential harm to yourself and others. So, the next time you need to dispose of coolant, remember to do so responsibly.
Conclusion
In conclusion, using a coolant tester is as simple as sipping tea from a cup of knowledge. Just follow these steps: first, ensure the engine is cooled down like a cucumber on a breeze. Next, stick the tester into the coolant reservoir like you’re sticking a thermometer into the mouth of a curious child.
Squeeze the bulb and watch as the tester eagerly slurps up the coolant like a parched traveler savoring a refreshing oasis. Finally, read the results on the tester like a seasoned fortune teller decoding the secrets of the universe. And just like that, you’ll know if your car’s coolant is as chill as a polar bear in a snowstorm or as hot as a jalapeno on a summer barbecue.
So go forth, my friend, armed with the wisdom of the coolant tester, and keep your engine running smoother than a well-lubricated joke.”
FAQs
Here are some possible FAQ questions and answers on the topic of “how to use a coolant tester”:
What is a coolant tester?
A coolant tester is a tool used to measure the concentration and condition of coolant in a car’s engine.
Why should I use a coolant tester?
Using a coolant tester allows you to check the quality and effectiveness of your engine coolant. It helps ensure that your coolant is protecting your engine from overheating and corrosion.
How do I use a coolant tester?
To use a coolant tester, you need to first make sure your engine is cool and the coolant is settled. Then, open the radiator cap or coolant reservoir and dip the tester’s probe into the coolant. The tester will provide a reading or visual indication of the coolant’s condition and concentration.
What should the coolant concentration be?
The ideal coolant concentration should be specified in your car’s manual. It is usually around 50% coolant and 50% distilled water. The coolant tester can help you determine if the concentration is within the recommended range.
What if the coolant concentration is too low?
If the coolant concentration is too low, you can add a mixture of coolant and distilled water to bring it up to the desired level. It’s important to not use tap water as it may contain minerals that can damage your cooling system.
What if the coolant concentration is too high?
If the coolant concentration is too high, you can add some distilled water to dilute the mixture. It’s important to follow the proper ratio to avoid compromising the effectiveness of the coolant.
What if the coolant appears dirty or contaminated?
If the coolant appears dirty or contaminated, it may be necessary to flush and replace the coolant. Consult your car’s manual or seek the assistance of a professional mechanic for guidance on this process.
How often should I use a coolant tester? A8. It is recommended to use a coolant tester at least once a year, or whenever you suspect an issue with your cooling system. Regular testing helps ensure that your coolant is in good condition for optimal engine performance and longevity.
Can I use a coolant tester for other fluids?
Coolant testers are specifically designed to test the condition and concentration of engine coolant. They may not be suitable for testing other types of fluids. Consult the manufacturer’s instructions or seek professional guidance for testing other fluids.
Are coolant testers expensive?
Coolant testers are generally affordable and can range in price depending on the brand and features. Basic coolant testers can be found for under $20, while more advanced models may cost around $50 or more.
Can I use a coolant tester on any type of vehicle?
Coolant testers are typically designed to be used on most types of vehicles, including cars, trucks, and motorcycles. However, it’s always recommended to check the compatibility of the specific coolant tester with your vehicle’s make and model.
What are the signs of a coolant problem?
Signs of a coolant problem can include overheating, a sweet or unusual odor coming from the engine, coolant leaks, or the appearance of rusty or discolored coolant. If you notice any of these signs, it’s important to use a coolant tester to assess the condition and concentration of your coolant.