
Hey there Chevy Silverado owners! Are you wondering how to check the coolant level in your truck? Well, you’re in luck because today we’re going to walk you through the process step by step. Checking your coolant level is an essential part of regular vehicle maintenance, as it ensures that your engine stays cool and running smoothly. Think of your coolant as your engine’s lifeline – it’s like the blood that keeps everything running smoothly.
Just like how you need to check your own blood levels to make sure you’re healthy, you need to check your coolant level to ensure your engine is in good shape. By keeping an eye on your coolant level, you can catch any potential issues early on and prevent costly repairs down the line. So, how do you check your coolant level in your Chevy Silverado? It’s actually quite simple! First, make sure your engine is cool and turned off.
Once it’s safe to do so, pop the hood and locate the coolant reservoir. In most Silverado models, you can find it near the front of the engine bay, typically on the passenger side. It’s a translucent plastic tank with markings indicating the minimum and maximum levels.
Next, remove the cap of the coolant reservoir and take a look inside. You should be able to see the coolant level, indicated by the markings on the side of the tank. Ideally, the level should be between the minimum and maximum marks.
If the coolant level is below the minimum mark, it’s time to add more coolant. Conversely, if the level is above the maximum mark, it’s a sign of overfilling and might require draining some coolant. Remember, always use the proper coolant recommended for your Chevy Silverado, as using the wrong type can cause damage to your engine.
It’s also important to note that coolant levels can vary depending on the temperature of your engine, so it’s best to check it when the engine is cool to get an accurate reading. By regularly checking your coolant level, you can stay on top of your Chevy Silverado’s health and ensure it stays running smoothly for years to come. So, take a few moments to check your coolant level today and keep your truck in tip-top shape!
Table of Contents
Introduction
Checking the coolant level in your Chevy Silverado is an essential part of regular maintenance. Not having enough coolant can result in serious engine damage, so it’s important to keep an eye on it. So, how do you check the coolant level in your Chevy Silverado? It’s actually a pretty straightforward process.
First, make sure your vehicle is parked on a level surface and the engine is cool. Locate the coolant reservoir, which is typically a white plastic tank with a cap that says “coolant.” Open the cap and visually inspect the coolant level.
The coolant should be between the “full” and “low” marks on the tank. If it’s below the “low” mark, you’ll need to add more coolant. Remember to use the recommended type of coolant for your specific Silverado model.
Just like checking your oil or tire pressure, checking your coolant level is an important step in keeping your Chevy Silverado running smoothly and preventing any potential engine issues. So, don’t forget to make this part of your regular vehicle maintenance routine.
Briefly explain the importance of checking the coolant level in a Chevy Silverado and why it should be done regularly.
Chevy Silverado, coolant level, importance, regularly
What You’ll Need
One important aspect of maintaining the performance and longevity of your Chevy Silverado is regularly checking the coolant level. This ensures that your engine stays cool and prevents it from overheating, which can cause costly damage. So, what do you need to do to check the coolant level in your Chevy Silverado? First, make sure you have a clean rag or towel handy to wipe off any excess coolant.
Next, locate the coolant reservoir, which is usually a plastic tank located near the radiator. Open the cap and check the level of coolant inside. The coolant should be at or above the minimum line marked on the tank.
If it is below the minimum line, you will need to add coolant to bring it back up to the proper level. It’s important to use the correct coolant for your specific Silverado model, as using the wrong type can cause damage. If you’re unsure, consult the owner’s manual or talk to a trusted mechanic.
Keeping a close eye on your coolant level and topping it up as needed will help ensure your Chevy Silverado stays running smoothly for years to come.
List the necessary tools and materials needed to check the coolant level, such as a coolant tester or a flashlight.
When it comes to checking the coolant level in your vehicle, there are a few tools and materials that will come in handy. First and foremost, you’ll need a flashlight to see inside the engine compartment and locate the coolant reservoir. This will help you determine the current level of coolant in the system.
Additionally, a coolant tester is essential to measure the concentration of the coolant mixture. This is important because an improper ratio of coolant to water can result in freezing or boiling of the coolant, which can lead to engine damage. Finally, it’s always a good idea to have a cloth or rag on hand to wipe away any spilled coolant or to clean the coolant reservoir cap before removing it.
By having these tools and materials at your disposal, you’ll be able to effectively check the coolant level in your vehicle and ensure that it’s properly maintained for optimal engine performance.
Step 1: Park the Truck
So you want to learn how to check the coolant level in your Chevy Silverado? Well, you’ve come to the right place! The first step is to park your truck on a level surface and turn off the engine. It’s crucial to make sure the truck is not running, as you don’t want to risk getting burned by hot coolant. Once you’ve turned off the engine, give it a couple of minutes to cool down before proceeding.
Safety first, right? Once the engine has cooled down, open the hood and locate the coolant reservoir. It’s usually a translucent plastic tank with a cap labeled “coolant” or “antifreeze.” Remove the cap, being cautious of any pressure buildup.
Look inside the reservoir and check the coolant level. Most reservoirs have labels indicating the “Full” and “Low” levels, so make sure the coolant level falls within the appropriate range. If the coolant level is below the “Low” mark, you may need to add more coolant.
However, it’s essential to consult your vehicle’s owner’s manual for the correct type and mixture of coolant to use. And there you have it, step one of checking the coolant level in your Chevy Silverado: park the truck! Stay tuned for the next steps to keep your truck running smoothly.
Explain the importance of parking the truck on a level surface and turning off the engine before checking the coolant level.
The first step in checking the coolant level in a truck is to park the vehicle on a level surface. This may seem like a simple and obvious step, but it is actually quite important. Parking the truck on a level surface ensures that the coolant is distributed evenly throughout the engine, allowing for an accurate reading of the coolant level.
If the truck is parked on an incline or decline, the coolant may be concentrated in one area of the engine, giving a false reading. This could lead to either overfilling or underfilling the coolant, which can cause serious damage to the engine. Additionally, it is crucial to turn off the engine before checking the coolant level.
This is because the coolant is circulated by the water pump, which is driven by the engine. So, if the engine is still running, the coolant will be actively circulating through the system, making it difficult to get an accurate reading. Furthermore, checking the coolant level with the engine running can be dangerous, as the coolant can be hot and under pressure, posing a risk of burns or injury.
By parking the truck on a level surface and turning off the engine before checking the coolant level, you can ensure an accurate reading and maintain the health of your truck’s engine. It only takes a few extra moments to do this step properly, but it can save you from costly repairs and potential accidents in the long run. So, always remember to find a level spot to park and turn off the engine before checking your truck’s coolant level.
Step 2: Locate the Coolant Reservoir
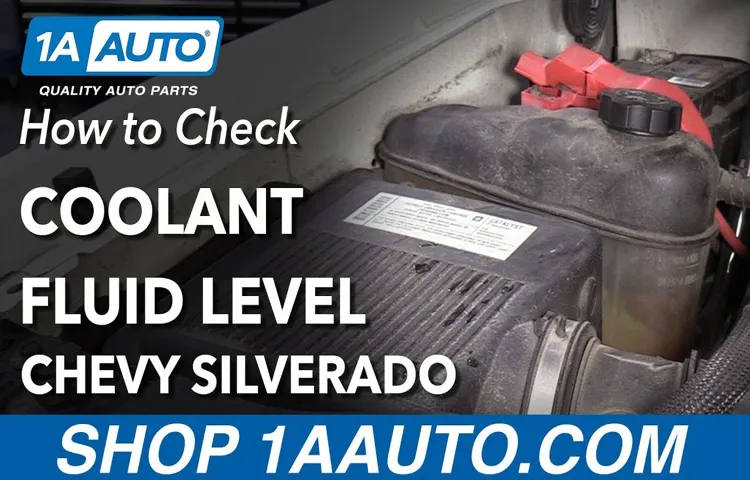
Once you’ve popped the hood of your Chevy Silverado, it’s time to locate the coolant reservoir. This is where you can check the coolant level in your truck. The coolant reservoir is typically a translucent plastic tank marked with “coolant” or “engine coolant.
” It’s usually located near the front of the engine compartment, on the driver’s side of the vehicle. You may need to move some components or parts out of the way to get a clear view of the reservoir. Once you’ve located it, take a moment to examine the coolant level indicator on the side of the tank.
It will usually have markings indicating the minimum and maximum levels. If the coolant level is below the minimum mark, it’s time to add more coolant. On the other hand, if the level is between the minimum and maximum marks, you can rest assured knowing your Chevy Silverado has enough coolant to keep the engine running at its optimal temperature.
Describe where the coolant reservoir is located in a Chevy Silverado and how to access it.
coolant reservoir, Chevy Silverado, access, location When it comes to accessing the coolant reservoir in a Chevy Silverado, it’s actually quite easy once you know where to look. The coolant reservoir is typically located near the front of the engine compartment, on the driver’s side. It is a translucent plastic container that holds the coolant needed to keep your engine from overheating.
To access the reservoir, you simply need to open the hood of your Silverado and locate the reservoir. It’s usually labeled with a cap that says “Coolant” or “Engine Coolant.” Once you’ve located it, you can remove the cap to check the coolant level.
Just be sure to do this when the engine is cool to avoid any potential injuries from hot coolant. If you need to add coolant, simply pour it into the reservoir until the level reaches the “Full” mark. It’s important to keep an eye on the coolant level in your Silverado to ensure that your engine stays cool and running smoothly.
So, the next time you need to check or add coolant in your Chevy Silverado, now you know exactly where to find the coolant reservoir and how to access it.
Include a visual aid, such as a diagram or a photo, to help readers locate the coolant reservoir.
coolant reservoir, locate coolant reservoir, visual aid, diagram, photo In order to properly maintain your vehicle’s coolant system, it’s important to know where to locate the coolant reservoir. This is where you will add coolant if it is low or if you need to perform a coolant flush. The coolant reservoir is typically a plastic tank that is located near the front of the engine compartment.
It is commonly labeled with a cap that has the word “coolant” or an icon that resembles a radiator. The reservoir can vary in shape and size depending on the make and model of your vehicle, but it is usually translucent so that you can easily see the level of coolant inside. To locate the coolant reservoir, open the hood of your car and look towards the front of the engine compartment.
You will likely see a variety of components, such as the radiator, air intake, and battery. The coolant reservoir is typically located near the radiator, but it can vary in position depending on the make and model of your vehicle. Some vehicles may have the coolant reservoir on the passenger side, while others may have it on the driver’s side.
If you are having trouble finding the coolant reservoir, it can be helpful to refer to your vehicle’s owner’s manual or consult with an automotive professional. They can provide you with more specific information about the location of the coolant reservoir for your particular vehicle. Additionally, a visual aid, such as a diagram or a photo, can be incredibly useful in helping you locate the coolant reservoir.
These visual aids may be available in the owner’s manual or online through the manufacturer’s website. By utilizing these resources, you can easily locate the coolant reservoir and properly maintain your vehicle’s coolant system.
Step 3: Check the Coolant Level
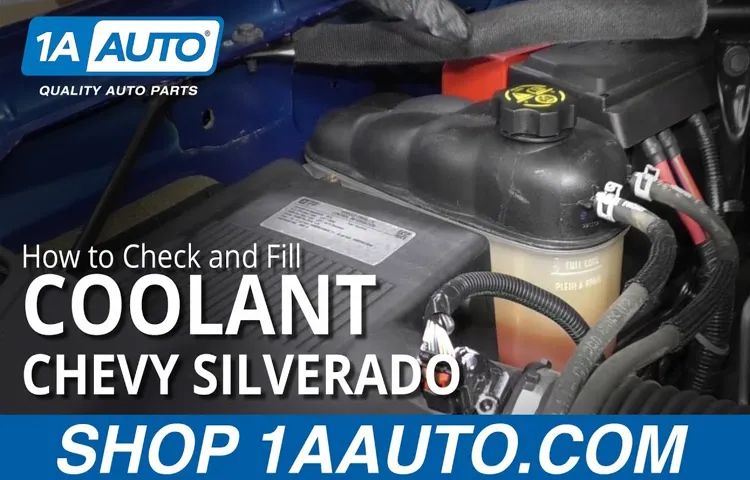
One important step in maintaining your Chevy Silverado is checking the coolant level regularly. Coolant is a crucial component in keeping your engine cool and preventing it from overheating. To check the coolant level, start by locating the coolant reservoir.
It is usually a translucent plastic container located near the radiator. Once you’ve found it, make sure the engine is cool and remove the cap from the reservoir. You can then visually inspect the coolant level, which should be between the minimum and maximum markings on the reservoir.
If the level is below the minimum mark, you will need to add coolant. It’s important to use the correct type of coolant for your specific Silverado model. Mixing different types of coolant can lead to engine damage.
Simply pour the coolant into the reservoir until it reaches the desired level and then replace the cap securely. Remember to check the coolant level regularly and top it off as needed to keep your Chevy Silverado running smoothly and efficiently.
Provide step-by-step instructions on how to check the coolant level in the reservoir, including how to properly read the markings.
To check the coolant level in the reservoir, start by locating the coolant reservoir in your vehicle’s engine bay. It’s usually a translucent plastic container with markings on the side indicating the minimum and maximum levels. Make sure the engine is cool before opening the hood to prevent any burns.
Once you’ve found the reservoir, remove the cap and inspect the coolant level. Ideally, it should be between the minimum and maximum markings. If it’s below the minimum level, you’ll need to add more coolant to prevent overheating.
On the other hand, if the coolant is above the maximum level, it could indicate an issue with the cooling system. To read the markings accurately, you may need to shine a flashlight to see the level more clearly. The coolant should be at a level that allows for proper heat dissipation and prevents any air pockets in the system.
Remember to always refer to your vehicle’s owner manual for specific instructions and precautions when checking the coolant level.
Encourage readers to use a flashlight if necessary to get a clear view of the coolant level.
coolant level, flashlight Step 3 in checking your car’s coolant level is to use a flashlight if necessary to get a clear view. Sometimes, the coolant reservoir can be located in a tight or dark area, making it difficult to see the level with just your eyes. Using a flashlight can help illuminate the reservoir and allow you to get a better view of the coolant level.
So, if you’re having trouble seeing the coolant level, don’t be afraid to grab a flashlight and shine some light on the situation. It’s important to have a clear view of the coolant level to ensure that your car is properly cooled and running smoothly.
Step 4: Add Coolant if Needed
Now that you’ve checked the coolant level in your Chevy Silverado, it’s time to add coolant if needed. If the coolant level is below the recommended mark on the overflow tank or radiator, it’s important to top it up. Coolant is vital for regulating the temperature of your engine and preventing it from overheating.
So, how do you go about adding coolant to your Silverado? First, make sure the engine is cool before attempting to add coolant. Opening the radiator cap or overflow tank when the engine is hot can lead to dangerous steam and pressure release. Once the engine has cooled down, locate the radiator cap or overflow tank.
If your Silverado has a radiator cap, carefully remove it by turning it counterclockwise. Be cautious as there may still be hot coolant underneath. Place a cloth or rag over the cap to protect your hand and slowly release any pressure that might have built up before completely removing the cap.
If your Silverado has an overflow tank, it will have a fill line indicating the optimal level of coolant. Simply pour the coolant into the tank until it reaches the recommended mark. Make sure not to overfill the tank, as it can lead to overflow and potential damage to the cooling system.
Once you’ve added the necessary coolant, replace the cap securely. If you removed the radiator cap, ensure it is twisted on tightly before moving on. Start the engine and let it run for a few minutes, allowing the coolant to circulate through the system.
While the engine is running, keep an eye on the temperature gauge to ensure it stays at a normal range. After running the engine for a few minutes, check for any leaks or drips around the coolant system. If you notice any signs of leakage, it’s crucial to have it inspected and repaired by a professional.
Explain what to do if the coolant level is below the recommended level, including how to add coolant safely.
If you find that the coolant level in your car is below the recommended level, there are a few steps you can take to safely add coolant. First, make sure the engine is cool before opening the hood. Next, locate the coolant reservoir, which is usually a plastic tank labeled “coolant” or “antifreeze.
” Check the markings on the side of the reservoir to determine the appropriate level of coolant. If it is below the recommended level, it’s time to add coolant. To add coolant, you’ll need a mixture of half coolant and half distilled water.
This ensures the right balance of protection and performance for your engine. Make sure you have the correct type of coolant for your vehicle, as different vehicles may require different types. Once you have the correct coolant mixture, open the cap of the coolant reservoir.
It’s important to note that opening the cap while the engine is hot can lead to burns, so be sure to wait until it has cooled down. Slowly pour the mixture into the reservoir until it reaches the appropriate level. Be careful not to overfill, as this can cause issues as well.
After adding the coolant, replace the cap securely and check for any leaks. It’s also a good idea to check the coolant level regularly to ensure it remains at the recommended level. If you notice that the coolant level continues to drop, it may indicate a larger issue with your cooling system, and it’s best to have it checked by a professional.
In summary, if your coolant level is below the recommended level, safely adding coolant is a straightforward process. Make sure the engine is cool, locate the coolant reservoir, and add a mixture of coolant and distilled water to the appropriate level. Remember to check for leaks and monitor the coolant level regularly to ensure your engine stays cool and protected.
Step 5: Replace the Cap
Now that you’ve checked the coolant level in your Chevy Silverado and addressed any issues, it’s time to replace the cap. This may seem like a simple step, but it’s an important one to ensure the proper functioning of your cooling system. The cap helps to maintain the correct pressure in the system, preventing overheating and potential damage to the engine.
To replace the cap, simply line up the tabs on the cap with the notches on the radiator or coolant reservoir and press it firmly into place. Make sure it is secure and tight to prevent any leaks. Once the cap is replaced, you can feel confident that your Chevy Silverado is ready to hit the road again, with a properly functioning cooling system.
Remind readers to properly replace the coolant reservoir cap after checking or adding coolant.
In the excitement of checking or adding coolant to your car’s engine, it’s easy to forget one crucial step: replacing the coolant reservoir cap. But keeping this little cap on tight is crucial to maintaining the optimal performance of your vehicle. Think of it as the “lid” that keeps all the coolant goodness locked in.
Without the cap securely in place, you risk losing coolant through evaporation or splashing, which can lead to engine overheating and potential damage. Just like forgetting to put the lid back on a bottle of soda, forgetting to replace the cap on your coolant reservoir can create a fizzy mess. So, after you’ve finished checking or adding coolant, take a moment to double-check that the cap is back on snugly.
Trust me, your car will thank you for it!
Conclusion
In conclusion, checking the coolant level in your Chevy Silverado is as essential as opening the door before getting in. Neglecting this vital task could lead to overheating and a potential meltdown of your engine, much like forgetting your sunscreen on a scorching beach day. So, don’t be caught off guard with a coolant crisis, be proactive and follow these simple steps to ensure your truck stays cool and collected.
Remember, a well-maintained coolant level is like a refreshing breeze on a hot summer day – it keeps your engine running smoothly and saves you from being stranded on the side of the road, sweating like a snowman in the Sahara. So, grab that flashlight and give your Chevy Silverado some much-needed TLC – your engine will thank you for it!”
Summarize the importance of regularly checking the coolant level in a Chevy Silverado and encourage readers to make it a part of their routine maintenance.
Checking the coolant level in your Chevy Silverado is a crucial part of routine maintenance. It is important to regularly monitor the coolant level because it plays a vital role in keeping your engine cool and preventing overheating. If the coolant level is too low, it can lead to serious engine damage.
By regularly checking the coolant level and topping it off when necessary, you can ensure that your engine stays cool and runs smoothly. This simple task can save you from costly repairs in the long run, as well as prevent potentially dangerous situations on the road. So, make it a habit to check your coolant level regularly and add more coolant if needed.
It’s a small step that can make a big difference in the performance and longevity of your Chevy Silverado.
Provide additional tips or advice for maintaining the coolant system in a Chevy Silverado.
coolant system, Chevy Silverado, replace the cap As we continue our journey towards maintaining the coolant system in your Chevy Silverado, we come to Step 5: Replace the Cap. While it may seem like a small and insignificant part, the coolant cap plays a vital role in the overall functionality of the system. It is responsible for maintaining the proper pressure within the system, which helps to prevent overheating and potential damage to the engine.
Over time, the cap can become worn or damaged, leading to leaks or a loss of pressure. This can result in decreased cooling efficiency and an increased risk of overheating. To avoid these issues, it is important to replace the cap periodically, especially if you notice any signs of wear or damage.
When replacing the coolant cap, it is crucial to ensure that you are using the correct cap for your specific Chevy Silverado model. Each cap is designed to fit securely and provide the proper pressure relief for the system. Using the wrong cap can lead to improper sealing or insufficient pressure relief, which can cause further damage to the system.
To replace the cap, start by allowing the engine to cool completely. Carefully remove the old cap, being cautious of any hot coolant that may be under pressure. Inspect the cap and the sealing gasket for any signs of damage or wear.
If necessary, clean the sealing surfaces to ensure a proper seal with the new cap. Next, simply place the new cap onto the coolant reservoir and tighten it securely. Be sure not to overtighten, as this can cause damage to the cap or the reservoir.
Once the cap is in place, you can continue with the rest of your coolant system maintenance. Remember, the coolant cap may be a small part, but it is an important one. By replacing it regularly and ensuring a proper seal, you can help to maintain the efficiency and functionality of your Chevy Silverado’s coolant system.
FAQs
How do I check the coolant level in a Chevy Silverado?
To check the coolant level in a Chevy Silverado, start by allowing the engine to cool down completely. Then locate the coolant reservoir, which is typically a translucent plastic tank near the radiator. Remove the cap from the reservoir and visually inspect the coolant level. It should be between the minimum and maximum marks on the reservoir. If the level is low, add a mixture of coolant and water until it reaches the appropriate level.
Can I use any type of coolant in my Chevy Silverado?
It is recommended to use the coolant type specified in the owner’s manual of your Chevy Silverado. Most models typically use a mixture of ethylene glycol-based coolant and distilled water. It is important to use the correct type of coolant to ensure the longevity and performance of your vehicle’s cooling system.
What are the signs of low coolant in a Chevy Silverado?
If the coolant level in your Chevy Silverado is low, you may experience some warning signs. These can include an illuminated coolant temperature warning light on the instrument panel, an engine overheating, lower than normal cabin heat, coolant leaks, or a sweet smell coming from the engine compartment. If you notice any of these signs, it is important to check the coolant level and refill it if necessary.
How often should I check the coolant level in my Chevy Silverado?
It is recommended to check the coolant level in your Chevy Silverado at least once a month. Regularly monitoring the coolant level can help prevent potential engine overheating and other cooling system issues. Additionally, it is a good practice to check the coolant level before embarking on long trips or during extreme weather conditions.
Can I drive my Chevy Silverado if the coolant level is low?
It is not recommended to drive your Chevy Silverado if the coolant level is low. The cooling system is crucial for maintaining optimal engine temperature and preventing overheating. Driving with low coolant can lead to serious engine damage and potentially leave you stranded. If you notice a low coolant level, it is best to address the issue before operating the vehicle.
What should I do if I discover a coolant leak in my Chevy Silverado?
If you find a coolant leak in your Chevy Silverado, it is important to address it promptly. Start by identifying the source of the leak, which may be a faulty hose, radiator, water pump, or gasket. Depending on the severity of the leak and your mechanical skills, you may choose to repair it yourself or take it to a professional mechanic. Ignoring a coolant leak can lead to engine damage and overheating.
Can I use tap water to top off the coolant level in my Chevy Silverado?
It is generally not recommended to use tap water to top off the coolant level in your Chevy Silverado. Tap water often contains minerals and impurities that can cause buildup and potentially damage the cooling system over time. It is best to use distilled water or a premixed coolant and water solution to maintain the appropriate coolant concentration.