

When it comes to maintaining your vehicle’s radiator, it’s important to keep an eye on the coolant level. After all, coolant is what helps regulate the temperature inside your engine, preventing it from overheating. But where exactly should the coolant level be in the radiator? Is there a specific mark to look for? Well, you’re in luck! In this blog post, we’ll answer all these questions and more, giving you the confidence to take care of your car’s cooling system like a pro.
So, buckle up and let’s dive in!
Table of Contents
Understanding the Importance of Coolant Level
When it comes to maintaining your vehicle’s radiator, an important factor to consider is the coolant level. The coolant, also known as antifreeze, helps to regulate the temperature in your engine and prevent it from overheating. So, where should the coolant level be in the radiator? Well, it should ideally be at the “full” or “max” line indicated on the coolant reservoir.
If the level is below this mark, it could indicate a leak or problem with the cooling system. On the other hand, if the coolant level is above the “full” line, it may indicate an overfill or a malfunctioning pressure cap. Monitoring and maintaining the coolant level in your radiator is crucial to the overall health and performance of your vehicle.
Maintaining the Correct Coolant Level
coolant level, maintaining coolant level
The Consequences of Low Coolant Level
coolant level, low coolant level, consequences of low coolant level, importance of coolant level
Checking the Coolant Level in Your Radiator
Have you ever wondered where the coolant level should be in your radiator? Well, you’re not alone! Many people are unsure about this, but it’s actually quite simple. The coolant level should be between the minimum and maximum marks on the radiator overflow tank. This is usually a clear plastic container located near the radiator.
It’s important to keep the coolant level within this range to ensure that your engine stays cool and doesn’t overheat. If the coolant level is too low, you risk damaging your engine, and if it’s too high, it can cause leaks or other problems. So, make sure to check your coolant level regularly and top it up if needed.
Your car will thank you for it!
Step 1: Park Your Vehicle on a Level Surface
coolant level, radiator, checking, vehicle, level surface Have you ever wondered why it’s important to check the coolant level in your radiator? Well, let me tell you why. Your vehicle’s radiator plays a crucial role in keeping the engine cool and preventing it from overheating. The coolant, also known as antifreeze, circulates through the radiator and absorbs the heat generated by the engine.
But in order for the coolant to do its job effectively, it needs to be at the right level. That’s why it’s essential to regularly check the coolant level in your radiator. The first step in checking the coolant level is to park your vehicle on a level surface.
This ensures that the coolant is distributed evenly throughout the radiator and gives you an accurate reading. Parking on a slope or uneven surface can cause the coolant to pool in certain areas of the radiator, leading to a false reading. Once your vehicle is parked on a level surface, pop open the hood and locate the radiator.
It’s usually located at the front of the engine bay and is easily identifiable by its metal fins and coolant hoses. Before opening the radiator cap, make sure the engine is cool. Opening the cap when the engine is hot can result in a steam explosion and serious burns.
Safety first, always! Now, with the engine cool, carefully remove the radiator cap. Some radiators have a pressure cap instead, so be sure you’re removing the right one. Using a rag or a paper towel, wipe away any dirt or debris from the cap to prevent it from falling into the radiator.
This might seem like a small step, but trust me, it can save you from a headache later on. With the cap removed, you can now check the coolant level. Most radiators have a coolant fill line marked on the side of the tank.
Step 2: Turn Off Your Engine and Let it Cool Down
Checking the coolant level in your radiator is an important step in maintaining the health of your engine. After turning off your engine and letting it cool down, you can begin this process. It’s a simple yet vital task that can help prevent overheating and potential engine damage.
So, how do you check the coolant level? First, locate the radiator cap, usually found on the top of the radiator. Carefully remove it, making sure the engine is completely cool. Then, visually inspect the coolant level.
The coolant should be at or just below the designated fill line. If it’s low, you can add coolant until it reaches the appropriate level. Remember to use the recommended coolant type specified by your vehicle’s manufacturer.
It’s also essential to check the coolant for any signs of contamination or discoloration, as this could indicate a more significant issue. Regularly checking and maintaining the coolant level in your radiator will help keep your engine running smoothly and prevent any potential problems down the road. So take a few minutes to give it a quick check and ensure your engine stays cool.
Step 3: Locate the Radiator Cap
radiator cap, coolant level, checking coolant level, locate the radiator cap
Step 4: Open the Radiator Cap Safely
Checking the coolant level in your radiator is an important maintenance task that ensures your engine stays cool and runs smoothly. One of the key steps in this process is safely opening the radiator cap. This may sound simple, but it’s crucial to do it correctly to avoid any accidents.
Before you even think about opening the cap, it’s essential to let your engine cool down completely. Hot coolant can cause severe burns, so patience is key here. Once the engine is cool, you can begin the process.
Start by finding the radiator cap, which is usually located on the top of the radiator. Gently twist the cap counterclockwise until you hear a hissing sound. This hissing sound indicates that there is still pressure in the system.
To release this pressure safely, use a cloth or rag to cover the cap and turn it the rest of the way, allowing any remaining pressure to escape slowly. Once the hissing has stopped, you can remove the cap completely and check the coolant level inside. Remember, never open the cap if the engine is still hot as this can cause hot coolant to spray out and potentially cause serious injuries.
Safety should always be your top priority when working with your vehicle’s cooling system.
Step 5: Check the Coolant Level
Checking the coolant level in your radiator is an important maintenance task that should be done regularly to prevent overheating and potential damage to your engine. Coolant, or antifreeze, plays a crucial role in regulating the temperature of your engine and preventing it from freezing in colder temperatures. To check the coolant level, start by making sure your engine is cool.
It is not safe to open the radiator cap when the engine is hot, as the coolant can be under pressure and cause severe burns. Once the engine has cooled down, locate the radiator and find the radiator cap. Carefully remove the radiator cap by pressing down and turning it counterclockwise.
Be cautious of any hissing sounds or signs of pressure when removing the cap, as this could indicate that the engine is still hot. Once the cap is off, take a look inside the radiator and check the coolant level. There will typically be markings or indicators on the side of the radiator that show the minimum and maximum levels of coolant.
The coolant level should be between these markers. If the coolant level is low, you will need to add more coolant. Make sure to use the correct type of coolant recommended by your vehicle’s manufacturer.
Slowly pour the coolant into the radiator until the level reaches the desired range. After adding the coolant, you can replace the radiator cap by aligning it with the opening and turning it clockwise until it is tightly secured. It’s important to note that if you often find yourself having to refill your coolant frequently, it may indicate a leak in the system, which should be addressed by a professional mechanic.
Checking the coolant level in your radiator is a simple task that can help ensure the proper functioning and longevity of your engine. By regularly monitoring and maintaining the coolant level, you can prevent overheating and avoid costly repairs down the line. It’s a small but essential step in taking care of your vehicle.
Adding Coolant to Your Radiator
When it comes to the coolant level in your radiator, it’s important to know where it should be. The coolant level should typically be about an inch or two below the radiator cap. This allows for expansion when the engine heats up and prevents the coolant from overflowing.
It’s important to check the coolant level regularly, especially before long trips or during hot summer months, to ensure your engine stays cool and avoids overheating. If you find that the coolant level is consistently low, it may be a sign of a leak in your cooling system, which should be addressed by a professional mechanic. Remember, keeping your coolant at the proper level is crucial to maintaining the temperature of your engine and ensuring its longevity.
Step 1: Prepare the Coolant and Mixing Ratio
coolant, radiator, mixing ratio, prepare, engine, overheating, automotive, liquid, reservoir, maintenance, temperature, antifreeze, water pump, system, circulating, corrosion, boiling, freezing, efficacy, mixture, manufacturer, instructions, proportions. The first step in preparing your coolant and getting it ready to add to your radiator is determining the correct mixing ratio. The mixing ratio refers to the proportion of coolant to water that should be used in your engine’s cooling system.
This is important because using the wrong mixture can lead to overheating or other issues with your vehicle. The mixing ratio can vary depending on the type of coolant you are using and the manufacturer’s instructions. It’s important to consult your owner’s manual or contact the manufacturer for the recommended mixing ratio for your specific vehicle.
Once you have determined the correct ratio, you can proceed with preparing the mixture. You will need to mix the coolant and water in a separate container before adding it to the radiator. It’s important to use distilled water rather than tap water to prevent any impurities from clogging your system.
Once you have mixed the coolant and water in the correct proportions, you can then proceed to add it to your radiator. This will ensure that your engine stays cool and prevents any potential damage from overheating.
Step 2: Locate the Coolant Reservoir
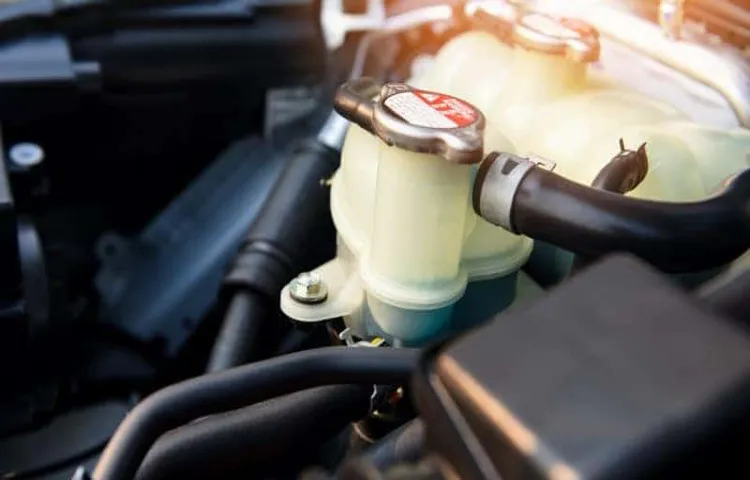
coolant reservoir, adding coolant to radiator After determining where the radiator is located, the next step in adding coolant to your radiator is to locate the coolant reservoir. The coolant reservoir is a small plastic tank usually located near the radiator. It acts as a storage container for the coolant and provides a place for excess coolant to be stored when the radiator heats up and expands.
To find the coolant reservoir, you’ll need to pop open your car’s hood. Once you have the hood open, take a look around the front of the engine compartment. You should see a small plastic tank with a cap on it.
This is the coolant reservoir. It may be labeled with the word “coolant” or have markings indicating the proper level of coolant. Keep in mind that different car makes and models may have slightly different locations for the coolant reservoir.
If you’re having trouble finding it, consult your car’s manual or do a quick internet search for the specific location on your car. Once you’ve located the coolant reservoir, it’s important to check the coolant level before adding more. There should be a “max” and “min” marking on the side of the reservoir indicating the proper fluid level.
If the coolant level is below the “min” mark, you’ll need to add more coolant. Adding coolant to the reservoir is a simple process. First, make sure the engine is cool before removing the cap.
If the engine is still hot, the pressure from the coolant can cause it to spray out when the cap is removed, resulting in serious burns. Once the engine has cooled down, unscrew the cap and carefully pour the coolant into the reservoir until it reaches the “max” mark. It’s important to use a coolant that is specifically designed for your car’s make and model.
Step 3: Slowly Pour the Coolant into the Reservoir
Adding coolant to your radiator is an essential part of regular vehicle maintenance. When the engine gets hot, the coolant helps to regulate its temperature, preventing overheating and potential damage. To add coolant to your radiator, follow these simple steps: Step 1: Make sure your engine is cool.
Adding coolant to a hot engine can be dangerous, as the pressure can cause the coolant to spray out and burn you. Wait for your engine to cool down before proceeding. Step 2: Locate the coolant reservoir.
It is usually a translucent plastic container with a cap that says “coolant” or “engine coolant.” In some vehicles, it may be located near the radiator, while in others, it may be in a different location, such as the front or rear of the engine compartment. Step 3: Slowly pour the coolant into the reservoir.
Check your vehicle’s owner’s manual to see which type of coolant is recommended for your specific vehicle. You can purchase coolant at your local auto parts store or dealership. Slowly pour the coolant into the reservoir, being careful not to spill it.
It’s important not to overfill the reservoir, as this can cause the coolant to spill out when the engine heats up. Step 4: Replace the cap securely. Make sure the cap is tightly secured on the reservoir to prevent any coolant from leaking out.
Step 5: Start your engine. Once you have added the coolant, start your engine and let it run for a few minutes. This will allow the coolant to circulate through the system and ensure that it is evenly distributed.
Step 4: Check the Coolant Level Again
Adding coolant to your radiator is an important step in maintaining the optimal temperature of your vehicle’s engine. After you have completed flushing out the old coolant and replacing it with new coolant, it is crucial to check the coolant level again. This is because when you initially add the coolant, it may not fill up the radiator completely due to air pockets or bubbles.
These pockets can obstruct the flow of coolant to the engine, leading to overheating and potential engine damage. To avoid this, take a moment to check the coolant level once again after running the engine for a few minutes. This will allow the coolant to circulate and disperse any trapped air.
If the coolant level appears to be lower than before, simply add more coolant until it reaches the recommended level. By ensuring that your radiator is filled with the right amount of coolant, you can help prevent any potential issues and keep your engine running smoothly.
Conclusion
When it comes to the coolant level in your radiator, it’s all about finding that perfect balance – not too high, not too low, but just right. It’s like a Goldilocks situation, but instead of trying out different porridge temperatures, we’re talking about the optimal level of coolant. So, where should the coolant level be? Well, imagine your radiator as a luxurious spa for your engine.
Too much coolant is like filling the spa to the brim – sure, it might feel good for a moment, but it’ll quickly overflow and create a watery mess. On the other hand, too little coolant is like dipping your toes into an empty pool – your engine will overheat faster than a cheetah on caffeine. To get it just right, your coolant level should be in the sweet spot indicated by the manufacturer.
Usually, there’s a max and min line on the radiator or coolant expansion tank to guide you. This ensures that your engine stays cool and happy, like a chilled-out polar bear taking a dip in the Arctic. But beware, my friends, for there is a dark side to this balance.
If the coolant level is too high, it could indicate a more sinister issue like a blown head gasket or a faulty radiator cap. And if it’s too low, well, you might have a leak on your hands – cue the dramatic music. So, where should the coolant level be in your radiator? Just like in life, find that perfect middle ground – not too high, not too low.
Keep your engine cool, your radiator content, and your journey smooth and enjoyable. And remember, in the grand scheme of things, it’s all about finding that ideal balance. Happy cooling, my friends!”
FAQs
What is the ideal coolant level in a radiator?
The ideal coolant level in a radiator should be at or slightly below the maximum fill line indicated on the radiator.
What happens if the coolant level in the radiator is too low?
If the coolant level in the radiator is too low, it can lead to overheating of the engine, as there won’t be enough coolant to effectively absorb and dissipate heat.
How can I check the coolant level in my radiator?
To check the coolant level in the radiator, make sure the engine is cool, and then remove the radiator cap. The coolant should be visible near the top of the radiator, close to the maximum fill line.
Can I add water instead of coolant to the radiator?
While water can be used as a temporary solution, it is not recommended to only add water to the radiator as a coolant. Coolant contains anti-freeze and anti-corrosion additives that help protect the engine and cooling system.
What should I do if the coolant level keeps dropping in my radiator?
If the coolant level keeps dropping in your radiator, it could be a sign of a coolant leak. It is important to have the cooling system inspected and repaired by a qualified technician to prevent engine damage.
Is it normal for the coolant level in the radiator to fluctuate?
It is normal for the coolant level in the radiator to slightly fluctuate due to expansion and contraction with temperature changes. However, if the coolant level consistently drops or rises significantly, it should be inspected for potential issues.
Can I overfill the radiator with coolant?
Overfilling the radiator with coolant can lead to excessive pressure in the cooling system, which can cause leaks or even damage components. It is important to follow the manufacturer’s guidelines and not overfill the radiator.