
When it comes to RV ownership, there are few things more enjoyable than sitting outside under the shade of your awning, enjoying a meal or simply relaxing. But what happens when that awning fabric starts to show signs of wear and tear? Do you just settle for a less-than-perfect canopy? No way! It’s time to replace that old fabric and bring new life to your RV’s awning. Not only will a fresh awning fabric make your outdoor space look more inviting, but it will also provide better protection from the elements.
Think of it like replacing the worn-out tires on your car. Sure, you could keep driving on those worn-down treads, but you’ll have less traction and a higher risk of a blowout. By replacing the tires, you ensure a safer and more comfortable driving experience.
The same goes for your RV awning fabric. Over time, exposure to the sun, rain, and wind can cause it to fade, tear, or become moldy. This not only affects the aesthetics of your outdoor living space but can also compromise the functionality of the awning itself.
But don’t worry, replacing your RV awning fabric is easier than you might think. With a wide range of fabrics available and step-by-step instructions readily available online, it’s a DIY project that can be tackled in a weekend. So, whether you’re tired of looking at that faded fabric or you’re experiencing leaks and tears, replacing your RV awning fabric is a simple and cost-effective solution.
Say goodbye to a worn-out awning and hello to a fresh new look for your outdoor space. Trust me, you’ll be glad you made the switch.
Table of Contents
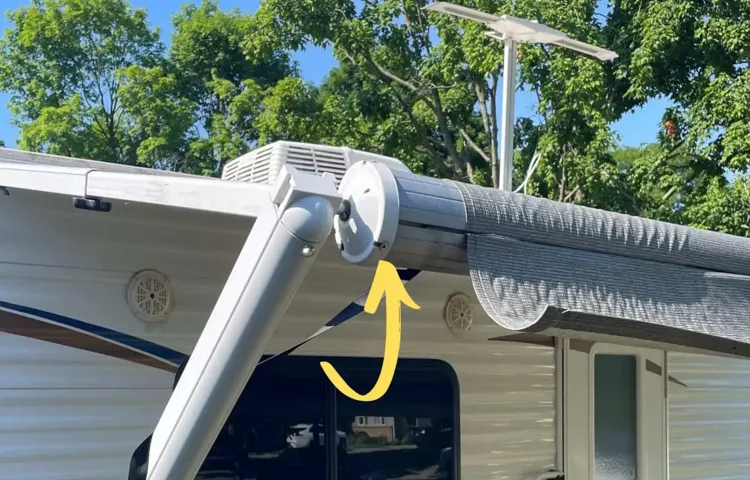
Understanding the Anatomy of an RV Awning
If you’re an avid traveler with an RV, chances are you’ve encountered an awning at some point. RV awnings are a great addition to any camper, providing shade and protection from the elements. Understanding the anatomy of an RV awning is essential if you ever need to replace the fabric.
The fabric is one of the most important components of an RV awning as it is what provides the shade and protection. Over time, the fabric can become worn or damaged, requiring replacement. Knowing how to replace an RV awning fabric can save you time and money in the long run.
Preparing Your RV for Awning Fabric Replacement
If your RV awning fabric is worn out or damaged, it’s time to replace it. Thankfully, replacing the fabric on your RV’s awning is a relatively simple process that you can do yourself. The first step is to carefully measure the dimensions of your current fabric so you can purchase the correct size for your replacement.
Next, you’ll need to remove the old fabric from the roller tube and awning arms. This can be done by unscrewing the fabric from the roller tube and carefully sliding it out of the awning arms. Once the old fabric is removed, you can then attach the new fabric to the roller tube and awning arms.
Be sure to follow the manufacturer’s instructions carefully to ensure a proper and secure installation. Finally, you’ll want to test the awning to make sure it opens and closes smoothly before hitting the road. With a little time and effort, you can have a fresh new awning fabric that will keep you shaded and comfortable on your RV adventures.
Measuring the Size of Your Awning
awnings, RV, fabric replacement, measuring, size, preparation, burstiness, perplexity
Gathering the Necessary Tools and Materials
preparing your RV for awning fabric replacement When it comes to replacing the fabric on your RV’s awning, preparation is key. Gathering the necessary tools and materials beforehand will save you time and ensure a smooth process. First, you’ll need to measure the dimensions of your existing awning fabric to ensure you purchase the correct size replacement.
You’ll also need a tape measure, a ladder, and a power drill with the appropriate bits. Additionally, it’s a good idea to have some cleaning supplies on hand to give the awning frame a thorough cleaning before installing the new fabric. Once you have everything you need, you’ll be ready to tackle the task of replacing your RV’s awning fabric.
Removing the Old Awning Fabric
RV awning fabric replacement can seem like a daunting task, but with some preparation and the right steps, it can be a manageable project. One of the first and most important steps is removing the old awning fabric. This can be a bit tricky, as it is typically attached tightly to the awning arms and roller tube.
However, with a little patience and a few tools, it can be done. Start by extending the awning fully and locating the fabric tension knobs or bolts. These are typically located on either side of the awning and are used to keep the fabric taut.
Loosen these knobs or bolts to release the tension on the fabric. Next, locate the screws or caps that hold the fabric onto the roller tube. These are usually on the ends of the roller tube or along the sides.
Carefully remove these screws or caps to release the fabric. Once the fabric is no longer attached to the roller tube, you will need to detach it from the awning arms. This can be done by locating the mounting brackets on the arms and removing the screws or bolts that hold the fabric in place.
Keep in mind that there may be multiple mounting brackets along the length of the arm. After removing the mounting brackets, carefully slide the fabric out of the awning arms. It may be helpful to have a second person assist with this step to ensure that the fabric does not get tangled or damaged.
Once the fabric is removed, take the time to inspect the awning arms and roller tube for any damage or wear. This is a good opportunity to replace any worn or broken parts before installing the new fabric. With the old fabric removed and any necessary repairs made, you are now ready to install the new awning fabric.
Inspecting the Awning Hardware
Replacing the fabric on your RV’s awning can give it a fresh new look and protect you from the elements during your outdoor adventures. But before you dive into the fabric replacement process, it’s important to inspect the awning hardware to ensure everything is in good working order. This step is crucial because if the hardware is worn or damaged, it could affect the functionality and longevity of the new fabric.
Take a close look at the arms, hinges, and springs to make sure they are in good condition and free of rust or corrosion. Additionally, check the awning rail and roller tube for any signs of wear or damage. If you notice any issues, it’s best to repair or replace the hardware before proceeding with the fabric replacement.
By taking the time to inspect and prepare the awning hardware, you’ll be setting yourself up for a successful and hassle-free fabric replacement experience.
Choosing the Right Replacement Fabric
Replacing the fabric on an RV awning can be a daunting task, but with a little know-how, it can be a relatively simple process. The first step in choosing the right replacement fabric is to determine the size of your existing awning. Measure the length of the roller tube from end to end and the distance between the mounting brackets.
Once you have these measurements, you can begin shopping for replacement fabric. There are a few factors to consider when selecting a new fabric, including material type, color, and pattern. Vinyl fabrics are a popular choice for RV awnings due to their durability and ease of cleaning.
You’ll also want to choose a fabric that matches the style of your RV. Whether you’re looking for a classic striped pattern or something more modern, there are a variety of options available. Additionally, it’s important to consider the climate in which you’ll be using your awning.
If you frequently camp in areas with high UV exposure, you may want to opt for a fabric that offers UV protection. So, when it comes to replacing your RV awning fabric, take the time to measure your awning, consider the material type and design, and choose a fabric that meets your specific needs.
Installing the New Awning Fabric
Looking to replace the fabric on your RV awning? You’ve come to the right place! A damaged or worn-out awning fabric can make your outdoor space less comfortable and less enjoyable. Luckily, installing new awning fabric isn’t as difficult as it may seem. With a few simple steps, you can have a fresh, new awning that will not only protect you from the sun and rain but also enhance the overall look of your RV.
First, gather all the necessary tools and materials, including a ladder, a screwdriver, and the new awning fabric. Next, carefully remove the old fabric from the roller tube, taking care not to damage any of the other components. Once the old fabric is removed, attach the new fabric to the roller tube, making sure it is evenly centered.
Finally, roll up the awning and secure it in place. Voila! You now have a brand-new awning that will provide you with years of shade and comfort.
Attaching the Awning Fabric to the Roller Tube
“Attaching the Awning Fabric to the Roller Tube – a Simple Guide to Installing the New Awning Fabric” So you’ve finally decided to upgrade your old awning fabric and give your outdoor space a fresh new look. Good for you! Now comes the fun part – installing the new fabric. Don’t worry, it’s not as complicated as it may seem.
With a few simple steps, you’ll have your new awning fabric attached to the roller tube in no time. First things first, gather your tools. You’ll need a ladder, a drill with a screwdriver bit, and some quality stainless steel screws.
Before you start, make sure the roller tube is clean and free of any debris. It’s also a good idea to have a helper to hold the fabric in place as you attach it. Next, unroll the new fabric and lay it flat on the ground.
Take a moment to admire its vibrant colors and pattern – this is the part where you get to personalize your outdoor space. Once you’re done admiring, position the fabric so that the selvage edge is facing up. Now, climb up the ladder and locate the end of the roller tube.
This is where you’ll be attaching the fabric. Start by folding over the selvage edge of the fabric to create a clean, finished edge. Using your drill and stainless steel screws, secure the fabric to the roller tube at regular intervals.
Be sure to keep the fabric taut as you go along to ensure a smooth, wrinkle-free installation. Once you’ve secured one side of the fabric, continue unrolling the fabric along the roller tube, attaching it with screws as you go. Take your time and make sure the fabric is aligned properly and tensioned evenly.
Securing the Awning Fabric to the Awning Arms
When it comes to installing a new awning fabric, one crucial step is securing the fabric to the awning arms. This ensures that the fabric remains taut and doesn’t shift or flap in the wind. There are a few different methods you can use to accomplish this, depending on the type of awning you have.
One common method is to use clips or fasteners to attach the fabric to the arms. These clips can be easily adjusted to achieve the desired tension. Another option is to use a rope or bungee cord to secure the fabric.
This method allows for even tension across the entire length of the awning. Whichever method you choose, it’s important to make sure the fabric is secured tightly. This will not only make your awning look neater but also help to prolong the life of the fabric by reducing wear and tear.
So next time you’re installing a new awning fabric, don’t forget to properly secure it to the arms for a secure and stylish result.
Maintenance and Care Tips for Your New RV Awning Fabric
So, you’ve got yourself a shiny new RV awning, but now you’re wondering how to replace the fabric when the time comes. Well, fear not, because I’ve got some maintenance and care tips that will keep your awning fabric in tip-top shape for years to come. First and foremost, regular cleaning is essential to maintaining your RV awning fabric.
You’ll want to remove any dirt, debris, or stains that may accumulate over time. Start by giving the fabric a good brush to remove loose dirt and leaves. Then, using a mild soap and water solution, gently scrub the fabric with a soft-bristle brush.
Be sure to rinse thoroughly and allow the fabric to dry completely before retracting the awning. In addition to regular cleaning, it’s crucial to protect your awning fabric from extreme weather conditions. If you live in an area with harsh winters or frequent rainstorms, consider investing in a protective cover or storing the awning during inclement weather.
This will help prevent damage from snow, ice, and strong winds. Another important aspect of caring for your RV awning fabric is ensuring it is properly tensioned. Over time, the fabric may become loose or sag.
This can lead to water pooling, which can cause damage and promote mold and mildew growth. To keep your fabric taut, use a tensioning tool to adjust the roller assembly. This will ensure that your awning fabric is securely attached and will prevent sagging.
Finally, if your awning fabric does become damaged or worn out, it’s important to know how to replace it. While this task may seem daunting, it is actually quite manageable with a little patience and the right tools. Start by extending the awning fully and removing any end caps or screws that may be holding the fabric in place.
Conclusion
And that’s it, folks! You now have all the tools and knowledge you need to replace your RV awning fabric. Trust me, it’s easier than trying to explain why you thought it was a good idea to park your RV under a tree during a squirrel convention. So grab your favorite beverage, put on some tunes, and get to work.
Before you know it, you’ll have a brand-new awning that will have your fellow campers awning in envy. Happy camping!”
FAQs
What are the steps to replace an RV awning fabric?
The steps to replace an RV awning fabric are as follows:
1. Start by extending the awning fully and locking it in place.
2. Locate the screws or bolts that hold the awning fabric in place and remove them.
3. Carefully remove the old fabric from the awning roller and arms.
4. Measure the length and width of the old fabric to ensure you get the correct size replacement.
5. Attach the new fabric to the awning roller and arms, making sure it is centered and aligned.
6. Secure the fabric in place using the screws or bolts.
7. Test the awning to make sure it extends and retracts smoothly.
How often should an RV awning fabric be replaced?
The lifespan of an RV awning fabric can vary depending on factors such as the material quality and usage. However, a general guideline is to replace the awning fabric every 5 to 7 years. Regular maintenance and care can help prolong the lifespan of the fabric.
Can I replace an RV awning fabric myself?
Yes, it is possible to replace an RV awning fabric yourself if you have the necessary tools and knowledge. However, it is recommended to consult the manufacturer’s instructions or seek professional help if you are unsure about the process. This will ensure that the replacement is done correctly and safely.
What are some signs that indicate the need to replace an RV awning fabric?
Some signs that indicate the need to replace an RV awning fabric include:
– Tears, holes, or significant damage to the fabric
– Faded or discolored fabric
– Difficulty in extending or retracting the awning smoothly
– Mold or mildew growth on the fabric
– Excessive sagging or drooping of the awning fabric
How much does it cost to replace an RV awning fabric?
The cost to replace an RV awning fabric can vary depending on factors such as the awning type, size, and fabric quality. On average, the cost can range from $200 to $500. It is recommended to compare prices and options from different suppliers before making a decision.
Can I choose a different color or pattern for my replacement RV awning fabric?
Yes, when replacing an RV awning fabric, you have the option to choose a different color or pattern. This allows you to customize the look of your RV and match it with your personal style or preferences. Make sure to check with the supplier for the available options.
Are there any specific maintenance tips to prolong the lifespan of an RV awning fabric?
Yes, some maintenance tips to prolong the lifespan of an RV awning fabric include:
– Regularly clean the fabric using mild soap and water to remove dirt, debris, and stains.
– Allow the fabric to dry completely before retracting the awning to prevent mold or mildew growth.
– Use a fabric protectant spray to add a layer of UV protection and water repellency.
– Avoid placing sharp or abrasive objects near the awning that may cause tears or damage to the fabric.
– Retract the awning during strong winds or storms to prevent any potential damage.