
So, you have a Sunsetter awning and you’re wondering if it’s time to replace the fabric. Well, let me tell you, there are plenty of good reasons why you might want to consider it. First and foremost, the fabric on your Sunsetter awning is constantly exposed to the elements.
It has to withstand blazing sun, torrential rain, heavy snow, and everything in between. Over time, this can cause wear and tear, leading to fading, discoloration, and even holes in the fabric. And let’s face it, a worn-out awning just doesn’t have the same appeal as a fresh, vibrant one.
But it’s not just about looks. The fabric on your Sunsetter awning also plays a crucial role in keeping you and your outdoor space protected. A high-quality fabric provides shade, blocking harmful UV rays and reducing heat buildup.
It also acts as a barrier against rain, preventing water from seeping through and potentially damaging your outdoor furniture or flooring. Furthermore, replacing the fabric on your Sunsetter awning gives you the opportunity to upgrade to a better, more durable material. The advancements in fabric technology have come a long way, and you can now choose from a wide range of options that are not only more resistant to fading and tearing but also easier to clean and maintain.
Now, you might be wondering if replacing the fabric on your Sunsetter awning is a task you can take on yourself. Well, the good news is that it’s actually quite simple. With just a few basic tools and some DIY know-how, you can have your awning looking as good as new in no time.
And if you’re not the DIY type, there are plenty of professionals out there who can do it for you. So, if your Sunsetter awning is looking a little worse for wear, don’t hesitate to consider replacing the fabric. Not only will it improve the overall appearance of your outdoor space, but it will also provide the protection and functionality you need to fully enjoy those sunny days and warm evenings.
Table of Contents
Materials Needed
When it comes to replacing the fabric on your Sunsetter awning, there are a few materials you will need to get the job done. First and foremost, you will need the new fabric for your awning. It’s important to choose a high-quality and durable fabric that can withstand the outdoor elements.
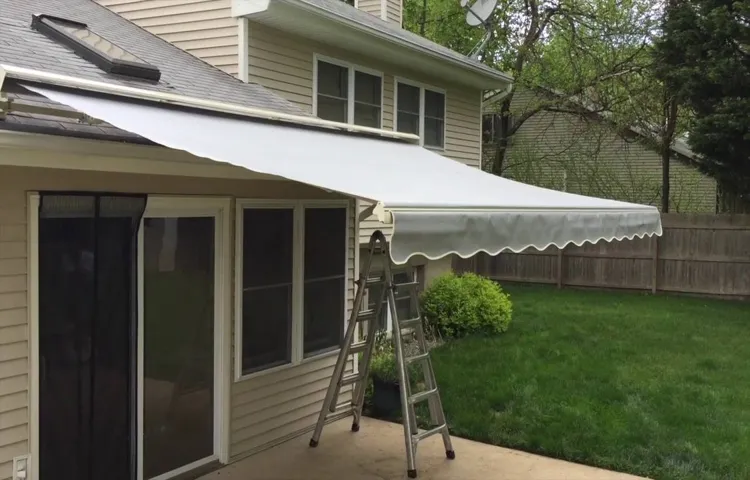
Next, you will need a screwdriver or drill to remove the old fabric and attach the new one. Additionally, you will need a ladder to reach the awning and some safety equipment, such as gloves and safety glasses, to protect yourself during the process. Finally, it’s always a good idea to have a friend or family member help you out, as awning replacement can be a two-person job.
Overall, by gathering these materials, you’ll be well-prepared to tackle the task of replacing the fabric on your Sunsetter awning.
List of materials needed to replace fabric on Sunsetter awning
If you’re looking to replace the fabric on your Sunsetter awning, there are a few materials you’ll need to get the job done. First and foremost, you’ll need the new fabric itself. Make sure to measure your awning carefully to ensure you get the correct size.
You’ll also need a few tools such as a ladder, a screwdriver or drill (depending on the type of fasteners used to hold your awning in place), and a tape measure. Additionally, you’ll need some heavy-duty thread and a needle to sew the new fabric onto the awning frame. Finally, you may also want to consider purchasing some fabric waterproofing spray to help protect your new fabric from the elements.
With these materials in hand, you’ll be well-equipped to tackle the task of replacing the fabric on your Sunsetter awning and give it a fresh new look.
Step 1 – Measure and Order Fabric
When it comes to replacing the fabric on your Sunsetter awning, the first step is to measure the area and order the appropriate amount of fabric. Measuring carefully is crucial to ensure that you have enough fabric to cover the entire awning. Start by measuring the width and height of the awning, taking into account any overhang or extra fabric needed for attachment.
Once you have these measurements, you can determine the amount of fabric you will need and order it online or through a local supplier. It’s always a good idea to order a bit more fabric than you think you’ll need, just in case of any mistakes or miscalculations. With the fabric on hand, you’ll be ready to move on to the next steps of replacing your Sunsetter awning fabric.
Measure the dimensions of your awning and order the appropriate fabric
If you’re looking to upgrade or replace the fabric on your awning, the first step is to measure the dimensions of your awning and order the appropriate fabric. This is an important step because you want to ensure that the fabric you order fits your awning perfectly. Start by measuring the length and width of your awning.
Use a tape measure to get the most accurate measurements possible. Make sure to measure from edge to edge and write down the measurements. Once you have the measurements, you can order the fabric.
Look for a fabric that is specifically designed for awnings and that matches the dimensions of your awning. This will ensure a perfect fit and a professional-looking result. Taking the time to measure and order the appropriate fabric will make a big difference in the overall appearance and functionality of your awning.
So, grab your tape measure and get started on this first step towards updating your awning!
Step 2 – Remove Existing Fabric
Now that you have gathered all the necessary tools and materials, it’s time to move on to the next step in replacing the fabric on your Sunsetter awning: removing the existing fabric. This step is crucial as it sets the stage for installing the new fabric. Start by extending the awning fully, making sure it is secure and won’t accidentally retract while you’re working.
Next, locate the screws or bolts that hold the fabric in place. These are usually found on the roller tube or the arms of the awning. Use a screwdriver or wrench to remove these fasteners, being careful not to strip or damage them.
Once the fasteners are removed, carefully detach the fabric from the roller tube and the arms. It may be helpful to have a partner assist you with this step, especially if the fabric is large and unwieldy. Gently pull the fabric away, being mindful of any wires or cables that may be attached.
Set aside the old fabric for disposal or repair, and make sure to give the awning a quick cleaning before proceeding to the next step.
Instructions on how to remove the old fabric from your Sunsetter awning
When it comes to rejuvenating your Sunsetter awning, the second step is removing the old fabric. This may seem like a daunting task, but with some simple instructions, you’ll have it done in no time. First, start by extending your awning fully and ensuring it is securely locked in place.
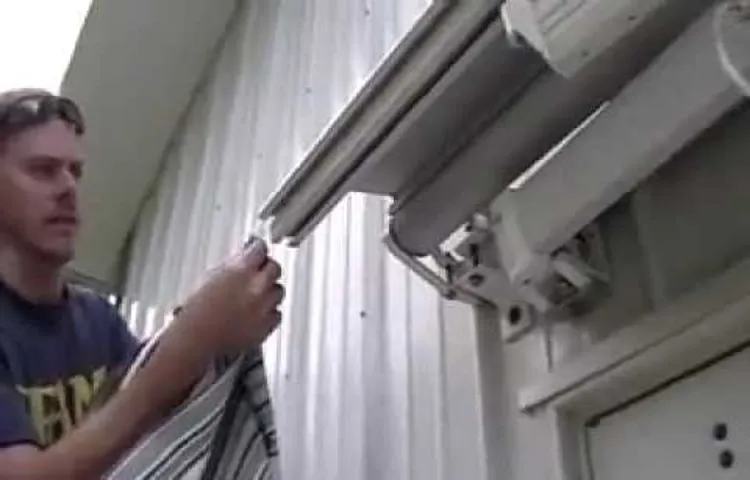
Then, locate the two end caps on the roller tube and remove them using a screwdriver. Once the end caps are off, carefully slide the roller tube out of the brackets on each end and set it aside. Next, look for the cotter pin that secures the awning fabric to the roller tube and remove it using pliers.
With the cotter pin removed, gently pull the fabric away from the roller tube, making sure to note its orientation for later installation. Finally, remove any remaining attachments, such as grommets or straps, and set them aside for later use. Once the old fabric is completely removed, you’ll be one step closer to enjoying a fresh and updated Sunsetter awning.
Step 3 – Prepare the Frame
Once you have removed the old fabric from your Sunsetter awning, it’s time to prepare the frame for the new fabric. Start by cleaning the frame thoroughly to remove any dirt, debris, or old adhesive. Use a mild soap and water solution, and a soft brush or sponge to gently scrub the frame.
Rinse it well and let it dry completely before moving on to the next step. Once the frame is clean and dry, inspect it for any damage or rust. If there are any rust spots, use sandpaper or a wire brush to remove the rust and then apply a rust converter or primer to prevent further corrosion.
If there are any damaged or broken parts, replace them before installing the new fabric. It’s important to have a sturdy and intact frame to ensure the new fabric attaches properly and lasts for a long time. Preparing the frame properly will also ensure that the new fabric fits correctly and looks great once it’s installed.
So take your time and make sure the frame is in good condition before moving on to the next step.
Guide on how to prepare the frame of your Sunsetter awning for the new fabric
preparing the Sunsetter awning frame In order to replace the fabric on your Sunsetter awning, it is important to properly prepare the frame beforehand. This step is crucial to ensure a smooth installation process and to prolong the lifespan of your new fabric. Here are a few key steps to follow when preparing the frame: First, begin by removing any existing fabric from the frame.
This can usually be done by carefully cutting away the old fabric using a sharp utility knife. Take your time and be cautious to avoid damaging the frame or any other components. Next, thoroughly clean the frame to remove any dirt, debris, or mildew that may have accumulated over time.
A gentle solution of mild soap and warm water can be used to clean the frame. Be sure to rinse it off thoroughly and allow it to dry completely before proceeding. Once the frame is clean and dry, inspect it for any signs of damage or wear.
This includes checking the metal components for rust, corrosion, or bends. If any issues are found, it is best to address them before installing the new fabric. Finally, lubricate any moving parts of the frame to ensure smooth operation.
This can be done with a silicone-based lubricant or a specialized awning lubricant. Apply the lubricant to the joints, hinges, and any other areas that require movement. By following these steps to prepare the frame of your Sunsetter awning, you can ensure a successful installation of the new fabric.
Taking the time to properly clean, inspect, and lubricate the frame will help to extend the life of your awning and provide years of enjoyment. So, let’s get ready to transform your awning and create a refreshing outdoor space for you and your loved ones to relax and unwind.
Step 4 – Install New Fabric
So, you’ve decided to replace the fabric on your Sunsetter awning. Congratulations! It’s a great way to give your outdoor space a fresh, new look. But how do you go about installing the new fabric? Don’t worry, it’s not as difficult as it may seem.
Here’s a step-by-step guide to help you get the job done. First, gather all the necessary tools and materials. You’ll need a ladder, a drill, a wrench, a screwdriver, and of course, the new fabric for your awning.
Make sure you have enough fabric to cover the entire awning, allowing for some extra material for a snug fit. Next, carefully remove the old fabric from the awning. Start by releasing the tension in the awning using the crank or the motor.
Once the tension is released, remove any screws or bolts holding the fabric in place. Gently pull the fabric off the awning frame, making sure not to rip or damage it. Now it’s time to install the new fabric.
Lay the fabric out flat on the ground and align it with the awning frame. Start by attaching one end of the fabric to the awning frame using the screws or bolts. Slowly work your way along the frame, attaching the fabric securely in place.
Once the fabric is attached to the frame, it’s time to tension it. Use the crank or the motor to slowly extend the awning and stretch the fabric tightly. This will help ensure a smooth and wrinkle-free surface.
Step-by-step instructions on how to install the new fabric onto your Sunsetter awning
install new fabric, Sunsetter awning, step-by-step instructions
Step 5 – Secure Fabric and Test
When it comes to replacing the fabric on your Sunsetter awning, there is an important step to consider after attaching the new fabric to the roller tube. That step is to secure the fabric in place and test it to ensure it is properly installed. To secure the fabric, you will need to use the provided rope or bungee cords to tie it down to the roller tube.
Make sure to evenly distribute the tension and secure the fabric tightly to prevent any sagging or flapping in the wind. After securing the fabric, you should test it by extending and retracting the awning a few times to ensure it operates smoothly and without any issues. This will help to identify any problems or adjustments that may need to be made before fully enjoying your new awning.
So, take the time to secure the fabric and give it a test run, and soon enough, you’ll be able to relax and enjoy the shade provided by your refreshed Sunsetter awning.
Tips on securing the fabric and testing the functionality of your Sunsetter awning
installing a Sunsetter awning Step 5 in installing a Sunsetter awning involves securing the fabric and testing its functionality. Once the awning frame is securely attached to the exterior of your home, you can begin attaching the fabric. Start by aligning the fabric with the frame and using the provided clips or Velcro straps to secure it in place.
Make sure the fabric is taut and evenly distributed across the frame to ensure proper functionality. Once the fabric is secure, it’s time to test out your new awning. Extend the awning fully and retract it to ensure smooth operation.
Check that the fabric opens and closes without any binding or resistance. Additionally, test the awning in different weather conditions, such as wind or rain, to ensure it can withstand various elements. By properly securing your fabric and testing its functionality, you can enjoy your Sunsetter awning worry-free for years to come.
Conclusion – Enjoy Your Renewed Sunsetter Awning
So there you have it, a step-by-step guide on how to replace the fabric on your Sunsetter awning. With a little patience and the right tools, you can turn your old, worn-out awning into a stylish and functional outdoor accessory once again. Just think of it as giving your awning a fashion makeover! By following these instructions, you’ll not only save money on hiring a professional, but you’ll also have the satisfaction of knowing you accomplished this DIY project all on your own.
Plus, you’ll have the added bonus of impressing your neighbors with your handy skills – I mean, who knew you were such a master awning fabric replacer? So go ahead, grab your screwdriver, your new fabric, and get ready to make your Sunsetter awning shine like new. Just remember to measure twice, cut once, and soon enough, you’ll be basking in the shade of your newly revamped outdoor oasis. Happy replacing!”
Wrap up the blog post with a conclusion and encourage readers to enjoy their newly replaced fabric on their Sunsetter awning
In conclusion, replacing the fabric on your Sunsetter awning is a relatively simple task that can greatly improve the appearance and functionality of your outdoor space. By following these five steps – removing the old fabric, measuring and cutting the new fabric, attaching the new fabric, securing it in place, and testing the awning – you can enjoy a fresh and durable fabric on your awning. Imagine the joy of sitting under your newly replaced fabric, enjoying the shade and protection it provides.
So don’t hesitate, grab your tools and get started on this DIY project today! Your Sunsetter awning will thank you.
FAQs
How often should I replace the fabric on my Sunsetter awning?
It is recommended to replace the fabric on your Sunsetter awning every 7-10 years, as over time it can become worn and faded due to exposure to the elements.
Can I replace the fabric on my Sunsetter awning myself, or do I need to hire a professional?
While it is possible to replace the fabric on your Sunsetter awning yourself, it can be a complex and time-consuming process. It is recommended to hire a professional to ensure the job is done correctly.
What tools will I need to replace the fabric on my Sunsetter awning?
To replace the fabric on your Sunsetter awning, you will typically need tools such as a ladder, screwdriver, pliers, and a staple gun.
How much does it cost to replace the fabric on a Sunsetter awning?
The cost of replacing the fabric on a Sunsetter awning can vary depending on the size of the awning and the type of fabric chosen. On average, it can range from $500 to $1,500.
Are there different fabric options available for Sunsetter awnings?
Yes, there are various fabric options available for Sunsetter awnings, including different colors, patterns, and materials such as woven acrylic or vinyl-laminated polyester.
Can I wash the fabric on my Sunsetter awning?
Yes, you can wash the fabric on your Sunsetter awning. It is recommended to use a mild soap and water solution and a soft brush or sponge to gently clean the fabric. Avoid using harsh chemicals or abrasive scrubbing tools.
How can I extend the lifespan of the fabric on my Sunsetter awning?
To extend the lifespan of the fabric on your Sunsetter awning, it is important to regularly clean it, keep it dry when not in use, and retract the awning during severe weather conditions. Additionally, applying a fabric protector can help guard against UV damage and staining.