
So you’re interested in learning about introductions? Well, you’re in the right place! Think of an introduction as the opening act of a play or the first few chords of a song. Its purpose is to grab your attention, set the stage, and give you a taste of what’s to come. In the world of writing, introductions serve a similar purpose.
They hook the reader, provide some background information, and give a sneak peek into what the rest of the piece will be about. Whether you’re crafting an essay, a blog post, or even a novel, the introduction is your opportunity to make a strong first impression. So let’s dive in and explore the art of creating captivating introductions!
Table of Contents
What is a trailer awning fabric?
When it comes to replacing the fabric on your trailer awning, there are a few key things to keep in mind. Firstly, what exactly is a trailer awning fabric? Well, it’s the material that covers and provides shade for your trailer’s awning. This fabric is typically made from a durable, weather-resistant material such as vinyl or acrylic, which helps protect you and your belongings from the sun, rain, and wind.
However, over time, this fabric can become worn or damaged, leading to the need for replacement. So, how do you go about replacing trailer awning fabric? It’s important to follow the manufacturer’s instructions, but in general, the process involves removing the old fabric, measuring and ordering the new fabric, and then installing it onto the awning frame. This can be a DIY project for those who are handy, but if you’re unsure or uncomfortable doing it yourself, it’s always best to consult with a professional.
Overall, replacing trailer awning fabric is a relatively straightforward process that can breathe new life into your trailer’s awning and provide you with years of shade and protection.
Signs that you need to replace your trailer awning fabric
If you own a trailer with an awning, you know how important it is to have reliable fabric. Over time, however, the fabric can become worn out and damaged, requiring a replacement. There are several signs that indicate it’s time to replace your trailer awning fabric.
One of the most obvious signs is the presence of holes or tears in the fabric. These can occur from various causes such as wind, rain, or general wear and tear. Another sign is fading or discoloration of the fabric.
Exposure to the sun’s UV rays can cause the fabric to lose its vibrant colors over time. Additionally, if you notice a musty or moldy smell coming from the fabric, it could be a sign of water damage, which can weaken the fabric and make it more susceptible to tearing. If you notice any of these signs, it is important to replace your trailer awning fabric to ensure its durability and functionality.
Things you will need to replace your trailer awning fabric
In order to replace your trailer awning fabric, there are a few essential items you’ll need. First and foremost, you’ll need to purchase the new fabric itself. Make sure to measure the length and width of your current awning to ensure you buy the correct size.
You’ll also need a ladder or step stool to reach the awning, as well as a screwdriver or drill to remove any screws or bolts keeping the fabric in place. Additionally, you may need a helper to hold the ladder steady while you work. Finally, don’t forget to have some basic tools on hand, such as a tape measure, scissors, and a marker to help with the measuring and cutting of the new fabric.
With these essential items, you’ll be well-prepared to replace your trailer awning fabric and enjoy the benefits of a fresh new look.
Step-by-step guide to replacing your trailer awning fabric
So, you’ve come to the realization that it’s time to replace your trailer awning fabric. Maybe it’s worn out or damaged, or perhaps you just want to change up the look of your trailer. Whatever the reason, replacing your trailer awning fabric is actually a lot easier than you might think.
Here’s a step-by-step guide to help you through the process. First, gather all the necessary tools and materials. You’ll need a ladder, a tape measure, a flathead screwdriver, a utility knife, a drill, a pair of pliers, and of course, the new awning fabric.
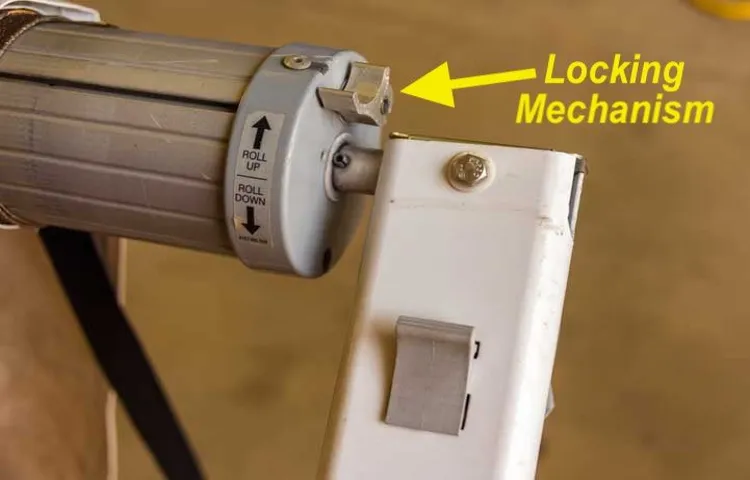
Once you have everything ready, start by retracting your awning fully. This will make it easier to remove the fabric. Next, locate the retaining screws that hold the fabric in place.
Use the flathead screwdriver to remove these screws, being careful not to strip them in the process. With the screws removed, you can now start taking off the old fabric. Start at one end and use the utility knife to carefully cut the fabric away from the awning frame.
As you go along, use the pliers to remove any staples or clips that are holding the fabric in place. Once the old fabric is completely removed, it’s time to install the new one. Lay out the new fabric on a clean surface and use the tape measure to ensure it’s the correct size for your awning.
If necessary, use the utility knife to trim any excess fabric. Now comes the fun part – attaching the new fabric to the awning frame. Starting at one end, line up the fabric with the frame and secure it in place with the retaining screws.
Step 1: Measure your trailer awning
In this step-by-step guide, we’ll walk you through the process of replacing your trailer awning fabric. The first step is to measure your existing awning to ensure you choose the right replacement. Start by extending your awning fully and measuring the width from end to end.
Be sure to include any end caps or hardware in your measurement. Next, measure the height of your awning, from the bottom of the fabric to the top where it attaches to your trailer. Once you have these measurements, you’ll be ready to move on to the next step in replacing your trailer awning fabric.
Step 2: Remove the old awning fabric
When it comes to replacing the fabric on your trailer awning, the first step is to remove the old fabric. This is a crucial part of the process, as it allows you to start with a clean slate and ensures that your new fabric will fit properly. To remove the old fabric, start by extending the awning fully so that you have easy access.
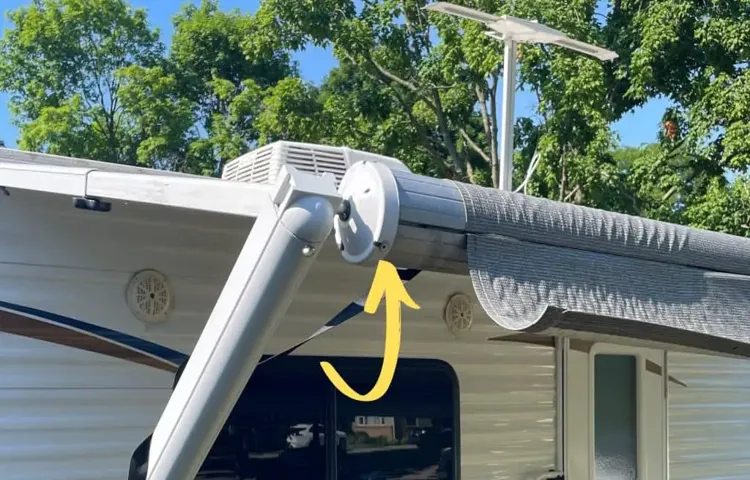
Then, locate the awning bead or rope that attaches the fabric to the roller tube. Carefully remove any screws or fasteners securing the fabric in place. Once the fabric is free from the roller tube, it’s time to remove it from the awning arms.
This can be done by sliding the fabric out of the slot or track on each arm. Be sure to keep track of any additional hardware or attachments that may be connected to the fabric. Once the fabric is fully removed, take the time to inspect the roller tube and awning arms for any damage or wear.
If necessary, clean and lubricate these components before installing your new fabric. With the old fabric out of the way, you’re ready to move on to the next step in replacing your trailer awning fabric.
Step 3: Purchase a new awning fabric
purchasing a new awning fabric. Once you’ve assessed the condition of your trailer awning and determined that it’s time for a replacement, the next step is to purchase a new awning fabric. This is an important decision, as the fabric you choose will not only affect the look of your trailer but also its functionality and durability.
When selecting a new awning fabric, consider factors such as the material, color, pattern, and size. The material should be weather-resistant, easy to clean, and long-lasting. Popular options include acrylic, vinyl, and polyester.
As for color and pattern, choose something that complements your trailer’s exterior and personal style. Finally, make sure to measure your awning carefully to ensure that you purchase the correct size fabric. Taking these steps will ensure that you find the perfect awning fabric for your trailer and can begin the replacement process with confidence.
Step 4: Install the new awning fabric
Replacing the awning fabric on your trailer can give it a fresh new look and protect you from the elements. In this step-by-step guide, we will walk you through the process of installing the new awning fabric. Step 4: Install the new awning fabric To begin, make sure you have all the necessary tools and materials ready.
You will need a ladder, a wrench, a utility knife, a tape measure, and the new awning fabric. Start by removing the old fabric from the awning rail. Use a wrench to loosen the screws or bolts that hold it in place.
Once the fabric is free, carefully roll it up and set it aside. Next, measure the length of the awning rail and cut the new fabric to size. Be sure to add a few extra inches to account for any shrinkage or stretching.
Once the fabric is cut, carefully feed it through the awning rail. Make sure it is evenly distributed and fits snugly. Now, it’s time to secure the fabric in place.
Start by attaching one end of the fabric to the awning rail using the screws or bolts. Pull the fabric taut and then attach the other end. Finally, check that the fabric is properly aligned and evenly tensioned.
Adjust as needed before tightening all the screws or bolts. Congratulations! You have successfully installed the new awning fabric on your trailer. Now you can enjoy the benefits of a clean and functional awning.
Tips for maintaining your trailer awning fabric
If you own a trailer, maintaining your awning fabric is an important part of keeping your outdoor living space comfortable and functional. Over time, awning fabric can become faded, torn, or weathered, making it necessary to replace. The process of replacing trailer awning fabric may seem daunting, but with a few tips, it can be a manageable task.
First, make sure you have the correct measurements for your awning fabric. This will ensure that the replacement fabric fits properly and eliminates the risk of wasting time and money on the wrong size. Next, carefully remove the old fabric, taking note of how it was attached, as this will be helpful when attaching the new fabric.
Once the old fabric is removed, clean the awning frame and inspect for any damage or necessary repairs. Finally, install the new fabric by following the manufacturer’s instructions, making sure to secure it tightly and evenly. With proper installation and regular maintenance, your trailer’s awning fabric will not only look great but also provide shade and protection for years to come.
So don’t let a worn-out awning fabric ruin your outdoor adventures – replace it and enjoy the great outdoors in style!
Conclusion
So there you have it, a step-by-step guide to replacing your trailer awning fabric. It may seem like a daunting task, but with a little patience and some handy skills, you can give your trailer a stylish new look in no time. Remember, it’s important to measure twice and cut once to ensure a perfect fit.
And don’t forget to enlist the help of a friend or two – after all, many hands make light work. So grab your tools and get ready to show off your DIY skills. Who knows, maybe you’ll become the talk of the trailer park with your impeccable awning fabric replacement abilities.
Happy sewing, my friend!”
FAQs
How do I determine the size of my trailer awning fabric?
To determine the size of your trailer awning fabric, measure the length and width of the awning roller, and add a few inches for overhang and hemming.
What tools do I need to replace trailer awning fabric?
To replace trailer awning fabric, you will need a ladder, a tape measure, a utility knife, a staple gun, and a rubber mallet.
Can I replace the fabric on my trailer awning myself, or do I need professional help?
It is possible to replace the fabric on your trailer awning yourself if you are comfortable with basic DIY projects. However, if you are unsure or not confident in your skills, it may be best to seek professional help.
How often should trailer awning fabric be replaced?
The lifespan of trailer awning fabric can vary depending on usage, climate conditions, and maintenance. On average, it is recommended to replace the fabric every 5 to 10 years to ensure optimal performance.
What are the signs that my trailer awning fabric needs replacing?
Signs that your trailer awning fabric may need replacing include tears, fraying, fading, mold/mildew growth, and difficulty in retracting or extending the awning.
How long does it take to replace trailer awning fabric?
The time it takes to replace trailer awning fabric can vary depending on the size of the awning, the accessibility, and the skill level of the person doing the replacement. On average, it can take a few hours to a full day.
Can I choose a different color or pattern for my new trailer awning fabric?
Yes, you can choose a different color or pattern for your new trailer awning fabric. There are various options available in the market to suit your personal style and preferences.